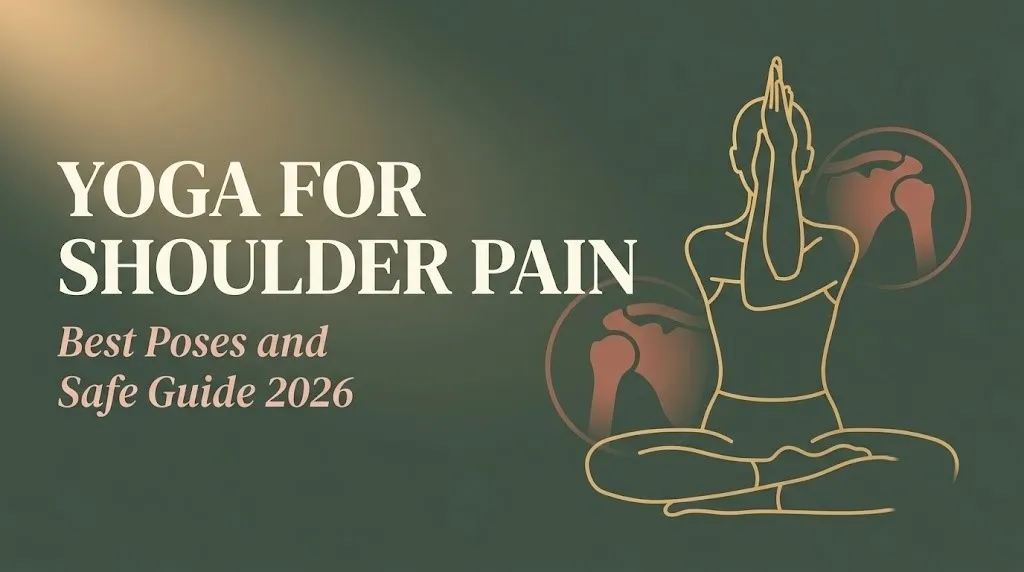
Yoga for Shoulder Pain: Best Poses and Safe Guide 2026
Yoga for shoulder pain works, but only when you understand which poses help, which aggravate, and how to modify for your specific condition. Used correctly, yoga addresses the muscle imbalances, postural patterns, and joint restrictions that keep shoulder pain cycling back week after week.
Shoulder pain is one of the most common musculoskeletal complaints in adults. According to the National Center for Complementary and Integrative Health (NCCIH), musculoskeletal conditions including chronic shoulder and neck pain are among the top reasons Americans seek complementary health practices like yoga. The shoulder joint’s extraordinary mobility makes it inherently vulnerable to both overuse and underuse patterns.
This guide covers fifteen specific topics: the anatomy behind shoulder pain, the research supporting yoga as an intervention, condition-specific guidance for impingement, frozen shoulder, and rotator cuff issues, a complete sequenced practice, and honest safety guidance on what to skip. You will leave with a plan you can actually use.
Yoga for Shoulder Pain: What It Is and How It Helps
Yoga for shoulder pain is the targeted use of specific yoga poses, breathwork, and alignment principles to reduce pain, improve range of motion, and address the muscular imbalances that contribute to shoulder dysfunction. It is not a passive stretch session. Done correctly, it is an active rehabilitation tool.
The shoulder is the most mobile joint in the human body. That mobility comes at a cost: stability depends almost entirely on the surrounding musculature rather than bony architecture. When those muscles become imbalanced, tight, or weak, the joint pays the price in pain, clicking, restricted movement, or chronic tension.
Yoga addresses shoulder pain through three distinct mechanisms. First, it lengthens chronically shortened muscles like the pectoralis minor and upper trapezius that pull the shoulder forward and upward into compression. Second, it strengthens the muscles that stabilize the glenohumeral joint (shoulder joint) from the back: the rhomboids, middle trapezius, and serratus anterior. Third, it restores thoracic spine mobility, which directly affects how the shoulder blade moves and how much space exists in the subacromial space above the rotator cuff tendons.
Pose Tip:
- Pain-free range of motion is the guide: never push into sharp joint pain during any shoulder pose
- If a pose creates clicking or pinching sensations in the front of the shoulder, back off immediately
- Mild muscular discomfort from a tight stretch is expected; joint-level pain is a stop signal
What Causes Shoulder Pain and Why Yoga Addresses It
The most common causes of shoulder pain include rotator cuff impingement, frozen shoulder (adhesive capsulitis), muscle tension from prolonged desk posture, rotator cuff tears, and referred pain from the cervical spine. Each condition has different underlying mechanics, which is why a single generic pose list rarely works for everyone.
Desk-based postural patterns drive a large portion of everyday shoulder pain. Hours of forward-reaching and screen-facing work shorten the pectoralis minor and anterior deltoid, which tilts the scapula (shoulder blade) into a position that narrows the subacromial space and compresses the rotator cuff tendons with every arm lift. Think of the subacromial space like a hallway: poor posture slowly narrows the walls until the tendons can barely pass through without friction.
Rotator cuff impingement occurs when the tendons of the rotator cuff are repeatedly compressed against the acromion (the bony roof of the shoulder) during overhead or reaching movements. Frozen shoulder involves progressive thickening of the joint capsule, limiting all planes of shoulder movement with a characteristic pattern of pain and restriction.
Understanding your specific pain source matters before starting any yoga practice for the shoulder. A yoga teacher and physical therapist work well together here. Yoga can address the muscular and postural contributors to all these conditions, but it cannot repair a full-thickness rotator cuff tear, and attempting aggressive poses on a torn tendon causes more damage.
Key causes of shoulder pain relevant to yoga practice:
- Postural tightness: shortened anterior chest muscles pulling the shoulder forward
- Rotator cuff impingement: subacromial compression from scapular positioning
- Frozen shoulder: joint capsule restriction in all movement directions
- Rotator cuff strain or partial tear: tendon-level damage requiring careful pose selection
- Cervical spine referral: neck-originating pain perceived at the shoulder or upper arm
How Yoga Helps Shoulder Pain: The Science and Research
Research supports yoga as an effective intervention for reducing shoulder pain intensity and improving shoulder range of motion, particularly for conditions rooted in postural imbalance, muscular tension, and chronic stress. The evidence is strongest for yoga practiced consistently over six or more weeks.
A study published in the International Journal of Yoga found that participants who practiced yoga targeting the cervical and shoulder region for eight weeks showed measurable improvements in pain scores and shoulder mobility compared to a control group receiving no intervention. The yoga group practiced three times per week, with sessions focusing on gentle stretching, strengthening, and breathwork.
The Journal of Alternative and Complementary Medicine has published multiple reviews linking regular yoga practice to improvements in musculoskeletal pain, with shoulder and neck pain among the most consistently responsive conditions. Researchers note that yoga’s combination of active stretching, motor control training through pose alignment, and breath-regulated movement may address multiple pain contributors simultaneously.
The American Physical Therapy Association acknowledges mind-body practices including yoga as appropriate adjunct interventions for chronic musculoskeletal pain, particularly when combined with physical therapy for underlying structural issues.
What the research does not support is using yoga alone for acute rotator cuff tears, frozen shoulder in the freezing phase, or pain following recent shoulder surgery. In these cases, yoga is a supportive complement to medical treatment rather than a standalone solution.
According to the Harvard T.H. Chan School of Public Health, mind-body practices that reduce perceived stress also reduce the physiological pain amplification associated with chronic conditions, suggesting that yoga’s breathing and relaxation components contribute to pain reduction beyond the purely mechanical effects of stretching.
Key Takeaway: Yoga works for shoulder pain through a combination of muscular lengthening, scapular stabilization, thoracic mobility, and stress-regulated pain modulation, but it works best when you choose poses matched to your specific condition rather than using a generic pose list.
Best Yoga Poses for Shoulder Pain Relief
The most effective yoga poses for shoulder pain relief target the posterior shoulder, thoracic spine, chest, and upper trapezius while keeping the glenohumeral joint within a pain-free range of motion. These five poses appear consistently in both clinical yoga therapy practice and research studies on shoulder pain.
| Pose (Sanskrit / English) | Primary Target | Key Benefit | Avoid If |
|---|---|---|---|
| Parsva Balasana / Thread the Needle | Posterior deltoid, rhomboids, thoracic rotators | Releases posterior shoulder and mid-back tension | Active frozen shoulder with severe rotation restriction |
| Gomukhasana arms / Cow Face Pose arms | Deltoids, triceps, pectoralis minor | Addresses both internal and external rotation simultaneously | Acute impingement or rotator cuff tear |
| Marjaryasana / Bitilasana / Cat-Cow | Thoracic spine, trapezius, serratus anterior | Restores thoracic mobility that directly affects shoulder mechanics | Not contraindicated for most shoulder conditions |
| Balasana / Child’s Pose (arms extended) | Latissimus dorsi, posterior shoulder, thoracic spine | Gentle traction and lengthening through the entire upper body | Wrist injuries; use forearms instead |
| Garudasana arms / Eagle Arms | Posterior deltoid, rhomboids, middle trapezius | Stretches the posterior shoulder capsule and strengthens scapular retractors | Acute impingement; use parallel forearms instead |
Each of these poses works on a different aspect of shoulder function. Practicing all five in sequence addresses the shoulder from multiple angles, which is why this combination outperforms picking one pose and repeating it endlessly.
Modification for beginners: Start with Cat-Cow and Child’s Pose for the first week. Add Thread the Needle in week two. Introduce Eagle Arms and Cow Face Pose arms only after the shoulder has demonstrated improved pain-free range in the gentler poses.
Yoga Pose for Shoulder Impingement: Safe Options and Technique
The safest yoga poses for shoulder impingement are those that open the subacromial space, strengthen the lower trapezius and serratus anterior, and avoid overhead reaching or internal rotation under load. Impingement responds well to yoga, but only when the practice respects the joint’s current tolerance.
Shoulder impingement occurs when the tendons of the rotator cuff are pinched between the head of the humerus and the acromion. Anything that narrows the subacromial space, including forward-rounded posture, weakness in the lower trapezius, or overhead loading, aggravates it. Yoga’s job in impingement is to reverse those patterns.
Parsva Balasana (Thread the Needle Pose) is one of the most consistently effective poses for impingement-related shoulder pain.
To practice Thread the Needle:
- Start on hands and knees with wrists under shoulders and knees under hips.
- Inhale and lift the right arm toward the ceiling, opening the chest to the right.
- On the exhale, slide the right arm underneath the left arm along the mat.
- Rest the right shoulder and ear on the mat; the left arm stays extended for support.
- Hold for five to eight breaths without forcing the shoulder deeper into the twist.
- Press into the left hand to rise on an inhale and switch sides.
Modification for acute impingement: Do not allow the threaded shoulder to press into the floor. Rest it just above the mat surface with a folded blanket underneath for support. This reduces the compressive load while maintaining the beneficial thoracic rotation.
Safety caution: Any pose that requires overhead arm position (arms above shoulder height) should be temporarily avoided during active impingement. This includes full Adho Mukha Svanasana (Downward-Facing Dog) and any warrior pose with arms raised overhead.
Yoga for Frozen Shoulder: Gentle Approaches That Work
Yoga for frozen shoulder (adhesive capsulitis) must be practiced very gently and within the shoulder’s current pain-free range, because pushing into restricted range during the freezing or frozen phase can increase inflammation and prolong the condition. Gentle, consistent movement within tolerance is the key principle.
Frozen shoulder progresses through three phases: freezing (increasing pain and stiffness), frozen (maximum restriction with lessening pain), and thawing (gradual mobility returning). Yoga approaches differ at each phase.
During the freezing phase, avoid any poses that require significant shoulder range of motion. Focus instead on breathwork, gentle thoracic mobility, and poses that involve the shoulder blade without moving the arm. Marjaryasana / Bitilasana (Cat-Cow Pose) at a very gentle range is appropriate. Scapular circles (drawing the shoulder blades together and apart) can be practiced without arm involvement.
During the frozen phase and into the thawing phase, gentle hanging-arm movements, Balasana (Child’s Pose) with arms at the sides (not extended overhead), and gentle pendulum-style shoulder circles in a seated position begin to reclaim range incrementally.
Research suggests that gentle, consistent movement within pain tolerance is more effective for frozen shoulder than aggressive stretching, which can increase inflammatory response and delay recovery.
Modification for all frozen shoulder phases: Never force range of motion. Work at 70 to 80 percent of your available range in every session. Consistency over weeks matters more than depth in any single practice.
People managing frozen shoulder benefit from working with both a physical therapist and a yoga teacher trained in therapeutic yoga, as combined approaches address both the mechanical and the pain-sensitization aspects of the condition.
Key Takeaway: Yoga for shoulder impingement focuses on opening the subacromial space and strengthening scapular stabilizers, while yoga for frozen shoulder requires extreme gentleness within the current range. Treating both conditions identically is the most common error in generic shoulder yoga content.
Yoga for Rotator Cuff Pain: What to Do and What to Skip
Yoga for rotator cuff pain is appropriate for mild to moderate tendon irritation and partial tears when practiced within pain-free range, but it is not appropriate as the primary intervention for full-thickness rotator cuff tears, which require medical evaluation before any physical practice begins. This distinction matters clinically.
The rotator cuff consists of four muscles: the supraspinatus, infraspinatus, teres minor, and subscapularis. Rotator cuff pain most commonly involves the supraspinatus tendon, which passes through the subacromial space and is vulnerable to compression and repetitive friction.
Yoga poses that strengthen the rotator cuff’s external rotators (infraspinatus and teres minor) without loading the supraspinatus under compression include:
- Garudasana arms (Eagle Arms): strengthens rhomboids and posterior shoulder while stretching the posterior capsule
- Parsva Balasana (Thread the Needle): targets thoracic rotation and posterior shoulder without subacromial load
- Prone locust arms variation: lying face-down with arms at the sides, gently lifting the arms off the floor engages the posterior shoulder without overhead demand
Yoga poses to skip with active rotator cuff pain:
- Full Adho Mukha Svanasana (Downward-Facing Dog): places the supraspinatus under significant load in an impingement-prone position
- Any pose requiring weight-bearing on an extended arm with the shoulder at or above 90 degrees
- Chaturanga Dandasana (Four-Limbed Staff Pose): aggressive anterior shoulder demand, contraindicated for all active rotator cuff conditions
Modification for rotator cuff pain in any class: Substitute forearm plank for standard plank and forearm Dolphin Pose for Downward-Facing Dog. These alternatives remove the supraspinatus loading while maintaining the class format.
Yoga for Shoulder and Neck Pain Together
Yoga for shoulder and neck pain together works most effectively when the practice addresses both the cervical spine and the thoracic spine simultaneously, because tension in one region directly affects the other through shared musculature and nerve pathways. The upper trapezius and levator scapulae muscles connect the neck and shoulder and are among the most chronically overworked muscles in desk-based adults.
Think of the relationship between the neck and shoulder like a set of interconnected pulleys. When the upper trapezius holds the shoulder blade elevated, it simultaneously shortens the cervical side-bending muscles, which generates neck pain on the same side. Releasing one without addressing the other produces temporary relief that disappears within days.
Yoga poses that address both the cervical spine and the shoulder girdle simultaneously:
| Pose | Neck Benefit | Shoulder Benefit |
|---|---|---|
| Parsva Balasana / Thread the Needle | Cervical rotation release | Posterior shoulder and thoracic release |
| Garudasana arms / Eagle Arms | Upper trapezius lengthening | Posterior deltoid and rhomboid activation |
| Seated neck side-bend with arm reach | Levator scapulae lengthening | Shoulder depression and stabilization |
| Marjaryasana / Bitilasana / Cat-Cow | Cervical flexion and extension | Full thoracic and shoulder girdle mobilization |
Seated neck side-bend with arm reach: Sit tall, reach the right arm toward the floor beside your hip (this depresses the right shoulder blade). Then tilt the left ear toward the left shoulder. Hold for five to eight breaths. The combined arm reach and head tilt creates a lengthening effect through the levator scapulae and upper trapezius simultaneously.
Modification for people with cervical disc issues: Avoid deep neck rotation or strong neck side-bending. Practice the shoulder components of these poses with the head in a neutral position, looking straight ahead throughout.
Yoga for Shoulder Tension From Desk Work and Poor Posture
Yoga for desk-work-related shoulder tension targets the forward-rounded postural pattern called postural kyphosis, where the upper back rounds, the chest tightens, and the shoulder blades wing out away from the spine. This is the most common shoulder pain pattern in office workers and remote workers, and it is highly responsive to yoga.
The desk worker’s shoulder pattern is predictable. Prolonged forward-reaching and keyboard use shortens the pectoralis minor, which tilts the shoulder blade forward and downward into a position that narrows the subacromial space and weakens the serratus anterior. The upper trapezius takes over workload that the weakened lower trapezius and serratus anterior cannot handle. Pain follows.
According to research published in Complementary Therapies in Medicine, yoga practiced consistently by desk workers reduced self-reported neck and shoulder pain scores and improved thoracic range of motion compared to control groups over 10 weeks.
The most effective yoga sequence for desk workers focuses on:
- Chest opening poses: opening the anterior chest to counteract pectoralis minor shortening
- Thoracic extension: reversing the forward-rounded thoracic curve
- Scapular stabilization: strengthening the lower trapezius and serratus anterior
Setu Bandha Sarvangasana (Bridge Pose) addresses all three. Lying on the back with knees bent, pressing the feet into the floor to lift the hips opens the anterior chest, extends the thoracic spine, and engages the lower trapezius when the arms press into the mat.
To practice Bridge Pose for shoulder tension:
- Lie on your back with knees bent, feet hip-width apart, arms alongside the body.
- Press the arms and feet firmly into the floor.
- Inhale and lift the hips, drawing the shoulder blades together underneath you.
- Hold for five breaths, keeping the chin slightly away from the chest.
- Exhale and slowly lower the spine vertebra by vertebra.
Modification for neck sensitivity: Place a folded blanket under the upper back and shoulders to reduce cervical compression during the pose.
Key Takeaway: Shoulder and neck tension from desk work responds fastest to yoga when the practice directly reverses the postural pattern that caused it: opening the chest, extending the thoracic spine, and activating the lower trapezius and serratus anterior.
Complete Shoulder Pain Yoga Sequence: Warm-Up Through Cool-Down
A complete yoga sequence for shoulder pain moves through four phases: breath and body awareness, gentle joint mobilization, targeted strengthening and stretching, and supported cool-down. This structure prevents the common error of jumping into deep shoulder stretches on a cold, unprepared joint.
The shoulder joint responds poorly to sudden demands. Like any mechanical system, it performs better when warmed gradually. A structured sequence respects this, which is why a properly ordered practice outperforms picking five poses at random from a list.
Complete shoulder pain sequence:
Phase 1: Arrival and Breath (3 to 5 minutes)
- Sit comfortably in a chair or on the floor with a tall spine.
- Take five slow, deep breaths, allowing the shoulders to release away from the ears on each exhale.
- Practice three rounds of gentle scapular circles: draw both shoulder blades together, then up, then apart, then down. Reverse direction.
Phase 2: Gentle Mobilization (5 to 8 minutes)
- Marjaryasana / Bitilasana (Cat-Cow Pose): eight to ten rounds, focusing on thoracic movement.
- Parsva Balasana (Thread the Needle): five breaths per side, without forcing the depth.
- Seated or standing neck side-bends with arm reach: five breaths per side.
Phase 3: Targeted Work (10 to 15 minutes)
- Garudasana arms (Eagle Arms): hold for eight breaths per side; modify with parallel forearms if needed.
- Gomukhasana arms (Cow Face Pose arms) with a strap: hold for eight breaths per side.
- Setu Bandha Sarvangasana (Bridge Pose): three rounds of five breaths each.
- Balasana (Child’s Pose) with arms extended: eight to ten breaths.
Phase 4: Supported Cool-Down (5 minutes)
- Supine: lie on your back with arms slightly away from the body, palms up.
- Place a folded blanket under the upper back for gentle thoracic opening.
- Rest for three to five minutes in Savasana (Corpse Pose), allowing the shoulder muscles to fully release.
Modification for the entire sequence: Every pose can be practiced from a chair. See the seated yoga section for specific chair adaptations.
Yoga Poses to Avoid With Shoulder Pain
The yoga poses most likely to aggravate shoulder pain are those that require weight-bearing on an extended arm, overhead loading, or deep internal rotation under load. Knowing which poses to skip is as important as knowing which to practice.
This is the section most yoga shoulder pain content gets wrong. Generic lists tell you to “be careful” without specifying why certain poses cause problems. The reason matters: a pose that aggravates impingement may be safe for frozen shoulder. A pose that helps a rotator cuff issue may worsen neck pain. Context is everything.
| Pose | Why It Can Aggravate Shoulder Pain | Safe Alternative |
|---|---|---|
| Adho Mukha Svanasana / Downward-Facing Dog (full) | Loads the supraspinatus under impingement-prone angle | Dolphin Pose (forearms on mat) |
| Chaturanga Dandasana / Four-Limbed Staff Pose | High anterior shoulder demand; strains partial rotator cuff tears | Lower knees to mat; rest in Child’s Pose |
| Urdhva Dhanurasana / Wheel Pose | Extreme shoulder extension under full body weight | Bridge Pose (Setu Bandha Sarvangasana) |
| Full Gomukhasana arms without a strap | Forces internal rotation that impinges the supraspinatus | Use a strap between the hands |
| Sirsasana / Headstand | Full body weight on the cervical spine and shoulder girdle | Supported Bridge or Legs Up the Wall |
| Vasisthasana / Side Plank | Lateral loading on single shoulder; high demand on rotator cuff | Forearm side plank with bottom knee down |
Safety rule for all shoulder pain contexts: Any pose that creates a pinching sensation in the front or top of the shoulder should be stopped immediately. Pinching signals subacromial compression. Sharp pain during a pose is a stop signal, not something to breathe through.
Modification principle: In any yoga class, you have full permission to substitute any pose that causes shoulder pain. This is not a failure of practice. It is the correct application of yoga’s core principle: ahimsa (non-harm).
Yoga for Shoulder Pain for Beginners
Beginners with shoulder pain should start with three poses: Cat-Cow, Thread the Needle, and Eagle Arms, practiced in that order, three times per week, for two weeks before adding any additional shoulder work. Starting small and building gradually prevents the common beginner error of doing too much too soon on an already irritated joint.
The beginner’s challenge with shoulder pain yoga is not a lack of poses. It is the temptation to do all the poses immediately. The shoulder is an irritable joint. Overloading it with ten new movements in one session often produces a flare-up that sets the practice back by a week.
To practice the beginner shoulder sequence:
- Marjaryasana / Bitilasana (Cat-Cow Pose): eight rounds, slow and deliberate, to warm the thoracic spine.
- Parsva Balasana (Thread the Needle): five breaths per side, resting the threaded shoulder on a folded blanket.
- Garudasana arms (Eagle Arms): eight breaths per side, using parallel forearms if crossing the arms causes pinching.
Each session should take no more than 10 to 15 minutes in the first two weeks. Frequency matters more than duration. Ten minutes daily outperforms 60 minutes once weekly for shoulder pain rehabilitation, based on how connective tissue adapts to repeated low-load input.
Yoga Alliance notes that new students working with health conditions benefit significantly from a single private yoga session before joining group classes. One session with a qualified teacher allows you to learn the correct form for shoulder-safe poses without the time pressure of a group class format.
Props for beginners with shoulder pain:
- Yoga strap: replaces the hand-to-hand clasp in Cow Face Pose when range is limited
- Yoga block: supports the extended arm in seated side-bend variations
- Folded blanket: cushions the threaded shoulder in Thread the Needle
- Chair: adapts all poses for people who cannot get to the floor
Key Takeaway: Beginners with shoulder pain get the best results from starting with three poses practiced consistently three times per week, then adding new poses only after the first three feel genuinely comfortable and pain-free.
Seated and Chair Yoga for Shoulder Pain
Seated and chair yoga for shoulder pain provides the same muscular and postural benefits as mat-based yoga while eliminating the floor-based barriers of getting down and up, making it accessible for people with knee, hip, or mobility limitations alongside their shoulder pain. All major shoulder pain poses have effective seated chair equivalents.
Chair yoga is not a lesser version of yoga. For anyone with multiple physical concerns, it is the smarter version. When shoulder pain coexists with knee osteoarthritis, hip restrictions, or balance issues, insisting on mat-based practice creates unnecessary barriers. A sturdy chair against a wall removes all of them.
Seated equivalents for the most important shoulder pain poses:
| Floor Pose | Chair Equivalent | Technique Note |
|---|---|---|
| Cat-Cow | Seated Cat-Cow: hands on knees, round and arch the spine | Same thoracic wave motion, seated |
| Thread the Needle | Seated thoracic rotation: cross one arm across the chest, support with the other | Rotate the thoracic spine, not the neck |
| Eagle Arms | Identical in chair: cross arms at elbows, lift forearms | No modification needed |
| Cow Face Pose arms | Identical in chair with strap | Use chair back for posture support |
| Child’s Pose | Seated forward fold: fold torso toward thighs, arms hanging | Place a pillow on the thighs for the forehead |
| Bridge Pose | Seated chest opener: hands behind chair seat, open chest upward | Avoid if neck extension is uncomfortable |
To practice seated Eagle Arms in a chair:
- Sit tall with feet flat on the floor, hip-width apart.
- Extend both arms forward at shoulder height.
- Cross the right arm under the left, bending both elbows.
- Wrap the forearms so the backs of the hands or palms touch.
- Lift the elbows slightly while drawing them away from the face.
- Hold for eight breaths, then release and switch sides.
Modification: If crossing the arms is impossible due to shoulder restriction, hold both arms forward at shoulder height with forearms parallel and simply breathe into the posterior shoulder stretch for eight breaths.
Yoga for Shoulder Pain for Seniors and People With Limited Mobility
Yoga for shoulder pain in seniors is most effective when it uses chair support, avoids all weight-bearing on the hands or arms, and prioritizes thoracic mobility and gentle scapular work over deep stretching. The combination of reduced tissue elasticity, potential joint changes, and multiple coexisting conditions in older adults requires a genuinely modified approach.
According to the NCCIH, yoga practiced by adults over 60 consistently shows improvements in functional range of motion, balance, and self-reported pain intensity across multiple study populations. These benefits do not require vigorous or advanced practice. Gentle, chair-based yoga practiced three times per week produces measurable outcomes.
Condition-specific considerations for seniors with shoulder pain:
| Condition | Yoga Approach | What to Avoid |
|---|---|---|
| Shoulder osteoarthritis | Gentle range-of-motion work within pain-free limits | Forced stretching or end-range loading |
| Rotator cuff degeneration (age-related) | Scapular strengthening, thoracic opening | Overhead arm positions, weight-bearing |
| Osteoporosis | Thoracic extension emphasis; no spinal flexion under load | Forward fold with rounded spine |
| Cervical stenosis with shoulder referral | Neutral neck position maintained throughout | Deep neck flexion or extension |
| Post-mastectomy shoulder restriction | Extremely gentle chest opening; medical guidance first | Any anterior chest pose without clearance |
Seniors managing multiple conditions should work with a yoga teacher with specialized training in senior or therapeutic yoga before beginning a self-directed practice. The modification decisions in this population are more complex than a general beginner modification, and the stakes of getting them wrong are higher.
A 15-minute chair yoga session for shoulder pain practiced daily produces more meaningful outcomes for older adults than a 60-minute studio class attended once per week, because the nervous system and connective tissue respond to frequency and repetition more than to single-session intensity.
Yoga Breathing and Pranayama to Support Shoulder Pain Relief
Yoga breathing techniques, particularly slow diaphragmatic breathing and Ujjayi pranayama, support shoulder pain relief by reducing the muscular tension that the sympathetic nervous system creates in the upper trapezius and shoulder girdle during stress. This is not a metaphor. Chronic stress physically increases muscle tone in the shoulder region, and controlled breathing actively reverses it.
The upper trapezius is one of the most stress-reactive muscles in the body. When the nervous system perceives threat or chronic stress, the upper trapezius elevates and holds the shoulders upward and forward as a protective pattern. Over time, this sustained tension becomes the background tone that makes yoga stretching feel less effective: you stretch the muscle, but the nervous system immediately re-tightens it.
Breathwork interrupts this cycle at the nervous system level rather than only at the muscular level.
Ujjayi pranayama (Victorious Breath):
To practice Ujjayi breath for shoulder tension:
- Sit or lie comfortably with a tall or supported spine.
- Breathe in and out through the nose.
- Slightly constrict the back of the throat, creating a gentle ocean sound.
- Inhale for a count of four. Exhale for a count of six.
- Practice for three to five minutes before or after shoulder yoga poses.
The extended exhale (longer out than in) is the mechanism: it activates the parasympathetic nervous system, reduces cortisol, and directly lowers resting muscle tone in the upper trapezius.
Research published in the International Journal of Yoga found that regular pranayama practice, particularly slow breathing with extended exhale, reduced self-reported anxiety and physical tension scores in multiple clinical populations, with shoulder and neck tension among the most responsive areas.
Modification for people with respiratory conditions: If Ujjayi feels effortful or causes breathlessness, practice simple diaphragmatic breathing instead. Breathe slowly into the belly for four counts, exhale for six. The mechanism is the same; the technique is simpler.
Key Takeaway: Adding five minutes of slow exhale-extended breathing before your shoulder yoga practice reduces nervous system-driven muscle tension in the upper trapezius and makes every subsequent pose more effective.
Frequently Asked Questions About Yoga for Shoulder Pain
Can yoga make shoulder pain worse?
Yes, yoga can make shoulder pain worse if you practice poses that aggravate your specific condition, particularly weight-bearing poses on extended arms during active impingement or rotator cuff irritation.
The most common causes of yoga-induced shoulder flare-ups are Chaturanga, full Downward-Facing Dog, and forced end-range stretching in the presence of inflammation.
Choosing pain-free poses, using props, and skipping any position that creates pinching or sharp joint pain prevents this outcome reliably.
How often should I do yoga for shoulder pain?
Yoga for shoulder pain produces the best results when practiced three to five times per week, even if sessions are only 10 to 15 minutes long.
Research in the International Journal of Yoga found that frequency of practice, not session length, is the primary driver of musculoskeletal pain improvement from yoga.
Daily gentle practice consistently outperforms occasional longer sessions for pain reduction and range-of-motion gains.
What is the best yoga pose for shoulder impingement?
Thread the Needle Pose (Parsva Balasana) is among the most consistently effective yoga poses for shoulder impingement because it restores thoracic rotation and releases posterior shoulder tension without loading the subacromial space.
Eagle Arms (Garudasana arms) with a modification for parallel forearms is also effective for impingement, targeting the posterior shoulder capsule without overhead demand.
Avoid full Downward-Facing Dog and Chaturanga until impingement symptoms have resolved, as both positions compress the supraspinatus tendon.
Can I do yoga if I have a rotator cuff tear?
It depends entirely on the severity of the tear. Mild partial tears managed conservatively may tolerate gentle yoga practices focused on thoracic mobility, scapular stabilization, and breath-based tension release.
Full-thickness rotator cuff tears require medical evaluation, and any physical yoga practice should be cleared by the treating orthopedic surgeon or physical therapist before beginning.
Chair-based and floor-based poses that do not load the arm at or above shoulder height are the safest starting options while a partial tear heals.
How long does it take for yoga to relieve shoulder pain?
Most people practicing yoga for shoulder pain three to four times per week report noticeable improvement in pain intensity and range of motion within four to eight weeks.
Research published in the International Journal of Yoga found measurable improvements in shoulder pain scores after eight weeks of consistent practice in participants with musculoskeletal shoulder complaints.
Postural-tension-related shoulder pain typically responds faster than structural conditions like frozen shoulder or rotator cuff degeneration, which may require three to six months of consistent practice.
Shoulder pain does not resolve in one session. What it does respond to is consistent, correctly chosen movement practiced regularly over weeks. That is the honest answer, and it is also the encouraging one: you do not need to do something heroic. You need to do something gentle, three to four times per week, starting today.
Begin with Thread the Needle and Cat-Cow. Practice them for five minutes this evening. Add Eagle Arms next week once those two feel familiar and comfortable.
The shoulder is a complex joint, but its response to patient, appropriate movement is reliable. Give it what it needs, and it will give back