Yoga and Knee Replacement: Safe Poses and Timeline
Yoga and knee replacement are compatible, but only when you understand specifically which movements protect the prosthetic joint and which ones risk it. The good news is that a well-adapted yoga practice is one of the most beneficial complementary activities for joint replacement recovery, and this guide gives you the clinical grounding to practice safely.
Joint replacement surgery has become increasingly common among active older adults. According to the American Academy of Orthopaedic Surgeons (AAOS), more than 790,000 total knee replacements are performed annually in the United States, with that number projected to grow substantially through 2030 as the population ages. For the many practitioners in that group who practiced yoga before surgery, knowing how to return safely and knowledgeably matters.
This guide covers the key differences between knee and hip replacement restrictions for yoga, exactly when each stage of return to practice is safe, which poses to prioritize and which to permanently modify or avoid, and what the research on yoga and joint replacement outcomes actually shows. You’ll also find step-by-step pose instructions, chair yoga guidance, and a clear recovery timeline.
Can You Do Yoga After Knee Replacement: The Honest Answer
Yes, most people can practice yoga after a total knee replacement, but the practice must be thoughtfully modified to account for the mechanical and physiological changes that a prosthetic knee joint introduces. This is not yoga as you practiced it before surgery. It is adapted yoga, which in many ways is more precise and more educational than your prior practice.
A total knee replacement (TKR) replaces the worn cartilage surfaces of the tibial plateau and the underside of the femoral condyle with metal and polyethylene components. The new joint has excellent structural integrity for most activities of daily living, but it has specific range-of-motion limits, particularly in deep flexion, that every yoga practitioner with a TKR needs to understand and respect.
The question of “can I do yoga” breaks down into three practical sub-questions:
- Can I practice yoga at all? Yes, with modifications, for the great majority of TKR patients after completing initial rehabilitation.
- When can I start? Most orthopedic surgeons and physical therapists clear patients for gentle yoga at 6 to 12 weeks post-surgery, depending on individual healing and rehabilitation progress.
- What do I have to give up? Deep knee flexion beyond what your surgeon clears is the primary restriction. Kneeling directly on the prosthetic knee is contraindicated for most practitioners indefinitely.
According to the American Academy of Orthopaedic Surgeons, low-impact exercise including gentle yoga is recommended as part of long-term joint replacement maintenance, with the primary guidance being to avoid high-impact loading and extreme range-of-motion demands on the prosthetic joint.
Yoga and Hip Replacement: What Changes After Surgery
Yoga after a total hip replacement (THR) is also safe with modifications, but the specific restrictions differ substantially from those after knee replacement, because the hip is a ball-and-socket joint and the surgical approach used determines which movements are contraindicated. Understanding the surgery your body has undergone is the starting point for every yoga decision.
A total hip replacement replaces the femoral head (the ball) with a metal or ceramic prosthesis and resurfaces the acetabular cup (the socket) with a metal shell and liner. The new joint is mechanically strong but vulnerable to dislocation in specific movement positions, particularly in the early months before the surrounding soft tissue has fully stabilized around the implant.
The most important distinction in hip replacement yoga is between surgical approaches:
| Surgical Approach | Primary Risk Direction | Yoga Implications |
|---|---|---|
| Posterior approach | Dislocation risk in flexion, adduction, internal rotation | Strict hip precautions: no flexion past 90 degrees, no crossing midline, no internal rotation |
| Anterior approach | Generally fewer movement restrictions | Hip precautions typically less restrictive; confirm with surgeon |
| Lateral approach | Moderate restrictions depending on surgeon | Confirm specific precautions with surgical team |
The posterior approach is the most common in the United States, and its restrictions are the most directly relevant to yoga practice. Every “hip precaution” reference in this article applies primarily to posterior-approach THR patients unless otherwise noted.
How Knee Replacement and Hip Replacement Differ for Yoga Practice
Knee replacement and hip replacement create fundamentally different yoga restrictions, and conflating the two is the most common mistake in online guides covering this topic. Your modified practice depends entirely on which surgery you had, at which stage of recovery you are, and which surgical approach was used for a hip replacement.
Think of it this way: a knee replacement limits the angle of bend in the replaced knee joint, much like a door hinge with a built-in stop that prevents it from opening past a certain point. A hip replacement, especially posterior-approach, creates a three-dimensional movement restriction that limits flexion, rotation, and adduction simultaneously, which affects a far wider range of yoga poses than a knee restriction alone.
Here is a direct comparison of the key yoga restrictions by surgery type:
| Restriction Category | Total Knee Replacement | Total Hip Replacement (Posterior) |
|---|---|---|
| Primary restriction | Deep knee flexion (typically no more than 110 to 130 degrees until cleared) | Hip flexion past 90 degrees, internal rotation, crossing midline |
| Kneeling directly on joint | Contraindicated (use padding or avoid) | Not directly affected |
| Cross-legged sitting | Generally safe (may need support) | Risky if involves internal rotation |
| Forward folds (standing) | Knee load concern; use wall or chair | Hip flexion concern; maintain spine upright |
| Lotus Pose (Padmasana) | High knee flexion and rotation: avoid | High hip external rotation: avoid until fully cleared |
| Child’s Pose (Balasana) | Deep knee flexion: avoid or use major modification | Hip flexion past 90 degrees: avoid in standard form |
Both surgeries share one common yoga rule: no poses that place the joint in a position of impingement or extreme range-of-motion demand before the surgical team has specifically cleared that range.
Key Takeaway: Knee replacement limits how far the knee bends. Hip replacement limits how far the hip flexes, rotates, and crosses the body’s midline. These are different restrictions affecting different poses. Know which surgery you had before choosing any pose.
When Can You Safely Start Yoga After Joint Replacement Surgery
Most orthopedic surgeons and physical therapists clear patients for gentle, modified yoga at 6 to 12 weeks after total knee replacement and 6 to 12 weeks after total hip replacement, with significant individual variation based on healing rate, rehabilitation progress, and implant stability. The specific clearance comes from your surgical team, not from a general timeline.
The healing process after joint replacement has distinct stages, each with different yoga implications:
| Recovery Stage | Timeline | Yoga Approach |
|---|---|---|
| Acute recovery | Weeks 1 to 3 | No yoga. Focus on prescribed physical therapy only. |
| Early rehabilitation | Weeks 3 to 6 | Breath work and supine ankle pumps only. No standing poses. |
| Active rehabilitation | Weeks 6 to 12 | Gentle chair yoga and supported standing poses with surgeon clearance. |
| Progressive return | Months 3 to 6 | Expanded gentle Hatha and Restorative practice. Avoid contraindicated poses. |
| Long-term maintenance | 6 months onward | Modified yoga practice as a long-term activity. Some poses remain permanently modified. |
The most common mistake practitioners make is beginning yoga practice before the surgical team has confirmed adequate osseointegration, the process by which the implant bonds to the surrounding bone. For cementless implants, this process typically requires 6 to 8 weeks of limited loading before the joint can safely manage the demands of yoga positions beyond the most passive.
If you had a cemented implant, your orthopedic surgeon may clear you for some activities earlier, as the cement provides immediate fixation. Always confirm which type of implant you received before assuming a timeline applies to you.
Hip Replacement Precautions and Yoga: The 90-Degree Rule Explained
The 90-degree hip flexion rule is the most important safety principle for yoga practitioners after a posterior-approach total hip replacement, and it means that the hip joint must not be bent past 90 degrees between the torso and the thigh during the precaution period, which typically lasts 6 to 12 weeks post-surgery but may extend longer depending on surgeon preference.
This rule exists because in the early months after posterior-approach THR, the posterior capsule of the hip has been surgically opened and has not yet fully healed. Taking the hip into flexion beyond 90 degrees, combined with internal rotation or adduction (bringing the leg across the body’s midline), creates the conditions for prosthetic dislocation. Dislocation after hip replacement is a serious complication requiring emergency reduction and sometimes revision surgery.
The three movements to avoid in combination after posterior-approach hip replacement are:
- Hip flexion past 90 degrees: Sitting with knees higher than hips, forward folding past a vertical torso, bringing the knee toward the chest
- Hip internal rotation: Turning the operated leg’s foot inward, which in yoga appears in certain seated twist positions and some standing poses
- Hip adduction past midline: Crossing the operated leg over the other leg or bringing it across the body’s center
In yoga terms, these three restrictions eliminate or severely modify: Balasana (Child’s Pose), seated cross-legged positions with deep hip flexion, Paschimottanasana (Seated Forward Fold), most reclined single-leg stretches past 90 degrees, and any pose requiring the operated leg to cross the body’s midline.
Important note for anterior-approach THR patients: The anterior approach typically results in fewer or different restrictions. Your surgeon may clear you for hip flexion past 90 degrees earlier than a posterior-approach patient. Confirm your specific precautions in writing from your surgical team before beginning any yoga practice.
Safe Yoga Poses After Knee Replacement: Alignment and Modifications
Safe yoga poses after total knee replacement are those that do not force the knee into deep flexion, do not require direct weight-bearing on the kneecap or tibial plateau in a kneeling position, and do not create shear forces across the knee joint through rapid transitions or momentum-driven movements.
The following poses are generally appropriate for TKR patients after surgical clearance, with specific modifications:
Setu Bandha Sarvangasana (Bridge Pose):
To practice Bridge Pose after knee replacement:
- Lie on your back with knees bent and feet flat on the floor, feet hip-width apart.
- Press firmly through the heels, not the balls of the feet. Pressing through the heels reduces anterior tibial shear across the knee joint.
- Inhale, then on the exhale, lift the hips toward the ceiling. The knee angle in this position is approximately 70 to 90 degrees, which is within safe range for most post-TKR patients after 12 weeks.
- Hold for 5 breath cycles. Maintain steady pressure through the heels throughout.
- Lower the hips slowly on an exhale. Avoid dropping suddenly.
Modification: Place a yoga block between the knees to maintain neutral knee tracking and prevent the knees from falling outward, which reduces medial compartment stress.
Tadasana (Mountain Pose):
Standing with full body alignment awareness. Both feet grounded. Gentle quadriceps engagement. Hold for 5 to 8 breath cycles. This pose builds the proprioceptive awareness that protects the replaced knee in all subsequent standing poses.
Modification for early TKR patients: Practice with the back touching a wall for balance feedback. This is not a limitation. It is a precision tool.
Safe Yoga Poses After Hip Replacement: What Works and Why
Safe yoga poses after total hip replacement are those that keep the operated hip joint within the flexion, rotation, and adduction limits set by the surgical team, while still providing meaningful benefit for mobility, strength, and nervous system regulation.
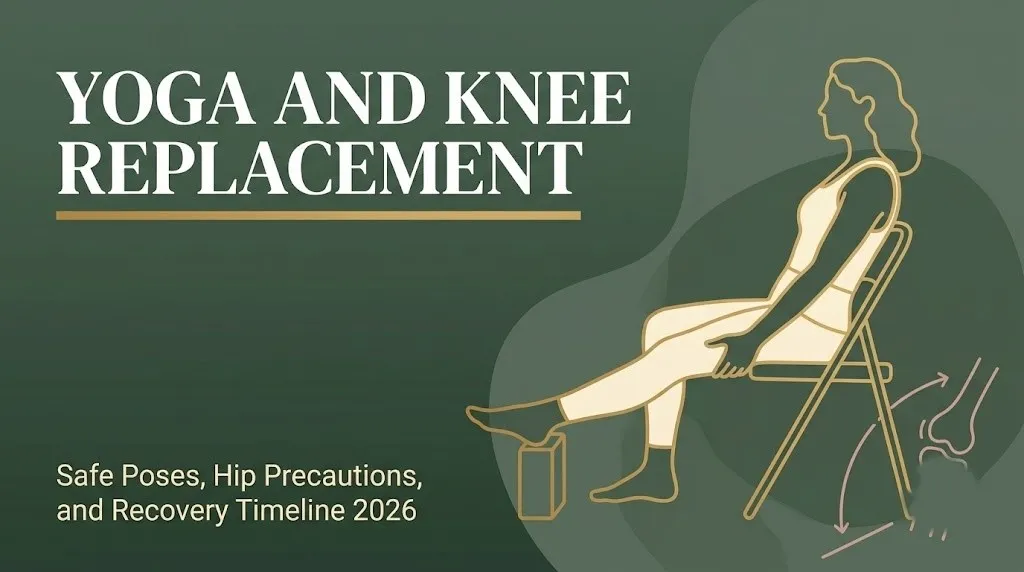
The poses best suited to early-stage post-THR practice:
| Pose | Sanskrit Name | Why It Is Safe | Key Alignment Point |
|---|---|---|---|
| Mountain Pose | Tadasana | Standing neutral; no hip flexion challenge | Feet hip-width; do not turn operated foot inward |
| Corpse Pose | Savasana | Fully supine; no joint load or flexion | Place a rolled blanket under the knees for lumbar support |
| Legs-Up-the-Wall | Viparita Karani | Mild hip flexion; well within 90-degree limit | Hip angle is typically 70 to 80 degrees against a wall |
| Supported Bridge | Setu Bandha Sarvangasana | No hip flexion past 90 degrees in the lift | Use block under sacrum for passive version |
| Seated Mountain | Chair-based Tadasana | Seated neutral position; no flexion challenge if chair height is correct | Sit with knees at or below hip height |
| Ankle Pumps and Circles | N/A (therapeutic movement) | Improves circulation; no hip joint demand | Full ankle range is safe from day one post-surgery |
The single most important prop after hip replacement is a chair with a firm, high seat. Sitting in a low chair or soft sofa takes the hip into flexion beyond 90 degrees. A firm, high-seated chair keeps the hips above the knees and within safe range for the entire seated period.
Key Takeaway: After hip replacement, the chair height you sit in during yoga is as important as which poses you choose. Low seats violate the 90-degree hip precaution. Sit high, knees below hips, always.
Yoga Poses to Avoid After Knee Replacement and Why
Certain yoga poses place the replaced knee joint in positions of deep flexion, compressive loading, or shear stress that exceed what the prosthetic components are designed to safely accommodate, particularly in the first 12 months post-surgery. Knowing which poses to avoid, and specifically why, is more useful than a simple list.
Poses to avoid after total knee replacement:
- Balasana (Child’s Pose): Requires deep knee flexion, typically 120 to 150 degrees. This range exceeds safe post-TKR limits in the first 12 months for most patients and may remain permanently contraindicated depending on implant design and surgeon guidance.
- Malasana (Garland Pose / Squat): Places the knee in its deepest flexion range while simultaneously bearing full body weight. This combination of deep flexion and compressive load is contraindicated for all TKR patients.
- Virasana (Hero Pose): Kneeling with the foot beside the hip creates extreme knee flexion and tibial rotation. Avoid completely after TKR.
- Padmasana (Lotus Pose): Combines deep knee flexion with significant tibial external rotation. Both movements stress the prosthetic components and the surrounding soft tissue. Avoid completely.
- Janu Sirsasana (Head-to-Knee Forward Bend): The bent knee in this pose is placed in a high flexion, externally rotated position that is inappropriate for most post-TKR patients.
- Any pose requiring kneeling directly on the knee: The tibial component of a knee replacement does not have sensory tissue. Kneeling pressure goes directly to the periosteum of the tibia without the cushioning of a natural knee. Use a folded blanket at minimum; better to avoid kneeling entirely.
Safety note: These restrictions may ease over time as the surgical team confirms implant stability and tissue healing. Never self-clear for a previously contraindicated pose. The clearance decision belongs to your orthopedic surgeon and physical therapist.
Yoga Poses to Avoid After Hip Replacement: The Complete List
Yoga poses to avoid after total hip replacement with posterior approach are those that bring the hip into flexion past 90 degrees, internal rotation, or adduction past the body’s midline. During the hip precaution period (typically the first 6 to 12 weeks), these movements risk dislocation of the prosthetic joint.
Poses to avoid after posterior-approach THR:
- Balasana (Child’s Pose): Takes the hip into extreme flexion, typically 120 degrees or more. Completely contraindicated during hip precaution period. May remain modified permanently.
- Paschimottanasana (Seated Forward Fold): Even a modest forward fold from a seated position brings the hip past 90 degrees of flexion. Avoid until specifically cleared.
- Malasana (Garland Pose / Squat): Deep hip flexion with knee-to-chest positioning. Contraindicated.
- Garudasana (Eagle Pose): The leg wrap requires hip adduction past the midline and internal rotation. Both are contraindicated after posterior THR.
- Padmasana (Lotus Pose): Extreme external rotation of the hip may stress the acetabular component and surrounding tissue. Avoid until surgeon-cleared.
- Reclined hip stretches past 90 degrees: Any supine leg raise where the hip angle exceeds the precaution limit.
- Seated cross-legged poses with the hip in deep internal rotation: Some seated meditation positions internally rotate the operated hip. Use a chair or ensure the foot of the operated leg points forward.
For anterior-approach THR patients: Many of these restrictions are reduced or eliminated. Your surgical team’s specific post-operative instructions override any general guidance here.
Chair Yoga After Joint Replacement: The Safest Starting Point
Chair yoga is the most appropriate yoga format for the early return-to-practice period after both knee and hip replacement, because it eliminates floor transitions, removes the need to lower and raise from the ground, and allows the hip and knee joints to remain in safe, controlled positions throughout the entire session.
A firm, non-wheeled chair with a seat height that keeps the knees at or below hip level is the foundational prop. For hip replacement patients, the chair height ensures the hip remains above or at the 90-degree threshold throughout seated practice. For knee replacement patients, the chair eliminates any kneeling requirement while still allowing meaningful movement.
A practical chair yoga sequence for early post-surgical practice:
- Seated Tadasana (Chair Mountain Pose): Sit at the chair edge, feet flat on the floor. Lengthen the spine upward. 5 breath cycles. Develops postural awareness and quadriceps engagement without joint load.
- Seated ankle circles: Rotate each ankle through full range. 10 circles each direction per foot. Improves circulation and reduces post-surgical swelling.
- **Seated *Marjaryasana-Bitilasana (Cat-Cow Pose):* Hands on thighs. Alternate between spinal extension and flexion with breath. 8 to 10 cycles. Mobilizes the thoracic and lumbar spine without hip or knee challenge.
- Seated side body stretch: One arm reaches overhead, gentle lateral lean away from the arm. Hold 3 breath cycles per side. Stretches the quadratus lumborum and lateral rib cage.
- **Seated *Savasana (Corpse Pose) adaptation:* Hands on thighs, eyes closed, full-body breath awareness. 2 to 3 minutes. Nervous system integration after practice.
Modification: Place a folded blanket on the chair seat for added cushioning if the tibial component of a knee replacement is sensitive to firm contact pressure.
Key Takeaway: Chair yoga eliminates every floor transition that risks the replaced joint in early recovery. It is not a lesser practice. It is the correct starting point for the first 3 to 6 months after joint replacement.
Restorative Yoga After Joint Replacement: Science and Practice
Restorative yoga is a fully passive, prop-supported practice that places the body in carefully positioned holds for 5 to 20 minutes per pose, activating the parasympathetic nervous system and producing physiological rest without any joint loading demand. For joint replacement patients, it offers therapeutic benefits with the lowest possible mechanical risk of any active yoga format.
Research published in Complementary Therapies in Medicine links Restorative yoga practice to reduced pain perception, lower anxiety, and improved sleep quality in adults with chronic musculoskeletal conditions. Post-surgical patients face exactly these challenges: pain, anxiety, and disrupted sleep are among the most commonly reported post-operative complaints during the first three months after joint replacement.
The most appropriate Restorative poses for early joint replacement recovery:
- Supported Savasana (Corpse Pose): Lying supine with a bolster under the knees (TKR) or a rolled blanket under the knees positioned to keep the hip below 90 degrees (THR). 10 to 20 minutes. The most immediately accessible pose for any post-surgical patient.
- Supported Viparita Karani (Legs-Up-the-Wall Pose): For THR patients, the hip angle against the wall is typically 70 to 80 degrees, which is within precaution limits. For TKR patients, the knee is in mild, supported flexion. 5 to 10 minutes. Reduces lower extremity swelling significantly.
- Supported reclined position with bolster under thoracic spine: A gentle chest opener that requires no hip or knee demand. 5 to 10 minutes. Addresses the thoracic rounding that develops from using a walker or crutches post-surgery.
Safety note: For THR patients, confirm that Viparita Karani (Legs-Up-the-Wall Pose) does not bring the hip past the 90-degree precaution limit based on your height and the wall distance. A longer-legged practitioner may need to position the hips further from the wall to maintain safe hip angle.
Yoga for Joint Replacement Recovery: What Research Actually Shows
The research on yoga specifically for joint replacement recovery is developing but promising, and the broader evidence base on yoga for joint health and surgical rehabilitation gives a clear picture of what benefits are genuinely supported. This is a YMYL topic, and the claims deserve sources.
What the research directly supports:
- Arthritis Care and Research published findings showing that yoga practice in adults with knee osteoarthritis (the most common precursor to TKR) produced improvements in pain, physical function, and walking speed over 8 weeks compared to control groups. These pre-surgical benefits suggest yoga supports the joint health that makes surgery outcomes better.
- The International Journal of Yoga documents improved balance, gait speed, and lower extremity strength in adults over 65 following adapted yoga programs. These outcomes are directly relevant to post-TKR and post-THR rehabilitation goals.
- A review published in Complementary Therapies in Medicine found that mind-body practices including yoga reduced post-surgical anxiety and improved pain management outcomes in orthopedic surgery patients, suggesting a role for yoga in the psychological as well as physical recovery process.
- The NCCIH identifies yoga as an evidence-supported complementary approach for chronic musculoskeletal pain, noting that its combination of movement, breath regulation, and body awareness addresses multiple dimensions of the pain experience that pharmaceutical pain management alone does not.
What the research does not yet fully establish: The ideal yoga format, frequency, and pose selection specifically for the post-TKR or post-THR population has not been studied in large, randomized controlled trials. Most recommendations in this area are based on anatomical reasoning, physical therapy principles, and extrapolation from adjacent research populations.
Yoga vs Physical Therapy After Knee or Hip Replacement
Yoga and physical therapy are not competing options after joint replacement surgery. Physical therapy is the medically prescribed, surgeon-directed rehabilitation protocol that every joint replacement patient undergoes. Yoga is a complementary movement practice that can supplement, extend, and enrich what physical therapy begins, once clearance is given.
Physical therapy after joint replacement focuses on restoring functional range of motion, building the specific muscular strength needed to protect the prosthetic joint, and re-establishing safe gait mechanics. Your physical therapist sets the baseline. Yoga works within it.
Where yoga adds unique value that standard post-surgical physical therapy often does not:
- Breath awareness and nervous system regulation: Post-surgical anxiety and pain sensitization respond to the parasympathetic activation that sustained breath-focused yoga produces. PT exercises rarely include this dimension.
- Long-term maintenance: Physical therapy is time-limited by insurance and surgical protocol. Yoga can be practiced independently and indefinitely as a long-term joint health tool.
- Body awareness and proprioception: Yoga’s emphasis on noticing internal sensation builds the proprioceptive awareness that protects a replaced joint in daily movement far beyond what structured exercise alone develops.
- Flexibility and surrounding tissue health: The muscles, fascia, and connective tissue around a replaced joint need sustained, progressive lengthening. Yoga provides this in a format that most physical therapy exercise prescriptions do not.
The important rule: Never use yoga to replace physical therapy in the first 3 to 6 months after joint replacement. Use it to supplement PT with the full knowledge of your surgical team.
Yoga for Seniors After Joint Replacement: Special Considerations
Yoga for seniors after joint replacement involves additional considerations beyond the surgical restrictions themselves, because older adults experience a combination of factors that affect how quickly and safely they can return to physical practice: reduced connective tissue elasticity, slower wound healing, greater baseline cardiovascular variability, and in many cases, concurrent health conditions that influence exercise tolerance.
According to the AAOS, the average age of patients undergoing total knee replacement in the United States is 65 to 70 years. This population overlaps significantly with the group of older adults for whom yoga is already recognized as a beneficial low-impact activity, making the intersection of joint replacement and yoga practice a highly relevant clinical and lifestyle topic.
Special considerations for seniors returning to yoga after joint replacement:
- Longer warm-up periods: Older connective tissue requires more gradual thermal preparation before stretching loads are applied. Begin every post-surgical yoga session with 10 to 15 minutes of gentle joint mobility work before any held poses.
- Balance support requirements: The altered proprioception that follows joint replacement surgery temporarily increases fall risk. Practice standing poses near a wall or with a chair available for the first 3 to 6 months post-surgery.
- Medication interactions: Many older adults take blood thinners, blood pressure medications, or pain medications following joint replacement. These can affect balance, stamina, and pain signal reliability. Inform your yoga teacher of your medication regimen, because pain medication in particular can mask warning signals that would normally prompt you to stop or modify a pose.
- Bilateral replacement considerations: Some practitioners have had both knees or both hips replaced. Bilateral replacement creates compounding restrictions. Work with a yoga therapist (C-IAYT credential) rather than a general yoga teacher for the initial return to practice.
Key Takeaway: For seniors after joint replacement, the safest return to yoga combines three things: surgical team clearance, a chair yoga starting point, and a teacher who understands joint replacement precautions specifically, not just “modifications for seniors” in general.
How to Work With a Yoga Teacher After Joint Replacement Surgery
Working with a yoga teacher after joint replacement surgery requires finding a teacher with specific knowledge of joint replacement precautions, not just general experience with seniors or beginners. The distinction matters. A general yoga teacher may not know the difference between posterior and anterior hip replacement restrictions, or understand why Balasana (Child’s Pose) is contraindicated after TKR but potentially modifiable after some THR approaches.
What to look for in a yoga teacher for post-joint-replacement practice:
- C-IAYT credential (Certified Yoga Therapist): This certification from the International Association of Yoga Therapists represents the highest clinical standard in yoga instruction. C-IAYT practitioners are specifically trained to work with medical populations and health conditions.
- Yoga Alliance RYT-500 with documented specialty experience: A 500-hour trained teacher with demonstrated experience in therapeutic yoga for surgical populations is an appropriate alternative.
- Willingness to communicate with your physical therapist: The best post-surgical yoga teachers work in collaboration with the rehabilitation team, not independently of it. A teacher who resists this communication is not the right teacher for this context.
- Knowledge of hip precautions and knee flexion restrictions: Ask directly. If the teacher cannot explain the 90-degree hip rule or the knee flexion concerns after TKR, find a different teacher.
Before your first post-surgical yoga session with any teacher, bring a written list of:
- Your surgery type (TKR or THR) and approach (posterior, anterior, lateral)
- Your current range of motion limits as confirmed by your physical therapist
- Any poses your surgical team has specifically cleared or prohibited
- Your current medications, particularly pain management and blood thinners
This documentation takes 10 minutes to prepare and prevents every avoidable error in your adapted practice.
Building a Yoga Practice After Joint Replacement: A Safe Timeline
Building a sustainable yoga practice after joint replacement is a gradual process that follows the healing trajectory of the replaced joint rather than your motivation level or prior yoga experience. The timeline is set by bone healing, soft tissue recovery, and your surgical team’s assessment, not by how quickly you feel ready.
A realistic, stage-based return to yoga after joint replacement:
| Stage | Timeline | Yoga Activity | Key Limitation |
|---|---|---|---|
| Stage 1: Breath and Rest | Weeks 1 to 3 | Diaphragmatic breathing, supine ankle pumps, Savasana | No standing poses. No floor transitions. |
| Stage 2: Gentle Chair | Weeks 3 to 8 | Chair-based seated poses, supported standing near wall | Stay within PT-confirmed range of motion |
| Stage 3: Expanded Gentle | Months 2 to 4 | Gentle Hatha, Restorative poses, supported supine work | Avoid all contraindicated poses |
| Stage 4: Progressive | Months 4 to 6 | Wider Hatha practice; begin introducing modified standing poses | Continue avoiding deep flexion and rotation poses |
| Stage 5: Long-term | 6 months onward | Modified yoga practice as ongoing activity | Some poses remain permanently modified |
The poses that remain permanently modified or avoided for most joint replacement patients include Malasana (Garland Pose), Virasana (Hero Pose), Padmasana (Lotus Pose), and Balasana (Child’s Pose) in its full expression. This is not a failure. These modifications are permanent adaptations that allow everything else in your practice to remain safe and beneficial for decades.
One key note on Yin yoga: Yin yoga uses long passive holds (3 to 5 minutes) to target connective tissue. The long, passive loading in deep joint positions makes Yin yoga inappropriate until at least 12 months post-surgery and only with specific surgical clearance for each pose. The extended load duration in deep flexion is not equivalent to a brief hold in the same position.
Frequently Asked Questions About Yoga and Knee Replacement
Can I do yoga after total knee replacement surgery?
Yes, most people can practice yoga after total knee replacement with appropriate modifications and after surgical clearance, typically at 6 to 12 weeks post-surgery.
The practice must avoid deep knee flexion, direct kneeling on the replaced joint, and any pose that places shear or compressive forces on the prosthetic components beyond the range your surgeon has cleared.
Chair yoga and Restorative yoga are the safest starting formats before progressing to modified Hatha practice.
How long after hip replacement can I start yoga?
Most orthopedic surgeons clear patients for gentle, modified yoga at 6 to 12 weeks after total hip replacement, depending on the surgical approach and individual healing.
Posterior-approach THR patients must observe hip precautions (no flexion past 90 degrees, no internal rotation, no adduction past midline) throughout the precaution period and often beyond.
Always get written clearance from your surgical team before beginning any yoga practice after THR, and confirm which specific movements are permitted.
What yoga poses should I avoid after knee replacement?
After total knee replacement, avoid Balasana (Child’s Pose), Malasana (Garland Pose), Virasana (Hero Pose), Padmasana (Lotus Pose), and any pose requiring direct kneeling on the replaced knee.
These poses require deep knee flexion (beyond 110 to 130 degrees) or place the knee in a combined flexion-rotation position that stresses the prosthetic components.
The American Academy of Orthopaedic Surgeons recommends avoiding high-impact and extreme range-of-motion activities after TKR indefinitely.
Is child’s pose safe after hip replacement?
Balasana (Child’s Pose) is contraindicated for most posterior-approach hip replacement patients because it requires hip flexion of 120 degrees or more, which exceeds the standard 90-degree hip precaution.
Even after the formal precaution period ends, Child’s Pose requires specific clearance from your orthopedic surgeon before re-introduction.
A supported alternative is lying prone (face down) with a bolster under the chest and a blanket under the hips, which provides spinal rest without hip flexion challenge.
Can I do hot yoga after joint replacement surgery?
Hot yoga is not recommended in the first 6 to 12 months after joint replacement surgery for several reasons: the heat reduces pain signal reliability, the intensity of most hot yoga formats exceeds appropriate post-surgical loading, and the cardiovascular demand is higher than gentle yoga in the early recovery period.
The American College of Sports Medicine classifies vigorous exercise in hot environments as a significant cardiovascular stressor, which is a relevant consideration for older adults in early post-surgical recovery.
After full clearance from the surgical team, some patients return to lower-temperature hot yoga formats (90 to 95 degrees rather than 105 degrees), but this should be a gradual, surgeon-cleared decision, not an independent one.
Your Practice Is Waiting for You
Yoga after joint replacement is not about getting back to where you were. It is about building a practice that works with the body you have now, which happens to include a prosthetic joint that will allow you to move with less pain than before surgery.
Start with chair yoga and breath work in weeks three through eight. Add supported supine poses with your surgical team’s clearance. Build the Hatha practice slowly over months, not weeks.
The mat will still be there. The poses that serve you will still serve you. Work within the timeline and respect the restrictions. That patient approach is what allows yoga to be a lifelong practice after joint replacement.