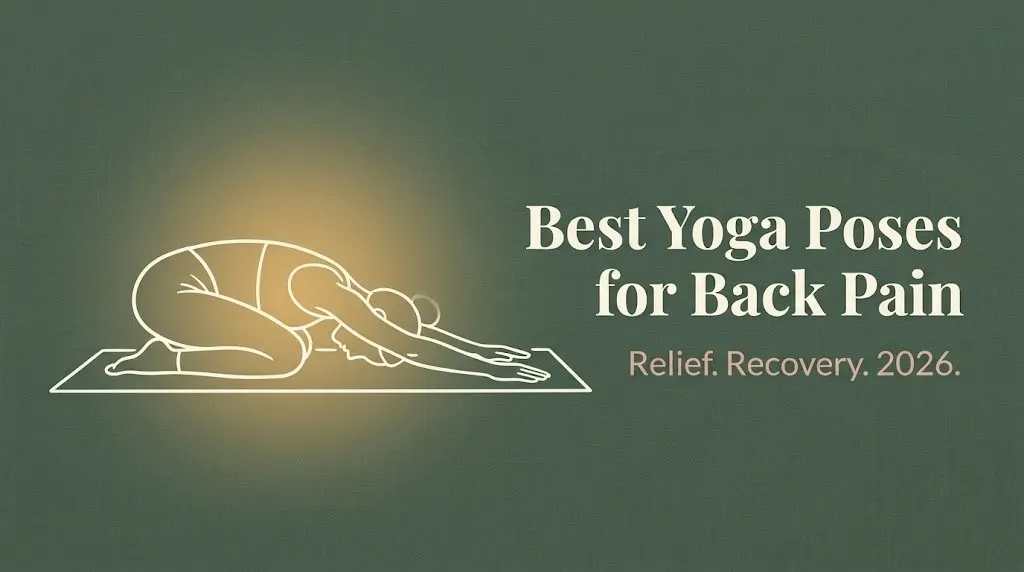
Best Yoga Poses for Back Pain Relief and Recovery: 2026
The best yoga poses for back pain work by stretching tight muscles, strengthening the structures that support your spine, and reducing the neural tension that keeps pain cycles running. Done consistently and correctly, yoga gives most people meaningful relief without needing a gym, a trainer, or special equipment.
Back pain is one of the most common health complaints in the United States. According to the National Center for Complementary and Integrative Health (NCCIH), back pain affects roughly 80 percent of adults at some point in their lives and is a leading reason people try complementary approaches like yoga.
This article walks you through the most effective poses for both lower and upper back pain, with step-by-step instructions, modifications for beginners and seniors, safety notes for specific conditions, and guidance on how long to practice. Every section is built around what actually works, based on research and real yoga experience.
Best Yoga Poses for Back Pain
The best yoga poses for back pain include Balasana (Child’s Pose), Marjaryasana-Bitilasana (Cat-Cow), Salamba Bhujangasana (Sphinx Pose), Setu Bandha Sarvangasana (Bridge Pose), and Supta Matsyendrasana (Supine Spinal Twist). These five form a reliable foundation for anyone starting a back-focused practice.
Each of these poses targets the muscles and connective tissue that most directly influence back pain. The erector spinae, multifidus, glutes, hip flexors, and hamstrings are all involved. Think of these muscle groups like a web of tension cables connected to your spine. When one cable is too tight or too weak, the entire system compensates.
The poses below are organized by purpose. Some decompress the spine. Some strengthen the supporting muscles. Some simply create space in areas that have been compressed by sitting, standing, or repetitive movement.
| Pose | English Name | Target Region | Primary Benefit | Difficulty |
|---|---|---|---|---|
| Balasana | Child’s Pose | Lower back, hips | Gentle spinal decompression | Beginner |
| Marjaryasana-Bitilasana | Cat-Cow | Full spine | Mobility and circulation | Beginner |
| Salamba Bhujangasana | Sphinx Pose | Lower back | Gentle lumbar extension | Beginner |
| Setu Bandha Sarvangasana | Bridge Pose | Lower back, glutes | Strengthening | Beginner-Intermediate |
| Supta Matsyendrasana | Supine Spinal Twist | Lower and mid back | Rotation and release | Beginner |
| Adho Mukha Svanasana | Downward Facing Dog | Full spine, hamstrings | Lengthening and decompression | Beginner-Intermediate |
Safety caution: If your back pain is acute, meaning it started within the past 72 hours, reduce range of motion significantly. Move slowly. If any pose produces sharp, shooting, or radiating pain, stop immediately and contact a physical therapist or spine specialist.
Will Yoga Help Back Pain?
Yes, yoga can help back pain for most people, but results depend on which type of pain you have, how consistently you practice, and whether you adapt poses to your specific body. The evidence supporting yoga for back pain is substantial and specific.
A study published in the Annals of Internal Medicine found that yoga was as effective as physical therapy for chronic low back pain after 12 weeks. Participants who practiced yoga showed improvements in pain intensity, physical function, and reliance on pain medication. This was a randomized controlled trial, not a wellness blog claim.
The NCCIH notes that yoga appears to be most effective for chronic low back pain, meaning pain lasting more than 12 weeks. For acute pain, gentle movement is often still encouraged, but more aggressive yoga practices should wait until the acute phase passes.
Yoga helps back pain through several mechanisms:
- Lengthening muscles that have shortened from prolonged sitting or poor posture
- Strengthening stabilizing muscles like the multifidus and transverse abdominis
- Reducing cortisol levels, which research links to heightened pain sensitivity
- Improving body awareness, which helps people move more safely in daily life
- Creating hydration and circulation in intervertebral discs through gentle spinal movement
Yoga is not a cure. It will not repair structural damage like a herniated disc or spinal stenosis. But it can reduce the functional impairment and pain perception that these conditions produce, often meaningfully.
Best Yoga for Lower Back Pain
The best yoga for lower back pain combines gentle spinal extension, hip opening, and core activation. Hatha yoga and Iyengar yoga are the two styles most consistently recommended by physical therapists and spine specialists for this purpose.
Hatha yoga moves at a slower pace, holds poses longer, and focuses on alignment fundamentals. This gives people with lower back pain time to feel their body’s response to each position before moving on. Iyengar yoga adds props systematically and emphasizes precise anatomical alignment. Both approaches are better suited for back pain than faster styles like Vinyasa or Ashtanga, particularly in early recovery.
| Yoga Style | Pace | Props Used | Back Pain Suitability | Best For |
|---|---|---|---|---|
| Hatha | Slow to moderate | Optional | High | Beginners, chronic pain |
| Iyengar | Slow | Extensive | Very high | Structural issues, seniors |
| Restorative | Very slow | Extensive | Very high | Acute flare-ups, sensitive spines |
| Yin | Slow | Moderate | High | Connective tissue, chronic stiffness |
| Vinyasa | Moderate to fast | Minimal | Moderate (with modification) | Intermediate practitioners |
| Ashtanga | Fast | Minimal | Low for pain management | Experienced, no acute pain |
For home practice, start with Hatha sequences and add Restorative elements on high-pain days. Do not attempt fast-flow practices until you can move through basic poses without discomfort.
A 2016 study in the Annals of Internal Medicine specifically used a standardized weekly Hatha yoga class as its treatment arm for chronic low back pain. This is the design that showed equivalence with physical therapy over 12 weeks.
Yoga Asanas for Lower Back Pain
The core yoga asanas for lower back pain target the lumbar spine, sacroiliac joint, hip flexors, and hamstrings. These four areas are the most common contributors to lower back dysfunction.
Here are the five most effective asanas for lower back pain, with step-by-step instructions for the most foundational of the group:
Marjaryasana-Bitilasana (Cat-Cow Pose) is the single best starting point for almost any back pain practice. It warms the spine, creates fluid movement between vertebrae, and gently activates the core without loading the lumbar.
To practice Cat-Cow:
- Start on hands and knees. Wrists align under shoulders. Knees align under hips.
- Inhale: drop your belly toward the floor. Lift your tailbone and chest. This is Bitilasana (Cow).
- Exhale: round your spine toward the ceiling. Tuck your tailbone and chin. This is Marjaryasana (Cat).
- Move slowly. Let the breath lead the movement. Never rush.
- Repeat for 6 to 10 breath cycles.
Modification: If wrists hurt, make fists or place forearms on the floor. If knees ache, fold a blanket under them.
Other key asanas for lower back pain:
- Balasana (Child’s Pose): gently lengthens the erector spinae and decompresses lumbar vertebrae
- Salamba Bhujangasana (Sphinx Pose): builds passive lumbar extension without stressing the wrists
- Setu Bandha Sarvangasana (Bridge Pose): strengthens the glutes and hamstrings, which directly unload the lower back
- Supta Matsyendrasana (Supine Spinal Twist): releases rotational tension through the thoracolumbar fascia
Modification for seniors or limited mobility: all five of these asanas can be performed with support from blankets, bolsters, or blocks. No asana should produce a sensation beyond mild to moderate stretch.
Yoga Poses for Upper Back Pain
The best yoga poses for upper back pain target the thoracic spine, rhomboids, trapezius, and pectoral muscles, which are chronically tight in people who sit at desks or look at screens for long periods.
Upper back pain is often driven by posture. When the chest rounds forward and the shoulders collapse inward, the muscles between the shoulder blades are forced to work continuously to resist gravity. Over time, this creates a familiar burning ache between and around the shoulder blades.
Gomukhasana (Cow Face Pose) arms and Garudasana (Eagle Pose) arms are two of the most targeted stretches for this region. Neither requires any floor work.
To practice Garudasana arms for upper back relief:
- Sit tall in a chair or cross-legged on the floor.
- Extend both arms forward at shoulder height.
- Cross your right arm over your left at the elbow.
- Wrap the forearms and try to bring the palms together. Use a strap if they do not meet.
- Lift the elbows slightly. Feel the stretch across the upper back and between the shoulder blades.
- Hold for 5 breath cycles. Switch sides.
Other effective poses for upper back pain:
- Bitilasana (Cow Pose) spinal extension: gently opens the front of the chest and draws the shoulder blades together
- Matsyasana (Fish Pose): a deeper chest opener that stretches the anterior thoracic region
- Supported Matsyasana with a bolster under the thoracic spine: the most accessible version for desk workers with significant tension
Safety note: People with thoracic herniation or diagnosed osteoporosis should avoid deep spinal extension poses like Fish Pose without clearance from a spine specialist.
Modification: Use a rolled blanket under the upper back instead of a bolster. This allows you to control the depth of the backbend precisely.
Key Takeaway: Cat-Cow is the best single starting asana for lower back pain, and Eagle arms are the most targeted upper back release. Start here before anything else.
Easy Yoga Poses for Back Pain
Easy yoga poses for back pain are accessible, low-risk positions that require no prior yoga experience and minimal flexibility. Ease, however, is individual. What feels simple to one person may be challenging for another, depending on body structure and pain history.
The following poses are commonly described by yoga teachers and physical therapists as appropriate entry points for back pain beginners:
- Balasana (Child’s Pose): Kneel and fold forward with arms extended or resting alongside the body. Hips reach toward heels. Forehead rests on the mat or a folded blanket.
- Marjaryasana-Bitilasana (Cat-Cow): As described above. No strength or flexibility required.
- Viparita Karani (Legs Up the Wall): Lie on your back and rest your legs vertically up a wall. This passively decompresses the lumbar spine and reduces leg fatigue. No flexibility needed.
- Supta Baddha Konasana (Reclined Bound Angle Pose): Lie on your back. Bring the soles of your feet together. Let knees fall out. Support knees with folded blankets if needed.
- Savasana (Corpse Pose) with a bolster under the knees: A supported version of lying flat on your back. The bolster reduces lumbar curve and takes pressure off the sacrum.
| Pose | Floor or Standing | Props That Help | Time to Hold |
|---|---|---|---|
| Balasana | Floor | Bolster, blanket | 1 to 3 minutes |
| Cat-Cow | Floor | Blanket under knees | 6 to 10 breath cycles |
| Viparita Karani | Floor and wall | Folded blanket under hips | 3 to 10 minutes |
| Supta Baddha Konasana | Floor | Blankets under knees | 3 to 5 minutes |
| Savasana with bolster | Floor | Bolster or rolled blanket | 5 to 15 minutes |
Modification: All poses above can be made gentler by reducing range of motion, adding support under any joint that feels strain, or shortening hold times.
Yoga Pose to Stretch Lower Back
The single most effective yoga pose to stretch the lower back is Balasana (Child’s Pose), because it gently lengthens the erector spinae along the entire lumbar and thoracic spine while simultaneously releasing the hip rotators and glutes.
Many people underestimate this pose because it looks simple. But the length of the hold and the placement of the hips relative to the heels determines how much actual stretch occurs. Sitting hips slightly higher than heels targets the lumbar more specifically. Sitting hips closer to heels emphasizes the thoracic and mid-back.
To practice Balasana for lower back stretch:
- Kneel on your mat with knees hip-width apart. Big toes touch behind you.
- Inhale to lengthen your spine.
- Exhale and fold forward slowly, extending arms out in front of you.
- Rest your forehead on the mat or on stacked fists if your forehead does not reach.
- Breathe into your lower back. With each exhale, let the belly drop slightly.
- Hold for 1 to 3 minutes. Longer holds create greater tissue release.
- To release: walk hands back toward knees and slowly rise on an inhale.
Pose Tip:
- Widen your knees further to create space for the belly if you are larger-bodied or pregnant.
- Place a bolster lengthwise between your thighs and torso for full support.
- Avoid this pose if you have a knee injury that prevents kneeling without pain.
The second-best lower back stretch is Anjaneyasana (Low Lunge), which targets the psoas and hip flexors. Think of the hip flexors like a bungee cord that has been held in a shortened position all day. Every hour of sitting tightens this cord. Low Lunge is how you lengthen it back out.
Standing Yoga Poses for Lower Back Pain
Standing yoga poses for lower back pain strengthen the legs and hips, which are the primary load-bearing structures that protect the lumbar spine during everyday movement. Strong legs take pressure off the lower back.
Virabhadrasana II (Warrior II) and Utthita Trikonasana (Extended Triangle Pose) are two of the most effective standing poses for lower back pain, because both require the legs to work actively while the spine maintains a neutral position.
Uttanasana (Standing Forward Fold) is technically a standing pose, but it functions primarily as a decompressive stretch. With knees bent generously, it allows the spine to hang and creates gentle traction through the lumbar.
To practice Uttanasana for lower back relief:
- Stand with feet hip-width apart.
- Bend your knees significantly. This is not optional for back pain.
- Hinge at the hips and fold forward. Let your torso hang.
- Cross your forearms and hold opposite elbows. Let your head hang heavy.
- Sway gently side to side if it feels good.
- Hold for 6 to 10 breaths. Straighten knees only slightly over time.
- To rise, bend knees deeply, press feet into the ground, and slowly roll up.
- Modification for limited balance: Hold a chair back or wall while folding forward.
- Modification for tight hamstrings: Keep a deep bend in the knees throughout. The lower back releases regardless of leg straightness.
- Avoid this pose if bending forward increases your pain. Some disc conditions are aggravated by forward flexion.
According to the American College of Sports Medicine, strengthening the muscles of the lower extremities, including the gluteus maximus, quadriceps, and hamstrings, directly reduces mechanical load on the lumbar spine.
Key Takeaway: Standing poses like Warrior II and modified Forward Fold build the leg and hip strength that takes pressure off your lower back during daily movement.
Spine Stretches Yoga
Yoga spine stretches work by creating length, decompression, and gentle movement through the vertebral column, targeting the joints, discs, and surrounding soft tissue that restrict movement during back pain. The spine is designed to move in six directions: forward, backward, sideways to both sides, and rotation to both sides.
Most people with back pain avoid movement, which actually worsens stiffness and disc health over time. Intervertebral discs receive nutrients through movement and compression, not through blood vessels. Stillness starves them.
The most effective yoga spine stretches cover all six movement directions:
| Movement Direction | Yoga Pose | Sanskrit Name |
|---|---|---|
| Forward flexion | Child’s Pose | Balasana |
| Backward extension | Sphinx Pose | Salamba Bhujangasana |
| Left lateral flexion | Gate Pose (left) | Parighasana |
| Right lateral flexion | Gate Pose (right) | Parighasana |
| Left rotation | Supine Twist (left) | Supta Matsyendrasana |
| Right rotation | Supine Twist (right) | Supta Matsyendrasana |
A full spine stretch sequence should ideally include at least one representative pose from each direction. This does not need to be lengthy. Six poses held for 60 seconds each requires only six minutes.
Modification: For any lateral stretch or rotation, reduce the range by 50 percent initially. Pain on one side more than the other may indicate a structural preference. A physical therapist can help identify your spine’s preferred direction if pain is asymmetrical.
The International Journal of Yoga published a 2017 study finding that a consistent yoga-based spinal mobility program reduced pain scores and improved range of motion in participants with chronic non-specific low back pain over eight weeks.
Yoga for Chronic Lower Back Pain
Yoga for chronic lower back pain, defined as pain lasting more than 12 weeks, requires a different approach than yoga for acute or occasional pain. The goal shifts from immediate relief to long-term function, movement confidence, and pain sensitivity reduction.
Chronic pain involves changes in how the nervous system processes pain signals. This means physical tension in muscles is often only part of the picture. Yoga addresses this through its simultaneous effect on the sympathetic nervous system (stress response) and parasympathetic nervous system (rest and recovery).
A randomized controlled trial published in the Annals of Internal Medicine followed 320 adults with chronic low back pain. Participants assigned to a yoga program showed similar improvement in function and pain scores to those in physical therapy, and both groups outperformed those receiving only educational materials. The yoga group maintained improvements at one year.
For chronic lower back pain, the most effective approach includes:
- Practicing 2 to 3 times per week consistently rather than practicing daily for two weeks and then stopping
- Including both active poses (Bridge, Warrior) and passive poses (Child’s Pose, Supported Reclined Angle)
- Avoiding the temptation to push through pain. Sensation is fine. Sharp pain is a stop signal.
- Adding pranayama (breath practice) to every session, because breath directly regulates nervous system tone
Modification for flare-up days: On high-pain days, skip all active strengthening poses. Practice only Viparita Karani (Legs Up the Wall), Supta Baddha Konasana (Reclined Bound Angle), and supported Savasana. These three poses provide nervous system calming without loading the spine.
Yoga for Herniated Disc
Yoga for a herniated disc requires careful selection of poses, because some yoga positions that help most back pain can significantly worsen disc herniation symptoms. The direction of the herniation matters enormously.
A posterolateral herniation, the most common type, means the disc material has bulged toward the back and side. Forward bends typically increase pressure in this direction and may worsen symptoms. Gentle backward extension is usually better tolerated.
Poses generally appropriate for posterolateral disc herniation:
- Salamba Bhujangasana (Sphinx Pose): gentle passive extension, low load
- Bhujangasana (Cobra Pose): slightly more active extension, proceed with caution
- Setu Bandha Sarvangasana (Bridge Pose): extension with glute engagement
- Balasana (Child’s Pose): for some people, mild forward flexion provides relief; for others it does not
Poses to generally avoid with active disc herniation:
- Deep forward folds like Paschimottanasana (Seated Forward Fold)
- Deep twists with significant spinal rounding
- Adho Mukha Svanasana (Downward Facing Dog) if it increases leg symptoms
Safety note: Yoga for herniated discs should ideally begin with guidance from a physical therapist familiar with yoga or a certified yoga therapist (C-IAYT). The direction, severity, and location of the herniation changes what is safe or beneficial. This is a situation where self-directed practice carries more risk than usual.
Modification: Sphinx Pose performed with a pillow under the pelvis, rather than the floor, reduces the amount of lumbar extension and makes it safer for people with moderate disc irritation.
Key Takeaway: Yoga for chronic pain, herniated discs, or sciatica requires you to distinguish which movement directions help versus hurt, not all poses are appropriate for all spinal conditions.
Yoga for Sciatica Pain Relief
Yoga for sciatica relief works by releasing the muscles that compress or irritate the sciatic nerve, most often the piriformis, gluteus medius, and hamstrings in the posterior chain. Sciatica is not a diagnosis; it is a symptom of nerve irritation that usually runs from the lower back through the glute and down the leg.
Not all sciatica is the same. Piriformis syndrome causes sciatic pain through muscle compression of the nerve in the hip. Disc-related sciatica comes from herniation pressing on a nerve root. These respond to different poses.
For piriformis-related sciatica, hip-opening poses are often the most effective:
- Eka Pada Rajakapotasana (Pigeon Pose): the most targeted piriformis stretch in yoga; be cautious of knee torque
- Supta Kapotasana (Reclined Pigeon or Figure-Four Stretch): the safest version, performed lying on your back
- Gomukhasana (Cow Face Pose) legs: deep external hip rotation that stretches the piriformis
To practice Supta Kapotasana (the safest sciatica stretch):
- Lie on your back. Bend both knees, feet flat.
- Cross your right ankle over your left knee. Flex the right foot.
- Either stay here or lift your left foot and draw your legs toward your chest.
- Hold behind your left thigh or shin. Do not hold the knee joint.
- Hold for 1 to 2 minutes. Breathe slowly and steadily.
- Release and repeat on the other side.
Modification: If lifting the legs is uncomfortable, keep the left foot flat on the floor and stay there. The stretch is still present.
For disc-related sciatica: Forward folds may increase symptoms. Gentle extension poses and nerve-glide exercises supervised by a physiotherapist are often more appropriate. If leg symptoms increase during any yoga pose, stop and seek professional assessment.
Chair Yoga for Back Pain Seniors
Chair yoga for back pain offers seniors a safe, accessible way to practice spinal mobility, gentle strengthening, and hip opening without needing to get down to the floor. The chair acts as a prop and a support structure simultaneously.
Falls during yoga practice are a genuine risk for older adults with balance challenges. Chair yoga eliminates most of that risk while preserving the core benefits of spinal movement and muscle engagement.
According to the Journal of Alternative and Complementary Medicine, chair-based yoga programs have been shown to reduce pain and improve mobility in older adults with musculoskeletal conditions, including lower back pain and hip osteoarthritis.
| Chair Yoga Pose | What It Does | Hold Time |
|---|---|---|
| Seated Cat-Cow | Spinal mobility | 8 breath cycles |
| Seated Forward Fold | Hamstring and lower back stretch | 30 to 60 seconds |
| Seated Spinal Twist | Thoracic rotation | 5 breaths per side |
| Seated Pigeon | Hip and piriformis stretch | 60 seconds per side |
| Chair-Supported Mountain Pose | Posture and leg activation | 30 seconds |
To practice Seated Spinal Twist:
- Sit tall at the front half of your chair. Do not lean on the backrest.
- Place your feet flat on the floor, hip-width apart.
- Inhale and lengthen your spine upward.
- Exhale and rotate gently to the right. Place your left hand on your right knee.
- Place your right hand on the chair back or seat.
- Hold for 5 slow breaths. Return to center on an inhale.
- Repeat to the left.
Modification for osteoporosis: Avoid deep twists or any posture that involves significant spinal flexion or rotation beyond comfortable range. Osteoporosis increases fracture risk with forceful movements. Keep all movements small, slow, and controlled.
Restorative Yoga for Back Pain
Restorative yoga for back pain works by placing the body in fully supported, passive positions held for 5 to 20 minutes, allowing the nervous system to shift into a parasympathetic (rest and digest) state. This state reduces muscle guarding, decreases pain sensitivity, and allows the soft tissue to release in ways that active stretching cannot produce.
Restorative yoga uses bolsters, blankets, blocks, straps, and sometimes a wall to support the body completely. You are not stretching actively. You are allowing gravity and time to do the work.
For back pain, the most effective restorative poses are:
- Supta Baddha Konasana (Reclined Bound Angle): bolster under the spine, blankets under the knees, completely passive
- Viparita Karani (Legs Up the Wall): hips on a folded blanket, legs vertical against the wall, profound lumbar decompression
- Supported Balasana (Supported Child’s Pose): bolster under the chest and belly, forehead on a blanket
- Supported Matsyasana (Supported Fish): bolster under the thoracic spine, head supported on a blanket
A typical restorative session for back pain does not need to last more than 30 to 40 minutes. Two or three poses, held long enough for the nervous system to settle, is often more effective than a longer active practice on high-pain days.
The International Journal of Yoga has published research indicating that restorative yoga practices show measurable reductions in salivary cortisol, a biochemical marker of stress. Elevated cortisol is associated with increased pain sensitivity, making stress reduction a direct route to pain reduction.
Modification: If lying flat on your back causes discomfort, use a bolster under the knees for all supine restorative poses. This reduces lumbar curve and is appropriate for most lower back conditions.
Key Takeaway: Restorative yoga is not a passive option for people who cannot do “real” yoga. It is a distinct, research-supported practice that specifically reduces the nervous system’s contribution to chronic pain.
How Long to Hold Yoga Poses for Back Pain
The ideal hold time for yoga poses for back pain depends on the type of pose and the goal of that pose. There is no single universal answer, but research and clinical practice offer clear guidelines.
For active strengthening poses like Bridge Pose or Warrior series, shorter holds with more repetitions produce better results. These poses build muscular endurance. The American College of Sports Medicine notes that muscular endurance training involves holds of 15 to 45 seconds or controlled repetitions with consistent form.
For stretch-focused poses targeting the lumbar and hip regions, longer holds create more meaningful tissue change. Research in flexibility science indicates that holding a stretch for less than 30 seconds produces minimal lasting change. Most yoga teachers and physiotherapists recommend 60 to 90 seconds for genuine connective tissue response.
| Pose Type | Goal | Recommended Hold Time | Repetitions |
|---|---|---|---|
| Active strengthening (Bridge, Warrior) | Muscle endurance | 15 to 30 seconds | 3 to 5 rounds |
| Active stretch (Cat-Cow, Forward Fold) | Mobility and circulation | 5 to 10 breath cycles | 1 to 2 rounds |
| Passive stretch (Child’s Pose, Low Lunge) | Muscle lengthening | 60 to 90 seconds | 1 to 2 rounds |
| Restorative (Legs Up the Wall, Reclined Angle) | Nervous system reset | 5 to 15 minutes | 1 round |
| Yin (Pigeon, Dragon Pose) | Deep connective tissue | 3 to 5 minutes | 1 round |
Beginner guidance: Start at the lower end of every range. A 60-second hold that you can maintain with steady breathing is more effective than a 3-minute hold where you tense up and brace against the sensation.
Modification: If pain increases during a hold, shorten it immediately. Pain during a hold is a signal to adjust, not to persist.
Yoga Breathing for Back Pain
Yoga breathing, known as pranayama, reduces back pain through its direct effect on the autonomic nervous system and its physical effect on intra-abdominal pressure, spinal support, and muscle tension. Breathing is not supplementary to yoga for back pain. It is a primary tool.
The diaphragm is anatomically connected to the lumbar spine via the crura, two muscular attachments that anchor the diaphragm to the first through third lumbar vertebrae. When breathing is shallow and chest-dominant, the diaphragm does not fully descend. This keeps the crura chronically shortened and contributes directly to lumbar tension.
Diaphragmatic breathing, also called belly breathing, is the foundation of all pranayama for back pain:
- Lie on your back with knees bent. Place one hand on your chest and one on your belly.
- Inhale slowly through the nose. Direct the breath so that your belly rises first. Chest stays relatively quiet.
- Exhale slowly through the nose or pursed lips. Let the belly fall.
- Hold the exhale for a moment before the next inhale.
- Practice for 5 to 10 minutes. This is enough to shift autonomic tone measurably.
Ujjayi breath, a gentle constriction at the back of the throat that creates an audible ocean sound, is the most commonly used pranayama in physical yoga practice. It slows the breath, increases oxygen efficiency, and creates a slight increase in intra-thoracic pressure that can support spinal stability during poses.
Nadi Shodhana (Alternate Nostril Breathing) is particularly effective for people whose back pain has a strong stress component. A 2018 study in the International Journal of Yoga found that Nadi Shodhana practice reduced perceived stress scores significantly among participants after four weeks of daily practice.
Modification: For anyone with respiratory conditions or who finds breath retention uncomfortable, simply focus on slow, deep nasal breathing without any holds or ratios. The depth and pace of the breath matter more than any specific pranayama technique.
Frequently Asked Questions About Yoga for Back Pain
What are the best yoga poses for lower back pain beginners can try at home?
The best starting poses for lower back pain at home are Cat-Cow, Child’s Pose, and Legs Up the Wall.
These three require no flexibility, no equipment beyond a mat or carpet, and can be completed in under 15 minutes.
Start with Cat-Cow for 2 minutes, transition to Child’s Pose for 2 minutes, and finish with Legs Up the Wall for 5 minutes.
Is yoga safe if you have a herniated disc or slipped disc?
Yoga can be safe with a herniated disc, but pose selection depends entirely on the direction and severity of the herniation.
Generally, gentle backward extension poses like Sphinx Pose are better tolerated than deep forward bends, which can increase disc pressure in the most common herniation direction.
Before starting a self-directed yoga practice with a known disc herniation, a session with a physical therapist or certified yoga therapist who understands your specific imaging findings will clarify which movement directions are safe for your spine.
How often should you do yoga to see improvement in back pain?
Research suggests that practicing yoga 2 to 3 times per week produces measurable improvements in back pain within 8 to 12 weeks.
The Annals of Internal Medicine trial that compared yoga to physical therapy used a once-weekly class plus home practice as its treatment model.
Consistency over months matters more than how long any single session lasts.
Which yoga style is best for back pain relief?
Hatha yoga and Iyengar yoga are the most consistently recommended styles for back pain, because both emphasize slow movement, precise alignment, and accessible modifications.
Restorative yoga is the best choice on high-pain or flare-up days.
Fast-flow styles like Vinyasa or Ashtanga are generally not recommended until a baseline level of pain-free movement is established.
Can yoga make back pain worse?
Yes, yoga can worsen back pain if poses are done incorrectly, if a practice moves too quickly for your current level, or if you practice through sharp or radiating pain rather than pausing.
Certain poses, particularly deep forward bends and unsupported twists, can aggravate specific spinal conditions like disc herniation or spinal stenosis.
If your pain increases during or after yoga practice on more than one occasion, stop and work with a yoga therapist or physical therapist to identify which movements are appropriate for your body.
Back pain responds well to movement, and yoga gives you a structured, graduated way to move without fear. Start with Cat-Cow and Child’s Pose this week. Do them for 10 minutes before bed three times. That is a real practice, not a watered-down version of one.
From there, add one new pose per week from the sections above. Let your body teach you what it needs. If something feels wrong, it probably is. Adjust, prop up, slow down, and keep going.
The people who see the most improvement from yoga for back pain are not the most flexible. They are the most consistent.