Yoga Wrist Support: A 2026 Guide to Pain-Free Practice
The right yoga wrist support can be the difference between a practice you love and one you dread. Whether you need a wrap, brace, wedge, or just better hand placement, your wrists deserve the same attention you give your alignment and breath.
Wrist injuries account for a notable portion of yoga-related complaints. A study published in the Journal of Bodywork and Movement Therapies found that the upper extremities, including wrists and hands, are among the most commonly reported sites of yoga-related pain. That statistic makes sense when you consider how many popular poses load your body weight directly through the wrist joint.
This guide breaks down every type of wrist support available in 2026. You will learn what causes wrist pain during yoga, which poses stress the joint most, and how to pick the right solution for your body. We also cover exercises, modifications, and specific advice for conditions like carpal tunnel syndrome and age-related stiffness.
What Is Yoga Wrist Support?
Yoga wrist support refers to any product, prop, or technique that reduces stress on the wrist joint during yoga practice. This includes physical accessories like wraps and wedges, as well as alignment strategies that change how force travels through the hand and forearm.
Most yoga poses ask you to bear weight on open palms. That position pushes the radiocarpal joint into extension, sometimes past 70 degrees. For people with existing wrist conditions, limited flexibility, or weak forearm muscles, that angle creates discomfort or pain.
Support tools work by reducing the degree of wrist extension, redistributing load across a wider area, or stabilizing the joint during movement. Some are worn on the body. Others sit on the mat beneath your hands. The best approach often combines a physical support with improved technique.
| Support Category | Examples | How It Helps |
|---|---|---|
| Worn on the wrist | Wraps, braces, compression gloves | Stabilizes joint, limits painful range |
| Placed on the mat | Wedges, folded towels, yoga blocks | Reduces extension angle |
| Technique-based | Hasta bandha (hand lock), finger spreading, forearm engagement | Distributes load, activates stabilizers |
Choosing the right category depends on your pain level, the style of yoga you practice, and whether your discomfort is temporary or chronic.
Why You Need Wrist Support for Yoga
Wrist support for yoga matters because the wrist is a small, complex joint being asked to handle loads it was not primarily designed for. Walking on your hands is not a daily human activity, yet many yoga sequences treat it like one.
The wrist contains eight carpal bones, a web of ligaments, and the median nerve running through the carpal tunnel. When you press your palms flat in Phalakasana (Plank Pose), your full body weight passes through this compact architecture. Repeated loading without adequate strength or technique can lead to strain, inflammation, or nerve compression.
Using wrist support is not a sign of weakness. Iyengar yoga, one of the most alignment-focused styles, routinely uses props to protect joints. B.K.S. Iyengar himself championed the use of blocks, walls, and modified hand positions to make poses safe and accessible.
Key reasons to consider wrist support include:
- Existing pain or injury in the wrist, hand, or forearm
- Carpal tunnel syndrome or other nerve-related conditions
- Hypermobility that allows the wrist to extend beyond a safe range
- Beginner status with underdeveloped forearm strength
- High-volume Vinyasa or Ashtanga practice with many weight-bearing transitions
Ignoring wrist pain rarely makes it go away. Addressing it early with the right support keeps you on the mat longer.
What Causes Wrist Pain During Yoga?
Wrist pain during yoga most often results from excessive wrist extension under load, poor hand placement, or insufficient forearm strength. These three factors create a cycle that worsens with repetition.
Your wrist is comfortable in a neutral position, roughly 0 to 20 degrees of extension. Adho Mukha Svanasana (Downward Facing Dog) pushes the joint to approximately 45 to 60 degrees. Plank Pose demands closer to 90 degrees. At those angles, the joint surfaces compress unevenly, and soft tissues stretch beyond their resting length.
Poor hand placement magnifies the problem. When practitioners dump weight into the heel of the palm rather than spreading it across the full hand, pressure concentrates on the smallest area of the joint. Think of it like wearing a backpack with one thin strap versus two padded ones. Same weight, very different experience.
The American Academy of Orthopaedic Surgeons (AAOS) notes that repetitive wrist extension under load is a known risk factor for both tendinitis and carpal tunnel symptoms. Yoga does not cause these conditions in isolation, but it can aggravate them when alignment and support are ignored.
Other contributing factors include:
- Tight forearm flexors from desk work or phone use
- Weak wrist extensors that cannot stabilize the joint under load
- Previous wrist fractures or sprains that left scar tissue or reduced range
- Cold muscles from skipping a wrist warm-up before practice
Key Takeaway: Wrist pain in yoga is not inevitable. It is a signal that your joint angle, hand placement, or forearm strength needs attention, and the right support tool can fix the problem while you build long-term resilience.
How to Protect Wrists in Yoga
The most effective way to protect wrists in yoga is to change how force enters the hand before adding any external support. Technique adjustments alone solve most mild wrist discomfort.
Hasta bandha, sometimes called the “hand lock,” is the wrist equivalent of engaging your core. It means pressing actively through all five fingertips and the base of each finger, creating a dome or suction-cup shape in the center of the palm. This distributes weight away from the heel of the hand and activates the forearm stabilizers.
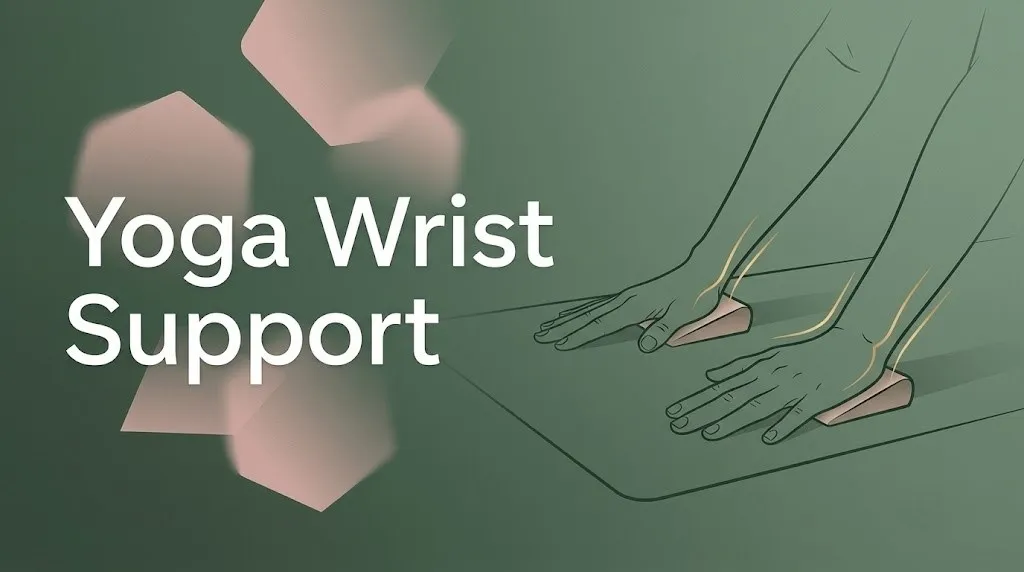
To apply hasta bandha in any weight-bearing pose:
- Spread your fingers wide with even spacing between each finger.
- Press firmly through the fingertip pads, especially the index finger and thumb.
- Root down through the knuckle mounds at the base of each finger.
- Lift slightly through the center of the palm, as if gripping a small ball.
- Engage your forearm muscles by gently rotating the outer forearms down.
This technique should feel like work in your forearms. If you only feel pressure in the wrist, you are not engaging deeply enough.
Beyond hand placement, warming up the wrists before practice makes a measurable difference. Spend 60 to 90 seconds on gentle wrist circles, flexion and extension stretches, and prayer-position presses before your first Downward Dog.
Quick Summary:
- Hasta bandha redistributes load from the wrist to the full hand.
- Warm up your wrists for at least 60 seconds before weight-bearing poses.
- If technique alone does not resolve discomfort, add a physical support tool.
Best Wrist Support for Yoga in 2026
The best wrist support for yoga depends on why your wrists hurt, how severe the discomfort is, and which style of yoga you practice. No single product works for everyone, so matching the support to your specific need matters more than brand names.
In 2026, the market offers four main categories of yoga wrist support products. Each one addresses a different part of the problem.
| Support Type | Best For | Pros | Cons |
|---|---|---|---|
| Wrist wraps | Mild instability, general soreness | Flexible, easy to adjust, affordable | Does not reduce wrist extension angle |
| Rigid wrist brace | Post-injury recovery, moderate to severe pain | Strong stabilization, limits risky ranges | Bulky, can restrict pose form |
| Wrist wedge | Excessive wrist extension, compression pain | Reduces joint angle by 20 to 30 degrees | Must be placed on mat, not worn |
| Yoga gloves | Grip issues, mild compression, sweaty palms | Lightweight, adds traction | Minimal structural support |
For practitioners with mild soreness, a neoprene wrap or a foam wrist wedge is usually sufficient. If you have a diagnosed condition like carpal tunnel, a firmer brace for certain poses combined with a wedge for others gives the most coverage.
The American College of Sports Medicine (ACSM) recommends choosing joint supports that allow functional movement rather than completely immobilizing the area. Your support should let you engage muscles and maintain alignment, not bypass them entirely.
Wrist Brace for Yoga: When and How to Use One
A wrist brace for yoga provides rigid or semi-rigid stabilization that limits the joint’s range of motion, which is helpful during recovery from injury or when pain is moderate to severe.
Braces differ from wraps in stiffness. A wrap compresses and warms the area. A brace physically prevents your wrist from bending past a set angle. This makes braces effective for acute issues but potentially limiting for poses that require full wrist articulation.
When a wrist brace makes sense:
- Post-sprain recovery when your physical therapist clears you for gentle movement
- Carpal tunnel flare-ups that worsen with wrist extension under load
- Ganglion cysts that compress with direct palm pressure
- Early return to practice after a wrist fracture has healed
When to skip the brace:
- Mild soreness that responds to warming up and technique correction
- Full Vinyasa flows where the brace interferes with transitions
- Arm balance practice where wrist mobility is needed for balance adjustments
If you use a brace, choose one that leaves your fingers and thumb free. A brace that covers the palm prevents hasta bandha engagement and can create compensatory stress in the elbow and shoulder.
Pose Tip:
- Wear the brace during static holds like Plank or Tabletop.
- Remove it for flowing sequences where wrist freedom matters.
- Never tighten a brace so much that your fingers tingle or go numb.
Yoga Wrist Wraps: Types and Benefits
Yoga wrist wraps are flexible fabric or neoprene bands that wrap around the wrist to provide compression, warmth, and mild joint stability without restricting movement.
Unlike rigid braces, wraps allow full range of motion. They work by increasing proprioceptive awareness, meaning your nervous system gets more sensory feedback from the joint. A 2019 study in the Journal of Hand Therapy found that wrist compression garments improved proprioception and reduced self-reported pain during repetitive hand tasks.
There are three main types of yoga wrist wraps:
- Neoprene wraps: Thick, warm, Velcro-closure. Best for cold environments or stiff joints.
- Elastic fabric wraps: Thin, breathable, adjustable tension. Best for Vinyasa or heated yoga.
- Cotton wrist bands: Minimal support, mainly absorbs sweat. Not therapeutic.
Wraps work well for practitioners who experience mild discomfort during weight-bearing poses but do not have a diagnosed structural injury. They are also a good option during Ashtanga or power yoga classes where frequent transitions between poses make a rigid brace impractical.
To get the most from a wrap, position it so the thickest part of the material sits over the dorsal (top) side of the wrist, where compression reduces excess extension. Avoid wrapping so tightly that circulation decreases. You should be able to slide one finger between the wrap and your skin.
Key Takeaway: Wraps, braces, and wedges each solve a different aspect of wrist discomfort. Wraps add compression and awareness, braces limit painful ranges of motion, and wedges reduce the extension angle at the mat. Most people benefit from trying a wedge first, since it addresses the root biomechanical cause without anything on the body.
Yoga Wrist Wedge: How This Simple Prop Helps
A yoga wrist wedge is a sloped foam or rubber prop placed under the heels of your palms to reduce the angle of wrist extension during weight-bearing poses. It is one of the most effective and underused tools in the yoga prop world.
Here is why wedges work so well. In Plank Pose, a flat mat puts the wrist at roughly 90 degrees of extension. A wedge with a 20 to 25 degree incline drops that angle to approximately 65 to 70 degrees. That 20-degree reduction often falls below the threshold where pain begins, allowing practitioners to hold the pose comfortably.
Think of a wrist wedge like a heel lift in a shoe. It does not change the activity. It changes the angle at which the joint experiences force, and that shift makes all the difference.
To use a wrist wedge:
- Place the wedge on your mat with the thick edge closest to your body.
- Position the heels of your palms on the raised (thick) edge.
- Spread your fingers over the front (thin) edge and onto the mat.
- Press down through your fingertips using hasta bandha.
- Check that the wedge does not slide during weight shifts.
A folded towel or the edge of a yoga blanket can serve as a makeshift wedge. Roll or fold it to create a gradual slope about one to two inches tall at the thickest point.
| Wedge Material | Thickness | Durability | Best For |
|---|---|---|---|
| EVA foam | 1 to 2 inches | High | Daily practice, firm support |
| Natural rubber | 1 to 1.5 inches | Very high | Hot yoga, non-slip surface |
| Folded towel | Variable | Low (shifts) | Trying before buying |
| Cork wedge | 1 to 2 inches | Very high | Eco-conscious practitioners |
Wedges pair well with any yoga style but are especially helpful in Vinyasa, Hatha, and Ashtanga where Downward Dog and Plank transitions happen repeatedly.
Yoga Gloves for Wrist Support
Yoga gloves for wrist support are fingerless gloves with textured palm grips and, in some designs, a built-in wrist strap that provides light compression. They address grip and mild wrist instability at the same time.
Gloves help most when the problem is partly grip-related. On a slippery mat, your hands slide forward during Adho Mukha Svanasana (Downward Facing Dog), which forces extra weight into the wrist. A non-slip glove surface keeps the hand anchored, letting you distribute force through the fingers as intended.
However, gloves are the lightest-duty wrist support option. They do not change the joint angle or restrict harmful ranges. If your pain is mainly from wrist extension, a wedge will do more.
Yoga gloves work best for:
- Sweaty-palm practitioners who lose grip on the mat
- Hot yoga or Bikram/26&2 classes where moisture is constant
- People who want light compression without bulky wraps
- Practitioners with mild joint looseness who benefit from tactile feedback
One downside: gloves can reduce the direct sensory connection between your skin and the mat. For styles like Iyengar, where precise hand-to-floor contact matters, many teachers prefer bare hands with a non-slip mat towel instead.
Quick Summary:
- Gloves solve grip problems and add mild wrist compression.
- They are the least supportive option for structural wrist pain.
- Pair gloves with a wedge if you need both traction and angle reduction.
Yoga Poses Bad for Wrists
Some yoga poses are harder on the wrists than others, and knowing which ones carry the most risk helps you prepare, modify, or substitute before pain starts.
The common factor in wrist-stressing poses is full body weight passing through the palms with the wrist in deep extension. Arm balances, certain inversions, and repeated Vinyasa transitions all fall into this category.
| Pose (Sanskrit) | Pose (English) | Wrist Extension Angle | Load Level |
|---|---|---|---|
| Phalakasana | Plank Pose | ~90 degrees | High (full body weight) |
| Chaturanga Dandasana | Four-Limbed Staff Pose | ~90 degrees | Very high (eccentric load) |
| Bakasana | Crow Pose | ~80 to 90 degrees | Very high (concentrated) |
| Vasisthasana | Side Plank | ~90 degrees | High (single wrist) |
| Urdhva Mukha Svanasana | Upward Facing Dog | ~70 degrees | Moderate to high |
| Adho Mukha Svanasana | Downward Facing Dog | ~50 to 70 degrees | Moderate |
Chaturanga Dandasana deserves special attention. This lowering movement adds an eccentric (lengthening under load) demand to the already-extended wrist. Performed dozens of times in a single Vinyasa class, it is the most frequent source of wrist overuse complaints.
Bakasana (Crow Pose) concentrates nearly all body weight into the wrists and requires them to make constant micro-adjustments for balance. If your wrists are not ready for this, you will know immediately.
For any of these poses, a wrist wedge or modified hand position (fists or forearms) can reduce the strain. Never push through sharp or shooting wrist pain in any posture.
Key Takeaway: The highest-risk poses for wrists are Plank, Chaturanga, and arm balances, all of which load the wrist near 90 degrees of extension. Using a wedge, dropping to forearms, or making fists are simple adjustments that remove most of the strain without losing the pose’s core benefit.
Wrist-Friendly Yoga Poses
Wrist-friendly yoga poses either avoid weight-bearing on the hands entirely or use positions where the wrist stays close to neutral. These poses let you build a strong, full-body practice even when your wrists are off-limits.
Standing poses, seated poses, supine poses, and wall-supported poses give your wrists a complete rest while still targeting every major muscle group.
Wrist-free alternatives for common sequences:
- Instead of Plank: Hold Forearm Plank (Phalakasana variation) with weight on elbows.
- Instead of Downward Dog: Practice Dolphin Pose (Ardha Pincha Mayurasana) on forearms.
- Instead of Tabletop: Use Forearm Tabletop with elbows under shoulders.
- Instead of Chaturanga: Lower to the mat from Plank on knees, or skip the transition.
Strong standing poses that bypass the wrists entirely:
- Virabhadrasana II (Warrior II): Strengthens legs, opens hips, no hand loading.
- Utkatasana (Chair Pose): Builds quad and core strength with arms overhead.
- Vrksasana (Tree Pose): Trains balance and hip stability.
- Trikonasana (Triangle Pose): Stretches hamstrings and side body.
A study published in the International Journal of Yoga found that yoga sequences consisting primarily of standing and seated poses produced similar improvements in flexibility, balance, and self-reported well-being compared to sequences that included arm balances and inversions. You do not have to load your wrists to get the benefits of yoga.
Yoga Modifications for Wrist Pain
Yoga modifications for wrist pain adjust the hand position, surface, or angle so you can still practice weight-bearing poses without aggravating the joint. The goal is to stay in the pose while removing the painful variable.
The most effective modifications, ranked by how much they reduce wrist stress:
- Forearm variation: Drop from hands to forearms. Eliminates wrist extension entirely. Works for Plank, Downward Dog, and Tabletop.
- Fist position: Make fists and place knuckles on the mat. Keeps the wrist in neutral alignment. Works for Plank, Cat-Cow, and Tabletop.
- Wrist wedge: Raises the heel of the hand by 1 to 2 inches. Reduces extension by 20 to 30 degrees. Works for all palm-down poses.
- Fingers turned outward: Rotate hands so fingers point to the sides of the mat. Shifts the axis of extension. Partial relief only.
- Blocks under hands: Grip the edges of yoga blocks instead of pressing flat palms. Keeps wrists closer to neutral. Works for Plank and Downward Dog.
For Marjaryasana-Bitilasana (Cat-Cow), a common warm-up, making fists is the simplest and most effective wrist modification. The fist position keeps the wrist at zero degrees of extension while allowing full spinal movement.
Pose Tip:
- Try the fist position in Cat-Cow for three classes before deciding you need a product.
- If fists are uncomfortable on knuckles, place a folded towel under each fist.
- When modifying Downward Dog on forearms (Dolphin Pose), keep elbows directly under shoulders to avoid shoulder strain.
Yoga Wrist Exercises
Yoga wrist exercises prepare the joint for weight-bearing by increasing range of motion, blood flow, and neuromuscular activation before practice starts. Spending two to three minutes on these before class reduces the shock of suddenly loading a cold, stiff joint.
Pre-practice wrist warm-up sequence:
- Wrist circles: Interlace fingers, draw slow circles in both directions. 10 circles each way.
- Prayer press: Press palms together at chest height, lower hands toward navel while keeping palms connected. Hold 10 seconds. Repeat 3 times.
- Reverse prayer press: Press backs of hands together, fingers pointing down. Hold 10 seconds. Repeat 3 times.
- Tabletop finger lifts: In Tabletop position, lift each finger individually off the mat, keeping palm down. 5 lifts per finger.
- Tabletop wrist rocks: In Tabletop, gently rock forward and back to gradually increase wrist extension. 30 seconds.
These exercises activate the forearm extensors and flexors, the small intrinsic muscles of the hand, and the stabilizers around the radiocarpal joint. That activation primes the joint to handle load rather than absorbing it passively.
Post-practice wrist cool-down is equally valuable. After weight-bearing work, gently stretch the wrists in flexion (back of hand toward forearm) for 15 to 20 seconds per side. This counteracts the sustained extension of the practice session.
Wrist Strengthening for Yoga
Wrist strengthening for yoga builds the muscular endurance your forearms and hands need to support body weight across an entire practice. Unlike wrist exercises done as warm-ups, strengthening work targets progressive overload of the muscles surrounding the wrist joint.
Weak forearm muscles are the primary reason healthy wrists fatigue during yoga. Your bones and ligaments may be fine, but the muscles that control wrist position under load give out before the class does. Strengthening those muscles raises the threshold before fatigue-related pain begins.
Effective strengthening exercises for yoga practitioners:
- Wrist curls with light weight (1 to 3 lbs): Sit with forearm resting on thigh, palm up. Curl the weight up and down. 3 sets of 12 to 15 reps.
- Reverse wrist curls: Same position, palm down. 3 sets of 12 to 15 reps.
- Towel wringing: Hold a damp towel and wring it with maximum effort for 10 seconds. Reverse direction. 5 rounds.
- Finger extension with rubber band: Loop a thick rubber band around all five fingertips. Open fingers against resistance. 3 sets of 15.
- Farmer’s carry (light): Hold a 5 to 10 lb dumbbell in each hand, walk for 30 seconds. Repeat 3 times.
The American College of Sports Medicine (ACSM) recommends training grip and wrist strength two to three times per week on non-consecutive days. Results typically appear within four to six weeks of consistent work.
You do not need a gym. A can of soup works for wrist curls. A rubber band works for finger extensions. Consistency matters more than equipment.
Key Takeaway: Strengthening the forearms is the best long-term investment for wrist health in yoga. External supports manage symptoms, but building muscular endurance around the joint addresses the root cause. Start with light resistance and progress gradually.
Carpal Tunnel Yoga Wrist Support
Carpal tunnel yoga wrist support requires a more careful approach than general wrist soreness because the median nerve is involved. Compressing or stretching this nerve during yoga can trigger numbness, tingling, or shooting pain in the thumb, index, and middle fingers.
Carpal tunnel syndrome occurs when the carpal tunnel, a narrow passageway on the palm side of the wrist, narrows and compresses the median nerve. Wrist extension under load, the exact position of most yoga weight-bearing poses, increases pressure inside the tunnel.
The National Center for Complementary and Integrative Health (NCCIH) notes that yoga has been studied as a complementary approach for carpal tunnel symptoms. A frequently cited study from the Journal of the American Medical Association found that a yoga-based intervention focused on stretching, strengthening, and alignment reduced carpal tunnel symptoms more effectively than wrist splinting alone. The key detail: that program avoided heavy wrist loading and emphasized gentle, supported postures.
For practitioners with carpal tunnel, recommended support strategies include:
- Wrist wedge to reduce extension angle in poses like Downward Dog
- Forearm-based modifications for Plank and Tabletop to eliminate wrist extension entirely
- Night splint (worn during sleep, not during yoga) to prevent nighttime wrist flexion that worsens symptoms
- Avoiding Chaturanga and arm balances until symptoms stabilize
| Strategy | Reduces Nerve Compression? | Works During Practice? |
|---|---|---|
| Wrist wedge | Yes (reduces extension) | Yes |
| Forearm plank | Yes (eliminates extension) | Yes |
| Rigid wrist brace | Yes (limits motion) | Partially (restricts movement) |
| Night splint | Yes (prevents sleep flexion) | No (worn at night) |
| Nerve gliding exercises | Yes (mobilizes nerve) | Before/after practice |
If tingling or numbness occurs during any pose, stop the pose immediately. Nerve symptoms are not something to push through, and doing so can cause lasting sensitivity. Working with a physical therapist alongside your yoga practice is the safest path forward.
Yoga for Seniors: Managing Wrist Pain
Yoga for seniors with wrist pain requires thoughtful prop use and pose selection because age-related changes in bone density, joint cartilage, and grip strength make the wrist more vulnerable to compression injuries.
After age 50, both men and women experience gradual loss of bone mineral density. The distal radius, the large forearm bone that forms the primary weight-bearing surface of the wrist, is one of the most common fracture sites in older adults. Loading this area with full body weight during Plank or Downward Dog increases risk, especially without adequate preparation.
Grip strength also declines with age. The forearm extensors and flexors that stabilize the wrist under load lose both mass and endurance. This means seniors reach fatigue faster and lose the muscular protection that keeps the joint aligned.
Recommended approach for seniors:
- Chair yoga for weight-bearing alternatives. Press hands into the chair seat or armrests instead of the floor.
- Wall Downward Dog with palms pressing into a wall at waist height. Minimal wrist extension, excellent shoulder stretch.
- Forearm-based poses exclusively for floor work. Forearm Plank and Dolphin Pose protect the wrist completely.
- Yoga blocks gripped on their edges to keep the wrist neutral during floor poses.
According to the International Journal of Yoga, yoga practice adapted for older adults improves balance, flexibility, and self-reported quality of life without requiring high-load weight-bearing postures. The benefits of yoga do not require wrist strain.
Pose Tip:
- Seniors should always warm up wrists for at least 90 seconds before any floor work.
- Foam wrist wedges are especially helpful for seniors because they reduce extension while keeping the practice grounded.
- If a senior practitioner has osteoporosis, they should discuss wrist-loading poses with their medical provider before adding them.
Do Wrist Wraps Help for Yoga?
Yes, wrist wraps help for yoga in specific situations, but they are not a universal fix. Their effectiveness depends on why your wrists hurt and what you expect the wraps to do.
Wraps excel at providing compression, warmth, and proprioceptive feedback. If your wrist discomfort is mild, related to general stiffness, or worse in cold environments, a neoprene or elastic wrap can make a noticeable difference. The compression improves blood flow and gives your brain more data about where the joint is in space, which helps with stabilization.
Wraps do not change the angle of wrist extension. If your pain comes from loading the wrist at 90 degrees in Plank, a wrap alone will not eliminate that force. A wedge or forearm modification addresses the angle problem directly.
| Scenario | Will Wraps Help? | Better Alternative? |
|---|---|---|
| Mild stiffness or soreness | Yes | Warm-up exercises |
| Instability or looseness | Yes | Strengthening program |
| Pain from wrist extension angle | Partially | Wrist wedge |
| Carpal tunnel tingling | Minimally | Forearm modifications, wedge |
| Post-fracture recovery | Not enough | Rigid brace + PT guidance |
| Sweaty grip issues | No | Yoga gloves or mat towel |
The most honest answer: wraps are a helpful middle-ground tool. They are affordable, portable, and non-restrictive. Pair them with technique corrections and, if needed, a wedge. That combination addresses both the symptom and the cause.
A note on dependency: wearing wraps for every practice without also strengthening your wrists can create reliance on external support. Use wraps to manage current discomfort while working on forearm strength so you eventually need them less.
Key Takeaway: Wrist wraps provide real benefits for mild stiffness and instability, but they do not solve every type of wrist pain. If your pain comes from the angle of wrist extension, add a wedge. If it comes from weakness, start a strengthening routine. The best long-term approach combines smart support with progressive conditioning.
Frequently Asked Questions About Yoga Wrist Support
Can I do yoga if my wrists hurt?
Yes, you can practice yoga with wrist pain by using modifications and supports.
Forearm-based poses, fist positions, and wrist wedges let you continue practicing without loading the painful joint.
Standing, seated, and supine poses bypass the wrists entirely and still deliver meaningful physical and mental benefits.
What is the best type of wrist support for Downward Dog?
A foam wrist wedge is the most effective support for Adho Mukha Svanasana (Downward Facing Dog) because it reduces the wrist extension angle by 20 to 30 degrees.
Place the thick edge of the wedge closest to your body and root your fingertips into the mat beyond the thin edge.
For additional help, combine the wedge with active hasta bandha finger engagement.
Should I wear a wrist brace during yoga class?
Wear a wrist brace during yoga only if you are recovering from an injury or managing moderate to severe pain.
Braces restrict range of motion, which can interfere with flowing sequences and arm balances.
Use a brace for static holds and remove it for movements where wrist freedom is needed.
How do I strengthen weak wrists for yoga?
Build wrist strength with wrist curls, reverse wrist curls, and finger extension exercises using light resistance two to three times per week.
Consistent work for four to six weeks typically produces noticeable improvement in wrist endurance during practice.
Start with bodyweight exercises and progress to 1 to 3 pound weights as the muscles adapt.
Are wrist wedges better than wrist wraps for yoga?
Wrist wedges and wraps solve different problems, so one is not universally better than the other.
Wedges reduce the angle of wrist extension at the mat, directly addressing the most common cause of wrist pain in yoga.
Wraps add compression and joint awareness, which helps with mild stiffness or instability but does not change the angle.
Your Wrists Deserve Better
Wrist pain does not have to be the price of a yoga practice. The right combination of support, technique, and strengthening makes almost any pose accessible.
Start with one change this week. Try a wrist wedge in your next Downward Dog, spend two minutes on wrist warm-ups before practice, or swap Plank for Forearm Plank. Small adjustments compound quickly.
Your mat should be a place where your body feels supported, not stressed. Give your wrists what they need, and they will carry you through years of practice to come.