Best Yoga Poses for 1 Person to Practice Solo in 2026
Yoga poses for 1 person are some of the most accessible, effective, and research-supported forms of movement you can build into daily life. You do not need a class, a partner, or a studio to build a real, consistent practice.
The evidence behind solo yoga is worth taking seriously. According to the National Center for Complementary and Integrative Health (NCCIH), yoga is one of the most commonly used complementary health practices among adults in the United States, with tens of millions practicing regularly. Research published in the International Journal of Yoga has linked consistent practice to measurable reductions in cortisol, improved balance, and greater flexibility over time.
This guide covers 16 specific poses and themes for one-person practice. You will find step-by-step instructions, muscle engagement details, modifications for tight hips and lower back sensitivity, and guidance on breathing and sequencing for a complete home practice.
Yoga Poses for 1 Person: What You Need to Know First
Yoga poses for 1 person require nothing more than enough floor space to lie down flat and a basic mat. That said, knowing a few foundational principles before you start will save you weeks of frustration and reduce your injury risk significantly.
Solo practice means there is no instructor watching your alignment. That is not a problem if you understand what each pose is supposed to feel like, not just what it looks like from the outside. The difference between a pose that helps you and one that strains you is often just a centimeter of hip position or a shoulder that is braced instead of released.
Hatha yoga, the style most beginner home practices draw from, focuses on holding individual poses with attention to breath and alignment. This is a practical starting point for solo practitioners because the slower pace allows you to self-correct as you go.
Pose Tip:
- Before your first pose, stand still and notice where you are holding tension
- Release your jaw, your hands, and the muscles around your eyes
- This small reset shifts your nervous system toward a more receptive state before movement begins
Most yoga injuries in solo practice come from two sources: moving too fast into unfamiliar ranges of motion, and ignoring discomfort because there is no teacher to stop them. Sharp pain is always a stop signal. Dull stretch sensation is usually appropriate. If you have a recent injury to your knees, wrists, lumbar spine, or sacroiliac joint, discuss specific pose limitations with a physical therapist or sports medicine physician before beginning a home practice.
Yoga for One Person: Why Solo Practice Works
Solo yoga practice works because it removes external pressure and lets you respond to what your body actually needs that day. This is not a consolation prize for people who cannot get to a class. It is a genuinely different and often more sustainable form of practice.
Group classes have real benefits. But they also move at one pace for many bodies. When you practice yoga for one person, you can hold a pose for eight breaths instead of five. You can skip a pose that is not right for your body. You can repeat the one that finally made your right hip release.
According to a study published in the Journal of Alternative and Complementary Medicine, self-directed yoga practice showed similar improvements in flexibility and perceived stress compared to instructor-led sessions when practitioners maintained consistent frequency. The key variable was regularity, not supervision.
| Practice Setting | Benefits | Limitations |
|---|---|---|
| Solo home practice | Flexible timing, personal pace, zero cost | No live alignment feedback |
| Group studio class | Community, instructor guidance | Fixed schedule, cost, external pacing |
| Online guided solo | Structured with visual cues | Screen dependency, no direct feedback |
| Hybrid approach | Best of all three | Requires scheduling discipline |
The hybrid approach works well for most people. Use a guided video or a teacher two or three times per week while also building one or two independent sessions. Over time, you will need less external guidance as your body learns the poses from the inside.
Easy Yoga Poses for One Person to Start Today
Easy yoga poses for one person include Balasana (Child’s Pose), Marjaryasana-Bitilasana (Cat-Cow), and Savasana (Corpse Pose). These three poses alone form the backbone of a restorative solo practice.
The word “easy” in yoga is always relative. A pose that feels effortless to one body can be genuinely difficult for another. Tight hip flexors, limited thoracic mobility, or wrist sensitivity can turn a “beginner” pose into a real challenge. The three poses below are described as approachable because they require minimal flexibility, carry low injury risk, and offer high reward for time invested.
Balasana (Child’s Pose) decompresses the lumbar spine and quiets the nervous system. Research suggests it activates the parasympathetic branch of the autonomic nervous system, which is the part responsible for rest and recovery.
To practice Balasana (Child’s Pose):
- Kneel on your mat with your big toes touching and knees hip-width apart or wider
- Sit your hips back toward your heels as far as they go without pain
- Extend your arms forward on the mat or rest them alongside your body
- Let your forehead drop toward the mat or rest it on stacked fists
- Breathe deeply for 5 to 10 full breath cycles
- To release, walk your hands back and slowly rise
Modification for tight knees: Place a rolled blanket behind your knees between your thighs and calves. This reduces compression on the knee joint considerably.
Modification for people with knee replacements: Replace Child’s Pose with a seated forward fold from a chair.
Yoga Poses to Do by Yourself at Home
The best yoga poses to do by yourself at home are those that target the areas most affected by sedentary modern life: the hip flexors, the thoracic spine, the hamstrings, and the shoulders. Think of your hip flexors after eight hours at a desk like a bungee cord held in a shortened position all day. They are not weak. They are just chronically contracted. Yoga addresses exactly this.
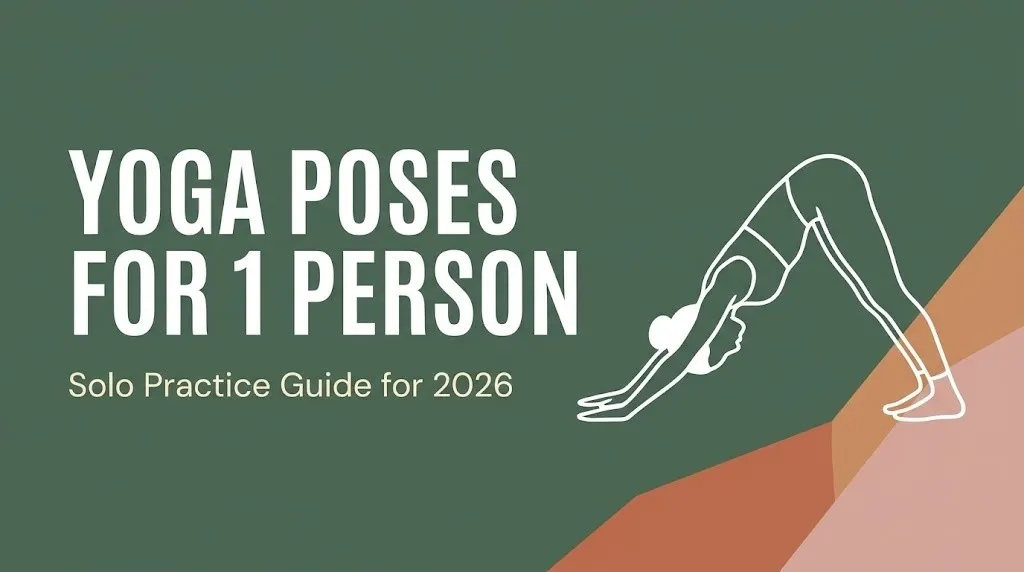
Adho Mukha Svanasana (Downward-Facing Dog) is the single most useful pose for a home solo practitioner. It stretches the hamstrings, calves, and spinal erectors simultaneously. It also builds shoulder girdle stability and improves proprioception in the wrists and ankles.
To practice Adho Mukha Svanasana (Downward-Facing Dog):
- Start on hands and knees, wrists under shoulders, knees under hips
- Spread your fingers wide, press through your knuckles
- Tuck your toes and lift your hips toward the ceiling
- Straighten your legs as much as your hamstrings allow
- Let your head hang between your arms, ears in line with your biceps
- Hold for 5 breath cycles, then lower back to hands and knees
Wrist modification: Make fists and practice on your knuckles to reduce wrist extension pressure. This works well for people with carpal tunnel sensitivity or wrist injuries.
People with uncontrolled high blood pressure or glaucoma should skip inversions and instead practice a standing forward fold with hands on a chair back.
Best Solo Yoga Poses for Beginners
The best solo yoga poses for beginners build body awareness before they build flexibility. Tadasana (Mountain Pose) is the most underestimated starting point in yoga. It looks like standing. It is not just standing.
Tadasana (Mountain Pose) teaches you to distribute weight evenly across both feet, engage your quadriceps without locking your knees, and find neutral spinal alignment. These cues carry into every other pose you will ever practice.
Key benefits of the five core beginner solo poses:
- Tadasana (Mountain Pose): Builds postural awareness, activates the quadriceps and core, establishes neutral spinal alignment
- Marjaryasana-Bitilasana (Cat-Cow): Warms the thoracic and lumbar spine, coordinates breath with movement, reduces morning stiffness
- Virabhadrasana II (Warrior II): Strengthens the quadriceps, glutes, and hip abductors; opens the hip flexors and inner thighs
- Setu Bandha Sarvangasana (Bridge Pose): Activates the glutes and hamstrings, gently mobilizes the thoracic spine, counteracts hip flexor tightness
- Savasana (Corpse Pose): Integrates the physical work of the practice, supports nervous system recovery, allows proprioceptive recalibration
According to the American College of Sports Medicine, yoga qualifies as both a flexibility and a neuromuscular training modality when practiced with proper alignment and regular frequency. For beginners, three sessions per week of 20 to 30 minutes each is enough to produce measurable improvement in 6 to 8 weeks.
Modification for all five poses: If the floor is not accessible, all five can be adapted for practice in a chair or standing with a wall as support.
Key Takeaway: Solo yoga works, is backed by research, and does not require a studio or partner. Start with Child’s Pose, Downward Dog, and Mountain Pose to build a real foundation.
One Person Yoga Poses That Are Genuinely Approachable
One-person yoga poses that are genuinely approachable are those with multiple entry points, meaning a beginner and an experienced practitioner can both do the same pose at very different depths. Uttanasana (Standing Forward Fold) is the clearest example of this principle.
In Uttanasana (Standing Forward Fold), a beginner might keep significant bend in the knees, with hands resting on blocks or shins. An experienced practitioner might have palms flat on the floor and a deep hamstring stretch. Same pose, completely different experience, both valid.
| Pose | Beginner Entry | Intermediate Version | Advanced Option |
|---|---|---|---|
| Uttanasana (Forward Fold) | Hands on blocks, bent knees | Hands to shins, mild knee bend | Palms flat, straight legs |
| Virabhadrasana I (Warrior I) | Short stance, back heel raised | Full stance, arms at shoulder height | Arms overhead, gaze lifted |
| Setu Bandha Sarvangasana (Bridge) | Low lift, feet wide | Full lift, feet hip-width | Single-leg extension at top |
| Vrksasana (Tree Pose) | Foot below knee, wall nearby | Foot at inner thigh, no wall | Arms overhead, eyes closed |
The table above shows how a single pose library can serve you across years of practice. You do not need new poses as you progress. You need to go deeper into the ones you already know.
Vrksasana (Tree Pose) is particularly good for solo practice because it requires and builds proprioception, your body’s internal sense of where it is in space. Research published in the International Journal of Yoga found that regular balance pose practice improved postural stability in adults across all age groups, with the most notable gains in adults over 60.
How to Build a Yoga Sequence for One Person
A yoga sequence for one person should follow a clear physiological progression: warm the body, build heat and strength, open flexibility, then cool down and integrate. Skipping steps in this progression is where most solo practitioners run into trouble.
A well-built sequence for one person takes 25 to 45 minutes and does not require more than eight to twelve poses. More poses do not equal a better session. Depth and breath quality matter more than variety.
A practical 30-minute solo sequence structure:
- Warm-up (5 minutes): Marjaryasana-Bitilasana (Cat-Cow) for 8 cycles; Balasana (Child’s Pose) for 10 breaths
- Standing work (10 minutes): Tadasana (Mountain Pose) for 5 breaths; Virabhadrasana I (Warrior I) for 5 breaths each side; Virabhadrasana II (Warrior II) for 5 breaths each side; Adho Mukha Svanasana (Downward Dog) for 5 breaths
- Floor work (10 minutes): Setu Bandha Sarvangasana (Bridge Pose) for 5 breaths times 3 sets; Supta Matsyendrasana (Supine Spinal Twist) for 8 breaths each side; Uttanasana (Standing Forward Fold) for 10 breaths
- Cool-down (5 minutes): Sukhasana (Easy Seated Pose) with 5 full breaths; Savasana (Corpse Pose) for 3 to 5 minutes
The cool-down is non-negotiable. Savasana (Corpse Pose) is not a reward or an optional bonus. It is the period during which your nervous system processes and consolidates the physical input of the session.
Yoga for Flexibility: One-Person Poses That Actually Work
Yoga for flexibility in a one-person practice is most effective when you target the body’s primary restriction zones: hamstrings, hip flexors, thoracic spine, and the posterior shoulder capsule. Most people are restricted in all four simultaneously, which is why even one yoga session per week can feel like a noticeable release.
According to a 2016 study published in the International Journal of Yoga, participants who practiced yoga three times per week for 10 weeks showed a 35% improvement in hamstring flexibility compared to a control group with no yoga practice. The poses most associated with these gains were forward folds and standing hip openers.
The important distinction here is between passive flexibility and active flexibility. Passive flexibility means your body can be moved into a range of motion by external force or gravity. Active flexibility means your muscles can control movement through that same range. Yoga builds both, which makes it more functional than static stretching alone.
Poses that most directly build flexibility in solo practice:
- Uttanasana (Standing Forward Fold): Primarily targets the hamstrings and spinal erectors
- Supta Matsyendrasana (Supine Spinal Twist): Targets the thoracic rotators and external hip rotators
- Eka Pada Rajakapotasana (Pigeon Pose): Targets the iliopsoas, piriformis, and hip external rotators
- Gomukhasana (Cow Face Pose): Targets the posterior shoulder capsule and hip rotators simultaneously
- Paschimottanasana (Seated Forward Fold): Targets the hamstrings, calves, and entire posterior chain
Modification for stiff hamstrings: In any seated or standing forward fold, bend your knees generously. The spine stays long. The hamstrings will gradually release over weeks of consistent practice.
Yoga for Stress Relief: Solo Poses That Calm the Nervous System
Yoga for stress relief works through a specific physiological mechanism: it activates the parasympathetic nervous system and suppresses the stress response driven by cortisol and the sympathetic branch. This is not a vague wellness claim. It is a documented physiological process.
The Harvard T.H. Chan School of Public Health has noted that yoga’s breathing and movement combination consistently reduces self-reported stress and measurable cortisol levels across multiple study populations. The effect is stronger in practices that include breath focus and longer holds, which aligns closely with how solo practitioners naturally work.
The poses most effective for stress relief in a solo practice are those held for longer durations with an emphasis on exhalation. Extended exhales directly activate the vagus nerve, which is the primary driver of parasympathetic response.
Most effective solo stress-relief poses:
- Balasana (Child’s Pose): Held 1 to 3 minutes, arms forward or alongside body
- Supta Baddha Konasana (Reclined Bound Angle Pose): Held 2 to 5 minutes, with bolster support under the spine optional
- Viparita Karani (Legs Up the Wall): Held 3 to 10 minutes, legs resting on wall
- Savasana (Corpse Pose): Held 5 to 15 minutes, ideally with an eye pillow or blanket
Modification for restlessness during long holds: Place a folded blanket over the belly during reclined poses. Gentle weight on the abdomen supports the relaxation response and makes stillness easier to sustain.
People with severe anxiety disorders may find that long holds trigger rather than reduce distress, particularly early in practice. Shorter holds of 30 to 60 seconds with movement between poses may be more comfortable as an entry point.
Key Takeaway: Solo yoga builds flexibility and reduces cortisol through a real physiological process. Forward folds, long holds, and extended exhales are your most effective tools.
Yoga for Lower Back Pain: One-Person Poses to Try
Yoga for lower back pain in a one-person home practice is one of the most evidence-supported applications of yoga overall. The evidence is specific and worth naming directly.
A 2017 clinical practice guideline from the American College of Physicians recommended yoga and other mind-body practices as a first-line approach for chronic low back pain, ahead of many pharmaceutical interventions. This is not fringe information. It reflects where clinical consensus has moved.
The mechanism is threefold: yoga strengthens the stabilizing muscles around the lumbar spine, improves mobility in the hips and thoracic spine that compensate for lumbar restriction, and reduces pain perception through nervous system regulation.
| Pose | What It Targets | Hold Time | Caution |
|---|---|---|---|
| Marjaryasana-Bitilasana (Cat-Cow) | Lumbar mobility | 8 to 10 cycles | Avoid if acute disc herniation |
| Setu Bandha Sarvangasana (Bridge) | Glutes, hamstrings | 5 breaths, 3 sets | Skip if sacroiliac pain is sharp |
| Supta Matsyendrasana (Supine Twist) | Thoracic rotation, hip rotators | 8 breaths each side | Keep hips stacked, do not force rotation |
| Balasana (Child’s Pose) | Lumbar decompression | 1 to 2 minutes | Use wide knee variation if needed |
| Vidalasana (Thread the Needle) | Thoracic rotation | 5 breaths each side | Reduce range if neck is tight |
Anyone with a diagnosed disc herniation, spinal stenosis, or recent lumbar surgery should get specific clearance from a spine specialist or physical therapist before practicing any forward-folding or twisting poses. This is not a formality. Some poses that feel good in the moment can aggravate certain disc conditions.
Yoga for Tight Hips: Solo Poses That Release Tension
Yoga for tight hips in a solo practice targets two distinct but related areas: the hip flexors at the front of the hip, and the external hip rotators at the back. Both need attention, and they require different poses.
Most people with tight hips are actually dealing with tight hip flexors from prolonged sitting, tight piriformis and gluteus medius from underuse, and reduced internal rotation range of motion in the hip joint itself. These are different restrictions that require different approaches.
Eka Pada Rajakapotasana (Pigeon Pose) is the most commonly prescribed hip opener, but it is also frequently done incorrectly. The pelvis should be as square to the mat as possible. When one hip lifts dramatically, the stretch moves from the piriformis into the sacroiliac joint, which is not the target.
To practice a modified Eka Pada Rajakapotasana (Pigeon Pose) safely:
- From hands and knees, bring your right knee toward your right wrist
- Slide your right foot toward your left wrist; your shin may be nearly parallel to the mat or at an angle
- Extend your left leg straight behind you
- Place a folded blanket under your right hip if it lifts off the mat
- Lower your forearms or forehead to the mat and breathe deeply
- Hold for 8 to 15 breaths, then switch sides
Modification for knee sensitivity: Practice Supta Kapotasana (Reclined Pigeon Pose) instead, also called Figure Four. Lie on your back, cross one ankle over the opposite knee, and flex that foot. This targets the same hip rotators with zero pressure on the knee joint.
Yoga for Seniors Alone: Safe and Effective Solo Poses
Yoga for seniors practicing alone is most effective when it prioritizes balance, bone density support, fall prevention, and joint mobility over flexibility depth or strength loading. The goals are different from those of a 30-year-old beginner, and the pose selection should reflect that.
According to research published in Complementary Therapies in Medicine, yoga practice in adults over 60 showed measurable improvements in balance, gait speed, and fear of falling after 8 weeks of twice-weekly practice. Fear of falling is an independent risk factor for actual falls, so reducing it has real protective value.
Safe and effective solo poses for seniors:
- Tadasana (Mountain Pose): Build postural awareness and weight distribution; practice near a wall for safety
- Vrksasana (Tree Pose): Balance work with wall support one arm’s length away; even brief holds of 10 to 15 seconds produce balance improvements over time
- Setu Bandha Sarvangasana (Bridge Pose): Glute and hamstring activation from the floor; supports bone density at the hip and lumbar spine
- Marjaryasana-Bitilasana (Cat-Cow): Spinal mobility without loading the joints; ideal as a daily morning warm-up
- Viparita Karani (Legs Up the Wall): Circulation support, lower limb fluid drainage, gentle inversion without pressure on the head or neck
- Chair Sukhasana (Seated Meditation Pose): For those for whom floor sitting is not appropriate; supports breath awareness and stress reduction
Modification for all senior solo practice: Keep a sturdy, non-rolling chair nearby during any standing pose. A wall within reach is equally effective. The goal is confidence in the pose, not proving balance capability.
Key Takeaway: Yoga for tight hips, lower back pain, and seniors all require different pose priorities. Matching the pose to the actual restriction produces results faster than a generic sequence.
Yoga Poses for 1 Person Made Easier with Props
Yoga poses for 1 person become significantly more accessible and anatomically correct when props are used strategically. Props are not a sign of limited ability. They are precision tools that make the correct alignment available regardless of where your flexibility currently is.
Iyengar yoga, the style developed by B.K.S. Iyengar, formalized prop use in yoga practice. Blocks, straps, bolsters, blankets, and chairs are all standard tools in this approach. The principle transfers directly to solo home practice.
| Prop | Primary Use | Best Poses |
|---|---|---|
| Yoga block (2) | Raises the floor for limited forward fold range | Uttanasana, triangle pose, low lunge |
| Yoga strap | Extends reach for shoulder or hamstring work | Seated forward fold, bound poses |
| Bolster | Supports the body in restorative poses | Reclined Bound Angle, Savasana |
| Folded blanket | Cushions knees, hips, or elevates the seat | Child’s Pose, Pigeon Pose, seated poses |
| Chair | Replaces floor for standing or seated poses | All standing poses, chair yoga variations |
| Wall | Provides balance support and resistance | Tree Pose, Legs Up the Wall, standing forward fold |
If you own nothing else, two yoga blocks change everything for a solo practice. They make forward folds accessible with a neutral spine, give you a foundation in standing poses, and support your hips in seated poses when the pelvis tips backward rather than forward.
A standard yoga block costs between 8 and 20 dollars. A strap costs between 10 and 18 dollars. These two items alone address the majority of beginner accessibility barriers in solo practice.
How Long to Hold Yoga Poses When Practicing Alone
How long you hold a yoga pose alone depends on the style of yoga you are practicing and what outcome you are working toward. There is no single correct answer, but there are clear guidelines from yoga research and sports medicine.
The American College of Sports Medicine notes that static stretches held for 15 to 30 seconds are sufficient to produce flexibility gains over time. Yoga pose holds in most styles fall within or exceed this range, which partly explains why yoga consistently outperforms isolated static stretching in flexibility research.
| Yoga Style | Typical Hold Duration | Primary Goal |
|---|---|---|
| Hatha | 3 to 5 breath cycles (20 to 40 seconds) | Alignment and awareness |
| Vinyasa | 1 to 3 breaths (5 to 15 seconds) | Flow and cardiovascular effect |
| Yin | 2 to 5 minutes | Connective tissue and fascia |
| Restorative | 5 to 20 minutes | Nervous system recovery |
| Iyengar | 1 to 3 minutes | Precision and deeper engagement |
For solo beginners, 3 to 5 breath cycles per pose is a practical and safe starting point. One breath cycle is one full inhale and one full exhale. At a relaxed pace, that is roughly 6 to 8 seconds. So 5 breath cycles equals approximately 30 to 40 seconds per pose.
As you become more comfortable in a pose and your body gains range and stability, extend holds gradually. Do not increase hold time in a pose where your form is compromised. A 10-second hold with correct alignment produces better outcomes than a 3-minute hold with collapsed form.
Yoga Breathing for Solo Practice
Yoga breathing for solo practice is the element most beginners skip and experienced practitioners cite as the most important part of their practice. Breath is not background noise in yoga. It is the primary tool.
In Hatha yoga, the most common breath for solo practice is Ujjayi pranayama (Victorious Breath). It involves a slight constriction at the back of the throat that creates a soft, audible sound on both inhale and exhale. It sounds like a gentle ocean wave or soft snoring.
Ujjayi breath does several specific things:
- It slows the breathing rate, which activates the parasympathetic nervous system
- It gives you an audible focus point, which reduces mental distraction during practice
- It creates internal heat, which supports deeper muscle release in flexibility work
- It coordinates naturally with movement, making transitions between poses more fluid
To practice Ujjayi pranayama:
- Inhale slowly through your nose for 4 counts
- At the top of the inhale, gently constrict the back of your throat as if fogging a mirror
- Exhale through your nose with that same constriction for 5 to 6 counts
- The exhale should be slightly longer than the inhale
- Practice this breath in Tadasana (Mountain Pose) for 8 cycles before beginning any sequence
Alternative for beginners who find Ujjayi breath awkward: Three-part breath (Dirga pranayama) is simpler. Inhale into the belly first, then the rib cage, then the chest. Exhale from the chest, then ribs, then belly. This breath alone has been shown in research from the Journal of Alternative and Complementary Medicine to reduce perceived anxiety within a single 10-minute session.
Key Takeaway: Breath is the most overlooked element in solo yoga. Extending your exhale and slowing your breath rate activates the parasympathetic nervous system in a measurable, consistent way.
Morning Yoga Routine for One Person
A morning yoga routine for one person works best when it is short, achievable without full warm-up, and designed to counteract the specific stiffness patterns that come from sleep. The body in the morning is not cold in a temperature sense. It is simply less mobile, with overnight fluid redistribution in the joints and lower core temperature.
This 20-minute morning solo sequence is designed to be done within 30 minutes of waking, on a mat beside your bed if needed:
Morning Solo Yoga Sequence (20 minutes):
- Marjaryasana-Bitilasana (Cat-Cow): 8 slow cycles, coordinating breath with movement; wakes the spine gently
- Balasana (Child’s Pose): 10 breaths; decompresses the lumbar spine after a night of inactivity
- Adho Mukha Svanasana (Downward-Facing Dog): 5 breaths; wakes the hamstrings, calves, and shoulder girdle
- Virabhadrasana I (Warrior I): 5 breaths each side; activates the glutes, hip flexors, and upper body simultaneously
- Uttanasana (Standing Forward Fold): 8 breaths; releases the posterior chain after the standing poses
- Setu Bandha Sarvangasana (Bridge Pose): 5 breaths times 3 repetitions; glute and hamstring activation, lumbar support
- Supta Matsyendrasana (Supine Spinal Twist): 8 breaths each side; final thoracic and hip release
- Savasana (Corpse Pose): 3 minutes; integration and breath return
This sequence moves from the ground up, from spinal warm-up through standing strength to floor release and rest. That progression mirrors the way the body naturally wants to warm up after sleep.
Modification for mornings when the floor is not accessible: Complete Cat-Cow standing with hands on a wall. Replace Downward Dog with a standing wall stretch. Perform Bridge as a standing hip hinge or wall sit. All poses can be adapted without losing the physiological sequence.
Frequently Asked Questions About Yoga Poses for 1 Person
What yoga poses can I do alone as a complete beginner?
The best yoga poses for a complete beginner to do alone are Balasana (Child’s Pose), Marjaryasana-Bitilasana (Cat-Cow), Tadasana (Mountain Pose), Adho Mukha Svanasana (Downward-Facing Dog), and Savasana (Corpse Pose).
These five poses cover spinal mobility, basic standing alignment, full-body stretching, and nervous system recovery.
Start with 3 to 5 breath holds per pose and practice them in sequence three times per week.
How long should I hold yoga poses when practicing by myself?
Most yoga teachers and physical therapists recommend holding poses for 3 to 5 breath cycles as a starting point, which is roughly 20 to 40 seconds.
Longer holds of 2 to 5 minutes are appropriate for Yin yoga or Restorative yoga, where the goal is connective tissue release.
Start shorter, maintain correct form, and extend hold times gradually as your body adapts.
Is it safe to do yoga alone at home without an instructor?
Yes, yoga can be practiced safely alone at home when you choose beginner-appropriate poses, listen to your body’s pain signals, and use props to support correct alignment.
The most common injuries in solo practice come from moving too quickly into unfamiliar ranges of motion or ignoring sharp discomfort in joints.
If you have a recent or chronic injury to your spine, knees, or wrists, discussing specific pose limitations with a physical therapist before starting a home practice is worth the one appointment.
What yoga poses help with lower back pain that I can do alone?
The most evidence-supported yoga poses for lower back pain in solo practice include Marjaryasana-Bitilasana (Cat-Cow), Setu Bandha Sarvangasana (Bridge Pose), Supta Matsyendrasana (Supine Spinal Twist), and Balasana (Child’s Pose).
The American College of Physicians recommends yoga as a first-line approach for chronic low back pain, specifically because it combines spinal mobility, muscle activation, and nervous system regulation.
Avoid deep forward folds or twists if you have a diagnosed disc herniation until you have clearance from a spine specialist.
How many yoga poses should I do in one solo session?
A complete and effective solo session can be built around 6 to 12 poses total, not counting warm-up and cool-down.
More poses do not produce better outcomes. Depth of engagement, breath quality, and hold duration within a smaller pose selection produce more consistent results.
For a 20 to 30 minute session, eight poses at a thoughtful pace with proper breathing and transitions is more than sufficient.
Start with one pose today. Not a full sequence. One pose, held for five breaths, practiced with your full attention. Balasana (Child’s Pose) or Marjaryasana-Bitilasana (Cat-Cow) are both ideal starting points.
Add one new pose each week until you have a rotation of eight to ten that your body knows well. That familiarity is where the real practice begins.
Consistency with a small group of poses beats novelty with a long list every time. Your body does not need more variety. It needs more depth.