Yoga Pants Ass: Best Glute Poses, Fit and Science 2026
Your yoga pants and your yoga practice both affect how your glutes look, feel, and function. The phrase “yoga pants ass” captures two real questions: which pants flatter and support a bigger or curvy butt, and which yoga poses genuinely build glute strength.
Both questions deserve better answers than most fitness content provides. A 2022 study published in the Journal of Strength and Conditioning Research confirmed that single-leg balance poses activate the gluteus medius at levels comparable to common gym exercises. That finding matters because weak glutes contribute to lower back pain, knee instability, and poor posture.
This guide covers the anatomy of your glute muscles, how to choose yoga pants that actually work during practice, the best poses for each part of the glutes, a complete at-home sequence, and an honest look at how often you need to practice to see results.
Yoga Pants Ass: What This Conversation Is Really About
The term “yoga pants ass” refers to both the visual effect of fitted yoga leggings on the glutes and the glute-shaping potential of a consistent yoga practice. These two topics intersect more than most people realize.
Fitted activewear draws attention to the gluteal region. That is by design. Compression fabrics contour the body’s natural shape, and yoga’s emphasis on hip extension, hip abduction, and isometric holds genuinely changes glute muscle tone over time.
But the conversation goes deeper than appearance. Your gluteus maximus, gluteus medius, and gluteus minimus are the largest and arguably most functionally important muscle group in the body. Weak glutes lead to compensatory movement patterns that strain the lower back, knees, and hips.
Key points this guide addresses:
- How yoga pants fabric and fit affect movement quality
- Which yoga poses target each specific glute muscle
- How to build a progressive glute practice at home
- What research says about yoga and muscle activation
- Who benefits most from glute-focused yoga work
| Topic Area | Fashion Content Covers It? | Yoga Content Covers It? | This Guide |
|---|---|---|---|
| Pants fit for curves | Yes | No | Yes |
| Glute anatomy | No | Rarely | Yes, in detail |
| Pose-specific muscle activation | No | Superficially | Yes, with cues |
| Progressive sequences | No | Rarely | Yes, with tiers |
| Research citations | No | No | Yes |
The rest of this article treats both sides of the equation with equal seriousness.
Big Butt Yoga Pants: Finding the Right Fit for Your Body
Big butt yoga pants are leggings designed with a wider hip-to-waist ratio, a deeper seat, and stretchy fabric that accommodates fuller glutes without rolling, bunching, or becoming see-through. Finding the right pair is not about vanity. It is about comfort and function during practice.
Standard sizing in most activewear brands assumes a proportional hip-to-waist ratio. If your glutes are larger relative to your waist, you end up choosing between pants that fit your butt but gap at the waist, or pants that fit your waist but compress your hips.
Several fit features solve this:
- Gusseted crotch: A diamond-shaped fabric panel that adds room for hip movement
- Wide, elasticized waistband: Stays in place without digging into the waist
- Four-way stretch fabric: Moves with your body in every direction
- Higher rise (at least 3 inches above the navel): Prevents sliding during forward folds and inversions
The National Academy of Sports Medicine (NASM) notes that restricted clothing can alter movement patterns during exercise. If your pants limit hip range of motion, your glutes cannot fully engage during poses like Utkatasana (Chair Pose) or Virabhadrasana II (Warrior II).
The fit should let you move through a full Surya Namaskar (Sun Salutation) without adjusting your waistband once. If you are pulling your pants up between poses, the fit is wrong for your body.
Why Do Yoga Pants Make Your Butt Look Good
Yoga pants make your butt look good primarily because of compression, contouring seam placement, and the way stretchy fabric follows the natural curvature of the gluteal muscles. This effect is a combination of textile engineering and anatomy.
Compression fabric presses gently against the skin. This smooths the surface and creates a streamlined silhouette. Unlike looser clothing, leggings do not add bulk or shift around. They reveal the shape already there.
Seam placement plays a surprising role. Many yoga pants use a back yoke seam or center-back seam that sits along the gluteal cleft. This creates a visual “frame” around each glute, which enhances the appearance of roundness and lift.
/
| Factor | How It Affects Appearance |
|---|---|
| Compression level | Smooths surface, reduces jiggle |
| Fabric weight | Heavier fabrics hold shape; lighter ones cling |
| Seam placement | Back yoke seams lift visual center of glute |
| Rise height | High rise elongates the torso and rounds the glute profile |
| Color and pattern | Dark solid colors create the most contouring effect |
A secondary factor is the fabric’s interaction with proprioception. The gentle pressure of compression against the glute muscles can subtly remind you to engage them. Yoga teachers call this “kinesthetic cueing.” Your pants are not building muscle, but they may help you notice when your glutes are firing.
For actual glute development, though, what you wear matters far less than what you practice. The poses and sequences later in this guide address that directly.
Key Takeaway: The right yoga pants remove fit distractions and let you focus on form, but real glute change comes from consistent, well-cued practice, not from fabric alone.
Yoga Pants for Big Butt: Features That Actually Matter
Yoga pants for a big butt need a combination of high stretch, a deep seat, and a waistband that stays anchored without squeezing. Standard activewear fails curvy bodies because it is designed for a narrow range of proportions.
The most common complaint is “waist gap.” When you size up to fit your glutes, the waist becomes too loose. This causes the pants to slide down during Downward Dog or any forward fold. A few construction details fix this entirely.
Features to prioritize:
- Crossover or drawstring waistband: Allows waist customization independent of hip fit
- At least 20% spandex or elastane content: Fabrics below this threshold lose stretch recovery quickly
- Squat-proof opacity test: Bend over in fitting room lighting; if you see skin, the fabric is too thin
- Flat-lock seams: Reduce chafing along the inner thigh and gluteal fold
- No front seam through the crotch: A single front seam creates discomfort in deep lunges
| Feature | Why It Matters for Curvy Bodies |
|---|---|
| 20%+ spandex | Maintains shape through 50+ washes |
| Gusseted crotch | Adds 2 to 3 inches of movement room |
| High rise (12+ inches) | Covers lower belly, stays put in folds |
| Flat-lock seams | Prevents friction burns during flow |
| Moisture wicking | Keeps fabric from becoming heavy and saggy |
Pose Tip:
- Test any new yoga pants in Adho Mukha Svanasana (Downward-Facing Dog) held for 10 breaths before buying.
- If the waistband slides past your hip bones, the fit is not secure enough for practice.
- A pants fitting should include a deep squat and a standing forward fold at minimum.
Best Yoga Pants for Glutes: What to Look For in 2026
The best yoga pants for glutes in 2026 combine body-inclusive sizing, sustainable stretch fabrics, and construction details that support full range of motion at the hip joint. The market has improved, but knowing what to look for still matters.
Two fabric trends stand out this year. Recycled nylon-spandex blends now match virgin fabric in stretch recovery. Several brands also offer “zoned compression,” which uses varying fabric density to provide more support at the waistband and less restriction through the hips and thighs.
What experienced practitioners recommend:
- Fabric blend: 75 to 80% nylon or polyester, 20 to 25% spandex
- Weight: Medium weight (around 280 GSM) balances opacity with breathability
- Waist: High rise with interior silicone grip strip
- Inseam options: 25 inch for most heights; 28 inch for taller practitioners
- Size range: Brands offering XXS through 4XL with separate hip and waist measurements
Avoid pants marketed purely as “scrunch butt” or “booty lifting” styles. These use ruching along the center back seam. While visually enhancing, the gathered fabric can bunch uncomfortably during seated poses and create pressure points during Sukhasana (Easy Seated Pose) or long meditation holds.
According to the American College of Sports Medicine (ACSM), clothing should not restrict joint range of motion by more than 5% during exercise. If your yoga pants feel tight at the bottom of a squat, they are limiting your hip flexion and reducing glute engagement.
Function always outranks fashion on the mat.
Yoga Pants Compression Benefits for Practice and Recovery
Compression yoga pants provide graduated pressure that can improve proprioceptive awareness during practice and may support post-practice muscle recovery. The benefits are real, though sometimes overstated in marketing.
Proprioceptive feedback is the body’s awareness of its position in space. When compression fabric presses against the skin and muscles of the glutes and thighs, it increases sensory input to the brain. This can help you notice whether your glutes are actually firing during a pose or whether your quads and lower back are doing all the work.
A 2019 study published in the International Journal of Sports Physiology and Performance found that compression garments worn during exercise improved participants’ subjective sense of muscle engagement. Recovery benefits were modest but measurable: reduced perceived soreness 24 hours post-exercise.
| Compression Benefit | Evidence Level | Practical Impact |
|---|---|---|
| Improved proprioception | Moderate (multiple studies) | Helps with glute activation cueing |
| Reduced muscle oscillation | Strong | Less muscle vibration during jumps/transitions |
| Faster recovery | Modest | Slightly less soreness next day |
| Increased blood flow | Moderate | May reduce swelling in legs |
| Performance improvement | Weak | No confirmed strength or flexibility gain |
Not everyone needs compression. If you have circulation issues, peripheral neuropathy, or lymphedema, compression garments may require a specific medical grade and fit. People with these conditions should discuss compression level with a healthcare provider before choosing tight-fitting activewear.
For most practitioners, moderate compression (15 to 20 mmHg) is comfortable and functional. Heavy compression (above 20 mmHg) can actually restrict hip range of motion during deep lunges and wide-legged poses.
Key Takeaway: Compression yoga pants can genuinely help you feel your glutes working during practice, but they do not replace proper cueing, alignment, or consistent training.
Glute Activation Yoga: Waking Up Dormant Muscles
Glute activation yoga is a practice style focused on “turning on” the gluteal muscles before or during a yoga session, addressing a common pattern called gluteal amnesia where the glutes fail to fire properly. This condition is widespread among people who sit for long periods.
Your brain can essentially “forget” to use the glutes. When you sit for 8 or more hours daily, the hip flexors shorten, and the glutes remain in a stretched, inactive position. Over time, your body learns to use the lower back and hamstrings instead. This substitution pattern causes pain and limits performance.
Activation techniques used in yoga include:
- Isometric squeezes: Consciously contracting the glutes at the top of Setu Bandhasana (Bridge Pose) and holding for 5 breaths
- Tactile cueing: Placing your hands on your glutes during standing poses to confirm they are engaged
- Resistance band work: Wrapping a mini band above the knees during Chair Pose to force the gluteus medius to fire
- Slow eccentrics: Lowering out of Warrior III over a 5-count to increase time under tension
The National Academy of Sports Medicine (NASM) describes gluteal amnesia as a predictable consequence of prolonged sitting. Their corrective exercise protocols recommend isolated glute activation before compound movements, which translates directly to warming up with targeted poses before flowing sequences.
Think of your glutes like a car battery that has been sitting unused in winter. You need to turn the engine over a few times before expecting it to run smoothly. Activation poses are that initial spark.
Pose Tip:
- Start every practice with 2 minutes of supine glute bridges, squeezing at the top.
- Progress to single-leg bridges only after you can hold a bilateral bridge for 10 breaths without hamstring cramping.
- If your hamstrings cramp during bridges, your glutes are not yet activating properly.
Yoga for Glute Strength: Can Yoga Actually Build Muscle
Yoga can build glute strength, particularly muscular endurance and activation patterns, though it is less effective than resistance training for maximal hypertrophy. The answer depends on what “strength” means to you.
Muscular endurance is the ability to sustain contraction over time. Yoga excels here. Holding Virabhadrasana III (Warrior III) for 30 seconds challenges the gluteus medius and gluteus maximus through sustained isometric contraction. Repeating this across a full practice creates real fatigue and adaptation.
Muscular hypertrophy, the visible increase in muscle size, requires progressive overload. Traditional yoga uses only body weight. For many beginners, body weight provides enough resistance to stimulate growth. Experienced practitioners may plateau.
| Strength Quality | Yoga’s Effectiveness | How to Maximize It |
|---|---|---|
| Muscular endurance | High | Hold poses for 8 to 12 breaths |
| Isometric strength | High | Pause at the most challenging point |
| Muscle activation | High | Use slow transitions, not momentum |
| Hypertrophy (growth) | Moderate for beginners; low for advanced | Add ankle weights or resistance bands |
| Maximal strength | Low | Requires external resistance |
A 2015 study in the International Journal of Yoga found that 12 weeks of regular Hatha yoga practice increased lower body muscular endurance by 31% in previously sedentary adults. That is a meaningful change, especially for beginners.
For ongoing progress, consider layering. Practice yoga for activation, mobility, and endurance. Add resistance training for pure strength and size. The two approaches are complementary, not competing.
People with osteoporosis or joint hypermobility should approach strength-focused yoga carefully. Sustained single-leg balances put considerable demand on the hip joint. Using a wall or chair for support makes these poses accessible without increasing fall risk.
Yoga Poses for Glutes: The 7 Best Options
The best yoga poses for glutes target the gluteus maximus, gluteus medius, and gluteus minimus through hip extension, hip abduction, and external rotation. Not all yoga poses work the glutes equally, so choosing the right ones matters.
Here are seven poses with the highest glute engagement, based on muscle activation patterns described in sports science and yoga therapy literature.
| Pose | Sanskrit Name | Primary Glute Target | Hold Time |
|---|---|---|---|
| Bridge Pose | Setu Bandhasana | Gluteus maximus | 5 to 8 breaths |
| Chair Pose | Utkatasana | Gluteus maximus, medius | 5 to 8 breaths |
| Warrior III | Virabhadrasana III | Gluteus medius (standing leg) | 5 breaths per side |
| Locust Pose | Salabhasana | Gluteus maximus | 3 to 5 breaths |
| Half Moon Pose | Ardha Chandrasana | Gluteus medius (standing leg) | 5 breaths per side |
| Low Lunge | Anjaneyasana | Gluteus maximus (front leg) | 5 to 8 breaths per side |
| Goddess Pose | Utkata Konasana | Gluteus maximus, medius, minimus | 5 to 8 breaths |
Each of these poses is broken down in detail in the sections below. The common thread: all require conscious glute engagement. Simply being in the shape of the pose is not enough. You must actively squeeze and sustain contraction.
Quick Summary:
- For gluteus maximus: Bridge Pose, Locust Pose, Chair Pose
- For gluteus medius: Warrior III, Half Moon Pose, Goddess Pose
- For all three glute muscles together: Goddess Pose held with knees tracking over toes
Beginners should start with Bridge Pose and Chair Pose, which offer the most stability and the least balance demand. Progress to Warrior III and Half Moon only after building confidence on one leg.
Key Takeaway: The seven poses listed above cover all three glute muscles, but conscious contraction during the hold is what separates a glute workout from a passive stretch.
Yoga Poses That Tone Your Butt Without Equipment
Yoga poses that tone the butt without equipment rely on body weight, gravity, and sustained isometric holds to fatigue the glute muscles. You need nothing but a mat, though a yoga block can make certain poses more accessible.
“Toning” is a casual term. In exercise science, it means reducing body fat over a muscle while increasing that muscle’s definition and endurance. Yoga contributes to the muscular side. Body composition changes also require attention to nutrition and overall activity level.
The most effective no-equipment approach uses time under tension. Instead of moving quickly through poses, hold each one longer and transition slowly.
To increase glute toning demand:
- Hold Chair Pose for 10 breaths instead of 5. Sink lower each exhale.
- Pulse in Goddess Pose. Lower one inch on exhale, lift one inch on inhale. Repeat 10 times.
- Lift and lower in Locust Pose. Raise legs on inhale, lower halfway on exhale. Repeat 8 times.
- Add single-leg variations. A single-leg Bridge Pose doubles the load on the working glute.
- Slow your Vinyasa transitions. Take 4 counts to lower from Plank to Chaturanga. Your glutes stabilize the pelvis throughout.
According to Harvard T.H. Chan School of Public Health, body weight exercises performed consistently can improve muscle tone and reduce age-related muscle loss. Yoga’s emphasis on eccentric (lengthening under load) contractions is especially effective for maintaining muscle quality.
One common mistake: rushing through standing poses. If you hold Virabhadrasana II (Warrior II) for only 2 breaths, your glutes barely register the demand. Stay for 8 to 10 breaths. Feel the burn. That sensation is your glutes doing their job.
Glute Focused Yoga Sequence You Can Do at Home
A glute focused yoga sequence you can do at home should last 25 to 35 minutes, include a warm-up activation phase, a peak work phase, and a cool-down stretch. Below is a complete sequence designed for beginners and intermediate practitioners.
Warm-Up Phase (5 minutes):
- Supine Glute Bridge (Setu Bandhasana): 10 reps, squeeze at top for 2 seconds each
- Tabletop Fire Hydrants: 10 per side, slow and controlled
- Cat-Cow with glute squeeze at each Cow tilt: 8 rounds
Peak Work Phase (20 minutes):
- Utkatasana (Chair Pose): Hold 8 breaths. Rest. Repeat.
- Virabhadrasana II (Warrior II): 8 breaths per side. Keep back glute engaged.
- Virabhadrasana III (Warrior III): 5 breaths per side. Use a wall or block if needed.
- Utkata Konasana (Goddess Pose): 8 breaths. Add 10 pulses at the end.
- Salabhasana (Locust Pose): 5 breaths. Rest. Repeat twice.
- Setu Bandhasana (Bridge Pose): 8 breaths bilateral. Then 5 breaths each leg, single-leg variation.
- Ardha Chandrasana (Half Moon Pose): 5 breaths per side. Block under bottom hand recommended.
Cool-Down Phase (5 to 10 minutes):
- Eka Pada Rajakapotasana (Pigeon Pose): 1 to 2 minutes per side
- Supine Figure-Four Stretch: 1 minute per side
- Supta Baddha Konasana (Reclining Bound Angle Pose): 2 minutes
- Savasana: 3 to 5 minutes
| Phase | Duration | Purpose | Intensity |
|---|---|---|---|
| Warm-Up | 5 min | Activate glutes, mobilize hips | Low |
| Peak Work | 20 min | Build strength and endurance | Moderate to high |
| Cool-Down | 5 to 10 min | Stretch glutes and hip flexors | Low |
Modify for beginners by halving the hold times and using a chair for balance during Warrior III. Modify for seniors by performing all standing poses near a wall and reducing depth in Chair and Goddess Pose.
Yoga for Gluteus Maximus: Targeting the Largest Muscle
The gluteus maximus is the largest muscle in the human body by volume, and yoga targets it primarily through hip extension and external rotation movements. Every time you straighten your hip from a bent position, such as standing up from Chair Pose, your gluteus maximus does the work.
This muscle generates the force for walking uphill, climbing stairs, and standing up from a chair. When it is weak, your lower back compensates. That compensation is one of the most common causes of chronic lower back discomfort in adults who sit for work.
Poses that specifically load the gluteus maximus:
- Setu Bandhasana (Bridge Pose): Full hip extension against gravity
- Salabhasana (Locust Pose): Prone hip extension
- Utkatasana (Chair Pose): Eccentric loading during the hold
- Anjaneyasana (Low Lunge): Hip extension of the back leg
To practice Salabhasana (Locust Pose) for maximum gluteus maximus engagement:
- Lie face down. Arms beside your body, palms facing up.
- Press the tops of your feet into the mat.
- Inhale and lift both legs away from the floor. Keep legs straight.
- Squeeze your glutes at the top. Think of pressing your pubic bone into the mat.
- Hold for 3 to 5 breaths. Lower on an exhale.
- Rest for 2 breaths. Repeat twice more.
People with lumbar spinal stenosis or acute disc issues should avoid Locust Pose or perform a modified version lifting only one leg at a time. If prone positions cause discomfort, substitute standing hip extension using a wall for support.
Key Takeaway: Your gluteus maximus responds best to poses involving hip extension against gravity; Bridge Pose and Locust Pose are the two most direct options in any yoga practice.
Chair Pose Glute Engagement: Getting It Right
Utkatasana (Chair Pose) engages the glutes when performed with proper hip hinge depth and a conscious posterior weight shift, but many practitioners feel it only in their quadriceps because their form favors knee flexion over hip flexion.
The difference between a quad-dominant Chair Pose and a glute-dominant one is subtle. It comes down to where your weight sits and how deeply you hinge at the hips.
To practice Chair Pose with glute emphasis:
- Stand with feet hip-width apart. Toes pointing forward.
- Inhale and raise arms overhead, shoulder-width apart.
- Exhale and hinge at the hips first, sending your butt back as if sitting into a real chair.
- Bend the knees only after the hips have hinged. Keep your weight in your heels.
- Squeeze your glutes as if holding a coin between them.
- Hold for 5 to 8 breaths. Keep your chest lifted.
- Inhale to stand. Press through your heels.
| Cue | Quad-Dominant Version | Glute-Dominant Version |
|---|---|---|
| Weight placement | Balls of feet | Heels |
| Hip action | Minimal hinge | Deep hinge, butt reaches back |
| Knee position | Shoots forward past toes | Stays behind or over toes |
| Glute sensation | Little or none | Burning in outer and lower glute |
| Trunk angle | Upright | Slight forward lean from hips |
Pose Tip:
- If you cannot feel your glutes in Chair Pose, place a yoga block between your inner thighs and squeeze it. This activates the adductors, which co-contract with the glutes.
- For knee pain, reduce depth. A shallow Chair Pose with strong glute engagement is more effective than a deep one with poor form.
- Seniors or those with balance concerns can practice this pose with their back against a wall.
Warrior Pose Glute Activation: Technique Breakdown
Virabhadrasana III (Warrior III) produces some of the highest gluteus medius activation of any yoga pose, making it one of the best single-leg balance poses for building glute stability. The standing leg’s glute works to keep your pelvis level while the lifted leg’s glute fires to maintain hip extension.
Most practitioners lose glute engagement in Warrior III by opening the hip of the lifted leg. When the lifted hip rotates upward toward the ceiling, the work shifts from the glutes to the tensor fasciae latae and IT band. Keeping both hip points facing the floor is the single most important alignment cue.
To practice Warrior III for glute activation:
- From standing, shift weight onto your left foot.
- Hinge forward at the hips while lifting your right leg behind you.
- Your body and lifted leg form one straight line parallel to the floor.
- Flex the lifted foot. Point your toes down, not out.
- Keep both hip bones facing the mat. Squeeze the standing leg glute.
- Reach arms forward or place hands on a block or chair for balance.
- Hold for 5 breaths. Lower slowly and switch sides.
A 2020 study in the Journal of Strength and Conditioning Research measured gluteus medius activation during various exercises. Single-leg balance positions, including poses similar to Warrior III, showed activation levels of 50 to 70% of maximum voluntary contraction. That is comparable to lateral band walks, a standard physical therapy exercise.
Modifications:
- Beginner: Fingertips on a wall or chair seat. Lift the back leg only halfway.
- Intermediate: Arms alongside the body (airplane arms) for less balance demand than arms forward.
- Limited mobility: Practice standing hip extension only, lifting the back leg without leaning forward.
Glute Bridge in Yoga: Setu Bandhasana Form Guide
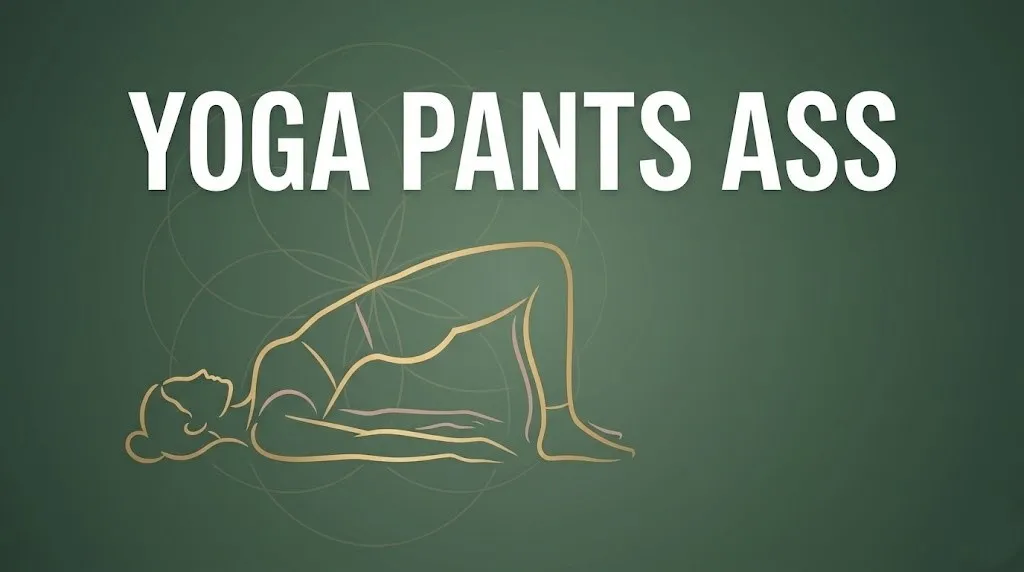
Setu Bandhasana (Bridge Pose) is the most accessible and effective glute-building pose in yoga because it isolates hip extension in a stable, supine position. If you can lie on your back with your knees bent, you can practice this pose.
Bridge Pose removes balance from the equation. That makes it ideal for beginners, seniors, and anyone recovering from a lower body injury. The glutes are the primary mover; the hamstrings and lower back assist.
To practice Setu Bandhasana with proper glute engagement:
- Lie on your back. Bend your knees. Place feet flat, hip-width apart.
- Position your feet so your fingertips can graze your heels.
- Press your feet into the mat. Arms rest alongside your body, palms down.
- Exhale and lift your hips toward the ceiling.
- Squeeze your glutes firmly at the top. Do not clench your jaw.
- Hold for 5 to 8 breaths. Keep your knees tracking over your second toes.
- Lower your hips slowly on an exhale. Roll down one vertebra at a time.
| Variation | Difficulty | Glute Demand | Best For |
|---|---|---|---|
| Bilateral Bridge | Beginner | Moderate | Learning activation |
| Bridge with block between knees | Beginner | Moderate-high | Engaging adductors and medial glute |
| Single-Leg Bridge | Intermediate | High | Correcting bilateral imbalances |
| Bridge with feet elevated on a chair | Intermediate | High | Increased hip extension range |
| Bridge with resistance band above knees | Advanced | Very high | Adding external resistance |
Pose Tip:
- If your hamstrings cramp during Bridge Pose, walk your feet slightly closer to your hips. This shifts the load onto the glutes.
- Avoid pressing into the back of your neck. Your weight should rest on your shoulder blades and feet.
- People with sacroiliac joint dysfunction should keep the standard bilateral version and avoid the single-leg variation unless cleared by a physical therapist.
Key Takeaway: Setu Bandhasana is the safest, most scalable glute pose in yoga; master it with consistent holds and conscious squeezes before adding single-leg or banded variations.
Yoga for Lower Back Pain Glutes Connection
Weak glutes are one of the most common contributors to lower back pain because the lumbar spine compensates when the glutes fail to extend the hip. Yoga addresses this by both strengthening the glutes and stretching the hip flexors that inhibit them.
Your body follows a principle called reciprocal inhibition. When the hip flexors (especially the psoas and iliacus) are chronically tight, they actively dampen the signal to your glutes. This is why sitting all day does not just passively weaken the glutes. It actively turns them off.
Yoga breaks this cycle in two ways:
- Lengthening the hip flexors: Poses like Anjaneyasana (Low Lunge) and Virabhadrasana I (Warrior I) stretch the front of the hip
- Activating the glutes: Poses like Bridge and Locust force the glutes to contract against resistance
The National Center for Complementary and Integrative Health (NCCIH) identifies yoga as an evidence-based approach for chronic lower back pain management. Multiple clinical trials support yoga’s effectiveness, particularly styles like Hatha and Iyengar that emphasize alignment and sustained holds.
| Pattern | What Happens | Yoga Fix |
|---|---|---|
| Tight hip flexors | Glutes shut down | Low Lunge, Crescent Lunge holds |
| Weak gluteus medius | Pelvis drops during walking | Warrior III, Half Moon Pose |
| Overactive lower back | Back extensors fatigue and spasm | Bridge Pose (glutes take over) |
| Anterior pelvic tilt | Lower back arches excessively | Cat-Cow awareness, core engagement |
If you experience lower back pain during any glute-focused pose, reduce the range of motion. Pain during Bridge Pose may indicate you are arching from the lumbar spine instead of lifting from the hips. Place a block between your knees to help stabilize the pelvis.
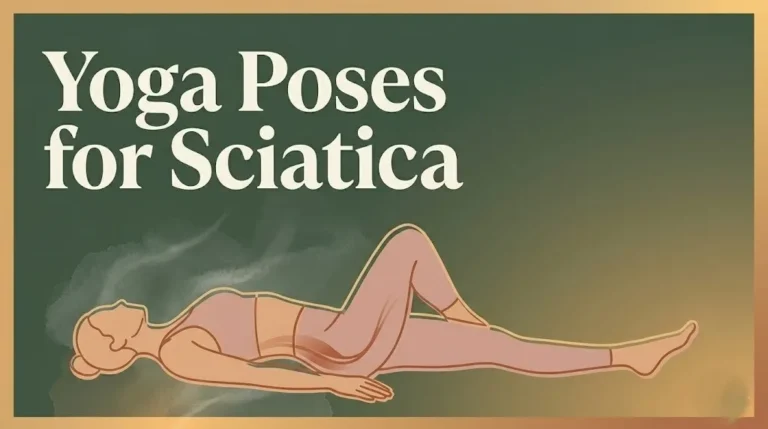
Anyone with diagnosed disc herniation, spondylolisthesis, or acute sciatica should work with a qualified yoga therapist or physical therapist before practicing glute-focused sequences independently.
How Often to Do Yoga for Glutes: Frequency Guide
Practicing glute-focused yoga 3 to 4 times per week is the minimum frequency needed to build measurable strength and endurance, based on exercise science principles for muscular adaptation. Fewer sessions maintain existing fitness but are unlikely to produce visible changes.
The American College of Sports Medicine (ACSM) recommends working each major muscle group 2 to 3 times per week with adequate recovery between sessions. Yoga’s lower-intensity nature (compared to heavy weightlifting) means you can train the glutes more frequently without the same recovery demands.
| Frequency | Expected Outcome | Best For |
|---|---|---|
| 1 to 2 sessions/week | Maintenance; prevents further weakening | Busy schedules; supplement to other training |
| 3 to 4 sessions/week | Strength gains; improved activation | Primary glute development through yoga |
| 5+ sessions/week | Endurance gains; risk of overuse without variety | Advanced practitioners varying intensity daily |
A practical weekly schedule:
- Monday: Full glute-focused sequence (25 to 35 minutes)
- Wednesday: Vinyasa flow with emphasis on standing poses (30 to 45 minutes)
- Friday: Full glute-focused sequence (repeat Monday’s)
- Sunday: Yin or Restorative yoga focusing on hip and glute stretching (30 minutes)
Recovery matters even in yoga. After an intense glute session, your muscles need 24 to 48 hours to repair and adapt. Fill rest days with gentle stretching, walking, or upper body work.
Beginners often ask how long before they see results. Muscular strength adaptations typically begin within 4 to 6 weeks of consistent training. Visible body composition changes, meaning the look of your glutes, depend on overall body fat levels and may take 8 to 12 weeks. Patience and consistency outperform intensity every time.
Pose Tip:
- Track your hold times. If you held Chair Pose for 5 breaths in week one, aim for 7 in week three.
- Progressive overload in yoga means longer holds, slower transitions, and single-leg variations, not just more sessions.
- If your glutes feel sore for more than 48 hours, take an extra rest day. Soreness beyond that window suggests you exceeded your current capacity.
Key Takeaway: Three to four glute-focused yoga sessions per week, with progressive hold times and at least one recovery day between intense sessions, produces measurable results within 4 to 6 weeks.
Frequently Asked Questions About Yoga Pants and Glute Training
Can yoga alone make your butt bigger?
Yoga can increase glute muscle tone, endurance, and activation, especially for beginners.
Visible size increases (hypertrophy) are limited with body weight alone; adding resistance bands or ankle weights extends the stimulus.
For maximum growth, combine yoga with progressive resistance training and adequate protein intake.
What are the best yoga pants for a curvy body?
Look for high-rise pants with at least 20% spandex, a gusseted crotch, and a wide waistband with interior grip.
Four-way stretch fabric and flat-lock seams prevent bunching and chafing during deep hip movements.
Brands offering separate waist and hip sizing provide the most reliable fit for curvy proportions.
Which yoga pose works the glutes the most?
Setu Bandhasana (Bridge Pose) and Virabhadrasana III (Warrior III) produce the highest overall glute activation.
Bridge Pose isolates the gluteus maximus through hip extension.
Warrior III challenges the gluteus medius of the standing leg through sustained single-leg balance.
Do compression yoga pants help during practice?
Compression pants improve proprioceptive awareness, which can help you feel whether your glutes are engaging.
They may reduce perceived muscle soreness after practice.
They do not increase actual strength or flexibility; those gains come from the poses themselves.
How long does it take to see glute results from yoga?
Most practitioners notice improved muscle activation and reduced lower back fatigue within 2 to 3 weeks.
Visible toning changes typically appear after 6 to 12 weeks of consistent practice, 3 to 4 sessions per week.
Results depend on your starting point, practice intensity, overall nutrition, and whether you are also doing other forms of exercise.
Your glutes are the foundation of how you stand, walk, and move through every pose. Strengthening them does not require a gym membership, a personal trainer, or expensive equipment.
Start with Bridge Pose. Practice it three times this week, holding for 8 breaths each time with a conscious squeeze at the top. Once that feels easy, add Chair Pose and Warrior III to your routine.
The right yoga pants remove one distraction. The right practice builds something that lasts far longer than any pair of leggings.