Best Yoga Poses for Sciatica Pain: 2026 Relief Guide
Yoga poses for sciatica can reduce nerve pain by releasing tension in the piriformis, hips, and lower back. The right poses, practiced safely, help decompress the areas where the sciatic nerve gets trapped or irritated.
Research supports this approach. A 2017 study published in the International Journal of Yoga found that a 12-week yoga program reduced pain intensity and improved functional ability in participants with chronic sciatica. That finding has been reinforced by newer reviews showing yoga’s effectiveness for lower back and nerve-related pain.
This guide covers the best poses, step-by-step instructions, and the styles that match different sciatica causes. You will also find sequences with timing, modifications for flare-ups, chair-based options, and a clear breakdown of which poses to avoid. Everything here is sourced, safety-checked, and built for people who want relief without guesswork.
Yoga Poses for Sciatica
Yoga poses for sciatica target the muscles and joints most likely to compress or irritate the sciatic nerve. The sciatic nerve runs from the lower lumbar spine through the piriformis muscle, down through the gluteal region, and along the back of each leg.
Sciatica is not a single condition. It is a symptom with multiple possible causes. The pose that helps one type of sciatica may worsen another.
Three common causes respond differently to yoga:
| Sciatica Cause | What Happens | Best Pose Focus |
|---|---|---|
| Piriformis syndrome | Piriformis muscle spasms and compresses the nerve | Hip openers, external rotation stretches |
| Herniated disc | Disc material presses on the nerve root | Gentle extensions (Sphinx, Cobra); avoid deep forward folds |
| Spinal stenosis | Narrowed spinal canal pinches nerves | Flexion-based poses (Child’s Pose, knee-to-chest) |
Knowing the source of your pain matters. A person with a bulging disc at L4-L5 needs different poses than someone with a tight piriformis.
If you have not received a diagnosis, working with a physical therapist before starting a yoga routine helps you choose poses that match your specific anatomy. This one step prevents the most common mistakes people make when searching for sciatica relief through yoga.
Is Yoga Good for Sciatica Pain
Yes, yoga is good for sciatica pain when practiced with the right poses, appropriate intensity, and awareness of the underlying cause. It works by reducing muscular tension around the sciatic nerve and improving spinal mobility.
The National Center for Complementary and Integrative Health (NCCIH) recognizes yoga as one of several mind-body practices with evidence supporting its use for chronic low back pain. Since sciatica often originates from lumbar spine issues, these findings apply directly.
Yoga addresses sciatica through several mechanisms:
- Muscular release: Stretching the piriformis, hip rotators, and hamstrings reduces compression on the nerve.
- Spinal decompression: Poses that gently extend or flex the spine create space around nerve roots.
- Improved circulation: Movement and breathing increase blood flow to inflamed areas.
- Nervous system regulation: Slow, breath-linked movement activates the parasympathetic nervous system, lowering pain sensitivity.
The key qualifier is “right poses.” Not all yoga is appropriate for all types of sciatica. A fast-paced Vinyasa class with deep forward folds can aggravate disc-related sciatica. A gentle Hatha class with supported hip openers may bring noticeable relief.
Yoga works best for sciatica as part of a broader strategy. Pair it with walking, core strengthening, and ergonomic changes to your sitting habits for the strongest results.
Best Yoga for Sciatica
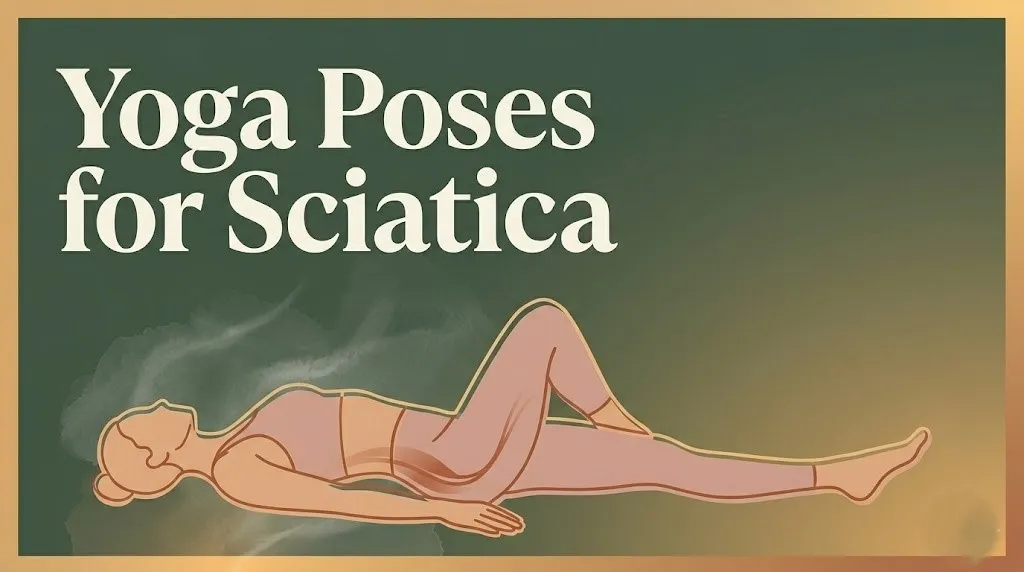
The best yoga for sciatica is a slow, controlled practice that prioritizes sustained holds and prop support over flow and intensity. Restorative yoga, Yin yoga, and gentle Hatha yoga rank highest for sciatica management.
Each style offers something different:
| Yoga Style | Pace | Hold Time | Best Phase | Sciatica Benefit |
|---|---|---|---|---|
| Restorative | Very slow | 5 to 15 min | Acute flare-up | Passive release, minimal nerve irritation |
| Yin | Slow | 3 to 5 min | Between flare-ups | Deep connective tissue stretch around hips |
| Hatha | Moderate | 5 to 10 breaths | Maintenance | Active strengthening plus flexibility |
| Iyengar | Slow, precise | Varies | All phases | Prop-heavy alignment reduces injury risk |
| Vinyasa | Faster | 1 to 5 breaths | Recovery only | Builds functional strength; avoid during flare-ups |
During an acute flare-up, Restorative yoga is the safest choice. Bolsters, blankets, and blocks do most of the work. Your body rests in supported positions without active stretching that could irritate an inflamed nerve.
Once pain decreases, Yin and Hatha styles help restore range of motion. Think of these as the rebuilding phase. Iyengar yoga, with its emphasis on precise alignment and extensive prop use, is particularly well-suited because teachers adjust poses to your exact limitations.
Avoid hot yoga, power yoga, and Ashtanga during sciatica episodes. The intensity and pace leave little room for the careful positioning sciatica requires.
Key Takeaway: Match your yoga style to your pain phase. Restorative for flare-ups, Yin or Hatha for rebuilding, and avoid intense flow styles until the nerve calms down.
Yoga for Nerve Pain
Yoga for nerve pain works differently than yoga for muscle soreness. Nerve pain requires gentle, sustained positions that create space around compressed pathways rather than aggressive stretching that can further irritate sensitive tissue.
The sciatic nerve is the longest and thickest nerve in the body. It originates from nerve roots at L4, L5, S1, S2, and S3. When any of these roots get compressed, the pain can radiate from the lower back through the buttock and down the leg.
Harvard Health Publishing notes that gentle stretching and strengthening exercises rank among the most effective conservative treatments for nerve-related pain. Yoga fits this description when practiced correctly.
A few principles separate helpful nerve pain yoga from harmful practice:
- Never stretch into sharp or shooting pain. Dull, mild tension is acceptable. Electricity, burning, or shooting sensations mean you have gone too far.
- Hold positions below your pain threshold. Backing off by 20% from your maximum range often produces better results.
- Prioritize nerve gliding over nerve stretching. Gentle, oscillating movements encourage the nerve to move freely through surrounding tissue without pulling on it.
Pose Tip:
- If a stretch sends shooting pain down your leg, ease out immediately.
- Tingling that worsens during a hold means the nerve is being compressed, not released.
- Mild discomfort that fades within a few seconds of holding is typically safe.
Breathing matters here more than in most yoga contexts. Slow diaphragmatic breathing (Dirga Pranayama) keeps the nervous system calm during poses that might otherwise trigger a pain response.
Best Yoga Poses for Sciatica
The best yoga poses for sciatica release the piriformis, lengthen the hamstrings, open the hip flexors, and create space in the lumbar spine. Here are seven poses with the strongest track record for sciatica relief, matched to the muscles they target.
| Pose (English) | Pose (Sanskrit) | Primary Target | Hold Time |
|---|---|---|---|
| Reclined Pigeon | Supta Kapotasana | Piriformis, deep hip rotators | 1 to 3 min per side |
| Bridge Pose | Setu Bandhasana | Glutes, hamstrings, lumbar extensors | 5 to 8 breaths |
| Cat-Cow | Marjaryasana-Bitilasana | Entire spine, abdominals | 8 to 10 rounds |
| Child’s Pose | Balasana | Erector spinae, latissimus dorsi | 1 to 3 min |
| Low Lunge | Anjaneyasana | Psoas, iliacus, rectus femoris | 5 to 8 breaths per side |
| Sphinx Pose | Salamba Bhujangasana | Erector spinae, abdominals | 5 to 10 breaths |
| Reclined Hand to Big Toe | Supta Padangusthasana | Hamstrings, calves | 1 to 2 min per side |
Reclined Pigeon (Supta Kapotasana) is often the first pose physical therapists and yoga teachers recommend. It targets the piriformis without putting weight on the spine. Lying on your back with both feet off the floor removes gravitational compression from the lumbar discs.
Bridge Pose (Setu Bandhasana) strengthens the glutes and hamstrings while gently mobilizing the lumbar spine. Weak glutes contribute to piriformis overwork, so this pose addresses a root cause rather than just a symptom.
Start with the gentlest option from this list and add poses gradually. One pose practiced consistently beats seven poses practiced once.
Sciatica Yoga Poses
Sciatica yoga poses fall into three functional categories: releases, stabilizers, and mobilizers. Each category plays a distinct role in managing sciatic nerve irritation.
Releases reduce tension in muscles that compress the nerve. Sucirandhrasana (Thread the Needle Pose, also called Eye of the Needle) is the safest piriformis release for beginners. Lying supine protects the spine while the crossed-leg position targets the deep hip rotators directly.
To practice Sucirandhrasana (Thread the Needle Pose):
- Lie on your back with both knees bent and feet flat on the floor.
- Cross your right ankle over your left thigh, just above the knee.
- Keep your right foot flexed to protect the knee joint.
- Thread your right hand through the opening between your legs.
- Clasp both hands behind your left thigh or on top of your left shin.
- Gently draw your left knee toward your chest until you feel a stretch in the right hip.
- Hold for 60 to 90 seconds, breathing steadily.
- Release slowly and switch sides.
Stabilizers strengthen the muscles that support the spine and pelvis. Setu Bandhasana (Bridge Pose) and gentle core engagement exercises prevent the piriformis from compensating for weak glutes.
Mobilizers restore movement in stiff spinal segments. Marjaryasana-Bitilasana (Cat-Cow) gently moves each vertebra through flexion and extension, encouraging fluid distribution in the intervertebral discs.
Modification: If threading your hands behind the thigh feels too intense, loop a yoga strap around the thigh instead. This allows you to control the depth of the stretch without straining your shoulders or neck.
Key Takeaway: Group your sciatica yoga poses into releases, stabilizers, and mobilizers. Doing all three categories in each session creates a balanced approach that addresses both symptoms and causes.
Yoga Poses for Sciatica Pain
Yoga poses for sciatica pain should be selected based on where along the nerve pathway you feel the most discomfort. Pain location reveals which structures are involved, guiding your pose choice.
| Pain Location | Likely Involvement | Best Pose Category |
|---|---|---|
| Lower back only | Lumbar disc or nerve root | Gentle extensions (Sphinx, Cobra) |
| Buttock and hip | Piriformis or SI joint | Hip openers (Reclined Pigeon, Thread the Needle) |
| Back of thigh | Hamstring tension or nerve referral | Hamstring lengtheners (Supta Padangusthasana) |
| Calf or foot | Full nerve pathway irritation | Gentle overall sequence; avoid deep stretches |
When pain radiates all the way to the foot, start with the mildest poses. Balasana (Child’s Pose) with wide knees and a bolster under the torso provides gentle lumbar flexion without any nerve tension.
A 2013 study published in Complementary Therapies in Medicine found that participants with chronic low back pain who practiced yoga twice weekly for 12 weeks reported reduced pain and improved function compared to a physical therapy group. While this study addressed general low back pain rather than isolated sciatica, the overlap in affected structures makes it relevant.
For acute sciatica pain, avoid poses that produce numbness, tingling, or increased radiating symptoms. A good rule: if the pain centralizes (moves closer to the spine and away from the leg), the pose is likely helping. If pain peripheralizes (moves further down the leg), stop immediately.
Modification for acute flare-ups: practice only supine (lying on your back) poses for the first week. Gravity-eliminated positions reduce disc pressure and nerve tension simultaneously.
Sciatic Nerve Yoga Poses
Sciatic nerve yoga poses work best when they follow the principle of nerve gliding rather than aggressive nerve stretching. The sciatic nerve needs room to slide freely through the piriformis and along the hamstring pathway.
Think of the sciatic nerve like a rope running through a series of tunnels. If one tunnel narrows, pulling the rope harder (aggressive stretching) creates more friction. Gently moving the rope back and forth (nerve gliding) opens the tunnel naturally.
A simple nerve glide to practice:
- Sit on a chair with both feet flat on the floor.
- Slowly straighten your affected leg, pointing your toes toward the ceiling.
- At the same time, look up toward the ceiling.
- Then bend the knee back down while tucking your chin to your chest.
- Repeat this rocking motion 8 to 10 times, slowly and smoothly.
- The movement should be pain-free. Stop if shooting symptoms appear.
This glide mobilizes the sciatic nerve along its entire pathway. Pairing it with Supta Padangusthasana (Reclined Hand to Big Toe Pose) using a yoga strap adds a static hamstring lengthener that complements the dynamic glide.
Key differences between nerve gliding and nerve stretching:
- Nerve gliding: Alternating tension at one end while releasing the other end. Gentle, oscillating, pain-free.
- Nerve stretching: Pulling both ends simultaneously. Can irritate an already inflamed nerve. Avoid during flare-ups.
The American College of Sports Medicine (ACSM) recommends incorporating nerve mobilization techniques into rehabilitation programs for radiculopathy. Yoga-based nerve glides fit neatly into this recommendation.
Yoga Positions for Sciatica
Yoga positions for sciatica include standing, seated, supine, and prone variations. Your current pain level determines which category is safest to start with.
| Position Category | Pain Level Fit | Examples | Why It Works |
|---|---|---|---|
| Supine (lying face up) | Acute, moderate, mild | Reclined Pigeon, Thread the Needle, Bridge | Removes spinal loading; gravity assists |
| Prone (lying face down) | Moderate, mild | Sphinx, gentle Cobra | Encourages lumbar extension for disc-related sciatica |
| Seated | Moderate, mild | Seated twist, seated forward fold (modified) | Accessible but requires spinal support |
| Standing | Mild, maintenance | Standing Pigeon, Wide-leg forward fold | Builds functional strength; highest nerve tension |
Start with supine positions if your pain is above a 5 on a 10-point scale. Supine poses remove the compressive force of gravity from the spine. This is why Supta Kapotasana (Reclined Pigeon) often works better than traditional Eka Pada Rajakapotasana (Pigeon Pose) for sciatica.
Standing poses belong in the maintenance phase. They challenge balance, strengthen the legs and core, and build the functional capacity that prevents future flare-ups. Standing Pigeon (figure-four balance) tests your stability while opening the piriformis.
Modification for seniors or those with balance concerns: practice standing poses with one hand on a wall or the back of a sturdy chair.
Key Takeaway: Start with lying-down poses when pain is strong, progress to seated and prone poses as it eases, and add standing poses during the maintenance phase. Let your pain level guide your position category.
Yoga Stretches for Sciatic Nerve Pain
Yoga stretches for sciatic nerve pain focus on three key muscle groups: the piriformis, the hamstrings, and the hip flexors (primarily the psoas and iliacus). Tightness in any of these areas can contribute to sciatic nerve compression.
The piriformis sits deep in the buttock and runs directly over (or in some people, through) the sciatic nerve. When this muscle tightens or spasms, it squeezes the nerve. Supta Kapotasana (Reclined Pigeon) and Sucirandhrasana (Thread the Needle) both target the piriformis effectively.
Tight hamstrings pull on the pelvis and increase tension along the nerve’s pathway. Supta Padangusthasana (Reclined Hand to Big Toe Pose) stretches the hamstrings without compressing the spine.
To practice Supta Padangusthasana:
- Lie on your back with both legs extended.
- Loop a yoga strap around the ball of your right foot.
- Slowly straighten your right leg toward the ceiling.
- Keep both hips grounded and level.
- Do not lock your right knee; a slight bend is fine.
- Hold for 60 to 90 seconds, breathing deeply into your belly.
- Lower the leg slowly and switch sides.
Short hip flexors tilt the pelvis forward, increasing lumbar curve and compressing the nerve roots at L4 and L5. Anjaneyasana (Low Lunge) opens the psoas and iliacus while building hip stability.
Modification: Place a folded blanket under the back knee in Low Lunge. If the stretch feels too intense, keep the back knee closer to the front foot rather than sliding it further back.
Yoga Sequence for Sciatica Pain Relief
A yoga sequence for sciatica pain relief should follow a specific order: warm-up, nerve mobilization, targeted stretches, strengthening holds, and a supported cool-down. This progression prepares the tissue, releases the nerve, and builds stability.
Here is a 20-minute sequence you can practice at home:
Warm-Up (4 minutes):
- Marjaryasana-Bitilasana (Cat-Cow): 8 to 10 slow rounds, one breath per movement.
- Pelvic tilts: Lying on your back, flatten and arch your lower back against the floor, 10 repetitions.
Nerve Mobilization (3 minutes):
- Seated sciatic nerve glide (described in the Sciatic Nerve Yoga Poses section): 8 to 10 repetitions per side.
Targeted Stretches (8 minutes):
- Sucirandhrasana (Thread the Needle): 90 seconds per side.
- Supta Padangusthasana (Reclined Hand to Big Toe Pose) with strap: 60 seconds per side.
Strengthening (3 minutes):
- Setu Bandhasana (Bridge Pose): 3 sets of 8 breaths, lowering between sets.
Cool-Down (2 minutes):
- Balasana (Child’s Pose) with bolster: 2 minutes, wide knees.
Props needed for this sequence:
- Yoga strap (for Reclined Hand to Big Toe)
- Bolster or thick pillow (for Child’s Pose)
- Blanket (for knee padding)
- Yoga block (optional, between thighs in Bridge)
Practice this sequence in the morning or evening. Avoid practicing immediately after prolonged sitting; walk for 5 minutes first to increase blood flow to the lower back.
Gentle Yoga for Sciatica Relief
Gentle yoga for sciatica relief means slowing down, reducing range of motion, and using props to support every pose. This approach is specifically designed for acute episodes and for people new to yoga who are managing nerve pain.
A 2020 review published in the Spine Journal found that low-intensity exercise, including gentle yoga, produced comparable pain relief outcomes to higher-intensity exercise programs for chronic low back pain. The difference: gentle approaches had fewer adverse events.
Principles of gentle sciatica yoga:
- 50% rule: Move only to 50% of your available range. If you can straighten your leg fully, stop halfway.
- Breath-first movement: Initiate every movement with an inhale or exhale. Let breath lead, body follows.
- Prop everything: Use blocks, bolsters, straps, and blankets. No pose should require muscular effort above mild engagement.
- Stop before discomfort: The goal is decompression, not stretching intensity.
A gentle three-pose practice for beginners:
| Pose | Hold Time | Props Needed | Focus |
|---|---|---|---|
| Balasana (Child’s Pose) | 2 to 3 min | Bolster under torso | Lumbar release |
| Sucirandhrasana (Thread the Needle) | 60 to 90 sec per side | Strap around thigh | Piriformis release |
| Supported Setu Bandhasana (Supported Bridge) | 2 to 3 min | Block under sacrum | Gentle lumbar extension |
This three-pose routine takes about 10 minutes. It requires no fitness base and is safe for most people experiencing mild to moderate sciatica symptoms.
Key Takeaway: Gentle yoga is not weak yoga. It is strategic, intentional, and backed by research showing equal pain relief outcomes with fewer risks compared to intense programs.
Restorative Yoga for Sciatica
Restorative yoga for sciatica uses fully supported poses held for extended periods to allow the nervous system to release protective muscle guarding around the sciatic nerve. Every pose uses props. No muscular effort is required.
Restorative yoga differs from other styles because the body does nothing. Props hold every position. The nervous system, sensing safety, stops bracing the muscles that may be compressing the nerve.
Three restorative poses for sciatica:
Supported Supta Baddha Konasana (Supported Reclined Bound Angle Pose):
- Place a bolster lengthwise on your mat.
- Sit with your lower back touching the short end of the bolster.
- Bring the soles of your feet together and let your knees fall open.
- Place a block or rolled blanket under each knee for support.
- Lean back onto the bolster. Rest your arms by your sides.
- Hold for 5 to 10 minutes.
This pose opens the inner thighs and hip rotators without any active stretch on the sciatic nerve pathway.
Supported Balasana (Supported Child’s Pose):
Place a bolster between your knees and drape your body over it. Turn your head to one side. Hold for 5 to 8 minutes. Switch head direction halfway through.
Viparita Karani (Legs Up the Wall):
Bring your hips close to a wall. Swing your legs up. Rest your arms at your sides. A folded blanket under your sacrum adds gentle lumbar support. Hold for 5 to 15 minutes.
The International Journal of Yoga has published research showing that restorative yoga practices reduce cortisol levels, which correlates with reduced pain perception. Lower cortisol means lower inflammation and less muscle guarding.
Chair Yoga for Sciatica
Chair yoga for sciatica provides effective piriformis and hip flexor stretches for people who cannot get down to or up from the floor. It is ideal for office workers, seniors, and anyone during an acute flare-up.
All you need is a sturdy, armless chair on a non-slip surface.
Seated Figure-Four Stretch (Chair version of Sucirandhrasana):
- Sit near the front edge of the chair with feet flat on the floor.
- Cross your right ankle over your left thigh, above the knee.
- Flex your right foot to protect the knee joint.
- Sit tall. Gently hinge forward from the hips.
- Stop when you feel a stretch in the right buttock.
- Hold for 30 to 60 seconds. Repeat on the other side.
Seated Cat-Cow:
- Sit tall with hands on your knees.
- Inhale: arch your spine, lift your chest, look slightly upward.
- Exhale: round your spine, tuck your chin, draw your belly inward.
- Repeat 8 to 10 times, moving with your breath.
Seated Spinal Twist:
- Sit tall. Place your right hand on your left knee.
- Place your left hand on the chair seat behind you.
- Inhale to lengthen your spine. Exhale to twist gently to the left.
- Hold for 5 breaths. Switch sides.
| Chair Pose | Target Muscle | Sciatica Benefit |
|---|---|---|
| Seated Figure-Four | Piriformis, deep rotators | Reduces nerve compression at the hip |
| Seated Cat-Cow | Spinal extensors, abdominals | Mobilizes lumbar segments |
| Seated Spinal Twist | Obliques, piriformis | Releases tension around the SI joint |
Chair yoga can be practiced multiple times throughout the workday. Even a 3-minute session between meetings reduces the cumulative effects of prolonged sitting on the sciatic nerve.
Key Takeaway: Chair yoga is not a lesser practice. It delivers targeted relief for the piriformis, hip flexors, and spinal muscles without requiring floor access, making it the most practical option for people who sit all day.
Can Yoga Make Sciatica Worse
Yes, yoga can make sciatica worse if you practice the wrong poses, push too deep, or ignore your body’s warning signals. The most common cause of yoga-related sciatica aggravation is overstretching an already irritated nerve.
Three ways yoga commonly worsens sciatica:
- Deep forward folds (like Uttanasana or Paschimottanasana) place maximum stretch on the hamstrings and sciatic nerve simultaneously. For disc-related sciatica, this increases disc pressure on the nerve root.
- Aggressive hip openers (like full Eka Pada Rajakapotasana, Pigeon Pose, without props) can compress the piriformis against the nerve rather than releasing it if the hip sinks unevenly.
- Fast-paced flow classes do not allow time for careful positioning. Quick transitions through poses like forward folds, twists, and lunges can jolt an inflamed nerve.
Warning signs that a pose is making things worse:
| Signal | What It Means | What to Do |
|---|---|---|
| Shooting pain down the leg | Nerve is being compressed or stretched | Stop the pose immediately |
| Increased numbness or tingling | Nerve signal is being blocked | Come out slowly; rest in a neutral position |
| Pain that worsens after practice | Inflammation was triggered | Switch to supine-only poses for several days |
| Pain that moves further from the spine | Peripheralization; nerve irritation increasing | Stop yoga temporarily; consult a physical therapist |
The difference between productive discomfort and harmful pain in sciatica yoga is simple. A dull, localized stretch sensation that eases during the hold is productive. Any sharp, shooting, burning, or radiating sensation is a signal to stop.
Modification: When trying a new pose, enter at 30% of your available range first. Wait 15 seconds. If no nerve symptoms appear, move to 50%. Never exceed 70% range during an active sciatica episode.
Which Yoga Poses to Avoid with Sciatica
The yoga poses to avoid with sciatica are deep forward folds, aggressive twists, and any pose that produces shooting, burning, or radiating pain down the leg. The specific poses to skip depend on the cause of your sciatica.
For disc-related sciatica (herniated or bulging disc), avoid:
- Uttanasana (Standing Forward Fold)
- Paschimottanasana (Seated Forward Fold)
- Halasana (Plow Pose)
- Any deep, loaded spinal flexion
These poses increase intradiscal pressure, which can push disc material further into the nerve root.
For piriformis-related sciatica, avoid (initially):
- Full Eka Pada Rajakapotasana (full Pigeon Pose) without props
- Gomukhasana (Cow Face Pose) with forced hip stacking
- Any deep external rotation that produces sharp hip pain
For spinal stenosis-related sciatica, avoid:
- Salamba Bhujangasana (Sphinx Pose) held for extended periods
- Bhujangasana (Cobra Pose)
- Deep backbends like Urdhva Dhanurasana (Wheel Pose)
Spinal extension narrows the spinal canal, worsening stenosis symptoms.
Pose Tip:
- “Avoid” does not always mean “forever.” Many of these poses become accessible during the maintenance phase.
- Replace full Pigeon with Reclined Pigeon. Replace Standing Forward Fold with Reclined Hand to Big Toe.
- If a pose is on the “avoid” list but feels completely pain-free for you, it may be safe. Bodies differ. But proceed cautiously and check with a movement professional.
Key Takeaway: The pose you need to avoid depends on what is causing your sciatica. A herniated disc, a tight piriformis, and spinal stenosis each have their own “skip list.” Identify your cause to protect your nerve.
How Often Should You Do Yoga for Sciatica
You should practice yoga for sciatica 3 to 5 times per week for the best results, with each session lasting 15 to 30 minutes. Consistency matters more than session length.
A 2017 study in the International Journal of Yoga used a protocol of three sessions per week, each lasting 60 minutes, over 12 weeks. Participants showed reduced pain and improved function. For most people practicing at home without a teacher, shorter and more frequent sessions produce better adherence and comparable outcomes.
Suggested weekly schedule:
| Day | Session Type | Duration | Intensity |
|---|---|---|---|
| Monday | Full sciatica sequence | 20 min | Gentle |
| Tuesday | Rest or walking only | 0 min | None |
| Wednesday | Chair yoga during workday | 5 to 10 min | Very gentle |
| Thursday | Full sciatica sequence | 20 min | Gentle |
| Friday | Restorative yoga only | 15 to 20 min | Passive |
| Saturday | Full sciatica sequence | 20 min | Gentle to moderate |
| Sunday | Rest | 0 min | None |
Progress indicators that your practice is working:
- Pain centralizes (moves closer to the spine, away from the leg) over several weeks.
- Morning stiffness decreases.
- You can sit comfortably for longer periods.
- Your available range of motion in hip openers gradually increases.
Most people notice improvement within 2 to 4 weeks of consistent practice. Complete resolution depends on the severity and cause of the sciatica. Some people manage symptoms indefinitely through ongoing practice; others find full relief.
Modification for acute flare-ups: reduce frequency to 2 to 3 times per week and practice only supine poses. Increase frequency as symptoms allow.
Frequently Asked Questions About Yoga Poses for Sciatica
How long does it take for yoga to help sciatica?
Most people notice reduced pain within 2 to 4 weeks of consistent practice, typically 3 to 5 sessions per week.
Deeper structural changes, like improved piriformis flexibility or reduced disc compression, can take 6 to 12 weeks.
Results depend on the cause, severity, and whether you are also addressing contributing factors like prolonged sitting.
Can I do yoga during a sciatica flare-up?
Yes, but only with supine, prop-supported poses at very low intensity.
Restorative yoga and gentle nerve glides are the safest options during acute episodes.
Avoid standing poses, forward folds, and any position that increases radiating leg symptoms.
Is Pigeon Pose safe for sciatica?
Reclined Pigeon (Supta Kapotasana) is generally safe and widely recommended for piriformis-related sciatica.
Full Pigeon Pose (Eka Pada Rajakapotasana) on the floor can aggravate symptoms if your hip drops unevenly or the pose compresses the nerve.
Start with the reclined version and progress to the floor version only when you can hold Reclined Pigeon pain-free for 2 minutes.
Should I do yoga or physical therapy for sciatica?
Both work, and combining them often produces the best results.
Physical therapy provides diagnosis, manual treatment, and targeted strengthening.
Yoga adds flexibility, nervous system regulation, and a sustainable daily practice you can maintain after PT sessions end.
What is the single best yoga pose for sciatic nerve pain?
Sucirandhrasana (Thread the Needle Pose) is the most consistently recommended starting pose by both yoga teachers and physical therapists.
It targets the piriformis directly while keeping the spine fully supported on the floor.
Use a yoga strap around the thigh if clasping your hands behind the leg is uncomfortable.
Sciatica responds well to the right yoga poses practiced at the right intensity. The most practical thing you can do today is start with one supine pose, like Thread the Needle, and hold it for 60 to 90 seconds on each side.
Build from there. Add one new pose each week. Keep a simple log of what helps and what triggers symptoms.