Free Chair Yoga for Beginners: Poses and Routines 2026
Free chair yoga for beginners is a gentle, seated practice that requires no mat, no floor work, and no prior yoga experience. You can start today with a sturdy kitchen chair, a small amount of open space, and about 20 minutes.
Chair yoga is growing faster than almost any other yoga format in the United States. According to the National Center for Complementary and Integrative Health, adults over 65 are among the fastest-growing groups seeking yoga and movement-based therapies for pain management, balance improvement, and stress reduction. Getting started doesn’t require a studio, a subscription, or special equipment.
This guide covers every foundational element of chair yoga. You’ll find a pose-by-pose breakdown, a free beginner routine, condition-specific guidance for arthritis and back pain, breathing techniques, and safety tips that make this practice appropriate for the widest range of beginners possible.
What Is Free Chair Yoga for Beginners?
Free chair yoga for beginners refers to any accessible, cost-free seated yoga practice designed for people with no previous yoga experience, typically practiced at home using a standard household chair.
The “free” matters for two reasons. First, many people exploring chair yoga are seniors on fixed incomes, or beginners who aren’t ready to commit to a paid class. Second, the practice itself doesn’t require any paid props, studio access, or video subscription to be effective.
Chair yoga adapts traditional yoga poses from the floor or standing to a seated or supported position. The chair acts as a stabilizing prop. This removes the balance demands of standing poses and eliminates the need to get up and down from the floor, which is the primary barrier to floor yoga for older adults and people with mobility limitations.
Yoga Alliance recognizes chair yoga as a legitimate and distinct adaptation of traditional yoga practice. Teachers trained in adaptive or therapeutic yoga specifically learn chair-based modifications for populations including seniors, wheelchair users, and people recovering from surgery or illness.
You don’t need a yoga teacher to start. The poses in this guide are described with enough anatomical clarity that a complete beginner can practice safely using only these written instructions.
Who benefits most from free chair yoga at home:
- Adults aged 60 and older with reduced mobility or balance concerns
- Beginners who feel intimidated by floor-based or standing yoga classes
- People managing chronic pain conditions like arthritis or back pain
- Individuals in post-surgical recovery with weight-bearing restrictions
- Anyone practicing at home without a mat, open floor space, or grip strength for downward-facing poses
- Caregivers looking for a short, shared movement practice with an older family member
What Is Chair Yoga and How Does It Differ from Floor Yoga?
Chair yoga is a style of yoga in which traditional poses are adapted so that the practitioner performs them while seated in a chair or using a chair as a standing support prop.
Traditional floor yoga, whether Hatha yoga, Vinyasa yoga, or Iyengar yoga, requires practitioners to move between standing, seated, and reclined positions on a mat. For many older adults or people with joint pain, hip replacements, osteoporosis, or balance disorders, that movement pattern is either unsafe or inaccessible.
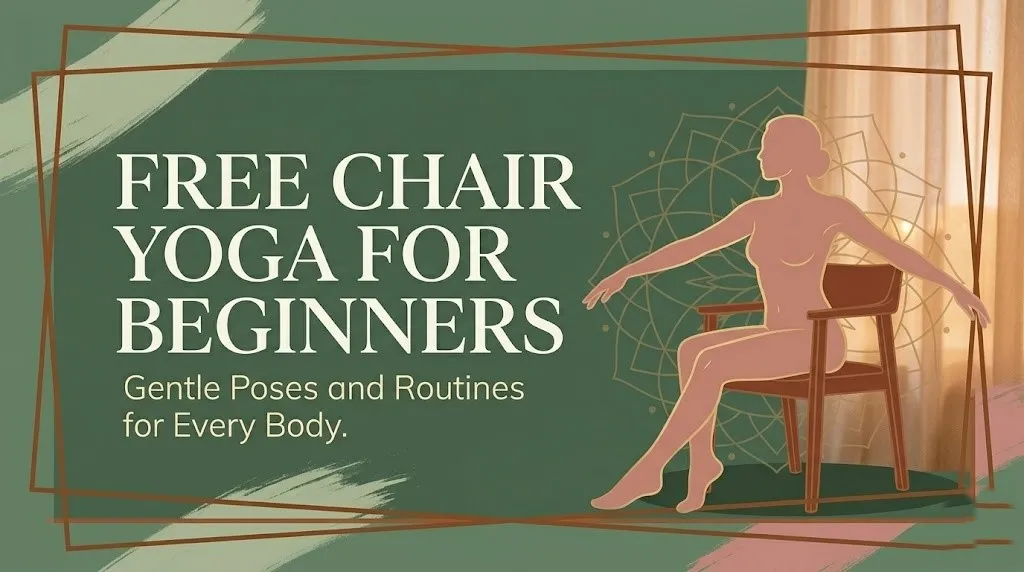
Chair yoga removes those barriers without removing the core principles of yoga practice. Breath awareness, spinal alignment, joint mobilization, and mindfulness remain central. The chair simply replaces the mat as the primary physical support.
The style closest to chair yoga in philosophy is Iyengar yoga, which emphasizes precise alignment and uses props extensively to make poses accessible. Chair yoga takes that prop-use philosophy further, making the chair the structural foundation of the entire practice rather than a supplemental aid.
Chair yoga vs. floor yoga: key differences:
| Feature | Chair Yoga | Floor Yoga |
|---|---|---|
| Starting position | Seated | Standing or lying down |
| Fall risk | Very low | Low to moderate |
| Joint pressure on knees | Minimal | Moderate to high |
| Core engagement | Moderate | High |
| Balance requirements | Low | Moderate to high |
| Suitable for mobility issues | Yes | Depends on condition |
| Floor transition required | No | Yes |
| Equipment needed | Sturdy chair | Yoga mat |
Modification note: Practitioners who use a walker or wheelchair can adapt most chair yoga poses from their existing seated position. The key is spinal alignment. Sit at the front third of the seat rather than leaning back into a reclined position whenever possible.
Couch Yoga for Seniors Free: How to Practice Without a Chair
Couch yoga for seniors is a modification of seated yoga practice that uses the edge of a sofa or firm couch as a seated support instead of a rigid chair.
This matters because many people searching for chair yoga at home don’t have an armless, firm-seated chair available. They have a couch. A kitchen chair is the better option whenever possible, but a firm couch edge is a workable alternative for most upper-body and breathing poses.
The practical challenge with couch yoga is that soft seating changes your pelvic position. When you sit on a soft sofa, your hips tend to drop below your knees and your pelvis tilts backward into a posterior tilt. This rounds the lumbar spine, reduces core engagement, and makes spinal extension poses less effective and occasionally uncomfortable.
You can solve this with one adjustment. Sit at the very front edge of the couch cushion. Place a firm folded blanket or a firm pillow under your sitting bones to raise your hips slightly. Your knees should be at or just below hip level. This restores the neutral pelvic position you’d have in a firm chair.
Couch yoga position setup:
- Sit at the front edge of the cushion, not reclined into the back
- Place a folded blanket or firm pillow under your hips if they feel lower than your knees
- Both feet flat on the floor, hip-width apart
- Hands resting on thighs, palms down or up
- Spine tall, not locked or rigid
Poses that work well from a couch edge include seated spinal rotations, neck stretches, shoulder rolls, Garudasana (Eagle Pose) arm variations, seated Marjaryasana and Bitilasana (Cat-Cow Pose), and all breathing practices.
Modification note: Avoid deep forward folds from a couch position. The soft cushion behind your hips reduces stability during forward bending and may allow your pelvis to shift in ways that strain the lower back. Save those poses for a firm chair session.
Key Takeaway: You don’t need a perfect setup to start chair yoga. A firm couch edge with a folded blanket under your hips works for most upper-body and breathing poses. Start there and adjust as you build familiarity.
Chair Yoga Benefits for Seniors: What the Research Shows
Chair yoga offers seniors a documented range of physical and mental health benefits, including improved flexibility, better balance, reduced pain, and lower stress hormone levels, all without requiring floor-based movement.
The research base for chair yoga is more developed than most beginners realize. A study published in the Journal of Alternative and Complementary Medicine found that older adults who participated in chair yoga reported reduced pain interference, improved physical function, and better sleep quality compared to control groups after an eight-week program.
Balance improvement is one of the most clinically relevant benefits for seniors. The American College of Sports Medicine recommends balance training at least two to three times per week for adults over 65 to reduce fall risk. Chair yoga, practiced consistently, addresses multiple balance-relevant systems simultaneously: proprioception (your body’s sense of its own position), lower limb strength, and postural awareness.
A review published in Complementary Therapies in Medicine found that yoga-based interventions, including seated and chair-adapted practices, reduced self-reported pain and improved functional mobility in older adult populations across multiple studies. These outcomes were most consistent when practice frequency reached three or more sessions per week.
Chair yoga benefits at a glance:
| Benefit | Body System Involved | Research Source |
|---|---|---|
| Improved flexibility | Musculoskeletal | International Journal of Yoga |
| Reduced fall risk | Proprioceptive, vestibular | American College of Sports Medicine |
| Lower perceived pain | Central nervous system | Journal of Alternative and Complementary Medicine |
| Reduced stress and anxiety | Parasympathetic nervous system | Harvard T.H. Chan School of Public Health |
| Better sleep quality | Circadian and nervous system | Journal of Alternative and Complementary Medicine |
| Improved grip strength | Musculoskeletal | Complementary Therapies in Medicine |
Modification note: Seniors with cardiovascular conditions or who have recently had joint replacement surgery should receive medical clearance from the orthopedic or cardiac team managing their care before beginning any new movement program, including gentle chair yoga.
Chair Yoga for Arthritis: Gentle Movements for Stiff Joints
Chair yoga is one of the most joint-friendly movement practices available for people managing osteoarthritis or rheumatoid arthritis, because it allows controlled range-of-motion work without weight-bearing stress on inflamed joints.
The Arthritis Foundation specifically recommends low-impact movement practices like yoga and tai chi for people managing arthritis. Movement keeps synovial fluid circulating through the joints, which reduces stiffness. Stillness, by contrast, allows that fluid to stagnate and joints to stiffen further. Chair yoga provides gentle, controlled movement without the jarring impact of walking or the joint compression of floor-based exercise.
The best chair yoga poses for arthritic joints focus on slow, fluid range-of-motion work through the fingers, wrists, ankles, hips, and shoulders. Hold times should be shorter than in standard yoga, around 3 to 5 slow breaths, with gentle movement rather than static stretching into end range.
Best poses for arthritis by joint location:
| Joint Area | Recommended Chair Pose | What It Mobilizes |
|---|---|---|
| Fingers and wrists | Seated hand circles and fist releases | Interphalangeal joints, wrist flexion/extension |
| Shoulders | Seated shoulder rolls, Garudasana arms | Glenohumeral joint, scapular mobility |
| Hips | Seated hip circles, figure-four stretch | Hip joint, sacroiliac joint |
| Knees | Seated leg extensions, ankle pumps | Knee joint, tibial rotation |
| Spine | Seated Cat-Cow, gentle spinal rotation | Lumbar and thoracic vertebrae |
Modification note: On high-inflammation or flare days, skip range-of-motion work for affected joints entirely. Use those sessions for breathing practices and gentle neck releases only. Practicing through a flare can increase inflammation rather than reduce it.
Safety note: People managing rheumatoid arthritis who take immunosuppressive medications should be aware that their pain signals may be partially masked. Move slowly and rely on a range of motion that feels comfortable, not at the limit of what feels tolerable.
Chair Yoga for Back Pain: Poses That Support the Spine
Chair yoga for back pain works by gently mobilizing the spine through supported movement, strengthening the core muscles that stabilize the lumbar region, and reducing the muscular tension that often amplifies chronic pain.
Most people with back pain spend their days either sitting completely still (which tightens the erector spinae and hip flexors) or avoiding all movement out of fear. Neither helps. Think of the spinal muscles like a suspension bridge cable: they need gentle, repeated tension and release to stay functional. Complete rest weakens them. Chair yoga provides that middle ground.
A study published in the Spine Journal found that yoga-based interventions produced moderate improvement in lower back pain and function compared to usual care. Chair-adapted practices are particularly appropriate because they eliminate the spinal loading that occurs during standing poses and the lumbar strain that can occur during floor transitions.
The most effective chair yoga poses for back pain include seated Marjaryasana and Bitilasana (Cat-Cow Pose), gentle seated spinal twists, and Paschimottanasana (Seated Forward Bend) with a shallow hip hinge. All three mobilize the spine while the chair provides the postural support needed to keep movement controlled.
Spine safety in chair yoga for back pain:
- Keep both feet flat on the floor throughout all seated poses
- Initiate all forward bends from the hip joint, not the lumbar spine
- Avoid twisting past a comfortable range. Forcing a twist compresses spinal discs
- In spinal rotation, exhale into the twist and inhale to return to center
- Avoid deep backbends if you have diagnosed spinal stenosis or spondylolisthesis
Modification note: For people with active lumbar disc herniation, forward-folding poses should be kept very shallow (10 to 15 degrees of hip flexion) or replaced with seated spinal lengthening without any forward movement. A physical therapist familiar with your imaging can confirm which directions of movement are safe for your specific disc level.
Chair Yoga for Balance: Reducing Fall Risk Safely
Chair yoga improves balance in older adults by training the proprioceptive system, strengthening the stabilizing muscles of the hips and ankles, and improving postural awareness through repeated, mindful movement.
Falls are the leading cause of injury-related death in adults over 65 in the United States, according to the Centers for Disease Control and Prevention. Balance declines naturally with age due to reduced proprioceptive sensitivity, decreased lower limb strength, and slower neuromuscular response time. Chair yoga addresses all three of those factors within a low-risk, seated framework.
The chair provides a safety anchor during balance-challenging moments. Standing poses like Tadasana (Mountain Pose) practiced while holding the chair back, or single-leg weight shifts while seated, train the stabilizing muscles of the gluteus medius, tibialis anterior, and peroneals without the full fall risk of unsupported standing balance work.
Seated leg lifts, slow seated marching, and ankle circles are particularly effective. Each engages the postural chain from the ankle through the hip without requiring any unsupported balance.
Balance-training chair yoga progression:
| Level | Pose | Balance Challenge |
|---|---|---|
| Beginner | Seated ankle circles | Proprioception at ankle joint |
| Beginner | Seated marching in place | Hip flexor and core activation |
| Intermediate | Seated single-leg extension | Knee and hip stabilization |
| Intermediate | Chair-supported Tadasana | Full postural chain alignment |
| Advanced | Chair-supported single-leg stand | Unilateral lower limb balance |
Modification note: Anyone with a diagnosed vestibular disorder, including benign paroxysmal positional vertigo (BPPV), should avoid rapid head movements in chair yoga poses. Slow, controlled neck movements are appropriate. Work with a vestibular physical therapist for specific head-position guidance before adding balance-focused chair yoga to a routine.
Key Takeaway: Chair yoga is one of the few movement practices that simultaneously addresses fall risk, joint pain, and spinal mobility for seniors. Three sessions per week is where research consistently shows meaningful benefit.
Chair Yoga Poses for Beginners: Your First 8 Poses Step by Step
The best chair yoga poses for beginners focus on the spine, hips, shoulders, and breath, covering the major movement patterns the body needs without requiring flexibility, strength, or previous experience.
Start with a firm, armless chair. Sit at the front third of the seat so your thighs are not fully supported and your spine can lengthen freely. Both feet flat on the floor, hip-width apart.
Pose 1: Seated Tadasana (Mountain Pose)
To practice seated Tadasana:
- Sit at the front edge of your chair with feet flat, hip-width apart.
- Press both sitting bones evenly into the seat.
- Lengthen your spine upward from the base to the crown of your head.
- Roll your shoulders back and down, away from your ears.
- Rest hands on thighs. Breathe slowly for 5 full breath cycles.
Pose 2: Seated Marjaryasana and Bitilasana (Cat-Cow Pose)
To practice seated Cat-Cow:
- Place both hands on your knees, spine long.
- Inhale, lift your chest, arch your lower back gently (Cow).
- Exhale, round your spine, tuck your chin slightly toward your chest (Cat).
- Repeat this cycle 5 to 8 times, moving with your breath.
- Return to seated Tadasana to finish.
Pose 3: Seated spinal twist (Parivrtta Sukhasana, Easy Seated Twist)
To practice seated twist:
- Sit tall, both feet flat on the floor.
- Place your right hand on your left knee, left hand on the chair back or left hip.
- Inhale to lengthen your spine. Exhale to rotate left.
- Hold for 3 to 5 breaths, keeping the spine tall throughout.
- Inhale back to center. Repeat on the right side.
Remaining 5 poses overview:
| Pose | Sanskrit Name | Primary Target |
|---|---|---|
| Seated forward bend | Paschimottanasana (chair) | Hamstrings, lower back |
| Eagle arms | Garudasana arms | Shoulders, upper back |
| Seated figure four | Eka Pada Rajakapotasana (chair) | Hips, outer glutes |
| Seated leg extension | Modified Utthita Hasta Padangusthasana | Quadriceps, knee joint |
| Seated neck release | Parsva Balasana (chair adaptation) | Cervical spine, trapezius |
Modification note: In all seated poses, never force a range of motion. If a stretch creates sharp, shooting, or burning pain rather than a gentle tension, reduce the range immediately or skip that pose. Ease is individual and entirely body-dependent.
Chair Yoga Sequence for Beginners: A Free 20-Minute Routine
A complete free beginner chair yoga sequence includes a brief warm-up, a set of core seated poses, and a gentle cool-down, all designed to move every major joint through its comfortable range within 20 minutes.
This sequence requires no equipment beyond a sturdy chair. Practice in bare feet or non-slip socks for better foot contact with the floor. Remove any rolling wheels from your chair if it has them.
Free 20-minute beginner chair yoga sequence:
- Seated breathing warm-up (2 minutes): Sit in Tadasana. Take 10 slow, full breaths, counting 4 counts in and 6 counts out.
- Neck rolls (2 minutes): Slowly drop your right ear toward your right shoulder. Hold 3 breaths. Switch sides. Then slowly roll the chin toward the chest and back to neutral. Avoid full neck circles.
- Seated Cat-Cow (2 minutes): 8 slow cycles, linking movement to breath.
- Shoulder rolls (1 minute): 5 slow forward rolls, 5 slow backward rolls.
- Seated spinal twist (2 minutes): 3 to 5 breaths each side.
- Eagle arms, Garudasana (2 minutes): Hold each side for 5 breaths.
- Seated figure four (3 minutes): Hold each side for 5 to 8 slow breaths.
- Seated forward bend, Paschimottanasana (2 minutes): Hinge at the hips, hold for 5 breaths. Keep the spine long.
- Seated leg extensions (2 minutes): 8 slow extensions per leg, engaging the quadriceps.
- Closing seated breathing (2 minutes): Return to Tadasana. 10 slow breaths. Rest hands palm-up on thighs. Close the eyes if comfortable.
Modification note: Skip or shorten any pose that causes discomfort. This sequence is a framework, not a prescription. Practicing 10 minutes of this sequence consistently is more beneficial than forcing 20 minutes through pain.
Chair Yoga for Neck and Shoulders: Releasing Upper Body Tension
Chair yoga for the neck and shoulders targets the trapezius, levator scapulae, rhomboids, and posterior deltoid, releasing the chronic tension that builds from prolonged sitting, screen time, and stress-related muscle guarding.
Most adults carry significant tension through the upper trapezius. That muscle runs from the base of the skull down to the mid-back and across to the shoulder. When it chronically shortens, it pulls the cervical spine into compression and contributes to headaches, shoulder restriction, and poor posture.
According to research published in the International Journal of Yoga, regular yoga practice that includes shoulder and neck mobility work reduced self-reported neck pain and disability scores in office workers after an eight-week intervention. Chair yoga delivers the same movement patterns in a supported, accessible format.
Effective neck and shoulder chair yoga poses:
- Seated neck lateral flexion: Drop the right ear toward the right shoulder. Left hand rests on left thigh. Hold 3 to 5 breaths. Switch sides.
- Seated chin-to-chest stretch: Gently drop the chin toward the chest. Feel the stretch along the back of the neck (cervical extensors). Hold 3 breaths. Return slowly.
- Seated shoulder rolls: Roll the shoulders forward and upward in slow circles, then reverse. 5 rounds each direction.
- Garudasana arms (Eagle Pose arms): Cross the right elbow under the left at shoulder height. Lift the elbows slightly. Hold 5 breaths. Switch crossing direction.
- Seated chest opener: Interlace fingers behind the head. Gently draw elbows back. Open the chest and breathe into the front of the thorax. Hold 5 breaths.
Modification note: Anyone with a history of cervical disc herniation or cervical stenosis should avoid deep lateral neck flexion and forward chin drops. Keep neck movements small and controlled, moving only within a pain-free range. A physiatrist or cervical spine specialist can clarify safe movement directions for specific diagnoses.
Key Takeaway: Neck and shoulder tension is one of the most common physical complaints in older adults and sedentary beginners. Even 5 minutes of the moves above, done daily, can produce noticeable relief within two to three weeks.
Chair Yoga for Hips and Legs: Mobility from the Seat
Chair yoga for the hips and legs targets the hip flexors, hamstrings, gluteus medius, piriformis, and quadriceps, improving joint mobility and circulation in the lower body without requiring any floor work.
Long periods of sitting shorten the hip flexors dramatically. Think of those muscles like a rubber band that’s been held in a shortened position for eight or more hours. They don’t snap back automatically when you stand. Chair yoga uses hip mobilization and gentle stretching to restore length and functional range of motion gradually.
The hip joint has six primary movement directions: flexion, extension, abduction, adduction, internal rotation, and external rotation. A complete lower-body chair yoga session touches all six directions, which floor yoga also addresses but requires transitions that many beginners cannot perform safely.
Chair yoga lower body sequence:
- Seated hip circles: Sitting at the chair edge, place hands on knees. Slowly circle the hips clockwise for 5 rounds, then counterclockwise. This mobilizes the hip joint and warms the synovial fluid.
- Seated figure four, Eka Pada Rajakapotasana (chair): Cross the right ankle over the left knee. Sit tall. Hold 5 to 8 breaths, feeling the stretch in the outer right hip and piriformis.
- Seated hamstring stretch, Paschimottanasana (chair): Extend the right leg, heel on the floor. Hinge forward from the hip. Hold 5 breaths. Switch sides.
- Seated leg abduction: Widen both knees out to the sides. Hold 3 breaths. Return. Repeat 5 times.
- Seated ankle pumps and circles: Lift one foot slightly. Pump the ankle up and down 10 times. Circle in both directions 5 times. Switch feet.
Modification note: For people with hip replacement surgery, avoid crossing the leg over the knee (figure four) without clearance from their orthopedic surgeon, as this movement can exceed safe range-of-motion limits for some prosthetic placements.
Chair Yoga for Stress Relief: Calming the Nervous System
Chair yoga reduces stress by activating the parasympathetic nervous system, the body’s rest-and-digest mode, through slow breathing, mindful movement, and reduced physical tension in the muscles most associated with the stress response.
The stress response, managed by the sympathetic nervous system, tightens the shoulders and chest, shortens the breath, and increases the production of cortisol. Chair yoga works against all three of those patterns simultaneously.
According to the Harvard T.H. Chan School of Public Health, mind-body practices including yoga have been shown to reduce cortisol levels, lower blood pressure, and improve self-reported anxiety in older adult populations. The seated format removes performance pressure, which itself reduces psychological barriers to relaxation.
The most effective stress-relief chair yoga practices combine slow breathing (longer exhale than inhale) with gentle, rhythmic movement. The Cat-Cow cycle with a 4-count inhale and 6-count exhale is a simple and reliable example. The extended exhale specifically activates the vagus nerve, which directly stimulates parasympathetic activity.
Stress-relief chair yoga protocol:
- Begin seated in Tadasana with eyes closed or softly downcast
- Practice 5 minutes of slow breathing: 4 counts in, 6 counts out
- Follow with 5 minutes of slow Cat-Cow linked to this breath ratio
- Close with 5 minutes of seated stillness, hands resting palm-up on thighs
- Total time: 15 minutes. Practice this before bed or after a stressful event for best effect
Modification note: Practitioners with PTSD or a history of trauma may find extended stillness or closed-eye practice uncomfortable. Eyes-open, downward gaze is equally valid. Some individuals benefit from keeping their hands on their knees as a grounding anchor throughout the practice.
Chair Yoga Breathing Exercises: The Foundation of Every Practice
Chair yoga breathing exercises are breath-control techniques, called pranayama in Sanskrit, practiced from a seated position to regulate the nervous system, improve lung capacity, and prepare the mind and body for movement.
Breath is not a secondary feature of yoga. In traditional yoga philosophy, pranayama is considered the most direct tool for influencing the nervous system. Modern research supports this. A study published in the International Journal of Yoga found that slow, controlled breathing practices reduced resting heart rate and systolic blood pressure in older adult participants after six weeks of regular practice.
Three breathing techniques are particularly appropriate for chair yoga beginners.
Three beginner pranayama practices for chair yoga:
- Diaphragmatic breathing (belly breathing): Place one hand on the belly. Inhale slowly for 4 counts, allowing the belly to rise. Exhale for 6 counts, allowing it to fall. Repeat for 2 to 5 minutes. This is the safest starting breath for all populations.
- Ujjayi breath (Victorious Breath): Breathe in through the nose. Exhale through the nose with a slight constriction at the back of the throat, creating a soft ocean sound. This breath regulates pace and builds internal heat gently. Use this during any chair yoga movement sequence.
- Nadi Shodhana (Alternate Nostril Breathing): Close the right nostril with the right thumb. Inhale left for 4 counts. Close both nostrils. Exhale right for 8 counts. Inhale right for 4 counts. Close. Exhale left for 8 counts. This is one full cycle. Practice 5 cycles.
Modification note: People with chronic obstructive pulmonary disease (COPD), asthma, or other respiratory conditions should practice all breathing exercises with the guidance of a respiratory therapist or pulmonologist familiar with their lung function. Extended breath holds (kumbhaka) should be avoided by this group entirely.
Key Takeaway: Breathing is not a warm-up for chair yoga. It is the practice itself. Starting every session with 5 minutes of diaphragmatic breathing changes how your body and nervous system respond to the poses that follow.
Best Chair for Chair Yoga: Setup Tips for Home Practice
The best chair for chair yoga is a firm, armless, non-rolling chair with a flat seat that allows both feet to rest flat on the floor with hips at or slightly above knee height.
This matters more than beginners expect. The wrong chair creates the exact postural problems chair yoga is meant to address. A reclining chair tilts the pelvis backward, flattening the lumbar curve. A chair with arms limits shoulder and spinal rotation. A rolling chair creates instability during lateral movements.
Most standard dining chairs work well. The seat height should position your knees at approximately 90 degrees, with your thighs roughly parallel to the floor. If the chair is too high, your feet won’t reach the floor. Place a folded blanket under your feet to create a firm contact point.
Chair setup checklist for home practice:
- Seat height: hips at or slightly above knee level
- No armrests for upper body poses (or fold them down if adjustable)
- No wheels or casters
- Firm, flat seat surface (not padded or reclined)
- Chair placed on a non-slip surface, or a non-slip mat placed under chair legs
- Enough space behind the chair to extend arms backward without hitting a wall
- Enough space to each side for arm extensions
Place the chair on a non-slip yoga mat or rubber mat beneath all four legs. This prevents sliding during lateral movements and standing balance work at the chair back. A non-slip mat costs significantly less than an emergency room co-pay from a fall during practice.
Modification note: Practitioners who use a wheelchair can perform most seated chair yoga poses from their chair. Use the locked-wheel position for all seated poses. For poses requiring rotation, ensure the wheelchair is on a stable, level surface before beginning.
Chair Yoga Safety Tips: Who Should Modify and When to Stop
Chair yoga is one of the safest movement practices available for beginners and seniors, but “gentle” does not mean “without risk.” Knowing when to modify and when to stop is as important as knowing the poses themselves.
The primary safety risks in chair yoga are not dramatic injuries. They are gradual: practicing through pain rather than around it, using an unstable chair, moving the neck or spine beyond a comfortable range, or overheating during chair yoga practiced in a warm room.
The National Center for Complementary and Integrative Health notes that yoga-related adverse events are most commonly associated with improper technique rather than the practice itself. In chair yoga specifically, the most common issues are neck strain from forced lateral flexion and low back discomfort from uncontrolled forward bends.
When to stop a pose immediately:
- Sharp, shooting, or burning pain anywhere
- Dizziness or lightheadedness, particularly during head movements
- Numbness or tingling in the hands, arms, or legs
- Chest tightness or shortness of breath beyond normal exertion
- A sudden sensation of instability or the chair shifting
Who should modify or get medical guidance before starting:
| Condition | Recommended Modification |
|---|---|
| Severe osteoporosis | Avoid deep forward bends and spinal rounding |
| Recent hip replacement | Skip figure-four hip stretch until cleared by surgeon |
| Uncontrolled hypertension | Avoid inversions and breath holds; use gentle diaphragmatic breath |
| Active vertigo | No rapid head movements; slow neck work only |
| Post-stroke weakness | Work with a certified adaptive yoga teacher if possible |
| Severe COPD | Avoid pranayama breath holds; use natural breathing only |
Anyone managing a condition not listed here who is unsure whether chair yoga is appropriate should speak with the clinician currently managing that condition. Frame the conversation around specific movements you plan to practice rather than asking a general “is yoga safe” question. Specific questions yield specific, usable answers.
Frequently Asked Questions About Free Chair Yoga for Beginners
Is chair yoga good for seniors with limited mobility?
Chair yoga is well-suited for seniors with limited mobility because it eliminates floor transitions, minimizes fall risk, and adapts all poses to a stable seated position.
Research published in the Journal of Alternative and Complementary Medicine found measurable improvements in physical function, pain, and sleep quality in older adults after an eight-week chair yoga program.
Seniors with conditions like arthritis, post-surgical recovery, or balance disorders often find chair yoga more accessible than any other form of structured exercise.
Can you do chair yoga on a couch or sofa?
You can practice many chair yoga poses from the firm edge of a couch, though a rigid armless chair provides better postural support for the full range of poses.
Sit at the very front edge of the cushion and place a folded blanket under your hips if they drop below your knees, which helps restore neutral pelvic alignment.
Avoid deep forward bends from a couch, as the soft surface behind your hips reduces pelvic stability during those movements.
How long should a beginner do chair yoga each day?
Beginners can start with 10 to 15 minutes of chair yoga daily and increase to 20 to 30 minutes as comfort and familiarity grow.
Yoga teachers and physical therapists generally recommend consistency over duration: three to five short sessions per week produces better long-term results than one long weekly session.
The 20-minute free routine in this guide is a practical starting target for most beginners after one to two weeks of shorter practice.
What are the best chair yoga poses for arthritis?
The best chair yoga poses for arthritis are gentle, fluid range-of-motion movements rather than long static stretches held at end range.
Seated shoulder rolls, hand and wrist circles, seated Cat-Cow, and the seated figure-four hip stretch address the most commonly affected joints without loading them under body weight.
The Arthritis Foundation recommends low-impact movement daily; even 10 minutes of gentle seated mobility work helps circulate synovial fluid and reduce morning stiffness.
Do I need any equipment to start free chair yoga at home?
You need only a sturdy, armless, non-rolling chair to begin free chair yoga at home.
A non-slip mat placed under the chair legs adds an important safety layer, particularly on hardwood or tile floors.
Optional props like a folded blanket, a yoga strap, or a yoga block can make some poses more accessible but are not required to start practicing today.
Your Practice Starts Now
Chair yoga doesn’t require a perfect studio, a subscription, or a perfect body. It requires a chair, a few minutes, and the decision to begin.
Start with the 20-minute free sequence in this guide. Do it three times this week. Notice how your neck, hips, and breathing feel by day three compared to day one. That feedback is your teacher.
If one pose doesn’t work for your body, skip it. Return to the breath. The practice is the breath as much as it is the movement.