Bridge Pose Yoga: Complete Guide to Doing It Right in 2026
Bridge pose yoga, known in Sanskrit as Setu Bandha Sarvangasana, is a supine backbend that strengthens the glutes, hamstrings, and lower back while opening the chest and hip flexors. It is one of the most accessible and widely practiced poses in yoga, suitable for beginners and experienced practitioners alike.
The National Center for Complementary and Integrative Health (NCCIH) recognizes yoga as a practice with documented benefits for musculoskeletal health, stress reduction, and chronic pain management. Backbends like Bridge Pose are particularly noted for their role in countering the spinal flexion patterns most people accumulate from sitting all day.
This guide covers everything from the correct Sanskrit name and step-by-step technique to research-backed benefits, modifications for every body, safety guidance for people with back pain or neck issues, senior-specific adaptations, and a clear breakdown of when Bridge Pose ends and Wheel Pose begins.
What Is Bridge Pose Yoga?
Bridge pose yoga is a floor-based backbend where you lie on your back, bend your knees, plant your feet flat, and lift your hips toward the ceiling to create a diagonal line from shoulders to knees.
It belongs to the family of spinal extension poses, meaning the spine moves into a gentle backward arc. Unlike deeper backbends such as Urdhva Dhanurasana (Wheel Pose or Upward Bow Pose), Bridge Pose keeps the shoulders and upper back on the ground, making it more accessible and far less demanding on the wrists and shoulders.
The pose targets the posterior chain, which is the group of muscles running along the back of the body. Think of those muscles as a chain that, when strengthened, helps hold your skeleton upright without strain.
Bridge Pose appears across multiple yoga styles. In Hatha yoga, it is often held statically for several breath cycles. In Vinyasa yoga, it may be repeated dynamically. In Iyengar yoga, it is frequently practiced with props for precision and support. In Restorative yoga, it becomes a passive, prop-supported shape held for several minutes.
Pose Tip:
- Bridge Pose is not the same as a glute bridge in conventional fitness, though the movement looks similar.
- In yoga, the breath, alignment, and intention distinguish it from a purely strength-based exercise.
- Beginners should know that “accessible” does not mean effortless. Ease is individual and body-dependent.
Bridge in Yoga: Where It Fits in Your Practice
Bridge Pose sits at a useful intersection in any yoga practice: it is demanding enough to build real strength, yet gentle enough to serve as preparation for more advanced backbends.
In a typical Hatha yoga class, Bridge Pose appears in the middle or closing sections of a sequence, after the body has warmed up through standing poses. It is often paired with preparatory poses like Supta Baddha Konasana (Reclined Bound Angle Pose) or Ananda Balasana (Happy Baby Pose) to open the hips before lifting.
In Vinyasa flows, Bridge Pose can be done dynamically: lifting on the inhale, lowering on the exhale, for several repetitions before holding. This approach builds heat and glute endurance before the static version.
| Role in Practice | Style | How It’s Used |
|---|---|---|
| Strength builder | Vinyasa | Dynamic reps, then static hold |
| Alignment focus | Iyengar | Propped with block under sacrum or feet on wall |
| Passive recovery | Restorative | Bolster under sacrum, full body release |
| Backbend preparation | Hatha | Static hold, 5 to 8 breaths |
| Therapeutic support | Therapeutic yoga | Modified for back pain, with props and reduced range |
It also works well as a counterpoise after forward folds. After sitting in deep hip flexion, a gentle backbend helps restore balance to the lumbar region.
Bridge Pose Yoga Sanskrit Name: Setu Bandha Sarvangasana
Setu Bandha Sarvangasana (pronounced SAY-too BAHN-dah sar-van-GAHS-anna) is the full Sanskrit name for Bridge Pose in yoga. The name breaks down meaningfully: “Setu” means bridge, “Bandha” means lock or dam, and “Sarvangasana” relates to the whole body.
This etymology points to something real in the pose. The “lock” refers to the engaged, stable quality the body takes on when the hips are lifted and the muscles are working together. The bridge is literal: your body forms an arch between your feet and your shoulders, like a small stone bridge over a stream.
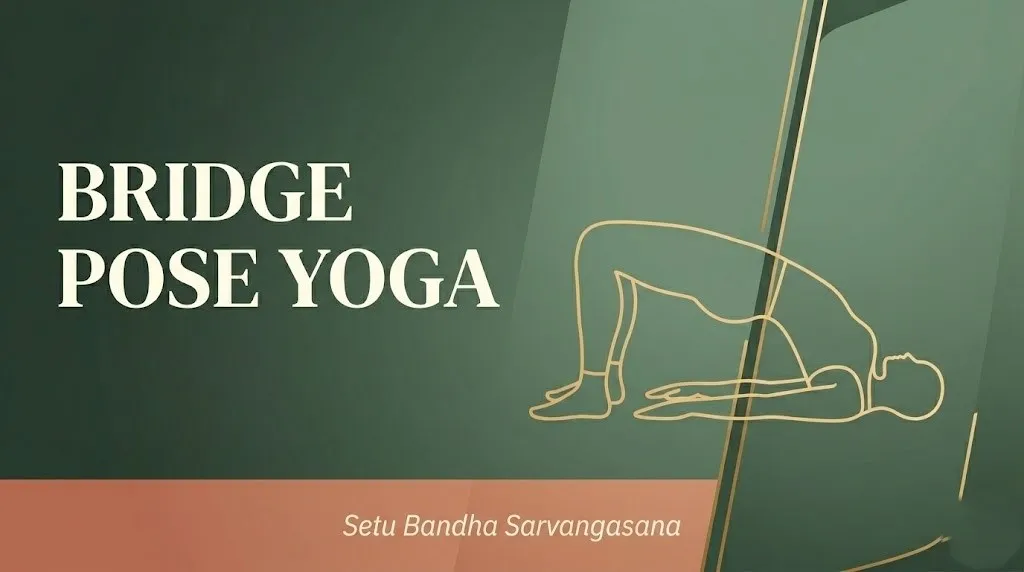
Some teachers and texts also call it Setu Bandhasana (a shorter version), dropping “Sarvangasana.” Both names refer to the same basic shape, though the longer version technically implies a fuller body engagement.
Understanding the Sanskrit name matters for more than memorization. In a mixed-level class, a teacher calling “come into Setu Bandha Sarvangasana” without the English translation is common. Knowing the name means you’re not looking around the room trying to figure out what everyone else is doing.
Pose Tip:
- The “bandha” in the name hints at an important technique cue: engage your inner thighs and pelvic floor subtly as you lift.
- This internal engagement stabilizes the sacroiliac joint and protects the lumbar spine.
- For beginners, simply squeezing a yoga block between the thighs mimics this engagement effectively.
How to Do Bridge Pose Yoga: Step-by-Step
Bridge Pose, Setu Bandha Sarvangasana, is performed from a supine position and requires no equipment, though a yoga mat and optional block help with alignment.
To practice Setu Bandha Sarvangasana:
- Lie on your back with your knees bent and feet flat on the mat, hip-width apart.
- Place your feet close enough that your fingertips can just graze your heels when your arms are extended alongside your body.
- Press your arms and palms flat into the mat beside you, fingers pointing toward your feet.
- On an inhale, press firmly through all four corners of both feet and lift your hips off the mat.
- Roll your shoulders slightly underneath you, broadening across the collarbones without straining the neck.
- Keep your thighs parallel. Your knees should track directly over your second and third toes.
- Engage your glutes and inner thighs. Avoid squeezing the glutes so hard that the lower back arches excessively.
- Hold for 5 to 8 breath cycles, roughly 30 to 60 seconds.
- On an exhale, slowly lower your spine to the mat, vertebra by vertebra, from the upper back down to the tailbone.
- Rest in Savasana (Corpse Pose) for 2 to 3 breaths before repeating.
Safety note in bold: Keep your head still. Do not turn your head left or right while your hips are lifted. This protects the cervical spine from compression.
Aim for 2 to 3 repetitions. As strength builds, extend the hold time gradually.
Bridge Pose Muscles Worked
Bridge Pose primarily works the gluteus maximus, hamstrings, and erector spinae, while simultaneously lengthening the hip flexors and activating the pelvic floor and core stabilizers.
The gluteus maximus is the primary mover here, responsible for lifting and holding the hips in extension. If you feel this pose mostly in your lower back rather than your glutes, your glutes may be underactivating, a very common pattern in people with desk-based jobs. Think of your glutes as the engine and your lower back as a passive passenger. When the engine works properly, the passenger just comes along for the ride.
The hamstrings work isometrically in the hold phase, keeping the knee joint stable as the hips rise. The erector spinae along the lumbar and thoracic spine support the extended position from behind.
Meanwhile, the iliopsoas and rectus femoris (the primary hip flexors) are placed under a gentle stretch. Over time, regularly practicing this pose may help counteract hip flexor tightness from prolonged sitting.
| Muscle Group | Role in Bridge Pose | Location |
|---|---|---|
| Gluteus maximus | Primary hip extensor, lifts the hips | Posterior hip/buttocks |
| Hamstrings | Stabilizes knee, assists hip extension | Posterior thigh |
| Erector spinae | Supports lumbar and thoracic extension | Along the spine |
| Iliopsoas | Stretched/lengthened | Anterior hip/thigh |
| Pelvic floor | Stabilizes the sacral base | Deep pelvis |
| Core stabilizers | Maintains neutral thoracic alignment | Abdomen and deep back |
Bridge Pose Benefits: What Research Actually Says
Bridge Pose offers documented benefits for spinal mobility, lower body strength, stress reduction, and nervous system regulation, with several of these outcomes supported by published research.
A study published in the International Journal of Yoga found that regular yoga practice, including backbend postures, was associated with measurable improvements in spinal flexibility and reduced markers of physical discomfort in sedentary adults. While this research examined yoga broadly, Bridge Pose was among the poses in those protocols.
The American College of Sports Medicine notes that functional strength training of the posterior chain (glutes and hamstrings) reduces injury risk and supports healthy movement patterns across daily activities. Bridge Pose directly trains this chain.
Research published in Complementary Therapies in Medicine has found that yoga practices activating the parasympathetic nervous system, which calming, restorative poses and gentle backbends support, are associated with lower self-reported stress and reduced cortisol levels.
Key benefits include:
- Glute and hamstring strength: Builds functional lower body power.
- Hip flexor lengthening: Counters the shortening effect of prolonged sitting.
- Spinal mobility: Encourages healthy thoracic and lumbar extension.
- Chest opening: Stretches the intercostal muscles and anterior shoulder girdle.
- Nervous system balance: Supports a shift from sympathetic (stress) to parasympathetic (rest) dominance.
- Pelvic floor activation: Engages deep stabilizing muscles supporting bladder and bowel health.
Note: Benefits are experienced individually. Results depend on consistency, overall health, and proper alignment.
Key Takeaway: Bridge Pose is not just a flexibility exercise. It trains functional posterior chain strength, opens the hip flexors, and supports nervous system balance, all from a position that most beginners can access on day one.
Is Bridge Pose Good for Back Pain?
Bridge Pose can be beneficial for certain types of lower back pain, particularly pain related to weak glutes, poor hip mobility, or prolonged sitting, but it is not appropriate for all back conditions.
The distinction matters. When the gluteus maximus is underactive, the lumbar spine often compensates by overworking. Strengthening the glutes through Bridge Pose can reduce that lumbar load. Physical therapists widely use glute bridge exercises for exactly this reason, and yoga’s version adds breathwork and mindful engagement to that foundation.
According to the NCCIH, yoga has been studied as a complementary approach for chronic low back pain, with multiple trials suggesting short-term improvements in pain and function. The 2017 clinical practice guidelines from the American College of Physicians included mind-body practices (including yoga) as first-line approaches for non-specific low back pain before medication.
However, Bridge Pose requires careful navigation for some people:
- Herniated or bulging discs: Spinal extension can increase pressure in certain disc positions. Anyone with a diagnosed disc issue should work with a physical therapist or experienced yoga therapist before attempting Bridge Pose.
- Spinal stenosis: Lumbar extension may worsen symptoms. A supported or very gentle version may be suitable; a narrower range of motion often helps.
- Sacroiliac (SI) joint dysfunction: Uneven loading in the pelvis can aggravate SI joint pain. Placing a block between the thighs and pressing evenly through both feet helps equalize pelvic load.
Modification for back pain: Reduce the height of the lift significantly. A two-inch hip lift with strong glute engagement often provides strength benefits without compressing the lumbar spine.
Bridge Pose for Beginners: Starting Points and What to Expect
Beginners can absolutely practice Bridge Pose from their very first yoga session, provided they understand the alignment basics and start with a modest range of motion.
The most common beginner error is lifting the hips as high as possible before establishing a stable foundation. A medium-height lift with strong foot press and active glutes is far more useful than a maximum lift with a wobbly, unsupported base.
Set realistic expectations for your first few weeks:
- Your hips may only lift a few inches. That is completely normal and still effective.
- You may feel the pose more in your lower back than your glutes initially. Focus on pressing your heels down and squeezing your inner thighs slightly.
- Tightness in the hip flexors may limit how high the hips can go comfortably.
According to Yoga Alliance, one of the most common instructor cues for beginners in Bridge Pose is to imagine “pressing the floor away” rather than “lifting up.” That mental cue shifts the work into the legs and glutes, where it belongs.
| Beginner Checklist | What to Do | Why It Matters |
|---|---|---|
| Foot placement | Hip-width, parallel, close to hips | Provides stable base |
| Knee tracking | Knees over second toe, not caving | Protects knee joints |
| Height of lift | Moderate, not maximum | Builds strength without strain |
| Head position | Neutral, do not turn | Protects cervical spine |
| Breath | Inhale to lift, exhale to hold | Supports safe spinal movement |
How to Use a Block in Bridge Pose
A yoga block placed between the thighs in Bridge Pose is one of the most effective alignment tools for teaching proper knee tracking, inner thigh engagement, and pelvic stability.
Squeeze the block gently but deliberately. You are not trying to crush it. You are activating the adductor muscles of the inner thigh, which keeps the knees from splaying outward and stabilizes the sacroiliac joint from below.
This application is especially useful for beginners who struggle to feel glute activation, or for practitioners with SI joint sensitivity where uneven hip loading causes discomfort.
The block also works at the sacrum in a different pose configuration. Placed horizontally under the sacrum (the flat triangular bone at the base of the spine) at a low or medium height, a block transforms Bridge Pose into a gentle supported backbend. This is distinct from the active version and is sometimes categorized under Restorative yoga.
To use a block between the thighs:
- Set up your Bridge Pose foundation as described in the step-by-step section.
- Place a yoga block lengthwise between your inner thighs, just above the knees.
- Before lifting, engage gently against the block to feel the inner thigh connection.
- Maintain that gentle squeeze throughout the lift and hold.
- Notice whether your lower back feels less compressed compared to without the block.
Modification: If squeezing a block feels uncomfortable due to knee issues, roll a blanket or small towel and hold it between the thighs instead.
Key Takeaway: A block between the thighs teaches the inner thigh engagement that most beginners can’t yet feel from verbal cues alone. It is a shortcut to better alignment that works immediately.
Bridge Pose Modifications for Every Body
Bridge Pose has a wide range of modifications that make it accessible for nearly everyone, from people with limited knee flexibility to those recovering from injury or working with significantly reduced range of motion.
The key principle is that the shape should fit the body, not the other way around. A flatter Bridge Pose with proper engagement is always more valuable than a high lift with compromised form.
| Modification | How to Do It | Best For |
|---|---|---|
| Reduced lift | Lift hips only 2 to 3 inches | Lower back sensitivity, beginners |
| Block between thighs | Squeeze gently, knees stable | SI joint issues, weak adductors |
| Feet elevated on chair | Feet on seat of chair, hips lifted | Hip flexor tightness, knee discomfort |
| Blanket under shoulders | Fold blanket under shoulder blades | Shoulder or neck discomfort |
| Wall-supported feet | Feet pressing into wall at knee height | Building leg strength with support |
| Arms overhead | Arms extended overhead rather than by sides | Shoulder opener variant, intermediate |
| Dynamic version | Slow lifts and lowerings, no static hold | Warming up, building endurance |
For practitioners with tight hamstrings, placing the feet slightly farther from the hips (while still keeping the knees bent) can reduce the hamstring pull that limits hip height.
Modification for limited knee flexion: If bending the knees to the standard position causes discomfort, try placing the feet further away, reducing the knee angle. The lift will be smaller but the essential mechanics remain.
Supported Bridge Pose: The Restorative Version
Supported Bridge Pose is a passive, prop-based version of Setu Bandha Sarvangasana where the hips rest on a block or bolster, allowing the body to release tension without muscular effort.
This is a fundamentally different experience from the active version. The muscles are not working to hold the hips up. Instead, the prop does that work, and the body sinks into a gentle backbend that decompresses the lumbar spine and opens the chest passively.
In Restorative yoga, Supported Bridge is often held for 3 to 10 minutes. The spine is supported in gentle extension, the hip flexors soften, and the nervous system receives a clear signal to downregulate. Research published in the Journal of Alternative and Complementary Medicine has found that Restorative yoga practices are associated with reduced anxiety and improved sleep quality in stressed adults.
To practice Supported Bridge Pose:
- Lie on your back with knees bent, feet flat.
- Lift the hips briefly and slide a yoga block under the sacrum at the lowest or medium height.
- Lower the sacrum onto the block. The block supports the pelvis, not the lumbar spine.
- Extend the legs if comfortable, or keep knees bent.
- Let the arms rest beside you or open them to a T-shape.
- Hold for 3 to 5 minutes. Breathe slowly and fully.
- To release, re-bend the knees, press into the feet, lift slightly, remove the block, then lower slowly.
Modification for neck discomfort: Place a folded blanket under the head and neck to maintain a neutral cervical curve during the hold.
Bridge Pose for Seniors: Safe Adaptations
Bridge Pose is well-suited for older adults when practiced with appropriate modifications, offering strength, mobility, and nervous system benefits that directly support healthy aging.
Gluteal weakness is common in older adults and is linked to fall risk, gait instability, and hip pain. Strengthening the glutes through accessible movements like Bridge Pose addresses a real functional need. The American College of Sports Medicine recommends lower body strengthening exercises for adults over 65, and Bridge Pose fits within that framework when introduced thoughtfully.
For seniors with osteoporosis, the spinal extension involved in Bridge Pose is generally considered safer than spinal flexion (rounding forward). However, individuals with osteoporosis should have a conversation with their managing clinician before beginning any new movement practice, particularly one involving the spine.
Senior-specific considerations:
- Range of motion: A smaller lift, 2 to 4 inches, is entirely sufficient. Forcing height is unnecessary.
- Foot sensitivity: Place a folded blanket under the feet if a hard floor creates discomfort.
- Getting up and down: Suggest rolling to one side first before rising from the floor. This reduces strain on the neck and lower back.
- Hold time: Shorter holds of 3 to 5 breaths are often more appropriate than longer ones.
- Chair-assisted version: Seniors who cannot comfortably lie on the floor can perform a seated version: sitting tall on a firm chair, pressing feet down, and engaging glutes to slightly tilt the pelvis forward and back. This trains the same muscles with zero floor work.
A 2022 review in Complementary Therapies in Medicine found that yoga-based interventions for older adults showed improvements in balance, lower limb strength, and self-reported quality of life, with backbend-inclusive protocols showing particular benefit for posture and spinal extension capacity.
Key Takeaway: For seniors, Bridge Pose is less about how high the hips go and more about consistent glute and posterior chain activation. A two-inch lift done correctly beats a maximum lift done wrong, every single time.
Bridge Pose Contraindications: Who Should Skip It or Go Carefully
Bridge Pose is contraindicated or requires significant modification for people with acute neck injuries, recent spinal surgery, uncontrolled blood pressure, or certain disc conditions.
This section addresses who needs caution, not to alarm anyone, but because knowing when to modify or skip a pose is genuine yoga knowledge.
Skip or significantly modify Bridge Pose if you have:
- Acute cervical (neck) injury or instability: The weight-bearing and spinal extension involved can stress an already-compromised neck. An experienced yoga therapist can suggest safer alternatives.
- Recent spinal surgery: Speak with your surgeon and physical therapist. Many spinal surgeries have specific movement restrictions during recovery.
- Uncontrolled hypertension: Some practitioners find that active backbends temporarily increase blood pressure. The Supported Bridge Pose is a gentler alternative that does not require sustained muscular effort.
- Severe lumbar disc herniation: Lumbar extension can worsen certain disc presentations. A very gentle, low-lift version may be possible, but assessment by a qualified health professional is appropriate first.
- Knee injuries: If deep knee flexion is painful, adjust foot placement to reduce the knee angle or practice the chair-based adaptation instead.
- Second and third trimester pregnancy: The supine position can compress the vena cava, reducing blood return to the heart. Prenatal-specific guidance from a certified prenatal yoga teacher is recommended.
One note on “contraindication” in yoga: This term does not always mean “never.” For most of the conditions above, the issue is the standard, unmodified form. A skilled teacher, yoga therapist, or physical therapist can often find a version that works safely. The goal is informed practice, not avoidance by default.
One-Legged Bridge Pose: Advancing Your Practice
One-Legged Bridge Pose, known in Sanskrit as Eka Pada Setu Bandha Sarvangasana (EK-ah PAH-dah SAY-too BAHN-dah), is an advanced variation where one leg extends straight toward the ceiling while the hips remain lifted and level.
This variation significantly increases the demand on the standing leg’s glutes and hamstrings, and introduces a balance challenge that requires core engagement to keep the pelvis from tilting. If the hips drop to one side when a leg lifts, the practitioner is not yet ready for this variation.
The key preparation question is simple: can you hold the standard Bridge Pose for 5 full breaths with the pelvis perfectly level and both glutes equally engaged? If the answer is yes, the one-legged version is a reasonable next step.
To practice Eka Pada Setu Bandha Sarvangasana:
- Begin in full Bridge Pose with hips lifted and stable.
- Take 2 breath cycles to establish an even, level pelvis.
- On an inhale, extend the right leg straight, parallel to the floor initially.
- On the next inhale, lift the right leg toward the ceiling, keeping it straight.
- Hold for 3 to 5 breaths. Keep both hip points at the same height.
- Lower the right foot back to the floor on an exhale.
- Rest for one breath, then repeat on the left side.
Modification: Instead of lifting the leg to full vertical, simply lift one foot one inch off the floor while keeping the hips level. This smaller challenge is appropriate for those building toward the full variation.
Caution: Any rotation, drop, or twist in the pelvis during this variation means the supporting hip is not yet strong enough. Return to the bilateral version and build more glute strength first.
Bridge Pose vs. Wheel Pose: When to Progress
Bridge Pose and Wheel Pose are both backbends, but they are structurally distinct: Bridge Pose is a supine, shoulder-supported backbend, while Wheel Pose (Urdhva Dhanurasana) is a full spinal extension where the entire body is lifted off the floor on hands and feet.
This is the question that many intermediate practitioners wrestle with: “Am I ready for Wheel?” The honest answer is that Bridge Pose readiness and Wheel Pose readiness require different benchmarks.
Bridge Pose requires glute strength, hip flexor flexibility, and a neutral cervical spine. Wheel Pose requires all of that, plus significant shoulder flexibility, wrist strength and mobility, thoracic spine extension, and the coordination to press weight through both the arms and legs simultaneously. Jumping from Bridge to Wheel without preparation risks shoulder impingement, wrist strain, or lumbar overcompression.
| Feature | Bridge Pose (Setu Bandha Sarvangasana) | Wheel Pose (Urdhva Dhanurasana) |
|---|---|---|
| Difficulty level | Beginner to intermediate | Intermediate to advanced |
| Weight bearing | Feet and shoulders | Feet and hands (wrists) |
| Spinal extension | Moderate, lumbar and thoracic | Full, cervical to lumbar |
| Shoulder requirement | Minimal | High flexibility and strength |
| Wrist requirement | None | Significant wrist extension needed |
| Neck position | Neutral, protected | Extended, can stress cervical spine |
| Who should attempt | Most practitioners | Those with adequate shoulder and thoracic mobility |
A useful readiness marker for Wheel Pose: standing with arms overhead, can you bring your biceps alongside your ears without your lower back arching significantly? If not, more thoracic extension and shoulder flexibility work in Bridge and preparatory poses is the right focus.
Intermediate bridge between Bridge and Wheel: Setu Bandha Sarvangasana with the hands interlaced under the body is a good preparatory step. It builds shoulder engagement without the demands of full weight-bearing on the hands.
Key Takeaway: Wheel Pose is not a “better” Bridge Pose. It is a fundamentally different pose with different demands. Bridge Pose, practiced with full engagement and good technique, is a complete backbend on its own terms.
Frequently Asked Questions About Bridge Pose Yoga
What does bridge pose do for your body?
Bridge pose strengthens the gluteus maximus, hamstrings, and erector spinae while stretching the hip flexors and chest.
It also activates the pelvic floor, supports spinal extension, and, in its restorative form, encourages parasympathetic nervous system activity.
Regular practice builds posterior chain strength and may help counter the physical effects of prolonged sitting.
How long should you hold bridge pose?
Beginners should hold Bridge Pose for 5 to 8 breath cycles, roughly 30 to 60 seconds.
In Restorative yoga, the supported version is often held for 3 to 10 minutes with a block or bolster under the sacrum.
Start at the shorter end and increase hold time gradually as your glute strength and spinal mobility improve.
Is bridge pose safe for people with lower back pain?
Bridge Pose may be helpful for lower back pain caused by weak glutes or hip flexor tightness, but it is not appropriate for all back conditions.
People with herniated discs, spinal stenosis, or recent spinal surgery should speak with a physical therapist or spine specialist before practicing this pose.
A reduced-height lift with a strong focus on glute activation is the safest starting point for anyone with back sensitivity.
What is the Sanskrit name for bridge pose in yoga?
The Sanskrit name for Bridge Pose is Setu Bandha Sarvangasana (SAY-too BAHN-dah sar-van-GAHS-anna).
“Setu” means bridge, “Bandha” means lock or dam, and “Sarvangasana” refers to the whole body.
A shorter version of the name, Setu Bandhasana, is also used in some traditions.
Can beginners do bridge pose yoga?
Yes, Bridge Pose is one of the most beginner-friendly backbends in yoga.
Most people can practice a modified version on their first day, starting with a low hip lift and focusing on pressing the feet firmly into the floor.
A yoga block between the thighs can help beginners feel the correct inner thigh and glute engagement right from the start.
Start Where You Are
Bridge Pose is one of the most practical poses in yoga. It builds real strength, opens tight hips, and teaches your body the kind of spinal extension that most people have lost from years of sitting and slouching.
Start with the basic version. Hold it for five breaths. Do it three times. Do that three times per week for a month before worrying about one-legged variations or progressions toward Wheel Pose.
If you need a block, use the block. If you need a bolster, use the bolster. The pose works when the body works in it, not when the shape looks a certain way from the outside.