Printable Chair Yoga for Seniors: Full 2026 Guide
A printable chair yoga for seniors plan gives you a clear, structured way to practice seated yoga safely at home, without needing a studio, a screen, or any prior yoga experience. This guide covers everything in one place: a full pose library, a 28-day progressive plan, breathing techniques, and specific safety guidance for common senior health conditions.
The Centers for Disease Control and Prevention reports that one in four adults over 65 falls each year, and that muscle weakness and poor balance are the leading contributing factors. Chair yoga directly addresses both. Research published in the International Journal of Yoga shows that regular chair-based yoga practice improves balance, flexibility, and lower-body strength in older adults within eight weeks of consistent practice.
This article walks you through what chair yoga is, how to structure a 28-day plan, which poses target which body systems, and what to modify if you have arthritis, osteoporosis, or balance challenges. You’ll also find a printable pose chart, breathing exercises, and specific hold-time recommendations you can follow independently.
Printable Chair Yoga for Seniors: What This Guide Covers
A printable chair yoga for seniors resource is most useful when it gives you the full picture, not just a list of poses. You need to know why each pose matters, how to do it correctly, how long to hold it, and when to skip it entirely.
This guide is organized so you can print any section and use it independently. The pose chart in the chair yoga chart section is formatted for home printing. The 28-day plan section gives you a week-by-week progression you can track on paper. The condition-specific sections are written so a caregiver or family member can read them alongside you.
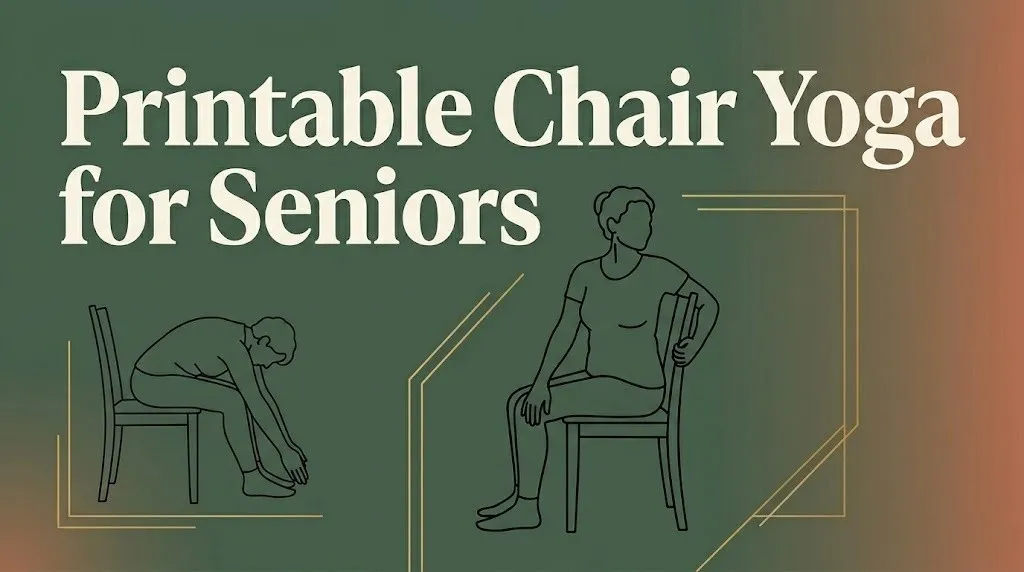
The chair yoga content here is grounded in adaptive yoga principles drawn from Iyengar yoga and Hatha yoga traditions, both of which emphasize precise alignment and the use of props to make poses accessible to every body type. Props matter enormously in chair yoga. A good chair is your most important tool. Choose an armless, straight-backed chair with a firm, flat seat. Avoid chairs with wheels. Place a non-slip mat under the chair legs for safety.
Pose Tip:
- Use a chair with a flat, firm seat, not a cushioned recliner
- Keep both feet flat on the floor unless a pose specifies otherwise
- Sit toward the front edge of the seat, not leaning against the back
What Is Chair Yoga and Who Is It For?
Chair yoga is a modified yoga practice performed while seated in a chair or using a chair for standing support, making it accessible to people who cannot safely practice on a floor mat. It draws on traditional yoga poses, breath work, and mindfulness but adapts the physical mechanics for seated or partially standing positions.
The practice is specifically appropriate for adults with limited mobility, joint pain, balance disorders, neurological conditions, or post-surgical restrictions. It is also a strong entry point for anyone over 60 who is new to yoga and understandably cautious about getting up and down from the floor.
According to the National Center for Complementary and Integrative Health (NCCIH), yoga is among the most commonly used complementary health approaches in the United States, and its use among adults over 50 has grown substantially. Chair yoga extends the benefits of traditional yoga to people who would otherwise be excluded by floor-based practice.
It is not a watered-down version of yoga. A well-structured chair yoga session works the spine, strengthens the core, opens the hips, stretches the shoulders, and trains breath awareness. Many traditional poses, including Ardha Matsyendrasana (seated Spinal Twist), Marjaryasana-Bitilasana (Cat-Cow Pose), and Gomukhasana arms (Cow Face Pose arms), translate fully and meaningfully to a seated format.
| Who Benefits Most | Why Chair Yoga Works for Them |
|---|---|
| Adults with arthritis | Low-impact movement lubricates joints without compressive loading |
| Seniors with balance concerns | The chair provides a stable grounding point during all poses |
| Post-surgical patients | Avoids the floor transitions that strain healing joints |
| Beginners over 60 | Removes the fear of falling that deters many from mat yoga |
| Adults with chronic low back pain | Seated postures can decompress the lumbar spine gently |
Free Printable Chair Yoga Exercises for Seniors: What to Include
The most useful free printable chair yoga exercises for seniors resource includes five key elements: the pose name in English, a brief description of the physical action, the muscles or body areas targeted, a hold-time recommendation, and at least one modification.
Most printable resources online skip the muscle targeting and hold-time guidance entirely. That omission matters. Knowing that seated Tadasana (Mountain Pose) works your erector spinae and transverse abdominis helps you understand why sitting tall is not passive. It is active work. That context motivates you to do the pose with intention rather than just sitting in a chair.
A well-designed printable chair yoga chart for home use should include:
- Pose name (English and Sanskrit on first encounter)
- Starting position (where hands, feet, and spine should be)
- The movement or hold (what you do physically)
- Hold time (in breath counts or seconds)
- Modification (what to do if the full version is uncomfortable)
- Target area (neck, shoulders, lower back, hips, or core)
| Pose | Target Area | Hold Time | Beginner Modification |
|---|---|---|---|
| Seated Mountain (Tadasana) | Spine, core | 5 breaths | Rest hands on thighs |
| Seated Cat-Cow (Marjaryasana-Bitilasana) | Thoracic spine | 5 repetitions | Reduce range of motion |
| Seated Forward Fold (Paschimottanasana variation) | Hamstrings, lower back | 30 seconds | Fold only halfway |
| Seated Spinal Twist (Ardha Matsyendrasana) | Thoracic spine, obliques | 5 breaths per side | Rest hand on opposite thigh |
| Seated Tree (Vrikshasana variation) | Hip abductors, core | 5 breaths per side | Keep foot at ankle level |
| Cow Face Arms (Gomukhasana arms) | Shoulders, rotator cuff | 5 breaths per side | Use a strap between hands |
| Seated Forward Warrior (Virabhadrasana variation) | Hips, quadriceps | 5 breaths | Reduce the reach of the arms |
Key Takeaway: A printable chair yoga plan works best when it includes hold times, muscle targets, and modifications alongside the pose name, not just a picture and a label.
28 Day Chair Yoga for Seniors: How to Structure the Plan
A 28 day chair yoga for seniors plan should build progressively, starting with foundational poses in week one and adding complexity, hold duration, and breathing integration over the following three weeks. Jumping into advanced poses on day one is the most common reason people quit.
The structure below is organized so that each week has a clear focus. Week one is about orientation: learning your chair, your breath, and four to five foundational poses. Week two adds the upper body. Week three adds lower body and hip work. Week four integrates all elements into flowing, longer sequences.
Week-by-Week Plan:
| Week | Focus | Daily Practice Time | New Elements Added |
|---|---|---|---|
| Week 1 (Days 1-7) | Foundation and breath | 10 minutes | Seated Mountain, Cat-Cow, basic breath awareness |
| Week 2 (Days 8-14) | Upper body and shoulders | 15 minutes | Cow Face Arms, seated twist, neck stretches |
| Week 3 (Days 15-21) | Lower body and hips | 20 minutes | Seated forward fold, seated Tree, ankle circles |
| Week 4 (Days 22-28) | Integration and flow | 20 to 25 minutes | Full sequence linking poses with breath |
A study published in Complementary Therapies in Medicine found that yoga programs lasting four weeks or more produced measurable improvements in balance and functional mobility in older adults. Eight to twelve minutes of daily practice was enough to show benefit. You do not need a long session. You need a consistent one.
Days six and seven of each week are rest or gentle review days. Use them to revisit poses that felt unclear, practice breathing exercises only, or simply observe how your body has changed since day one. Progress in chair yoga often shows up as subtle shifts: less morning stiffness, easier breathing, steadier standing from a seated position.
Pose Tip:
- Track each day on a printed calendar or check-off sheet
- Keep your chair in a consistent spot as a visual cue to practice
- If you miss a day, pick up where you left off rather than restarting
Chair Yoga Chart for Beginners: A Visual Reference Guide
A chair yoga chart for beginners is a one-page or two-page reference that shows each pose in sequence, with brief instructions and a hold time clearly visible at a glance. Think of it as the cue card version of your practice. You glance at it, do the pose, move on.
The most printable format places poses in a grid: three to four columns, four to six rows, with a small illustration space, the pose name, and hold time in each cell. If you are creating or printing one at home, landscape orientation on a standard 8.5 x 11 sheet works best.
Here is a reference-style quick chart you can use to organize your own printable:
| # | Pose (English) | Sanskrit Name | Hold | Notes |
|---|---|---|---|---|
| 1 | Seated Mountain | Tadasana | 5 breaths | Feet flat, spine tall |
| 2 | Cat-Cow (seated) | Marjaryasana-Bitilasana | 5 rounds | Inhale = Cow, Exhale = Cat |
| 3 | Seated Forward Fold | Paschimottanasana variation | 30 sec | Hinge from hips, not waist |
| 4 | Spinal Twist (right) | Ardha Matsyendrasana | 5 breaths | Rotate from mid-back |
| 5 | Spinal Twist (left) | Ardha Matsyendrasana | 5 breaths | Equal time both sides |
| 6 | Cow Face Arms | Gomukhasana arms | 5 breaths per side | Use strap if needed |
| 7 | Seated Tree (right) | Vrikshasana variation | 5 breaths | Foot at ankle or calf |
| 8 | Seated Tree (left) | Vrikshasana variation | 5 breaths | Hands on thighs for balance |
| 9 | Neck Rolls | Sukhasana variation | 3 per side | Slow and pain-free only |
| 10 | Seated Savasana | Savasana variation | 2 minutes | Eyes closed, breath natural |
For seniors new to yoga, completing this chart in order three to four times per week is a complete starting practice. The full sequence takes approximately twelve to fifteen minutes.
Chair Yoga Workout: A Complete Seated Sequence
A chair yoga workout is a linked sequence of poses practiced with breath awareness and intentional transitions between postures. This is distinct from a collection of isolated stretches. The difference is continuity: you breathe through each movement, and one pose prepares you for the next.
The sequence below is a complete beginner-appropriate chair yoga workout. It takes approximately fifteen to twenty minutes and works the full body from neck to ankles.
To practice this seated sequence:
- Sit at the front edge of your chair. Feet are flat on the floor, hip-width apart.
- Rest hands on thighs. Close or soften your eyes. Take 3 slow, natural breaths to arrive.
- Inhale to lengthen your spine into seated Tadasana (Mountain Pose). Hold for 5 breaths.
- Place hands on knees. Inhale and arch the spine, lifting the chest: Bitilasana (Cow Pose). Exhale and round the spine, dropping the chin: Marjaryasana (Cat Pose). Repeat 5 times.
- Inhale to sit tall. Exhale and twist to the right, placing your left hand on your right knee and your right hand behind you on the chair seat: Ardha Matsyendrasana (Spinal Twist), right side. Hold 5 breaths. Return to center. Repeat left.
- Inhale to lengthen the spine. Exhale and hinge forward from the hips, reaching hands toward the floor: Paschimottanasana variation (Seated Forward Fold). Hold 30 seconds. Inhale to come back up.
- Reach your right arm overhead and bend it at the elbow. Bring the left arm behind the back. Reach toward each other: Gomukhasana arms (Cow Face Pose arms). Hold 5 breaths. Use a strap if hands do not reach. Switch sides.
- Place your right foot at your left ankle, letting the right knee open to the side: Vrikshasana variation (seated Tree Pose). Hold 5 breaths. Switch sides.
- Extend both legs, flex feet, and circle ankles: 5 circles each direction.
- Return to seated Tadasana. Close with 5 slow, full breaths. Rest hands palms-up in your lap for 2 minutes of seated Savasana (Relaxation Pose).
Modification for limited shoulder mobility: In step 7, simply extend both arms overhead instead of bending them. This still opens the shoulder girdle without the rotator cuff challenge.
Free Chair Yoga Exercises for Balance and Fall Prevention
Chair yoga exercises specifically aimed at balance and fall prevention target the hip abductors, glutes, ankle stabilizers, and core muscles that control postural steadiness during everyday movement.
The CDC reports that falls are the leading cause of both fatal and non-fatal injuries among adults over 65. Reduced balance is largely a neuromuscular issue: the muscles that stabilize the ankle, knee, and hip weaken with age if they are not regularly challenged. Chair yoga addresses this through single-leg holds, lateral hip work, and ankle mobility exercises, all done with the chair as a safety support.
Key balance-focused chair yoga exercises include:
- Seated Vrikshasana (Tree Pose variation): Lifts one foot from the floor, loading the standing-side hip abductors and glutes. The chair prevents falling while the muscles do real work.
- Ankle circles: Simple but research-supported. Strong, mobile ankles are the first line of defense against falls. Circle each ankle 5 times in each direction.
- Seated Marching: Alternately lift each knee toward the chest while sitting tall. This trains hip flexor strength and proprioception simultaneously.
- Heel-to-toe raises: With hands on the chair back for support, rise onto the balls of the feet, then lower. This builds calf strength and ankle control.
- Side leg lifts (standing, chair-supported): Holding the chair back, lift one leg to the side. This directly trains the gluteus medius, the muscle most responsible for preventing lateral instability during walking.
A study published in Topics in Geriatric Rehabilitation found that chair-based exercise programs reduced fall risk by improving dynamic balance scores in community-dwelling older adults. Four weeks of twice-weekly practice produced measurable improvements.
Key Takeaway: Balance training in chair yoga is not just about doing yoga well. It is about building the hip, ankle, and core strength that prevents real-world falls on stairs, sidewalks, and in kitchens.
Chair Yoga for Arthritis and Joint Pain
Chair yoga is one of the most appropriate forms of movement for adults managing osteoarthritis or rheumatoid arthritis, because it loads joints through gentle, non-compressive movement rather than high-impact stress.
The American College of Sports Medicine recommends low-impact movement for adults with arthritis specifically because joint cartilage receives its nutrients through movement. Joints that do not move regularly become stiffer, more painful, and more prone to deterioration. Chair yoga provides exactly the type of slow, controlled, repeated range-of-motion work that keeps joints healthy.
Poses that benefit arthritic joints directly:
- Seated Cat-Cow (Marjaryasana-Bitilasana): Moves the spine through flexion and extension, lubricating the facet joints of the thoracic and lumbar spine.
- Ankle and wrist circles: Mobilize joints often stiffened by arthritis with zero load.
- Seated finger spreads and fist releases: Specifically useful for rheumatoid arthritis affecting the hands.
- Gentle neck rolls in Sukhasana (Easy Pose) seated: Reduces cervical spine stiffness common in arthritis.
Safety note: On days when a joint is actively inflamed, swollen, or hot to the touch, skip the movements involving that joint entirely. Gentle breathing exercises are appropriate even on high-pain days. When you have rheumatoid arthritis and your doctor has you on disease-modifying medications, confirm with your prescribing physician whether any movements affect your monitored joints before beginning a new routine.
Modification: For swollen finger joints, skip Gomukhasana arms and substitute a simple shoulder shrug and release. The shoulder work is preserved without stressing the hands.
Chair Yoga for Osteoporosis: What to Modify and What to Avoid
Osteoporosis changes the safety rules for yoga in specific ways, and most printable chair yoga resources fail to address this at all. Bones with reduced density are at higher fracture risk under compressive loading, deep forward bends, and strong twisting forces.
According to the National Osteoporosis Foundation (now Bone Health and Osteoporosis Foundation), spinal flexion exercises, meaning poses that round the upper back forward under load, carry a fracture risk for vertebrae already weakened by osteoporosis. Deep forward folds performed with trunk weight are the primary concern.
Avoid or modify these poses with osteoporosis:
- Deep seated Forward Fold (Paschimottanasana variation): Modify by folding only 20 to 30 percent forward, keeping the spine in neutral rather than rounding.
- Strong Spinal Twists: Reduce the rotation range and avoid using the arm as a lever. Rotate from the mid-back only, with the movement slow and pain-free.
- Poses involving rapid, jerky transitions: Bone with reduced density is more vulnerable during sudden loading changes.
Well-tolerated and beneficial poses for osteoporosis:
- Seated Tadasana (Mountain Pose): Spinal extension work is safe and beneficial. Tall, lengthened posture strengthens the postural muscles that protect the vertebral column.
- Gentle Cat-Cow (Marjaryasana-Bitilasana): Safe when the range is small and controlled.
- Wall-supported standing poses: Moderate weight-bearing through the legs is actually bone-building. Standing briefly behind the chair with hands on the chair back provides this benefit.
Pose Tip:
- Keep all spinal movements slow and in a pain-free range
- Skip deep forward folds; substitute a gentle chest lift instead
- Weight-bearing on the legs is encouraged; spinal compression or rounding is not
Chair Yoga for Flexibility and Range of Motion
Chair yoga improves flexibility and range of motion by taking joints and muscles through their available movement range in a sustained, controlled way, which gradually encourages tissue lengthening over time.
Think of tight hip flexors like a bungee cord that has been held shortened for years of sitting. One stretch does not reset years of adaptation. Repeated, held stretches over weeks do. A 2019 study published in the International Journal of Yoga found that eight weeks of yoga practice produced measurable improvements in hamstring flexibility and spinal range of motion in older adults.
The most effective chair yoga poses for flexibility:
- Seated Paschimottanasana variation (Forward Fold): Stretches the hamstrings and lower back. Hinge from the hips rather than rounding the spine.
- Gomukhasana arms (Cow Face Pose arms): Opens the shoulder joint and stretches the triceps, pectoralis minor, and rotator cuff muscles.
- Seated Ardha Matsyendrasana (Spinal Twist): Improves thoracic rotation, which stiffens significantly with age and contributes to difficulty looking over your shoulder while driving.
- Seated hip flexor stretch: Sit toward the front of the chair. Slide one foot back so the leg extends behind you. Keep the spine tall. This lengthens the iliopsoas, which shortens with prolonged sitting.
Hold each stretch for 30 to 60 seconds to allow the nervous system to release its protective tension in the muscle. Shorter holds, under 20 seconds, do not produce lasting flexibility changes in older tissue.
Modification for very stiff hamstrings: In the forward fold, loop a yoga strap around the soles of the feet and hold the strap rather than reaching toward the floor. This keeps the spine neutral and the stretch effective.
Key Takeaway: Flexibility gains from chair yoga require holds of at least 30 seconds and consistency over multiple weeks. A single session does not change tissue length. A consistent month does.
Chair Yoga for Weight Loss and Circulation
Chair yoga supports weight management and circulation primarily through improved metabolic function, reduced cortisol, and increased muscle engagement, rather than through high calorie burn during the session itself. Setting realistic expectations here matters.
A 30-minute gentle yoga session burns approximately 90 to 150 calories for a 155-pound person, according to general exercise science estimates aligned with American College of Sports Medicine metabolic equivalency tables. That is less than brisk walking. But the indirect effects of regular yoga practice on weight management are better documented than the direct calorie math.
Research published in the Journal of Alternative and Complementary Medicine found that regular yoga practice was associated with reduced cortisol levels, and chronically elevated cortisol is directly linked to visceral fat accumulation, particularly around the abdomen. For sedentary older adults, any consistent, enjoyable movement also tends to support better food choices and sleep quality, both of which influence body composition.
Chair yoga’s circulation benefits are more direct:
- Ankle circles and leg pumps: Activate the calf muscle pump, which drives venous blood return from the lower extremities. This is especially relevant for seniors with edema or who sit for long periods.
- Seated twists: Massage the abdominal organs and support digestive motility.
- Breath work: Deep diaphragmatic breathing increases intra-abdominal pressure rhythmically, which supports lymphatic circulation.
Modification for adults with edema or circulation concerns: Practice ankle circles and leg pumps first in your sequence before moving into static poses. Elevate legs briefly afterward if swelling is a concern, and discuss any new movement routine with the physician managing your circulation treatment.
Chair Yoga Breathing Exercises for Seniors
Breathing exercises in chair yoga are not a warm-up filler. They are a physiologically distinct practice with documented effects on the autonomic nervous system, blood pressure, and anxiety.
The NCCIH notes that yoga breathing techniques, collectively called pranayama, activate the parasympathetic nervous system, which counteracts the chronic stress response common in older adults managing health conditions, isolation, or pain. Just five minutes of slow, intentional breathing has been shown to reduce systolic blood pressure in short-term studies.
Three breath practices particularly suited to chair yoga for seniors:
- Diaphragmatic breathing (belly breathing): Sit in seated Tadasana (Mountain Pose). Place one hand on the belly. Inhale slowly through the nose, allowing the belly to expand outward. Exhale slowly, letting the belly fall. Inhale count of 4, exhale count of 6. Repeat 8 to 10 cycles.
- Ujjayi breath (victorious breath): Breathe in and out through the nose with a slight constriction at the back of the throat, creating a soft ocean-wave sound. This breath anchors attention, reduces mental chatter, and regulates the pace of movement in a yoga sequence.
- Nadi Shodhana (alternate nostril breathing): Use the right hand. Close the right nostril with the right thumb. Inhale left. Close the left nostril with the ring finger. Open and exhale right. Inhale right. Close right. Open and exhale left. That is one round. Practice 5 to 8 rounds. Avoid this technique if you have severe nasal congestion or breathing difficulties.
Safety note: Seniors with COPD, emphysema, or asthma should not practice breath retention or forced breathing techniques without guidance from their managing pulmonologist.
Chair Yoga Upper Body and Core Exercises
Chair yoga’s upper body and core work is frequently underestimated. Many people assume seated yoga is purely about leg stretching. In practice, a well-designed seated sequence challenges the shoulders, arms, chest, and deep abdominal muscles meaningfully.
The erector spinae, multifidus, and transverse abdominis all engage during seated posture work. These are the muscles that keep you upright without back pain. Sarcopenia, the age-related loss of muscle mass, affects these postural muscles significantly. Chair yoga does not reverse sarcopenia alone, but it maintains the neuromuscular control and range of motion that allows strength training to be safe and effective.
Upper body and core exercises from the chair yoga framework:
- Seated arm raises (Virabhadrasana arm variation): Raise both arms overhead on the inhale. Lower on the exhale. This trains the shoulder stabilizers and challenges the core to keep the spine from arching excessively.
- Gomukhasana arms (Cow Face Pose arms): As detailed earlier, this works the rotator cuff, triceps, and pectoralis minor simultaneously.
- Seated core engagement: On the exhale, gently draw the navel toward the spine without holding the breath. Hold 3 to 5 seconds. Release fully on the inhale. Repeat 10 times. This is an introduction to mula bandha principles without requiring traditional floor practice.
- Shoulder rolls: 5 forward, 5 backward. Releases tension in the upper trapezius and relieves cervical spine compression common in adults who use smartphones and computers.
Modification for post-mastectomy or shoulder surgery: Skip overhead arm raises and substitute gentle shoulder circles at a lower height. Discuss with your physical therapist which shoulder movements have been cleared before beginning any overhead work.
Key Takeaway: Upper body and core chair yoga work preserves the postural muscles that prevent back pain and the shoulder stability that makes everyday lifting safe, not just flexibility you only need on a yoga mat.
Chair Yoga Hip and Lower Body Stretches
Hip and lower body chair yoga stretches target the hip flexors, quadriceps, hamstrings, hip abductors, and the muscles of the lower leg, all of which are critical for walking, stair climbing, and safe rising from a seated position.
The iliopsoas (hip flexor complex) shortens in anyone who sits for multiple hours per day. In seniors, this contributes to anterior pelvic tilt, low back pain, and a shortened walking stride. Chair yoga addresses this without requiring the prone or kneeling positions that make hip flexor stretching difficult for people with knee or floor mobility limitations.
Lower body and hip stretches for the chair:
- Seated hip flexor stretch: Slide one foot back, keeping the ball of the foot on the floor behind you. Sit tall and feel the lengthening along the front of the hip and thigh. Hold 30 to 45 seconds per side.
- Seated figure-four stretch (Pigeon Pose variation): Cross the right ankle over the left thigh, just above the knee. Keep the right foot flexed to protect the knee. Sit tall or hinge gently forward to increase the hip stretch. This targets the piriformis and external hip rotators, common sources of sciatic pain in older adults. Hold 30 to 60 seconds per side.
- Seated Paschimottanasana (Forward Fold): Targets the hamstrings and lumbar fascia.
- Ankle circles and foot flexion-extension: Maintains ankle mobility and activates the calf muscles for venous circulation support.
Safety note: The figure-four stretch is contraindicated for anyone within the first 3 to 6 months of a total hip replacement. Confirm with your orthopedic surgeon which hip movements are cleared before practicing any hip-opening pose post-surgery.
Modification for tight hips: In the figure-four stretch, place a folded blanket under the crossed thigh for support. This reduces the depth of the stretch while keeping the alignment correct.
How Long to Hold Chair Yoga Poses and How Often to Practice
The optimal hold time for chair yoga poses depends on the goal: flexibility, strength, balance, or stress reduction, and each goal has a different time recommendation backed by movement science.
Yoga teachers and physical therapists generally recommend the following hold times based on purpose:
| Goal | Hold Duration | Repetitions | Notes |
|---|---|---|---|
| Flexibility and tissue lengthening | 30 to 60 seconds | 1 to 2 per side | Muscle must be fully relaxed to lengthen |
| Balance training | 5 to 10 breath cycles | 2 to 3 per side | Challenge increases as hold extends |
| Strength building | 5 to 8 breath cycles with active muscle engagement | 2 to 3 sets | Core and hip work especially |
| Stress reduction and breath focus | 2 to 5 minutes | 1 per pose | Restorative yoga principles applied to seated format |
| Warm-up and spinal mobility | 5 dynamic repetitions | 1 set | Cat-Cow, shoulder rolls, ankle circles |
For frequency, research published in Complementary Therapies in Medicine supports three to four sessions per week for meaningful improvement in flexibility and balance in older adults. Daily practice of ten to fifteen minutes also shows benefit, particularly for stress and sleep quality outcomes.
The American College of Sports Medicine recommends that older adults engage in flexibility exercise at least two to three days per week. Chair yoga qualifies as flexibility and balance training, and at moderate intensities, it also counts toward light aerobic activity goals.
A practical starting point: three sessions per week of fifteen minutes each, using the sequence from the chair yoga workout section. Add five minutes per session every two weeks as your stamina and comfort grow. By week four, you will be ready for the full twenty-five-minute integration sequence from the 28-day plan.
Key Takeaway: Hold poses for at least 30 seconds if flexibility is your goal, and practice at least three days per week to see real changes. Brief sessions done regularly beat long sessions done occasionally.
Frequently Asked Questions About Chair Yoga for Seniors
Is chair yoga effective for seniors who have never done yoga before?
Chair yoga is one of the most appropriate starting points for seniors with zero yoga experience.
It removes the floor transitions, balance demands, and flexibility prerequisites that make mat yoga intimidating for beginners.
Most people can complete a basic 10 to 15 minute chair yoga sequence safely on their first day with proper instruction.
What do you need to practice chair yoga at home?
You need an armless, straight-backed chair with a firm seat, placed on a non-slip surface.
A yoga strap is useful for shoulder and hamstring poses, and a folded blanket can support the hips if the seat is hard.
No mat, no special clothing, and no prior yoga experience is required to begin.
Can chair yoga help with balance and preventing falls in older adults?
Yes, chair yoga directly trains the muscles and neural pathways that control balance, including the hip abductors, ankle stabilizers, and core.
The CDC identifies muscle weakness and poor balance as primary fall risk factors in adults over 65, and chair-based balance exercises address both.
Research in Topics in Geriatric Rehabilitation found measurable fall-risk reduction after four weeks of chair-based exercise practice.
How many days a week should seniors do chair yoga?
Three to four days per week is the evidence-supported recommendation for balance and flexibility improvement.
The American College of Sports Medicine recommends older adults do flexibility training at least two to three days per week, and chair yoga meets that standard.
Even two sessions per week produces benefit over time if done consistently and progressively.
Are there any poses seniors with osteoporosis should avoid in chair yoga?
Yes, deep forward folds that round the spine, strong spinal twists used as levers, and any jerky or rapid transitions should be avoided or significantly modified.
The Bone Health and Osteoporosis Foundation advises against spinal flexion exercises under load for people with vertebral fracture risk.
Safe alternatives include gentle Cat-Cow with small range of motion, seated Mountain Pose for postural strength, and standing leg work using the chair back for support.
Start Simple, Stay Consistent
Print the pose chart from this guide. Set your chair in the same spot every time you practice. That repetition becomes its own cue.
Start with the ten-pose beginner chart three times this week. Do not aim for perfect form on day one. Aim to finish the sequence with your breath steady and your body feeling less stiff than when you started. That is the real measure of a good session.
Chair yoga compounds. What feels effortful in week one feels natural by week four. The 28-day plan exists because four weeks is genuinely enough time to notice a difference in your balance, your morning stiffness, and your ability to move through your day with less effort.