Yoga Push Up Guide: Form, Muscles, and Modifications 2026
The yoga push up, known in Sanskrit as Chaturanga Dandasana (Four-Limbed Staff Pose), is one of the most demanding and most commonly performed incorrectly of all foundational yoga poses. Getting it right changes the entire feel of a Vinyasa flow and protects your shoulders from cumulative injury over months and years of practice.
This matters because the stakes are real. According to the Journal of Bodywork and Movement Therapies, the shoulder is the most commonly injured joint in yoga practice, and Chaturanga is among the most frequently cited contributing movements when practitioners report pain. Most of those injuries are preventable with correct alignment and appropriate progressions.
This guide covers the exact muscles involved, a step-by-step technique breakdown, the alignment details that most instructors don’t have time to explain in a group class, every meaningful modification from beginner to advanced, and how the pose fits into a broader yoga sequence. Whether you’re attempting your first Chaturanga or refining one you’ve been doing for years, there’s something specific here for you.
What Is a Yoga Push Up?
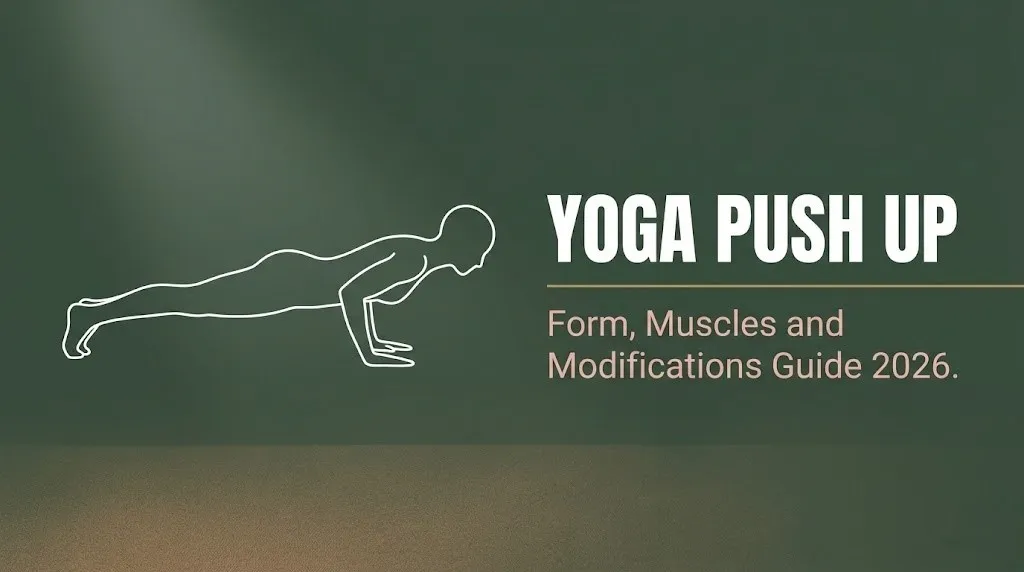
A yoga push up is the common name for Chaturanga Dandasana (Four-Limbed Staff Pose), a controlled lowering movement from a high plank position to a low, hovering position with the elbows bent to approximately 90 degrees and the body held parallel to the floor.
Unlike a conventional push up, which typically ends with the chest or torso touching the floor, Chaturanga stops at the lowered position. The body is held there for one breath cycle before transitioning to the next pose in a flow sequence, usually Urdhva Mukha Svanasana (Upward-Facing Dog) or Bhujangasana (Cobra Pose).
The name breaks down in Sanskrit as follows: chatur means four, anga means limb, danda means staff, and asana means pose. The four limbs in contact with or hovering near the floor are the two hands and two feet. The body itself is the staff, meant to be held straight and firm throughout the movement.
This pose appears in both Vinyasa and Ashtanga yoga as a core transitional element. In a Sun Salutation, it is performed multiple times per round. For regular practitioners, it is one of the highest-repetition poses in any given session, which is exactly why good form matters as much as it does.
Key facts about Chaturanga Dandasana:
- It is a dynamic, transitional pose rather than a static hold in most styles
- The target elbow angle is approximately 90 degrees at the lowest point
- It requires coordinated upper body, core, and scapular stability simultaneously
- Poor form in this one pose affects the quality of every pose that follows it in a flow
Yoga Push Up vs. Regular Push Up: What Makes Them Different?
A yoga push up differs from a regular push up in its elbow tracking, its stopping point, its integration with breath, and the muscular demand it places on the serratus anterior and rotator cuff as stabilizers.
In a standard gym push up, the elbows typically flare outward at 45 to 90 degrees from the torso. The range of motion goes from a straight-arm plank all the way down to chest contact with the floor. The push is then back up to the starting position. The primary movers are the pectoralis major and triceps brachii, with the shoulders providing secondary support.
In a yoga push up, the elbows track close to the ribs, brushing the sides of the body as the torso lowers. The movement stops at approximately 90 degrees of elbow flexion, never touching the floor. The body then shifts forward and up into Upward-Facing Dog rather than pressing back to the start.
| Feature | Yoga Push Up (Chaturanga) | Regular Push Up |
|---|---|---|
| Elbow path | Hugs ribs, backward tracking | Flares 45 to 90 degrees outward |
| Lowest point | Hovering, elbows at ~90 degrees | Chest contacts floor |
| Return movement | Flows forward into Upward Dog | Presses back to start |
| Breath integration | Exhale on the way down, always | Optional, rarely cued |
| Primary movers | Triceps, chest, serratus anterior | Pectoralis major, triceps |
| Difficulty for beginners | Higher: demands more scapular control | Lower: more forgiving on shoulder blades |
| Wrist load | Equal to body weight, sustained | Equal to body weight, brief |
This is why people who can do many standard push ups still struggle with Chaturanga. The scapular demands are categorically different.
Muscles Worked in a Yoga Push Up
The yoga push up works the triceps brachii, pectoralis major, anterior deltoid, serratus anterior, and the full set of rotator cuff muscles, alongside the deep core stabilizers that maintain the body as a straight line throughout the movement.
The serratus anterior deserves special attention because it is the muscle most people have never consciously trained and the one that most determines whether Chaturanga looks controlled or collapsed. The serratus anterior runs along the side of the ribcage and is responsible for holding the scapula (shoulder blade) flat against the ribcage during the movement. When it fails, the shoulder blades wing outward, the shoulders dump forward, and the pose becomes immediately harmful.
The rotator cuff (a group of four muscles: subscapularis, supraspinatus, infraspinatus, and teres minor) provides stability at the glenohumeral joint throughout the descent. These muscles are not the primary movers. They are the stabilizers. When they fatigue, the joint becomes vulnerable to impingement.
Full muscle engagement breakdown:
- Triceps brachii: Controls the elbow flexion descent; primary mover
- Pectoralis major: Assists in controlling the lowering and stabilizes the chest
- Anterior deltoid: Assists in shoulder flexion and controls the lowering movement
- Serratus anterior: Keeps shoulder blades against ribcage; prevents winging
- Rotator cuff (all four): Stabilizes the humeral head in the socket throughout
- Transversus abdominis: Deep core stability; prevents hips from dropping or rising
- Erector spinae: Maintains neutral spinal alignment as a countermeasure to gravity
- Quadriceps: Keeps the knees lifted in the full version of the pose
According to the Journal of Strength and Conditioning Research, compound movements that simultaneously require prime mover strength and stabilizer engagement produce greater neuromuscular adaptation over time than isolation exercises. Chaturanga is a textbook example of this category.
Key Takeaway: The yoga push up is harder than a regular push up specifically because the serratus anterior and rotator cuff are under much higher stabilizing demand. Building those muscles deliberately is how you make Chaturanga feel controlled instead of collapsed.
How to Do a Yoga Push Up with Correct Form
The yoga push up is performed as a controlled eccentric lowering movement, meaning the muscles lengthen under tension rather than simply letting the body fall. That control is the entire point of the exercise.
To practice Chaturanga Dandasana (Four-Limbed Staff Pose):
- Begin in Phalakasana (High Plank Pose) with wrists directly under shoulders, fingers spread wide, and middle fingers pointing forward. Body forms a straight line from heels to crown of head.
- Press the floor away with your palms. This activates the serratus anterior and prevents the shoulder blades from winging before the movement begins.
- Shift your body forward slightly on your toes so the shoulders move past the wrists. This redistributes weight to allow the elbows to track properly during descent.
- Exhale slowly. Begin bending the elbows, keeping them tracking straight back alongside the ribs. Do not let them flare outward.
- Lower until the upper arms are approximately parallel to the floor and the elbows form a 90-degree angle. The chest does not touch the floor.
- Hold for one full breath. Keep the core firm, hips level, and gaze slightly forward rather than dropping the head.
- On the next inhale, either push back to High Plank to repeat, or roll over the toes into Urdhva Mukha Svanasana (Upward-Facing Dog) to continue a flow.
Modification for beginners: Lower the knees to the floor before descending the upper body. This reduces the load on the shoulders and core enough to allow correct elbow tracking while building the necessary strength. Never sacrifice elbow alignment for the sake of staying in the full version.
Yoga Push Up Alignment: Elbow Angle, Spine, and Shoulder Position
Correct alignment in a yoga push up depends on three things happening simultaneously: the elbow angle, the spinal position, and the scapular control. All three must work together. Getting one right while ignoring the others produces either injury or inefficient movement.
The elbow angle is the most specific cue. The target is 90 degrees at the lowest point of the movement. This means the upper arm is parallel to the floor and the forearm is perpendicular. Elbows below 90 degrees place the glenohumeral joint in its most vulnerable position and dramatically increase rotator cuff stress. Elbows above 90 degrees, meaning a shallower descent, reduce the muscular demand without the injury risk, making it the smarter choice for practitioners who are still building strength.
The spine must maintain a neutral curve throughout. Letting the lower back sag into hyperextension shifts weight into the lumbar vertebrae and removes core engagement. Rounding the upper back collapses the chest and eliminates the serratus anterior’s ability to hold the shoulder blades in place.
The scapular position is the most commonly misunderstood alignment element. The shoulder blades should move slightly forward (protract) as the elbows bend, staying pressed against the ribcage rather than winging outward or pinching together. Think of trying to spread the back of your shirt as wide as possible.
Pose Tip:
- Check elbow position by glancing at your upper arms: they should be parallel to the floor, not dipping below
- Keep the gaze forward and slightly down: about one foot ahead of your hands on the mat
- If the lower back begins to sag during the descent, perform a knee modification rather than completing the full movement
Yoga Push Up Breathing: When to Inhale and Exhale
In a yoga push up, the exhale happens during the descent, always, and this is not arbitrary. Breath synchronization in Chaturanga follows a fundamental principle of pranayama: exhalation activates the deep abdominal muscles, primarily the transversus abdominis, which stabilizes the lumbar spine during the most demanding phase of any movement.
Inhaling while lowering into Chaturanga does the opposite. The diaphragm descends on an inhale, creating intra-abdominal pressure that can displace the lumbar spine and reduce core stability exactly when the body needs it most.
The correct breathing pattern for a single yoga push up in a flow:
- Inhale in Adho Mukha Svanasana (Downward-Facing Dog) or at the top of High Plank
- Exhale as you lower into Chaturanga, controlled and steady throughout the descent
- Inhale as you roll forward and up into Urdhva Mukha Svanasana (Upward-Facing Dog)
- Exhale as you lift the hips back to Adho Mukha Svanasana (Downward-Facing Dog)
According to the National Center for Complementary and Integrative Health (NCCIH), coordinating breath with physical movement, a defining feature of yoga practice, produces measurable improvements in both movement control and stress response compared to movement without breath awareness. Chaturanga is a direct example of this principle applied to strength training mechanics.
For beginners who find breath coordination difficult while managing alignment, yoga teachers and physical therapists generally recommend pausing at High Plank to settle the breath before each descent rather than rushing through the movement on a single exhale that feels incomplete.
Key Takeaway: Exhaling during the descent of a yoga push up is not a stylistic choice. It activates the deep core muscles that protect your lumbar spine during the most mechanically demanding moment of the pose.
Yoga Push Up Benefits for Strength and Yoga Practice
The yoga push up builds upper body and core strength in a way that directly serves the rest of yoga practice, not just physical fitness in isolation. The movements that precede and follow it in a Vinyasa flow require the same shoulder stability and scapular control that Chaturanga develops.
Upper body strength benefits are measurable. The eccentric load of lowering the full body weight under control builds triceps and chest strength faster than many isolated exercises because the muscle is resisting gravity rather than simply contracting against it. Eccentric training produces greater strength gains per repetition according to research in the Journal of Strength and Conditioning Research.
Core stability benefits are equally direct. Maintaining a straight body line through the descent requires continuous engagement of the transversus abdominis, erector spinae, and quadratus lumborum. This is functional core strength, meaning it transfers directly to every other standing, balancing, and floor-based pose in a yoga practice.
Beyond strength, practicing Chaturanga correctly builds proprioceptive awareness in the shoulder joint. The brain learns exactly where the shoulder is in space at every point in the range of motion. This awareness protects the joint during other arm-supported poses, including Bakasana (Crow Pose), Vasisthasana (Side Plank Pose), and all arm balances.
Additional benefits supported by yoga practice research:
- Improved shoulder joint stability over time with consistent practice
- Greater body awareness in the horizontal plane, which transfers to balance work
- Breath-movement coordination that supports the entire Vinyasa or Ashtanga practice
- Mental focus and concentration required for controlled eccentric movement under body weight
Yoga Push Up Modifications for Beginners
The best modification for a beginner yoga push up is not a shortcut. It is the correct starting point for anyone who cannot yet perform the full version with proper elbow tracking and a level spine.
The most important principle for beginners: a technically correct modified version is worth far more than a collapsed full version. Dropping the knees, reducing the range of motion, or breaking the pose into two phases are all legitimate practices, not signs of weakness.
Beginner modification options, organized by difficulty:
| Modification | Description | Who It’s For |
|---|---|---|
| High Plank hold | Hold at the top position only, building scapular stability before adding movement | Complete beginners, those rebuilding shoulder strength |
| Half Chaturanga (knees down) | Lower knees first, then perform the descent with elbows hugging ribs | Beginners, those with limited upper body strength |
| Three-quarter descent | Lower only until elbows reach 120 to 135 degrees rather than full 90 | Intermediate beginners, those with mild shoulder sensitivity |
| Chaturanga at the wall | Stand facing a wall, press palms flat, perform the elbow-tracking movement | Seniors, prenatal practitioners, those with wrist sensitivity |
| Block-supported Chaturanga | Place a yoga block under the chest at the lowest point for guided depth | Beginners learning depth awareness |
The wall version deserves emphasis. It teaches the exact elbow mechanics of Chaturanga without any body weight load on the wrists or shoulders. Stand about arm’s length from a wall, press both palms flat at chest height, and practice the slow, controlled descent while keeping elbows tight to the ribs. This is how yoga teachers and physical therapists introduce Chaturanga to participants with injury history or very low baseline upper body strength.
Yoga Push Up on Knees: The Modified Version Explained
The knee-down yoga push up is the most commonly used modification and also the most commonly performed incorrectly, which partially explains why it doesn’t always build toward the full version as expected.
The knee modification works correctly when the knees contact the floor at a position that creates the same angular relationship between the torso, arms, and floor as the full pose. If the knees simply drop straight down from High Plank without shifting position, the body angle is too steep, the shoulders end up above the wrists rather than slightly forward of them, and the elbow path changes.
To perform the knee modification correctly:
- From High Plank, lower both knees to the mat. Keep the core engaged and do not let the hips drop toward the heels.
- Shift the shoulders slightly forward of the wrists, so the body creates a diagonal line from knees to crown.
- Exhale and bend the elbows, tracking them straight back alongside the ribs. Do not let them flare outward.
- Lower the chest toward the mat, stopping when the elbows reach 90 degrees. Hold for one breath.
- Press back up to the knee-down High Plank position, or transition to a low Cobra Pose (Bhujangasana) by lowering the hips and lifting the chest.
Safety note: Practitioners with knee injuries, bursitis, or knee replacement history should place a folded blanket or knee pad under the kneecaps to reduce direct pressure on the joint. If knee discomfort persists even with padding, the wall version is the more appropriate modification.
The knee-down version is a legitimate long-term practice for seniors, for people with upper body injuries, and for anyone for whom the full version is chronically unavailable. There is no obligation to “graduate” from it.
Key Takeaway: The knee-down yoga push up only builds toward the full version when you replicate the same elbow tracking and shoulder angle as the full pose. Simply dropping the knees without adjusting position teaches a different movement pattern entirely.
Advanced Yoga Push Up Progressions
Advanced progressions of the yoga push up increase the demand on strength, stability, or proprioception, and they are only appropriate for practitioners who have demonstrated clean, controlled form in the standard version.
The clearest sign of readiness for progressions: you can perform five consecutive full Chaturangas with elbows tracking cleanly at 90 degrees, spine level throughout, and no shoulder blade winging at any point. If any of those markers are absent, the standard version still has room to develop.
Advanced progressions by category:
| Progression | Added Demand | Prerequisite |
|---|---|---|
| Slow Chaturanga (5-second descent) | Eccentric control, time under tension | Clean standard form |
| Single-leg Chaturanga | Core stability, hip stabilizer demand | Strong standard form |
| Chaturanga with block squeeze (block between upper arms) | Elbow alignment precision, adductor engagement | Good but imprecise elbow tracking |
| Weighted vest Chaturanga | Progressive overload | Excellent standard form |
| Chaturanga to handstand press prep | Shoulder pressing strength, inversion integration | Proficient standard Chaturanga and basic inversions |
The slow descent progression is the most practically useful for most intermediate practitioners. Lowering over a count of five instead of a count of one to two dramatically increases the eccentric strength demand. This single modification produces measurable shoulder and triceps strength gains without adding complexity or injury risk.
The block-squeeze progression addresses the most common technical error, elbow flaring, by giving the practitioner a physical cue. Place a foam yoga block between the upper arms, not the forearms. The goal is to keep light contact with the block throughout the entire descent. If the block falls, the elbows have flared.
Modification note: Even advanced practitioners should return to standard form on days of fatigue, after injury recovery, or when practicing at higher-than-usual volumes within a flow sequence.
Yoga Push Up Common Mistakes and How to Fix Them
The most common mistakes in a yoga push up are not random. They are predictable failure patterns that follow directly from specific strength deficits or misunderstood alignment cues.
The five most consistent errors and their specific fixes:
- Elbows flaring outward: This is the most common error and the most damaging. It shifts the load from the triceps and serratus anterior onto the rotator cuff in a mechanically disadvantaged position. Fix: Practice the block-squeeze progression or perform the movement slowly while actively thinking “elbows toward hips.”
- Hips rising above shoulder level: Usually caused by insufficient core strength or fear of putting weight into the shoulders. Fix: Engage the quadriceps firmly before beginning the descent. The legs should feel active and pressed toward the ceiling, not passive.
- Shoulder blades winging away from the ribs: Caused by serratus anterior weakness. Fix: Before lowering, press actively into both palms as if trying to push the floor away. This pre-activates the serratus anterior. Hold that engagement throughout the descent.
- Head dropping toward the floor: Indicates the practitioner is using neck effort to compensate for shoulder instability. Fix: Keep the gaze fixed one foot ahead of the hands. The cervical spine should remain in line with the thoracic spine throughout.
- Descending below 90 degrees: Often called “cheating deep” because it feels like more effort. It is, but it places the glenohumeral joint in its most vulnerable range. Fix: Use a yoga block on its middle height under the chest as a contact point for depth awareness.
According to the Yoga Alliance, alignment precision in foundational transitional poses like Chaturanga is a primary competency assessed in teacher training programs, reflecting how central correct form is to safe practice.
Yoga Push Up Shoulder and Wrist Safety
The shoulder and wrist are the two joints most frequently stressed by an incorrectly performed yoga push up, and both deserve specific attention before and during practice.
Shoulder safety centers on avoiding shoulder impingement, which occurs when the soft tissue structures around the glenohumeral joint are compressed between the humeral head and the acromion process of the scapula. This risk increases when the elbows flare wide, when the descent goes below 90 degrees, or when the practitioner has pre-existing rotator cuff damage.
Anyone with a diagnosed rotator cuff tear, shoulder impingement syndrome, or labral tear should discuss Chaturanga with their orthopedic surgeon or physical therapist before practicing it. The knee-down or wall modification is the appropriate starting point during any period of shoulder recovery.
Wrist safety requires attention to both load and alignment. The wrist bears the full weight of the upper body during Chaturanga, and repeated practice without attention to wrist preparation is a common cause of carpal tunnel aggravation and wrist extensor tendinopathy.
Wrist protection strategies:
- Spread the fingers wide and press all four corners of each hand into the mat equally, distributing load across the full palmar surface
- Avoid hyperextending the wrists by ensuring the shoulders do not move excessively behind the wrists during the descent
- Use fist push ups on a mat as an alternative if wrist extension is painful; this keeps the wrist in a neutral position
- Roll and flex the wrists for 30 to 60 seconds before beginning any Vinyasa practice that includes Chaturanga
Anyone experiencing sharp, shooting, or persistent wrist pain during or after practice should have the wrist assessed by a physical therapist or sports medicine physician before continuing.
Key Takeaway: The two most preventable yoga push up injuries are shoulder impingement from elbow flaring and wrist strain from improper load distribution. Both are technique problems, not inevitabilities.
Yoga Push Up for Seniors and Limited Upper Body Strength
Yoga push ups are appropriate for older adults when the appropriate modification level is selected from the start and when the progression is patient and systematic. The movement pattern itself is genuinely useful for older adults because it builds the pressing strength and shoulder stability needed for daily functional activities.
According to the American College of Sports Medicine, resistance-based exercises that include pushing movements help maintain bone mineral density, preserve muscle mass, and support functional independence in adults over 65, making movements like Chaturanga relevant beyond the yoga mat.
For seniors and practitioners with limited upper body strength, the wall version is the safest and most accessible starting point. It requires no floor work, eliminates wrist loading, and teaches the exact motor pattern that will eventually transfer to floor-based practice.
| Starting Level | Recommended Version | Goal Before Progressing |
|---|---|---|
| Minimal upper body strength | Wall Chaturanga | 10 controlled reps with correct elbow tracking |
| Building base strength | Inclined surface (countertop or chair back) | 8 controlled reps with level spine |
| Moderate strength | Knee-down floor version | 5 controlled reps to 90 degrees |
| Good functional strength | Full floor version | 3 clean reps before adding to flow |
Joint considerations specific to older adults:
- Osteoporosis: Weight-bearing through the wrists is generally beneficial for wrist bone density but should be cleared with a physician if severe osteoporosis is present
- Rotator cuff degeneration: Common with age; wall or inclined versions reduce rotator cuff demand substantially
- Wrist arthritis: Fist push up grip eliminates wrist extension load; this modification is appropriate and effective
The pace of progression for seniors is slower than for younger practitioners and that is appropriate, not a problem to solve quickly.
Yoga Push Up in the Sun Salutation Sequence
The yoga push up is the pivotal transitional movement in Surya Namaskar (Sun Salutation), both the A and B variants, and its quality determines the quality of every other pose in the sequence that follows.
In Surya Namaskar A, the sequence around Chaturanga runs: Adho Mukha Svanasana (Downward-Facing Dog), transition forward to High Plank on an exhale, lower into Chaturanga on the same exhale, transition to Urdhva Mukha Svanasana (Upward-Facing Dog) on an inhale, and return to Downward-Facing Dog on an exhale. In a flowing Vinyasa class, this full sequence repeats multiple times within a single session.
The connection between Chaturanga and Upward-Facing Dog is especially important. A Chaturanga that drops below 90 degrees sets up a compromised entry into Upward Dog where the lower back hyperextends before the chest has properly opened. Think of it like a bad foundation affecting every floor above it.
How Chaturanga position affects subsequent poses:
- Too deep (below 90 degrees): Leads to shoulder rounding in Upward Dog, forcing the lower back to compensate
- Elbows flared: Shifts the transition angle, making it harder to roll over the toes cleanly into Upward Dog
- Hips too high: Results in a pike-shaped transition that misses the spinal extension benefit of Upward Dog
- Correct form: Creates a smooth, efficient transition where the shoulders are already in the right position for Upward Dog’s chest opening
For practitioners who cannot yet perform a clean Chaturanga in flow, substituting a low Bhujangasana (Cobra Pose) instead is the standard and appropriate alternative. This keeps the flow moving while removing the demand that exceeds the practitioner’s current capacity.
How Many Yoga Push Ups Should You Do Per Day?
The right number of yoga push ups per day depends on your current strength level, your practice goals, and how Chaturanga fits into your overall movement volume.
For most Vinyasa or Ashtanga practitioners, the question is somewhat self-answering. A typical Vinyasa flow class includes 10 to 30 Chaturangas within the natural sequence of Sun Salutations and transitions. That volume is generally sufficient for both skill development and strength maintenance when the form is correct.
For practitioners specifically trying to build Chaturanga strength outside of a flow practice, yoga teachers and physical therapists generally recommend:
- Beginners: 3 to 5 repetitions per set, 2 to 3 sets, three times per week, using the appropriate modification level
- Intermediate: 5 to 8 repetitions per set, 3 sets, three to four times per week, in the full or near-full version
- Advanced or flow-integrated: Volume is determined by the number of sun salutations, typically sufficient without additional sets
Rest matters as much as volume. The American College of Sports Medicine recommends allowing 48 hours of recovery between sessions that significantly load the same muscle groups. If you practice Vinyasa daily, varying the intensity between sessions, including lighter or slower practices on alternating days, applies this principle without requiring complete rest.
Safety guidance on volume: More repetitions with poor form is genuinely worse than fewer repetitions with correct form. If elbow tracking deteriorates, shoulder blades begin to wing, or the spine loses its line at any point during a set, stop and rest rather than completing the planned number.
Frequently Asked Questions About Yoga Push Ups
What is the difference between a yoga push up and a regular push up?
A yoga push up, Chaturanga Dandasana, keeps the elbows hugging the ribs and stops at 90 degrees without the chest touching the floor, then transitions into the next pose.
A regular push up allows the elbows to flare outward and takes the chest all the way to the floor before pressing back up.
The yoga version demands greater serratus anterior and rotator cuff stability, making it harder for most people despite its smaller range of motion.
Is Chaturanga the same as a yoga push up?
Yes, Chaturanga Dandasana is the Sanskrit name for what is commonly called the yoga push up.
The full Sanskrit name, Chaturanga Dandasana, translates to Four-Limbed Staff Pose and refers to the straight, staff-like position of the body during the movement.
The term “yoga push up” is the English colloquial name used in most Western yoga classes and online content.
How do I modify a yoga push up if I have wrist pain?
The most effective modification for wrist pain is performing Chaturanga on fists rather than flat palms, which keeps the wrist in a neutral rather than extended position.
A wall version, where you stand and perform the same elbow-tracking movement against a vertical surface, eliminates wrist load entirely while preserving the movement pattern.
Anyone with persistent wrist pain during yoga practice should have the wrist assessed by a physical therapist to rule out carpal tunnel syndrome or tendinopathy before continuing.
How many yoga push ups should a beginner do?
Beginners should aim for 3 to 5 repetitions per set using the appropriate modification, two to three times per week, focusing entirely on form rather than volume.
Clean technique in 3 repetitions builds more strength and better movement patterns than 15 sloppy repetitions, according to the principle that motor learning requires accurate repetition, not just high repetition.
Increase volume only when the elbow tracking, shoulder blade control, and spine alignment remain consistent through every repetition of a current set.
Why does my shoulder hurt during a yoga push up?
Shoulder pain during Chaturanga most commonly results from elbow flaring, which places the rotator cuff in a mechanically disadvantaged position, or from descending below 90 degrees of elbow flexion.
Both errors create impingement at the glenohumeral joint, compressing soft tissue structures between the humeral head and the acromion.
Anyone experiencing recurring shoulder pain during yoga push ups should stop the full version, return to a wall or knee-down modification, and seek assessment from a physical therapist or sports medicine physician if the pain persists beyond two weeks.
Closing
Chaturanga is earned, not assumed. Most practitioners rush into the full version long before they have the shoulder stability and core strength to perform it safely. Starting with the wall version or the knee modification and working upward patiently produces better, more durable results than gritting through a collapsed full pose for months.
Pick one alignment cue to focus on per practice: elbows this week, serratus activation next week, breath pattern the week after. That single-focus approach accelerates improvement faster than trying to fix everything at once.
Practice it three times per week with intention. Your shoulders will thank you in a year.