Yoga Headstand Poses: Names, Types and Safe Steps
Yoga headstand poses refer to a family of inversions that place the crown of the head on the mat while the legs extend upward, and the most foundational of these is Salamba Sirsasana I (Supported Headstand), often called the King of Asanas in classical Hatha yoga tradition. The full family includes more than a dozen named variations, from beginner-friendly wall-supported versions to advanced free-balance poses requiring years of conditioning.
Inversions are among the most researched yoga postures for their effects on circulation, focus, and stress response. According to the National Center for Complementary and Integrative Health (NCCIH), yoga inversions appear in multiple clinical contexts for their proposed effects on the autonomic nervous system, though researchers note that further large-scale studies are still needed.
This guide covers every major yoga headstand pose by name, exactly how to do the foundational version with precise alignment cues, all named variations in order of difficulty, the specific muscles involved, preparatory poses, safety guidance, and a realistic progression timeline for beginners. Whether you’re working toward your first headstand or adding new variations to an established practice, there’s a specific and actionable path forward here.
Yoga Headstand Poses: An Overview of All Types
Yoga headstand poses are a family of inverted postures where the top of the head contacts the mat and the body is balanced upright, ranging from the forearm-supported Salamba Sirsasana I to advanced free-hand variations requiring independent cervical and core strength.
The headstand family is larger than most practitioners realize. Classical yoga texts, particularly those underlying Ashtanga and Iyengar yoga traditions, describe multiple distinct headstand forms differentiated by how the hands and arms are positioned. Each hand and arm configuration changes the base of support, the muscular demand, and the cervical spine load.
The broadest classification divides headstand poses into two groups. Baddha Hasta Sirsasana (Bound Hands Headstand) refers to variations where the hands clasp or interlace behind the head, forming a supportive cradle. Mukta Hasta Sirsasana (Free Hands Headstand) refers to variations where the hands are not clasped, requiring far greater independent cervical and shoulder strength.
Here is an overview of the complete headstand pose family:
| Pose Name (Sanskrit) | English Name | Support Type | Difficulty |
|---|---|---|---|
| Salamba Sirsasana I | Supported Headstand | Forearms + clasped hands | Intermediate |
| Salamba Sirsasana II | Tripod Headstand | Palms flat, arms bent | Intermediate to Advanced |
| Baddha Hasta Sirsasana A | Bound Hands A | Forearms crossed | Advanced |
| Baddha Hasta Sirsasana B | Bound Hands B | Hands on shoulders | Advanced |
| Baddha Hasta Sirsasana C | Bound Hands C | Hands on hips | Advanced |
| Baddha Hasta Sirsasana D | Bound Hands D | Arms extended forward | Advanced |
| Mukta Hasta Sirsasana A | Free Hands A | Palms down, arms extended | Advanced |
| Mukta Hasta Sirsasana B | Free Hands B | Palms up, arms extended | Expert |
| Mukta Hasta Sirsasana C | Free Hands C | Arms alongside body | Expert |
| Eka Pada Sirsasana | One-Legged Headstand | Forearms (from Sirsasana I) | Intermediate |
| Parivrttaikapada Sirsasana | Revolved One-Legged | Forearms (from Sirsasana I) | Advanced |
| Sirsasana Padmasana | Headstand Lotus | Forearms (legs in Lotus) | Advanced |
What Is the Yoga Headstand Pose Called in Sanskrit?
The primary yoga headstand pose is called Sirsasana (sometimes spelled Shirshasana), derived from the Sanskrit word “sirsa” meaning head, and the full name of the most commonly taught version is Salamba Sirsasana, meaning “supported headstand.”
“Salamba” translates to “with support,” referring to the forearm base that bears the majority of the body’s weight in the classical version. The word “asana” means pose or seat, a term used across all yoga postures. Together, Salamba Sirsasana translates directly as “supported head pose.”
Different yoga traditions use the term slightly differently. In Iyengar yoga, the classical forearm-supported version is consistently called Salamba Sirsasana I, with Roman numerals distinguishing it from the Tripod variation, Salamba Sirsasana II. In Ashtanga yoga, the headstand sequence appears in the finishing series and includes multiple Mukta Hasta and Baddha Hasta variations taught in sequence.
Pose Tip:
- The Sanskrit name Sirsasana tells you the pose type; the prefix (Salamba, Mukta Hasta, Baddha Hasta) tells you the hand position and support level
- Pronounce it “sheer-SHAH-suh-nuh” for Sirsasana and “suh-LOM-buh” for Salamba
- In class, teachers may simply say “headstand,” but knowing the full Sanskrit name helps you identify which of the many variations is being taught
Sirsasana I: The Foundational Supported Headstand
Salamba Sirsasana I (Supported Headstand) is the primary yoga headstand pose and the correct starting point for any practitioner building an inversion practice, characterized by a forearm base with interlaced fingers cradling the back of the skull.
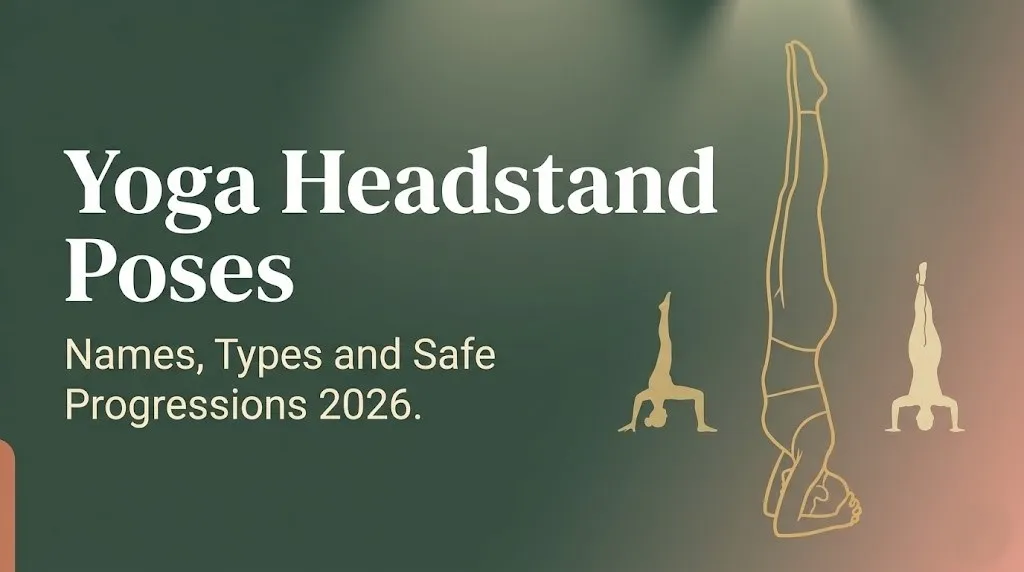
In this pose, the forearms form a triangular base on the mat: elbows are placed shoulder-width apart and the hands interlace, creating a cradle for the back of the head. The crown of the head rests gently on the mat within that cradle. Critically, the forearms press actively into the mat, bearing approximately 80% of the body’s total weight. The head provides positioning and light contact, not compression.
This weight distribution is what separates safe Sirsasana practice from the kind of cervical spine loading that leads to injury. Think of the forearms like the legs of a tripod camera stand: the weight of the camera (your torso and legs) is distributed through the legs (your forearms), not through the central mounting point (your head). When that distribution fails and weight collapses into the head, the cervical spine absorbs compressive force it is not designed to manage repeatedly.
The position is taught extensively in Iyengar yoga, where it appears as one of the most important poses in the entire system. BKS Iyengar, the founder of Iyengar yoga, described Sirsasana as fundamental to both physical and mental clarity, though those claims in his texts are experiential rather than clinically attributed.
Modification for practitioners not yet ready for full inversion: Practice the forearm base and head position only, with knees on the mat and hips raised in a preparatory position called Dolphin Pose (Ardha Pincha Mayurasana). Build shoulder and core endurance here before attempting to lift the legs.
Key Takeaway: In Sirsasana I, your forearms do the real work. If you feel significant pressure in your neck or head, the weight distribution is off and you need to press your forearms harder into the mat before going further.
How to Do a Yoga Headstand Step by Step
To practice Salamba Sirsasana I (Supported Headstand), you need adequate core strength, active shoulder engagement, and a clear understanding of weight distribution before your feet leave the mat.
Never attempt a full headstand without working near a wall for the first several months. The wall provides a landing point if balance fails, which prevents the kind of lateral fall that causes the most common headstand injuries.
To practice Salamba Sirsasana I:
- Kneel on your mat facing a wall, leaving about 30 centimeters (12 inches) of space between you and the wall
- Interlace your fingers, cup your hands, and place your forearms on the mat with elbows directly under your shoulders
- Place the crown of your head on the mat inside your cupped hands; the back of your skull rests gently against your fingers
- Tuck your toes, lift your knees, and walk your feet toward your elbows until your hips are directly above your head
- Press your forearms firmly into the mat; feel your shoulders lift away from the floor (this is scapular elevation and it is protective, not wrong)
- On an exhale, draw your lower belly in and lift both legs together, keeping the knees bent initially; straighten the legs when you feel stable
- Engage your glutes and press through the inner edges of your feet; hold for 5 to 10 breath cycles initially
- To release, bend your knees and lower your feet to the mat with control; rest in Balasana (Child’s Pose) for at least 5 breaths
Modification for beginners: Lift one leg at a time, keeping the second foot on the mat. This half-inversion builds the core and shoulder strength needed for the full pose without the balance demand of lifting both legs simultaneously.
Safety note: Do not kick up. Kicking creates momentum that bypasses the controlled muscular engagement needed to make the pose safe. If you cannot lift without kicking, continue building preparatory strength for several more weeks.
Sirsasana II: Tripod Headstand
Salamba Sirsasana II (Tripod Headstand), also called the Tripod Headstand, is a yoga headstand variation where both palms press flat on the mat with elbows bent to approximately 90 degrees, forming a three-point base with the head at the center.
In this variation, the base of support shifts from forearms to hands. The three contact points are the crown of the head and the two palms, creating the triangular “tripod” the name describes. The elbows bend to roughly 90 degrees with the forearms vertical, similar to a push-up position. This geometry places more demand on the deltoids, triceps, wrist extensors, and serratus anterior than Sirsasana I.
Despite appearing more open and approachable than the forearm-supported version, Sirsasana II actually places greater compressive load on the cervical spine for most practitioners, because the hand base provides less total surface area and less leverage for distributing weight away from the head. Physical therapists generally recommend that practitioners have a stable, established Sirsasana I practice before attempting Sirsasana II.
The Tripod Headstand is also used as a transitional pose in some Vinyasa and Ashtanga practices, where practitioners flow from Adho Mukha Svanasana (Downward-Facing Dog) into the tripod base and then lift into inversion. This transition requires significant wrist stability and core control.
| Feature | Sirsasana I (Forearm) | Sirsasana II (Tripod) |
|---|---|---|
| Base of support | Forearms + clasped hands | Two palms + crown of head |
| Primary muscles | Serratus anterior, deep neck flexors | Deltoids, triceps, wrist extensors |
| Cervical load | Lower (forearms bear more weight) | Higher (less surface area) |
| Wrist involvement | Minimal | Moderate to high |
| Recommended for beginners | Yes, with wall | Not recommended as first headstand |
| Flow transition use | Less common | Common in Vinyasa and Ashtanga |
Modification: Practice the Tripod base with knees resting on the backs of the upper arms (like Kakasana / Crow Pose) before lifting the legs. This builds the arm and shoulder strength required for the full pose.
Yoga Headstand Variations: The Complete Named List
The complete named list of yoga headstand variations includes poses from the Salamba Sirsasana (forearm-supported) family, the Baddha Hasta Sirsasana (bound hands) family, and the Mukta Hasta Sirsasana (free hands) family, totaling more than 10 distinct named variations in classical texts.
This is the section most practitioners never see in a single place. The variations are taught sequentially in Ashtanga yoga’s finishing series and are described in detail in BKS Iyengar’s Light on Yoga, which documents the systematic progression through the headstand family.
Here is the complete progression of named headstand variations:
| Pose (Sanskrit) | English Name | Hand Position | Difficulty Level |
|---|---|---|---|
| Salamba Sirsasana I | Supported Headstand | Fingers interlaced, forearm base | Intermediate |
| Salamba Sirsasana II | Tripod Headstand | Palms flat, elbows bent | Intermediate to Advanced |
| Baddha Hasta Sirsasana A | Bound Hands Headstand A | Forearms crossed, hands on opposite shoulders | Advanced |
| Baddha Hasta Sirsasana B | Bound Hands Headstand B | Hands on shoulders, elbows stacked | Advanced |
| Baddha Hasta Sirsasana C | Bound Hands Headstand C | Hands clasped behind head | Advanced |
| Baddha Hasta Sirsasana D | Bound Hands Headstand D | Arms forward, palms together | Advanced |
| Mukta Hasta Sirsasana A | Free Hands Headstand A | Arms extended, palms down | Expert |
| Mukta Hasta Sirsasana B | Free Hands Headstand B | Arms extended, palms up | Expert |
| Mukta Hasta Sirsasana C | Free Hands Headstand C | Arms alongside body | Expert |
| Eka Pada Sirsasana | One-Legged Headstand | From Sirsasana I base | Intermediate |
| Parivrttaikapada Sirsasana | Revolved One-Legged | From Sirsasana I, one leg rotated | Advanced |
| Sirsasana Padmasana | Lotus Headstand | Legs in full Lotus from Sirsasana I | Advanced |
Modification note: The Baddha Hasta and Mukta Hasta variations are not appropriate for practitioners still developing their Sirsasana I. Work systematically from the top of this list downward, spending adequate time at each stage before progressing.
Key Takeaway: The headstand family is not one pose with a few add-ons. It is a systematic progression of more than a dozen distinct named postures, each requiring specific prerequisite strength. Moving through them in order is the safest and most effective approach.
Advanced Headstand Variations in Yoga
Advanced yoga headstand variations are those where the hands provide no cradle support for the head, requiring the cervical spine stabilizers, serratus anterior, and full core chain to manage the body’s weight with minimal mechanical assistance.
The Mukta Hasta Sirsasana series (Free Hands Headstands A, B, and C) represents the most demanding tier of the headstand family. In these variations, the arms are extended away from the head, removing the forearm or palm base that provides stability in supported versions. The head contacts the mat at the crown, and the neck must manage compressive forces that are substantially greater than in Sirsasana I.
Mukta Hasta Sirsasana A has the palms pressing down into the mat with arms extended forward in a wide V shape. Mukta Hasta Sirsasana B reverses the palm orientation upward, which reduces grip available from the floor and increases the balance challenge. Mukta Hasta Sirsasana C is the most demanding: arms lie alongside the body with no mat contact from the hands at all.
These variations are taught in Ashtanga yoga’s advanced sequences and are typically only introduced after practitioners have maintained a stable Sirsasana I hold for at least 5 minutes and have demonstrated consistent control in Eka Pada Sirsasana (One-Legged Headstand) and leg variation work.
Sirsasana Padmasana (Lotus Headstand) requires full Padmasana (Lotus Pose) hip flexibility in addition to the inversion strength. The legs are crossed into Lotus while in the inverted position, which shifts the center of gravity and requires significant hip external rotation range and core adaptation.
Safety note for advanced variations: Anyone with any history of cervical disc pathology should avoid the Mukta Hasta series entirely, as these variations cannot be made safe through modification. The cervical spine load is inherent to the form.
What Muscles Do Yoga Headstand Poses Work?
Yoga headstand poses primarily engage the serratus anterior, upper and lower trapezius, deltoids, deep cervical flexors, transverse abdominis, and multifidus, with the specific muscle emphasis shifting depending on which variation is practiced.
The muscle engagement in a headstand is more complex than it appears from the outside. From above the waist, the serratus anterior is arguably the most important muscle in the pose. It draws the scapulae forward and upward against the ribcage (scapular protraction and upward rotation), which is what lifts the shoulders actively away from the floor. Without this engagement, the weight collapses into the head and neck.
The deep cervical flexors (longus colli and longus capitis) isometrically stabilize the cervical spine throughout the pose. These muscles are small and frequently undertrained in people who spend long hours at desks with the head protruding forward. Building their endurance through preparatory exercises before attempting headstand is a genuine prerequisite, not optional.
From the waist down, the transverse abdominis and multifidus stabilize the lumbar spine against the forces of inversion. The glutes and hip flexors work to maintain the legs’ upright alignment. In one-legged variations, the hip abductors and adductors work asymmetrically to control leg position.
Key muscles engaged in yoga headstand poses:
- Serratus anterior: Scapular protraction and upward rotation; lifts shoulders from mat; protective for the neck
- Upper and lower trapezius: Work with serratus to stabilize the scapulae and support shoulder elevation
- Deltoids (anterior and medial): Shoulder stability and load bearing, especially prominent in Sirsasana II
- Deep cervical flexors (longus colli, longus capitis): Isometric cervical spine stabilization
- Transverse abdominis: Deep core stability; prevents lumbar collapse in inversion
- Multifidus: Spinal stabilization throughout the thoracic and lumbar spine
- Gluteus maximus and medius: Hip extension and abduction to align the legs overhead
- Wrist extensors and flexors: Active in Sirsasana II and Mukta Hasta variations
Preparatory Poses for Yoga Headstands
The most effective preparatory poses for yoga headstands are those that develop serratus anterior strength, scapular stability, deep core endurance, and cervical spine isometric capacity, all of which are prerequisites for safe inversion.
Think of the preparatory poses as deposits into a strength account. The headstand is a withdrawal. You need enough in the account before you make the withdrawal. Attempting a headstand before those deposits are sufficient is not courage. It’s just premature loading of tissues that aren’t ready.
Here are the most effective preparatory poses, in progressive order:
| Pose (Sanskrit) | English Name | Primary Benefit for Headstand |
|---|---|---|
| Adho Mukha Svanasana | Downward-Facing Dog | Shoulder girdle strength, hamstring opening |
| Ardha Pincha Mayurasana | Dolphin Pose | Direct forearm base practice, serratus activation |
| Forearm Plank | Forearm Plank | Core endurance in the exact headstand arm position |
| Prasarita Padottanasana | Wide-Legged Forward Fold | Head-down orientation, hamstring and thoracic opening |
| Pincha Mayurasana | Feathered Peacock Pose | Full inversion on forearms, serratus and core at peak load |
| Sirsasana prep (head on mat) | Partial Headstand | Cervical isometric conditioning without full inversion |
| Navasana | Boat Pose | Deep core (hip flexor and transverse abdominis) endurance |
Ardha Pincha Mayurasana (Dolphin Pose) deserves particular attention. It uses exactly the same forearm base as Sirsasana I. Holding Dolphin Pose for 10 to 20 breath cycles multiple times per week directly builds the shoulder endurance and serratus strength needed for the inversion. When you can hold Dolphin comfortably for 20 breaths without the elbows sliding, you have built a meaningful portion of the prerequisite strength for Sirsasana I.
Modification for those not yet ready for Dolphin: Begin with forearm plank held for 10 to 30 seconds at a time, building to 60-second holds before attempting Dolphin.
Key Takeaway: Dolphin Pose (Ardha Pincha Mayurasana) is the single most direct preparatory pose for Sirsasana I because it uses the exact same forearm base and develops the serratus anterior strength that protects your neck in a full headstand.
How to Practice Headstand Safely at Home with a Wall
Practicing yoga headstand poses at home safely requires a wall within 30 centimeters (12 inches) of your mat placement, a non-slip mat surface, and a clear understanding that the wall is a safety net, not a leaning post.
The most common mistake practitioners make at home is pushing the back of their feet into the wall and using it to hold them up. This defeats the purpose entirely. The wall is there to stop you if you fall past vertical, not to bear your weight. If you’re pressing hard into the wall, you’re using it as a crutch rather than a safety measure, which means you’re not actually building the balance and core control the pose requires.
To practice at home with a wall:
- Set up your forearm base with your fingertips 5 to 10 centimeters (2 to 4 inches) away from the wall
- Enter the pose using the step-by-step method described in the “How to Do” section
- Once inverted, aim to hold your body just off the wall, with the heels barely grazing the wall’s surface if needed
- Practice holding for 5 breaths initially, working toward 10 to 15 breaths over several weeks
- Exit by bending knees and lowering with control; never fall out sideways
The mat surface matters more at home than in a studio. A mat that slides during your forearm setup creates instability at the foundation. Place your mat against a wall (the same wall you’ll invert toward) to prevent mat drift.
Safety note for solo home practice: Practice headstand only when you’re well-rested and not fatigued. Falls from headstand inversions are more likely when practitioners are tired, and without a teacher present to spot, a fatigued fall is more consequential.
Health Benefits of Yoga Inversion Poses
Yoga inversion poses, including headstands, are associated with improved venous return, reduced lower limb fluid retention, enhanced focus, and activation of the parasympathetic nervous system, though research specific to headstands remains more limited than for other yoga postures.
The most physiologically documented effect of inversions is on venous return: reversing the body’s gravitational relationship allows blood that pools in the legs during prolonged standing or sitting to return to the heart more efficiently. This is why people with occupations requiring long hours of standing often report that inversions help with leg fatigue and mild peripheral edema.
According to the International Journal of Yoga, inversion postures as a category have been associated with changes in autonomic nervous system activity, with some studies finding increased parasympathetic tone following inversion practice. This may partly explain the mental clarity and calm that experienced practitioners consistently report after headstand.
Research from the Journal of Alternative and Complementary Medicine has found yoga practice broadly associated with reduced cortisol levels and improved markers of psychological stress. Inversions appear within these broader yoga protocols, though isolating the specific contribution of headstand postures to these outcomes is methodologically difficult.
Key benefits supported by research or documented physiological mechanisms:
- Improved venous return: Gravity assists blood flow from legs and lower body back to the heart
- Reduced lower limb fluid accumulation: Relevant for people with jobs requiring prolonged standing
- Parasympathetic nervous system activation: Associated with post-inversion calm and reduced anxiety
- Core and shoulder strength development: Progressive loading through the preparatory and full pose sequence
- Proprioceptive training: The balance demands of inversion develop body awareness relevant to all standing and balancing poses
- Focus and concentration: Maintaining inversion requires sustained attention; this attentional demand appears to reduce rumination during practice
How Long Should You Hold a Yoga Headstand?
Beginner practitioners should hold yoga headstand poses for 5 to 10 breath cycles initially (approximately 30 to 60 seconds), building gradually toward 3 to 5 minutes over months of consistent practice.
The hold time matters for different reasons at different stages. Early in the learning process, shorter holds with more attention to alignment are far more valuable than longer holds with compromised form. A 10-breath headstand with perfect forearm engagement and a stable, lifted shoulder girdle builds more productive strength than a 5-minute hold where the weight has collapsed into the neck.
Yoga Alliance notes that experienced practitioners in established traditions such as Iyengar yoga work toward extended holds of 5 minutes or more in Sirsasana I, with some senior practitioners holding for longer periods in supervised contexts. These durations are appropriate only after years of progressive development.
Hold duration guidelines by experience level:
| Experience Level | Recommended Hold Time | Notes |
|---|---|---|
| Complete beginner | 5 to 10 breaths (30 to 60 sec) | Focus on alignment over duration |
| 6 months of practice | 15 to 20 breaths (90 to 120 sec) | Add only when form is stable |
| 1 to 2 years practice | 2 to 3 minutes | Begin working toward extended holds |
| Established practitioners | 3 to 5 minutes | Supervised context recommended |
| Advanced (Iyengar tradition) | 5 minutes or more | Under experienced teacher guidance |
Safety note: Come down from headstand immediately if you experience any tingling or numbness in the face, ears, or neck. These sensations indicate vascular or nerve compression and require medical evaluation before continuing inversion practice. They are not a normal part of the pose.
Key Takeaway: More time in a headstand is only better if the alignment is maintained throughout. A 30-second headstand with active forearms and a lifted shoulder girdle does more for your practice than a 3-minute hold with weight collapsing into your neck.
Common Alignment Mistakes in Yoga Headstand Poses
The most common and consequential alignment mistake in yoga headstand poses is placing body weight on the head and cervical spine rather than actively pressing the forearms into the mat to distribute the load upward.
This error happens for two reasons. First, practitioners underestimate how active the forearm press needs to be. The forearms pressing down is not passive contact. It is a sustained, intentional push, as if you were trying to press the mat away from you. Second, practitioners often place their elbows too wide. When the elbows are wider than shoulder-width, the mechanical advantage of the forearm lever is lost, and weight shifts to the head.
Other frequent and correctable alignment errors include:
- Elbows wider than shoulder-width: Reduces forearm leverage and increases head load. Fix: measure elbow placement with hands before interlacing fingers.
- Collapsing shoulders toward the ears: The opposite of what’s needed. Active scapular elevation (shoulders lifting away from the mat) is protective. If the shoulders drop, core engagement is usually also lost.
- Excessive lumbar arch in inversion: The lower back should be relatively neutral in the inverted position, not dramatically arched. Drawing the lower belly in prevents this.
- Kicking up instead of lifting: Kicking bypasses the controlled muscular engagement that makes the pose safe and builds strength progressively.
- Forgetting to engage the legs: In inversion, the legs should press actively through the inner heels toward the ceiling. Passive dangling legs shift weight unpredictably.
- Head too far forward in the cradle: The crown of the head contacts the mat; the back of the skull rests against the fingers. If the forehead contacts the mat, the neck is in flexion, which is incorrect alignment.
Pose Tip:
- Before lifting, check that you feel the forearms pressing into the mat actively; if they feel passive, push harder
- Have a teacher or experienced practitioner observe your shoulder position from the side before practicing alone
- Beginners should practice in front of a mirror side-on when possible to check lumbar and shoulder alignment
Who Should Avoid Yoga Headstand Poses?
Certain people should avoid yoga headstand poses entirely, and others should approach them only after getting specific guidance from a qualified medical specialist: the conditions most clearly contraindicated include glaucoma, uncontrolled hypertension, cervical disc herniation, detached retina, and active neck injury.
The intraocular pressure increase associated with inversion is well-documented in ophthalmology literature. A study published in the Journal of Glaucoma found measurable increases in intraocular pressure during head-down inversion postures in both healthy individuals and those with glaucoma. For people already managing elevated intraocular pressure, inversions can accelerate optic nerve damage. Anyone diagnosed with glaucoma should avoid all inversions unless their ophthalmologist has specifically cleared them.
Uncontrolled hypertension presents a similar concern. The head-down position increases cerebral blood pressure transiently. For people whose cardiovascular system is already under strain, this additional load warrants careful consideration. Anyone with cardiovascular conditions should discuss inversion practice specifically with the specialist managing their condition before attempting headstand.
People who should avoid yoga headstand poses:
- People with glaucoma or elevated intraocular pressure: Inversion increases intraocular pressure; discuss with your ophthalmologist before attempting any inversion.
- People with uncontrolled hypertension: Cerebral blood pressure increases in inversion; cardiovascular clearance is needed.
- People with cervical disc herniation or cervical instability: Compressive load on the neck, even in well-practiced Sirsasana I, is contraindicated.
- People with detached retina or history of retinal tears: Same intraocular pressure concerns as glaucoma.
- Pregnant women: Inversion is generally avoided in pregnancy, particularly after the first trimester, due to balance risk and vascular changes.
- People with acute vertigo or inner ear conditions: Inversion dramatically challenges the vestibular system and is not appropriate during active vertigo episodes.
- Seniors with osteoporosis in the cervical spine: Compressive loading of osteoporotic vertebrae carries fracture risk even at low load levels.
Yoga Headstand Poses for Beginners: Realistic Progression
A realistic beginner progression toward yoga headstand poses takes 3 to 6 months of dedicated preparatory work for most people starting from a general fitness base, with significant variation depending on existing shoulder strength, core endurance, and body awareness.
That timeline is not discouraging. It is honest. Most yoga classes that teach headstand in a single session are teaching the shape of the pose, not the foundations of the pose. Someone who has spent 3 months building genuine serratus anterior strength, practicing Dolphin Pose daily, and developing cervical spine endurance through preparatory exercises will have a safer and more stable headstand than someone who kicked up against a wall in their second week of practice and called it done.
A realistic month-by-month framework:
| Timeframe | Focus | Specific Work |
|---|---|---|
| Month 1 | Shoulder and core foundation | Forearm plank (30 to 60 sec), Dolphin Pose (10 breaths), Downward-Facing Dog (Adho Mukha Svanasana) |
| Month 2 | Extended preparation holds | Dolphin Pose (20 breaths), Wide-Legged Forward Fold, Prasarita Padottanasana |
| Month 3 | Partial inversion | Head on mat in forearm base with hips above head, one leg lifted |
| Month 4 | Wall-supported half inversion | Both legs lifted, heels near wall, 5-breath holds |
| Month 5 | Extended wall holds | 10 to 15 breath holds, minimal wall contact |
| Month 6 | First attempts at balance | Brief moments away from the wall, careful exit practice |
Yoga Alliance recommends that headstand practice be learned under a qualified, experienced teacher rather than through self-directed video practice alone. The alignment feedback a teacher provides in person is not replicable from video, and the cervical spine stakes make this guidance genuinely useful rather than just a standard disclaimer.
Modification for those with upper body strength limitations: Begin with Prasarita Padottanasana (Wide-Legged Forward Fold) as your primary head-down practice. It brings the head toward the floor, builds the experience of being inverted, and develops the necessary thoracic opening, with zero cervical spine compression risk.
Key Takeaway: The 3 to 6 month preparatory timeline for headstand is not a delay; it is the practice. The preparatory poses develop genuine strength that makes your eventual headstand stable, sustainable, and safe rather than a shaky experiment against the wall.
Frequently Asked Questions About Yoga Headstand Poses
What is the yoga headstand pose called in Sanskrit?
The foundational yoga headstand is called Salamba Sirsasana, where “salamba” means “with support” and “sirsa” means “head.”
The full headstand family includes Baddha Hasta Sirsasana (Bound Hands Headstand) and Mukta Hasta Sirsasana (Free Hands Headstand) variations, each distinguished by a different arm and hand position.
In class, teachers often use “headstand” informally, but the Sanskrit name indicates which specific variation is being taught.
Is it safe for beginners to practice yoga headstand poses?
Beginners can work safely toward headstand by starting with preparatory poses rather than attempting the full inversion immediately.
Dolphin Pose (Ardha Pincha Mayurasana), forearm plank, and Downward-Facing Dog (Adho Mukha Svanasana) build the shoulder and core strength needed for safe inversion over a period of 3 to 6 months for most people.
Practicing against a wall and working with a qualified teacher reduces the risk of cervical spine injury significantly during the learning process.
What muscles do you need to do a headstand in yoga?
The most important muscles for a safe headstand are the serratus anterior (which lifts the shoulders away from the mat), deep cervical flexors (which stabilize the neck), and transverse abdominis and multifidus (which stabilize the lumbar spine in inversion).
The deltoids, upper trapezius, and lower trapezius are also active throughout, providing shoulder girdle control that protects the neck from taking excess load.
Building these specific muscles through targeted preparatory poses is more effective preparation than general fitness training.
How long should a beginner hold a yoga headstand?
Beginners should hold a yoga headstand for 5 to 10 breath cycles, approximately 30 to 60 seconds, with full attention to alignment throughout.
Holding longer with compromised form is less productive and more risky than holding shorter with active forearms, lifted shoulders, and controlled breathing.
Increase hold time gradually only when the form remains consistent across the full duration of the current target hold.
What are the contraindications for yoga headstands?
Yoga headstands are contraindicated for people with glaucoma, uncontrolled hypertension, cervical disc herniation, detached retina, and active neck injuries, as inversion increases both intraocular pressure and cervical compressive load.
Pregnancy, particularly after the first trimester, is also a standard contraindication due to balance risk and circulatory changes.
Anyone with osteoporosis of the cervical spine should discuss inversion practice with the specialist managing their bone density before attempting any headstand variation.
Start at the Floor Before You Look at the Ceiling
The most productive thing you can do today is not attempt a headstand. It’s practice Dolphin Pose for 10 breaths, notice how your shoulders feel, and do it again tomorrow.
That sounds underwhelming. It isn’t. Every minute spent in Dolphin is directly building the serratus anterior strength that will make your eventual headstand safe and stable. The pose starts at the floor, months before your feet leave it.
When the foundational strength is genuinely there, the inversion follows naturally. Work the preparation. The headstand takes care of itself.