Lotus Yoga: The Full Guide to Padmasana Pose in 2026
Lotus yoga centers on Padmasana (Lotus Pose), one of the oldest and most recognized seated positions in all of yoga. Whether you’re drawn to it for meditation, flexibility training, or simply curious about what makes it so foundational, this guide covers everything you need to know.
Yoga’s growing presence in mainstream healthcare has made poses like Padmasana more relevant than ever. The National Center for Complementary and Integrative Health (NCCIH) reports that roughly 21 million American adults practiced yoga in recent years, with seated and meditative postures among the most commonly explored forms.
This guide walks you through what lotus yoga actually is, how to build safely toward the full pose, which modifications work best for your body type, and what the research says about its benefits. You’ll also find a warm-up sequence, contraindication guidance, and clear steps for beginners and seniors.
What Is Lotus Yoga?
Lotus yoga refers to any yoga practice that centers on or builds toward Padmasana (Lotus Pose) as its foundational seated posture.
In a broader sense, the term also describes yoga studio classes and personal practices that emphasize grounding, meditation, and hip-opening work. Some practitioners use “lotus yoga” to describe a full practice philosophy rooted in stillness and internal focus, not just a single pose.
The distinction matters. Padmasana itself is a specific physical posture requiring significant hip external rotation and knee flexibility. A “lotus yoga” practice, by contrast, might include a full sequence of preparatory poses, breathwork, and meditation designed to bring the body gradually toward that seated position.
Pose Tip:
- Lotus yoga as a practice is accessible at every level
- The full pose, Padmasana, requires specific hip mobility that must be developed over time
- A lotus yoga class typically includes hip openers, grounding sequences, and seated breathwork
Lotus Pose Yoga: Understanding Padmasana as a Practice
Padmasana (Lotus Pose) is a cross-legged seated posture in which each foot rests on the opposite thigh with the soles facing upward.
It appears across multiple yoga traditions. In Hatha yoga, it’s a primary meditation seat. In Ashtanga yoga, it forms the seated finishing sequence. In Yin yoga, the pose is held passively for longer durations to target the deep hip connective tissue. In Iyengar yoga, precise prop use helps practitioners find correct alignment without straining the knees.
Understanding which tradition you’re practicing in shapes how you approach the pose. Ashtanga practitioners often work toward Padmasana systematically over years of daily practice. A Yin practitioner might use a supported half-lotus variation from day one.
| Yoga Style | How Lotus Pose Is Used | Typical Hold Duration |
|---|---|---|
| Hatha | Primary meditation seat | 5 to 20 minutes |
| Ashtanga | Finishing sequence posture | 5 to 25 breaths |
| Yin | Passive hip stretch variation | 3 to 5 minutes |
| Iyengar | Prop-supported alignment practice | 2 to 10 minutes |
| Restorative | Supported reclined variation | 5 to 15 minutes |
Padmasana History and Origins
Padmasana is one of the oldest documented yoga postures, with references appearing in ancient Indian texts more than 2,000 years old.
The pose is described in the Hatha Yoga Pradipika, a 15th-century Sanskrit text considered one of the foundational manuals of Hatha yoga. It is also referenced in the Gheranda Samhita and the Shiva Samhita, both classical texts outlining seated meditation postures. In these texts, Padmasana is described not merely as a physical position but as the seat of awakened consciousness.
The name itself comes from Sanskrit. “Padma” means lotus flower. “Asana” means seat or posture. The lotus flower grows from muddy water into a clean, open bloom, a metaphor that yogic philosophy applied to the practitioner sitting in clarity above the turbulence of mental noise.
Across Buddhist and Hindu traditions, deities and enlightened figures are depicted seated in Padmasana. This cultural prevalence explains why the pose carries such symbolic weight beyond its physical mechanics. For modern practitioners, knowing this history adds depth to what might otherwise feel like just a stretching exercise.
Lotus Pose Benefits for Body and Mind
Padmasana (Lotus Pose) offers a range of documented physical and mental benefits when practiced with correct alignment and appropriate preparation.
According to a study published in the International Journal of Yoga, regular seated meditation practice in postures like Padmasana was associated with reduced perceived stress scores and improved attention span in adult practitioners. Researchers noted that the symmetrical, grounded posture contributed to consistent spinal alignment during extended meditation sits.
Physical benefits of regular lotus pose practice include:
- Increased hip external rotation and hip joint mobility
- Passive lengthening of the adductor muscles along the inner thigh
- Improved ankle flexibility from sustained foot placement
- Strengthened spinal erector muscles through active upright sitting
- Reduced compression in the lower back when the pelvis is correctly elevated
Mental and neurological benefits documented in research include reduced cortisol response, improved focus and concentration during seated tasks, and measurable changes in resting heart rate variability. The Journal of Alternative and Complementary Medicine has published findings connecting regular yoga meditation practice with parasympathetic nervous system activation, the “rest and digest” state that counteracts stress.
Lotus Pose for Meditation and Breathing
Padmasana is the most widely used seated posture for formal meditation and pranayama (breath control practice) in classical yoga traditions.
The reason is structural. When the hips are sufficiently open to allow the legs to sit in lotus position, the pelvis naturally tilts into a slight anterior (forward) tilt. This causes the lumbar spine to adopt a gentle inward curve rather than collapsing backward. That spinal position makes it significantly easier to breathe fully without muscular effort, which is exactly what long meditation sessions require.
Nadi Shodhana (alternate nostril breathing) and Ujjayi (victorious breath) are the two pranayama techniques most commonly practiced in Padmasana. Both require a stable, upright base so the diaphragm can move freely.
The breath and posture connection is not incidental. Complementary Therapies in Medicine published research finding that upright seated posture during breathwork practice was associated with greater respiratory efficiency and deeper breath cycles compared to slouched or reclined positions.
Pose Tip:
- Elevate the hips on a folded blanket or zafu (meditation cushion) to encourage natural lumbar curve
- Begin with 5 to 10 breath cycles and build toward longer sits of 10 to 20 minutes
- If the breath feels restricted at any point, ease the leg position into Half Lotus or Sukhasana (Easy Pose)
How to Do Lotus Pose Step by Step
Full Padmasana (Lotus Pose) requires sufficient hip external rotation to bring the feet onto the opposite thighs without forcing the knees. Do not attempt this pose before your preparatory poses feel genuinely comfortable.
To practice Padmasana:
- Sit on the floor with both legs extended straight in front of you. Use a folded blanket under the sitting bones if needed.
- Bend your right knee and draw the right shin toward you. Cradle the foot in both hands.
- Use your hands to externally rotate the right hip, turning the sole of the right foot to face upward.
- Place the right foot onto the left thigh, as close to the hip crease as comfortable. The ankle should rest on the thigh, not dig into it.
- Bend your left knee and draw the left foot toward you in the same way.
- Lift the left foot onto the right thigh, again as close to the hip crease as possible.
- Let both knees drop toward the floor. Do not press them down forcibly.
- Sit tall through the crown of the head. Rest your hands on your knees, palms up or down.
- Close your eyes. Take 3 to 5 full breath cycles to settle before beginning meditation or breathwork.
- To release: carefully lift the top foot first, then the bottom foot. Extend both legs and shake them gently.
Safety note: If either knee lifts more than a few inches off the floor, your hips are not yet ready for full lotus. Practice Ardha Padmasana (Half Lotus Pose) instead.
Key Takeaway: Lotus yoga is a practice built around Padmasana, which requires developed hip mobility over time. Rushing the pose bypasses the process and increases knee injury risk. Every modification is a valid, complete practice in itself.
Lotus Pose Muscles Engaged and Anatomy
Padmasana (Lotus Pose) works the body primarily through passive stretching and sustained isometric engagement, not dynamic contraction.
The hip external rotators are the primary muscle group under demand. These include the piriformis, obturator externus, obturator internus, gemellus superior and inferior, and quadratus femoris. Together, they allow the femur (thigh bone) to rotate outward in the hip socket, which is the fundamental movement that makes lotus possible.
The adductors along the inner thigh are passively lengthened as the knees drop outward. The iliopsoas and hip flexors are in a shortened position and require sustained flexibility to prevent anterior pelvic tipping. The spinal erectors engage actively to maintain the upright spine.
Think of your hip external rotators like a combination lock. All five mechanisms need to open, not just one. You can have very flexible hamstrings and still find Lotus impossible if the piriformis and obturator externus are restricted.
| Muscle or Muscle Group | Role in Lotus Pose | Where You Feel It |
|---|---|---|
| Piriformis | External rotation of the hip | Deep buttock |
| Adductors | Passively stretched | Inner thigh |
| Iliopsoas | Shortened, requires flexibility | Front of hip |
| Spinal erectors | Active upright support | Lower and mid back |
| Quadriceps | Passive lengthening | Front of thigh |
| Ankle stabilizers | Support foot placement | Outer ankle |
Lotus Pose Alignment Cues and Common Mistakes
The most frequent alignment error in Padmasana (Lotus Pose) is forcing knee descent when the hip external rotation is insufficient.
When the hips cannot rotate far enough outward, the body compensates by rotating through the knee instead. The knee joint is a hinge joint, not a ball-and-socket joint. It is not designed to absorb that rotational load. This is the primary mechanism behind lotus-pose-related knee injuries, specifically medial collateral ligament strain and meniscus compression.
Common mistakes practitioners make:
- Pressing the knees toward the floor with hands before the hips are ready
- Placing the foot too low on the shin instead of on the upper thigh
- Allowing the ankle to collapse inward (inversion) when resting on the thigh
- Rounding the lower back by sitting on a flat, hard surface without hip elevation
- Holding the breath while trying to get into position
Key alignment cues to follow:
- The ankle joint should rest on the thigh, not the top of the foot or the arch
- Both sitting bones must be equally weighted on the floor or prop
- The chin stays parallel to the floor; do not tilt the head forward
- The shoulders drop away from the ears throughout the hold
The American College of Sports Medicine advises that joint-specific mobility work should precede any pose that places the joint at or near its end range of motion. Lotus pose places the hip at its end range of external rotation. This means hip-specific prep is not optional.
Half Lotus Pose and Quarter Lotus Pose
Ardha Padmasana (Half Lotus Pose) places one foot on the opposite thigh while the other leg rests in a simple cross-legged position.
This is the most widely recommended starting point for practitioners building toward full lotus. It requires significantly less hip external rotation while still offering the same spinal alignment benefits. The seated posture remains stable enough for meditation and pranayama practice.
Quarter lotus, sometimes called Sukhasana (Easy Pose), keeps both feet on the floor with the legs simply crossed at the shins. This is the appropriate starting posture for most beginners and for anyone with hip or knee restrictions. It is a complete, legitimate meditation seat, not a lesser substitute.
| Pose | Sanskrit Name | Foot Placement | Hip Rotation Required | Best For |
|---|---|---|---|---|
| Full Lotus | Padmasana | Both feet on opposite thighs | High | Experienced practitioners with open hips |
| Half Lotus | Ardha Padmasana | One foot on thigh, one below | Moderate | Intermediate practitioners |
| Quarter Lotus | Sukhasana | Both feet on floor, legs crossed | Low | Beginners, seniors, tight hips |
| Seated on Chair | Modified Sukhasana | Feet flat on floor | None required | Anyone with knee or hip pain |
Switching sides regularly in half lotus is important. Holding only one side develops asymmetrical hip mobility, which can contribute to SI joint imbalance over time. Practice equal time on each side.
Key Takeaway: Half lotus and quarter lotus are not beginner shortcuts. They are complete seated postures with the same meditative and postural benefits as full Padmasana. Most bodies never need to progress beyond them.
Lotus Pose with Props and Modifications for Beginners
Beginners should approach Padmasana (Lotus Pose) with props from the first session, not as a last resort.
The single most effective modification is sitting on a folded blanket or yoga block. Elevating the sitting bones by 3 to 5 inches tips the pelvis forward, which naturally reduces the demand on the hip external rotators and prevents the lower back from rounding. This one change makes Sukhasana and Ardha Padmasana accessible to people who struggle with cross-legged sitting entirely.
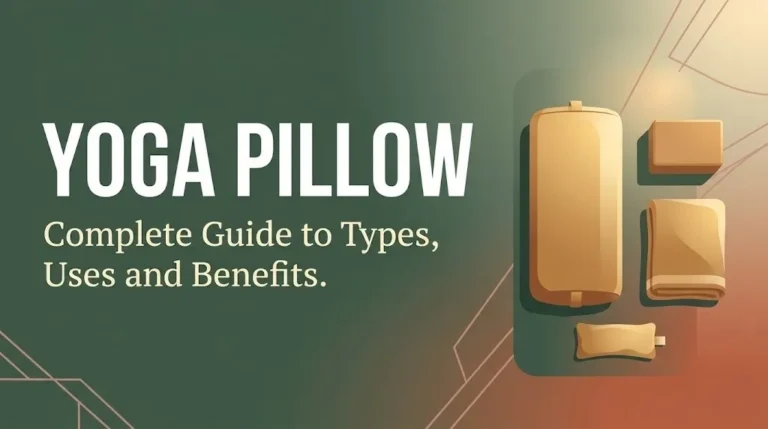
Props that support lotus yoga practice:
- Folded yoga blanket: Place under the sitting bones to elevate the pelvis. Two to three folds for tighter hips.
- Zafu or meditation cushion: Round cushion designed specifically for this purpose. Provides consistent elevation.
- Yoga block: Placed on its lowest or medium height under the sitting bones. Firm support for people who need it.
- Yoga strap: Looped around the waist and thighs to support lower back posture during extended sits.
- Bolster: Used under the outer thighs in Ardha Padmasana to reduce knee strain when the knee lifts off the floor.
For beginners, the target is finding a position where the spine can be upright without muscular strain for at least 5 minutes. If you’re using significant effort just to sit up, the prop setup needs adjustment before you add any deeper leg positioning.
A physical therapist or experienced yoga teacher familiar with hip anatomy can assess whether your hip structure allows for full external rotation. Some people have anatomical hip socket shapes that limit rotation regardless of flexibility training.
Bound Lotus Pose and Advanced Variations
Baddha Padmasana (Bound Lotus Pose) is the advanced variation in which the arms wrap behind the back and the fingers clasp the feet.
This variation requires full lotus leg positioning plus significant shoulder external rotation and spinal mobility. It is found in the Ashtanga yoga primary series and is not appropriate for anyone who has not already established a stable, comfortable full Padmasana. Attempting Baddha Padmasana with incomplete lotus position places the wrists, shoulders, and knees under simultaneous stress.
Additional advanced variations include:
- Tolasana (Scale Pose): Full lotus with the hands pressing the floor and the body lifting off the ground. Requires significant upper body and core strength.
- Kukkutasana (Rooster Pose): Arms threaded through the legs in lotus, then the body is lifted. Extreme core and wrist strength required.
- Utplutih: The Ashtanga finishing posture where Padmasana is held in a lifted position for a specified breath count.
Pose Tip:
- Never attempt Baddha Padmasana without a qualified teacher present for the first attempt
- Both shoulders must have equal range of motion before attempting the bind
- If the full bind is not accessible, use a yoga strap looped around the foot to simulate the arm position without force
Lotus Pose for Seniors
Seniors can absolutely practice lotus yoga, but the approach must match current hip mobility, joint health, and any existing conditions.
According to research published in Complementary Therapies in Medicine, gentle yoga including seated postures improved balance, reduced fall risk, and decreased self-reported joint stiffness in adults over 60. Seated practice in particular was found to be low risk and consistently well-tolerated when modifications were used.
For most seniors, the appropriate entry point is Sukhasana (Easy Pose) on a chair or with significant prop support. A chair modification places both feet flat on the floor and mimics the upright spinal posture of lotus without any hip or knee load. This version is equally effective for meditation and pranayama.
Seniors with the following conditions should modify significantly or work with a yoga teacher experienced in adaptive practice:
- Hip replacement: No deep external rotation. Padmasana is contraindicated. Chair or reclined practice only.
- Knee osteoarthritis: Reduce or eliminate leg crossing. Use a wide-legged chair position instead.
- Lumbar spinal stenosis: Elevate hips substantially. Avoid posterior pelvic tilt from floor sitting.
- Peripheral neuropathy: Check foot and ankle sensation frequently. Numbness from leg positioning can be masking potential injury.
Key Takeaway: Bound lotus and advanced variations require years of foundational work and teacher guidance. For seniors, modified seated practice offers equivalent benefits to full lotus without the structural risk.
Lotus Pose Knee Pain and Contraindications
The knee is the most vulnerable joint in Padmasana (Lotus Pose), and knee pain during the pose is always a signal to stop immediately.
Knee pain in lotus typically signals one of two problems. Either the hip external rotators are too restricted to allow proper rotation, causing the knee to absorb torque it cannot handle, or the foot placement on the thigh is too low, creating a mechanical angle that stresses the medial knee ligaments. Both issues are solved by backing off the leg position and working at a less demanding variation.
Lotus pose is contraindicated in the following situations:
- Recent or chronic ACL, MCL, or LCL ligament injury
- Meniscus tears or meniscus surgery within the past 12 months
- Hip impingement (femoroacetabular impingement, or FAI)
- Recent hip replacement surgery
- Acute sciatica or piriformis syndrome flare-up
- Pregnancy after the first trimester without specific guidance from a maternal yoga specialist
- Any knee or hip pain that occurred during a previous attempt at the pose
If you have knee pain during yoga generally, consulting with an orthopedic physical therapist before practicing Padmasana is worthwhile. They can assess joint integrity and recommend whether hip mobility work is safe to pursue.
The pose should never feel sharp, burning, or pinching in the knee. Mild sensation in the outer hip or thigh is expected. Pain in the joint itself is not.
Preparatory Poses and Hip Openers for Lotus Pose
Building toward Padmasana (Lotus Pose) requires a consistent practice of hip external rotation and adductor opening, ideally practiced over several weeks or months.
The most effective preparatory poses for lotus, in a logical progression from accessible to more demanding:
- Sukhasana (Easy Pose): Baseline seated posture. Practice sitting upright for 5 to 10 minutes daily.
- Baddha Konasana (Bound Angle Pose): Feet together, knees dropped to the sides. Targets adductors and hip external rotators simultaneously.
- Agnistambhasana (Fire Log Pose): Shins stacked, one on top of the other. Specifically trains the same rotation pathway as lotus.
- Eka Pada Rajakapotasana (Pigeon Pose): Deep unilateral hip opener targeting piriformis and deep external rotators.
- Malasana (Garland Pose/Squat): Full squat position that opens the hip joint and trains ankle mobility simultaneously.
- Virasana (Hero Pose): Targets the knee in the opposite flexion pattern, which can balance the demands of lotus prep work.
- Supta Kapotasana (Reclined Pigeon Pose): Supine version of Pigeon. Lower impact. Ideal for beginners and seniors.
According to the National Center for Complementary and Integrative Health, progressive flexibility training with consistent practice over 8 to 12 weeks shows measurable improvements in hip range of motion. Consistency matters more than intensity for joint mobility gains.
| Preparatory Pose | Sanskrit Name | Primary Target | Recommended Hold |
|---|---|---|---|
| Bound Angle Pose | Baddha Konasana | Adductors, hip external rotators | 1 to 3 minutes |
| Fire Log Pose | Agnistambhasana | Deep hip rotators | 1 to 3 minutes per side |
| Pigeon Pose | Eka Pada Rajakapotasana | Piriformis, hip capsule | 2 to 5 minutes per side |
| Garland Pose | Malasana | Hip joint, ankles | 1 to 2 minutes |
| Reclined Pigeon | Supta Kapotasana | Piriformis, lower impact | 2 to 5 minutes per side |
Lotus Yoga Sequence and Warm-Up Flow
A well-designed lotus yoga sequence begins at the ankles and works progressively inward toward the hips before any seated cross-legged work.
The principle here is joint preparation in sequence, not just “hip openers.” Your ankles, knees, and hips all contribute to lotus pose. Warming only the hips while ignoring ankle mobility leaves one piece of the puzzle unsolved. Stiff ankles prevent the foot from resting comfortably on the thigh, which shifts load onto the knee.
A practical 30-minute lotus yoga warm-up sequence:
- Tadasana (Mountain Pose) with ankle circles: 10 rotations each direction, each foot. Standing or seated.
- Malasana (Garland Pose): Hold 60 to 90 seconds. Heels elevated on a blanket if needed.
- Baddha Konasana (Bound Angle Pose): Seated, hold 2 minutes. Walk fingers forward for a gentle fold.
- Agnistambhasana (Fire Log Pose): 2 minutes per side. This is your primary lotus prep.
- Supta Kapotasana (Reclined Pigeon): 2 to 3 minutes per side. Back on the floor, ankle across opposite knee.
- Ardha Padmasana (Half Lotus Pose): 1 to 2 minutes per side. Add pranayama here if comfortable.
- Padmasana (Full Lotus Pose) or return to Sukhasana: 5 to 20 minutes of meditation or breathwork.
- Paschimottanasana (Seated Forward Fold): 2 minutes as a counter-stretch for the hip flexors.
- Savasana (Corpse Pose): 5 to 7 minutes. Non-negotiable close for any seated practice.
This sequence moves from standing mobility to floor-based hip openers to the target posture, then closes with a counter-pose and rest. That arc is what separates a thoughtful lotus yoga practice from simply sitting in a cross-legged position and hoping for the best.
Key Takeaway: A 30-minute lotus yoga sequence beginning with ankle mobility and ending with a forward fold gives the hips and joints a proper arc of preparation and recovery. Skipping the warm-up is the most common reason people plateau in their progress toward Padmasana.
Frequently Asked Questions About Lotus Yoga
Is lotus pose safe for beginners?
Lotus pose is safe for beginners who approach it gradually and use appropriate modifications.
Most beginners should start with Sukhasana (Easy Pose) or Ardha Padmasana (Half Lotus), working on hip mobility over several weeks before attempting the full pose.
If any knee pain occurs during the attempt, the pose should be eased back to a less demanding variation immediately.
Why can’t I sit in lotus pose even though I’m flexible?
Lotus pose requires hip external rotation specifically, not general flexibility.
Many people with flexible hamstrings or spines still have restricted hip external rotators, particularly the piriformis and obturator externus, which are the muscles that allow the femur to rotate in the socket.
Targeted hip rotation work, such as Fire Log Pose and Reclined Pigeon, addresses the specific mobility pattern lotus requires.
How long should I hold lotus pose?
Most yoga teachers recommend holding Padmasana for at least 5 breath cycles as a starting point, roughly 30 to 60 seconds.
For meditation purposes, holds of 10 to 20 minutes are common in experienced practitioners, but this is built up gradually over months.
If discomfort or numbness develops in the feet or legs, release the pose and allow circulation to return before resuming.
What is the difference between half lotus and full lotus pose?
In half lotus (Ardha Padmasana), one foot rests on the opposite thigh while the other leg remains in a simple cross-legged position.
Full lotus (Padmasana) places both feet on the opposite thighs simultaneously, requiring significantly greater hip external rotation from both sides.
Half lotus offers equivalent benefits for meditation and breathwork and is the recommended practice for most people at any experience level.
Does lotus pose hurt your knees?
Lotus pose should not cause knee pain when practiced with proper hip mobility and correct alignment.
Knee pain in this pose typically signals that the hip external rotators are not yet mobile enough, causing rotational stress to transfer to the knee rather than being absorbed by the hip joint.
Anyone who experiences knee pain in lotus should stop immediately, work with a physical therapist if the pain persists, and return to preparatory poses before attempting the full posture again.
Lotus yoga rewards patience above all else. Padmasana is not a pose you earn in a single class. It is something you build toward systematically, through consistent hip opener work, smart prop use, and a willingness to spend time in the preparatory stages without rushing.
Start with Sukhasana or Ardha Padmasana this week. Practice the Fire Log sequence three times before your next attempt at full lotus. Notice what changes.
The most experienced practitioners in any room often choose the simplest version of a pose. Choosing the right variation for your body is not a compromise. It is the practice.