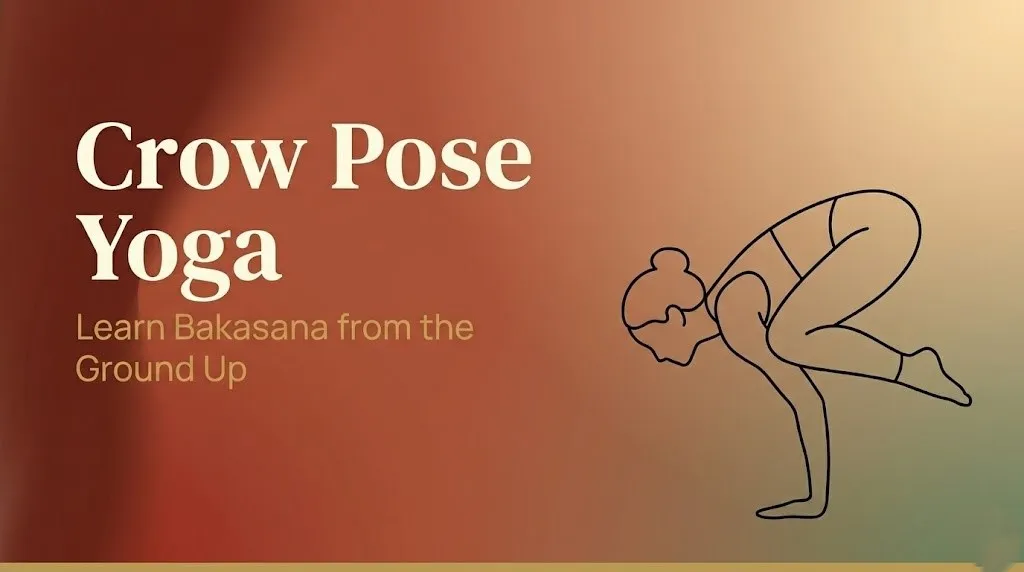
Crow Pose Yoga: Learn Bakasana from the Ground Up 2026
Crow pose yoga, known in Sanskrit as Bakasana, is a foundational arm balance where you balance your entire body weight on your bent arms while your knees rest on the backs of your upper arms. Most people can build up to it within weeks, not years, if they train the right muscles and address the fear of tipping forward before it becomes a mental block.
Arm balances like Bakasana demand more than raw strength. According to the National Center for Complementary and Integrative Health (NCCIH), yoga practice builds both physical capacity and body awareness simultaneously, which is exactly the combination this pose requires. You are not just getting stronger. You are learning to trust your own proprioception under load.
This guide covers the anatomy of crow pose, the real difference between crow and crane, a complete step-by-step breakdown, modifications for beginners and for people with wrist limitations, how to work through the fear of falling, and where the pose fits in a broader practice. Nothing is skipped.
Crow Pose Yoga: What It Is and Why Practitioners Love It
Bakasana (Crow Pose) is a front-facing arm balance performed in a squat position, where bent elbows act as a shelf for the knees while the core and hip flexors lift the hips upward.
It sits at the intersection of strength, balance, and concentrated attention. No other beginner arm balance demands that all three be present at once. That is precisely what makes it so satisfying when it clicks.
In Hatha yoga, Bakasana is often introduced as the first arm balance a student learns. In Vinyasa and Ashtanga yoga, it appears as a transitional posture between sequences. Iyengar yoga approaches it with extensive prop support, prioritizing correct alignment before any attempt at the full expression.
The pose earns its reputation not because it is dangerous, but because it feels dangerous. Understanding that distinction is the beginning of learning it.
Pose Tip:
- “Crow” and “Crane” are two different poses, even though many teachers and websites use the names interchangeably. More on this in the next section.
- The pose is not about upper body brute strength. Hip flexor engagement and core compression do most of the work.
- Your gaze matters. Looking forward, not down, prevents the forward tip that most beginners fear.
What Is Bakasana and Why Does It Matter in Yoga?
Bakasana is the Sanskrit name for Crow Pose, translating loosely from the root word “baka,” meaning crane or heron, which is part of why the crow and crane naming confusion exists across yoga traditions.
The pose matters because it is a gateway posture. Successfully practicing Bakasana builds the wrist strength, shoulder stability, and core compression skills required for nearly every other arm balance in yoga. Think of it as the introductory chapter to a whole category of practice.
From a neuromuscular perspective, Bakasana teaches the body to distribute load across the wrist, elbow, and shoulder joints simultaneously. That skill transfers directly to poses like Parsva Bakasana (Side Crow Pose), Tittibhasana (Firefly Pose), and eventually inversions like Pincha Mayurasana (Forearm Stand).
According to a study published in the Journal of Bodywork and Movement Therapies, yoga arm balance practice measurably improves scapular stability and proprioceptive awareness in the shoulder girdle. These are not just yoga-specific benefits. They translate to daily functional movement.
Modification: Practitioners who have never attempted an arm balance can practice the shape of Bakasana by sitting in a deep squat, placing the hands flat on the floor shoulder-width apart, and simply rocking forward to feel the weight shift. No lifting required. This alone builds the wrist confidence the full pose demands.
Crow vs Crane Pose Yoga: What Is the Actual Difference?
The difference between crow pose and crane pose comes down to arm angle: in Bakasana (Crow Pose), the elbows are bent; in Kakasana (Crane Pose), the arms are nearly straight.
This is not a minor variation. The two poses place entirely different loads on the elbow joint and require different strength levels and proportional anatomy.
| Feature | Bakasana (Crow Pose) | Kakasana (Crane Pose) |
|---|---|---|
| Elbow position | Bent, roughly 90 degrees | Nearly straight |
| Knee placement | On the backs of upper arms (triceps shelf) | High on the upper arms, close to armpits |
| Primary load | Wrist, forearm, core | Elbow joint, triceps, shoulder stabilizers |
| Difficulty level | Beginner arm balance | Intermediate to advanced |
| Risk factor | Lower; elbows absorb shock | Higher; less shock absorption in extended elbows |
| Common in which styles | Hatha, Vinyasa, Ashtanga | Iyengar, advanced Vinyasa |
Most Western yoga classes teach Bakasana and call it “Crow.” Some teachers call the straight-arm version “Crane.” A smaller number use the names oppositely. What matters is what your elbows are doing, not which bird name your teacher uses.
Safety note: People with elbow hyperextension tendency should prioritize Bakasana with bent elbows. Kakasana places significant load through an almost-straight elbow, which can compress the joint and stress the lateral ligaments if the triceps are not sufficiently pre-engaged.
Modification: If you are unsure which variation your teacher is cueing, ask where your knees should contact your arms. Knees low on the triceps means Bakasana. Knees high near the armpits means Kakasana.
Key Takeaway: Crow pose (Bakasana) uses bent elbows. Crane pose (Kakasana) uses nearly straight arms. They are different poses with different strength demands, and beginners should start with Bakasana every time.
What Muscles Does Crow Pose Work?
Bakasana primarily engages the serratus anterior, triceps brachii, anterior deltoid, wrist flexors and extensors, transversus abdominis, and hip flexors, specifically the psoas and iliacus.
Most beginners assume crow pose is mostly arms. It is not. The hips and core do an equal share of the work.
Here is what each muscle group actually does during the pose:
- Serratus anterior: Protracts the scapulae (pushes the shoulder blades apart and forward), creating the rounded upper back shape that keeps the body stable overhead.
- Triceps brachii: Maintain elbow position under load and prevent collapse toward the floor.
- Anterior deltoid and shoulder stabilizers: Keep the arms vertical and resist the forward pitching of the torso.
- Wrist flexors and extensors: Actively grip the floor and resist hyperextension through the wrist joint.
- Transversus abdominis: Creates intra-abdominal pressure that supports the spine and transfers force from the legs to the arms.
- Psoas and iliacus (hip flexors): Actively lift the knees higher on the arm shelf. This is the movement that keeps you airborne.
- Hip adductors (inner thighs): Squeeze inward against the arms to maintain the connection between knees and upper arms.
The American College of Sports Medicine notes that body weight exercises requiring multi-joint stability and force transfer, such as arm balances, produce greater neuromuscular activation patterns than isolated single-joint exercises. Bakasana qualifies as a full-body neuromuscular challenge.
Modification: To isolate and strengthen the hip flexors for this pose before attempting the balance, practice 10 slow repetitions of seated Navasana (Boat Pose) variations, holding the top position for 3 breath counts each time.
Crow Pose Yoga Benefits Backed by Research
The documented benefits of crow pose yoga include improved wrist and shoulder strength, enhanced core stability, better body-weight proprioception, and reduced anxiety through focused concentration practice.
Research published in the International Journal of Yoga found that consistent yoga arm balance practice improved upper extremity muscle endurance and self-efficacy scores in practitioners who trained three or more times per week over an eight-week period. Self-efficacy, meaning belief in your ability to accomplish a physical task, is a predictor of long-term practice adherence.
From a physical standpoint, the benefits include:
- Strengthened wrist extensors and flexors, reducing the risk of wrist tendinopathy in daily activities
- Increased scapular stability and rotator cuff endurance
- Improved deep core activation through transversus abdominis engagement
- Developed hip flexor strength that transfers to climbing stairs, cycling, and running
- Better proprioceptive acuity in the shoulder and wrist joints
- Reduced resting anxiety through the focused attentional demand the pose requires
The anxiety reduction effect is worth noting specifically. A study in Complementary Therapies in Medicine found that yoga practices requiring sustained balance and concentrated gaze (drishti) showed statistically measurable reductions in state anxiety scores compared to yoga practices without these elements. Bakasana delivers both: a fixed balance challenge and a forward gaze point.
Modification: Practitioners who cannot yet perform the full pose still build wrist, shoulder, and hip flexor strength through the prep work described in this article. The benefits accrue from the training process, not only from achieving the final expression.
How to Do Crow Pose in Yoga: Step-by-Step Instructions
To practice Bakasana (Crow Pose) safely and correctly, you need a non-slip mat, optionally a yoga block, and approximately 60 seconds of focused setup.
To practice Bakasana:
- Begin in Malasana (Garland Pose), a low squat with feet hip-width apart or slightly wider. Place your hands flat on the floor, shoulder-width apart, fingers spread wide. Press all four corners of each palm into the mat.
- Walk the knees up toward the outer edges of the upper arms. Squeeze your knees gently into your arms. This adductor engagement is your anchor.
- Bend the elbows to roughly 90 degrees. They should track directly over the wrists, not flare outward. Round the upper back actively. Think of spreading the shoulder blades apart.
- Shift your gaze forward, not down. Pick a spot on the floor about 12 inches in front of your hands. This is your drishti (gaze point). Keep it there.
- On an exhale, tip your body weight forward slowly until your toes lighten on the mat. Do not jump. Lean.
- Engage your hip flexors actively, drawing the knees higher onto the arms. This is what lifts the hips and feet, not the arms pushing down.
- Hold for 3 to 5 breath cycles. Keep breathing. Breath holding is a sign of excessive muscular tension.
- To exit, slowly shift your weight back and lower the feet to the floor on an exhale. Never drop suddenly from the pose.
Modification for beginners: Place a yoga block on its lowest height under the forehead. This gives you a reference point that prevents the head from dropping suddenly and also reduces the psychological fear of pitching forward into the floor.
Modification for wrist sensitivity: Come onto the fingertips rather than flat palms, or place the heel of the hands on a folded blanket to reduce the angle of wrist dorsiflexion.
Key Takeaway: Crow pose is built on hip flexor engagement, not just arm pushing. The moment you actively draw the knees up the arm shelf rather than just resting them there, the pose becomes dramatically more stable.
Crow Pose Yoga for Beginners: Starting From Zero
Beginners can absolutely learn crow pose, but the timeline is realistic only when the foundational strength is built first rather than attempted through repeated failed balancing attempts.
The honest truth is this: most beginners who cannot do crow pose do not lack the arm strength. They lack trained hip flexors, adequate wrist stability, and a practiced tolerance for the sensation of forward weight shift. These are all trainable qualities.
A practical beginner progression looks like this:
| Week | Focus | Practice |
|---|---|---|
| 1 to 2 | Wrist preparation | Tabletop wrist circles, wrist weight-bearing holds (30 sec each side) |
| 2 to 3 | Hip flexor strength | Navasana holds, seated knee drives |
| 3 to 4 | Core compression | Plank holds, tuck holds in squat |
| 4 to 5 | Weight shifting | Crow prep with block under forehead, toe-lifting drills |
| 5 to 6 | First full attempts | Crow with block, one-foot lift at a time |
| 6 to 8 | Full pose | Both feet off the floor, 3 to 5 breaths |
The 6 to 8 week timeline assumes you are practicing the foundational elements three to four times per week. Practicing once weekly will extend this significantly.
According to findings referenced by the Yoga Alliance, progressive skill development in yoga arm balances follows the same neuroplasticity principles as other motor learning tasks: consistent repetition with appropriate challenge load accelerates acquisition faster than infrequent high-intensity attempts.
Modification for absolute beginners: Practice the crow pose shape while sitting on the edge of a yoga block or low bolster. This removes the balance demand entirely and allows you to feel the knee-to-arm contact, the rounded spine shape, and the gaze direction without any risk of tipping.
Crow Pose Modifications and Prop Options
The best crow pose modifications use a yoga block to reduce fear, a blanket to protect wrists, or a wall to prevent forward falling.
Props are not training wheels. They are tools that isolate the elements of the pose you need to develop. Even experienced practitioners use blocks when refining alignment in new arm balance variations.
| Modification | Props Needed | Best For |
|---|---|---|
| Block under forehead | 1 yoga block | Fear of falling forward; beginners |
| Blanket under heels of hands | 1 folded blanket | Wrist pain; tight wrist dorsiflexion |
| One foot at a time | No props | Building confidence in weight shift |
| Crow facing a wall | Wall space | Preventing forward roll; beginners |
| Seated block prep | 1 yoga block (to sit on) | Absolute beginners; people with knee issues |
| Fingertip Crow | No props | Active wrist pain; reducing wrist load |
| Chair-supported Crow shape | 1 sturdy chair | Seniors; people with wrist contraindications |
For the block under forehead modification: place a block on its medium height directly in front of your hands. Perform all steps as normal. When you shift weight forward, your forehead rests on the block before you ever reach the tipping point. This alone eliminates the fear response for most beginners within two sessions.
The wall variation: face away from the wall, approximately 2 feet from it. When you shift forward and lift, the wall is behind your hips. If you tip backward (a much less common error), the wall catches you.
Modification for people with knee pain: Avoid resting body weight through the knee joint in any prep work. Come into the squat on the tiptoes and limit time with knees bent under load. The full pose itself does not load the knee joint directly, but the entry position does.
How to Overcome Fear of Falling in Crow Pose
The fear of falling forward in crow pose is the most common reason beginners cannot achieve the pose even when they have adequate strength.
This is not a weakness. It is the brain’s threat detection system doing exactly what it evolved to do. Your face is close to a hard floor. Your proprioceptive system has no prior reference for this sensation. The amygdala responds with a protective flinch that pulls the weight back before any genuine balance is established.
The fix is graduated exposure, not willpower. Here is what actually works:
- Practice falling. Set up on a very soft surface or with a folded blanket in front of your face. Tip forward slowly until the forehead touches the blanket. Do this deliberately, five times. Your nervous system learns that the consequence of forward tipping is mild and non-threatening.
- Use the block strategy. As described in the modifications section, a block under the forehead gives the brain a reference point. It cannot fall past the block. That ceiling on the fall radius reduces threat perception dramatically.
- Slow the weight shift. Most falls in crow pose happen because the weight is shifted too quickly. A slow, deliberate lean forward is far more controllable than a sudden jump.
- Keep the gaze forward, always. Looking down activates the startle response. Looking forward keeps the head and therefore the center of mass in a more stable relationship to the hands.
Research from Frontiers in Psychology on fear-based inhibition in physical skill learning indicates that graduated exposure to feared stimuli, combined with successful repetitions at reduced intensity, consistently outperforms motivational coaching alone for motor skill acquisition. In plain terms: practice the scary part slowly and repeatedly. Pep talks don’t build neural pathways.
Modification: If fear remains after trying these strategies, work with a yoga teacher who can spot the pose. One hand placed lightly on the hip from the side, not supporting weight but present as a physical reference, consistently reduces fear responses in new arm balance practitioners.
Key Takeaway: Fear is the primary barrier for most beginners in crow pose, not strength. Address the fear with graduated exposure and block support, and the balance often follows within a few sessions.
Crow Pose Wrist Pain: Causes and Solutions
Wrist pain during or after crow pose most commonly comes from excessive wrist dorsiflexion (bending the wrist back too sharply), inadequate wrist preparation, or misalignment of the wrist under the shoulder joint.
The wrist joint is not designed to bear the full weight of the body in dorsiflexion without specific preparation. In daily life, most people’s wrists are rarely loaded this way. When crow pose places that demand on an unprepared joint, the wrist extensors, flexor tendons, and the joint capsule of the radiocarpal joint all absorb more stress than they can comfortably manage.
Solutions include:
- Wrist warm-up protocol before every practice. Circle the wrists 10 times in each direction. Press the backs of the hands into the floor (reverse prayer on the mat) for 20 seconds. Do tabletop wrist weight-bearing for 30 seconds.
- Spread the fingers wide and press actively through all four corners of the palm. This distributes load across the entire hand rather than concentrating it at the heel of the palm.
- Use a folded blanket under the heel of the hand. This reduces the dorsiflexion angle by 10 to 15 degrees and can make an immediate difference in comfort.
- Try fingertip crow. Coming onto the fingertips reduces the effective angle of wrist dorsiflexion and engages the forearm flexors more actively, often reducing joint-level stress.
Anyone experiencing sharp, shooting, or persistent wrist pain during weight-bearing yoga poses should discuss the specific loading pattern with a physical therapist who works with yoga practitioners or athletes, as the cause may involve a specific tendon, nerve, or joint issue that requires targeted intervention rather than general modification.
Who this most affects: Practitioners who spend long hours typing or using a mouse often arrive at crow pose with chronically shortened wrist flexors and reduced dorsiflexion range. This population benefits significantly from a dedicated two-week wrist preparation program before attempting Bakasana.
Who Should Avoid Crow Pose and When to Skip It
Crow pose should be avoided by anyone with an active wrist injury, wrist tendinopathy, or recent wrist surgery until cleared by a physical therapist with specific load-bearing progression guidelines.
Additional contraindications include:
- Carpal tunnel syndrome (active): Weight-bearing in wrist dorsiflexion compresses the carpal tunnel and can worsen median nerve symptoms.
- Glaucoma or elevated intraocular pressure: Arm balances place the head lower than the heart briefly during entry and exit. People with diagnosed high eye pressure should discuss this with their ophthalmologist before attempting inversions or near-inversions.
- Pregnancy (second and third trimester): The prone balance position and abdominal compression are contraindicated as the pregnancy progresses. Discuss any arm balance with a prenatal yoga specialist.
- Shoulder impingement or rotator cuff injury (active): The protracted scapular position and load through the shoulder joint in Bakasana can aggravate impingement syndromes.
- Recent elbow injury: Any acute trauma to the elbow ligaments, tendons, or joint capsule contraindicates load-bearing at that joint.
- Uncontrolled high blood pressure: Brief inversions and intense isometric effort can spike blood pressure acutely.
For seniors: crow pose is not inherently inappropriate for older adults, but wrist bone density, joint space reduction, and balance confidence should all be assessed realistically. Many seniors find the chair-supported crow shape valuable for building the required hip flexor and core strength without the wrist loading. A bone density evaluation is worth discussing with a physician before beginning any weight-bearing wrist practice for the first time after age 65.
Modification: Any practitioner who falls into a contraindicated category can build all the same hip flexor, core, and shoulder stability benefits through Navasana (Boat Pose) variations, Plank Pose (Phalakasana) holds, and seated tuck holds without loading the wrists at all.
Advanced Crow Pose Variations for Experienced Practitioners
Once Bakasana is stable for 5 to 10 breath cycles with consistent form, practitioners can progress to more demanding variations that add rotation, extension, or transitional complexity.
| Advanced Variation | Sanskrit Name | Key Additional Demand |
|---|---|---|
| Side Crow | Parsva Bakasana | Spinal rotation, oblique strength |
| One-Legged Crow | Eka Pada Bakasana | Hip extension strength, balance asymmetry |
| Flying Crow | Eka Pada Galavasana | Hip opening, hamstring flexibility |
| Crow to Headstand | Bakasana into Sirsasana | Inversion control, core compression |
| Crane Pose | Kakasana | Straight-arm strength, elbow control |
| Grasshopper | Parsva Bhuja Dandasana | Extreme rotation, hip flexibility |
Parsva Bakasana (Side Crow Pose) is the most accessible advanced variation for most practitioners. The entry is from a twist in squat position. Both knees stack on one arm rather than one knee on each arm. This demands significant oblique and transverse abdominis engagement.
To progress from Bakasana to Kakasana: from your crow position, slowly begin to straighten the elbows while actively drawing the knees higher toward the armpits. Do not lock the elbows. Maintain a micro-bend. The triceps should feel fully engaged and close to failure within 3 to 5 breaths. If the elbows collapse, return to the bent-arm position and build triceps endurance over several more weeks of practice.
Modification for the transition: Practice straight-arm plank (top of a push-up) holds for 30 to 60 seconds daily. This builds the specific triceps and shoulder stabilization endurance needed for Kakasana.
Key Takeaway: Advanced crow variations require the same biomechanical foundations as the basic pose, just with added rotation, asymmetry, or straight-arm demand. Master Bakasana completely before moving on.
Best Prep Poses Before Attempting Crow Pose
The most effective preparatory poses for Bakasana build wrist stability, hip flexor strength, core compression, and the rounded upper-back position the pose requires.
Skip the prep work and you will keep making the same failed attempts. Spend two weeks on these poses first and the difference is usually immediate.
Essential prep poses:
- Malasana (Garland Pose/Squat): Builds hip flexibility and the low starting position for crow’s entry. Hold for 5 to 10 breaths daily.
- Phalakasana (Plank Pose): Develops wrist and shoulder endurance under load in a straight-arm position. Hold for 30 to 60 seconds.
- Chaturanga Dandasana (Four-Limbed Staff Pose): Trains the bent-elbow load-bearing pattern that Bakasana requires. Practice lowering slowly rather than dropping.
- Navasana (Boat Pose): Strengthens the hip flexors (psoas and iliacus) that lift the knees in the final pose. Hold the top position for 5 breaths. Repeat 5 times.
- Uttanasana (Standing Forward Fold) with hands flat: Teaches weight bearing through the palms while maintaining spinal flexion. Shift the weight progressively forward onto the hands.
- Cat Pose (Marjaryasana): Practices the rounded upper-back (spinal flexion) position that keeps Bakasana stable. Hold the rounded position at the top of the movement for 3 breath counts.
According to the Journal of Alternative and Complementary Medicine, systematic preparatory sequencing in yoga practice reduces the incidence of technique-related strain injury and improves pose acquisition rates compared to unsupported direct attempts.
Modification: For practitioners with wrist sensitivity, substitute dolphin push-ups (forearm plank to forearm pike) for Chaturanga and plank work to build shoulder and core strength without wrist loading.
Crow Pose in a Yoga Sequence: Where It Fits
Bakasana fits best in the middle of a yoga sequence, after the body is warm and hip flexors are activated, but before the deep cool-down stretches that reduce the neuromuscular readiness the pose requires.
Placing it at the beginning of a practice, before the body is warm, is the most common structural mistake in crow pose sequencing. Attempting Bakasana with cold wrists, stiff hip flexors, and an un-activated core dramatically increases both injury risk and failure rate.
A well-structured sequence for crow pose looks like this:
- Warm-up (10 minutes): Wrist preparation, Cat-Cow, Downward Dog walking, Malasana holds.
- Hip flexor activation (5 minutes): Navasana series, high lunge knee drives.
- Shoulder and core work (5 minutes): Plank to Chaturanga, Dolphin Pose, Forearm Plank.
- Crow pose attempt (5 to 10 minutes): Prep drills, then full attempts.
- Counter poses (5 minutes): Wrist release stretches, Child’s Pose, gentle spinal extension (Cobra or Baby Cobra).
- Cool-down (5 to 10 minutes): Seated hip openers, Supine Twist, Shavasana.
In Vinyasa yoga, Bakasana commonly appears after a standing series and before an inversion or deeper backbend. In Ashtanga yoga, it appears in the Primary Series as a transitional element between seated poses.
After crow pose, the wrists need specific release work. The reverse wrist prayer (backs of hands pressed together, fingers pointing down) held for 30 seconds in each direction consistently reduces post-practice wrist tension.
Modification: Practitioners who are fatigued should not attempt Bakasana. Arm balance practice under muscular fatigue is the fastest route to a collapse and a wrist or face injury. If you have already done 60 minutes of challenging practice, skip crow pose that day.
Frequently Asked Questions About Crow Pose Yoga
What is the difference between crow pose and crane pose in yoga?
Crow pose (Bakasana) uses bent elbows, with the knees resting on the backs of the upper arms (the triceps shelf).
Crane pose (Kakasana) uses nearly straight arms, with the knees placed higher on the arms, closer to the armpits.
The bent-arm version is less demanding on the elbow joint and is appropriate for beginners; the straight-arm version requires more triceps endurance and elbow stability.
How long does it take a beginner to learn crow pose?
Most beginners can achieve a stable crow pose within 6 to 8 weeks of consistent targeted practice, approximately three to four sessions per week.
The timeline depends heavily on hip flexor strength and wrist preparation, not overall fitness level.
Practitioners who focus on the prep poses described in this article typically progress faster than those who practice the full pose attempt repeatedly without foundational work.
Is crow pose safe if I have wrist pain?
Crow pose is not recommended during active wrist injury, carpal tunnel flare-ups, or within the recovery period from wrist surgery.
Modifications like fingertip crow, blanket under the heels of the hands, or fist crow (on the knuckles) reduce wrist load significantly and may be tolerated with mild chronic wrist tightness.
Anyone with persistent or sharp wrist pain during weight-bearing should discuss the specific loading pattern with a physical therapist before continuing.
What should I do if I’m scared of falling in crow pose?
Place a yoga block on its medium height under your forehead before you attempt the pose.
This creates a physical ceiling on how far forward you can tip, which reduces the brain’s threat response and allows genuine weight shifting to occur.
Practice deliberate slow forward tilting until the forehead touches the block, repeating this five times, before attempting the full lift.
What muscles do you need to be strong to do crow pose?
The primary muscles required for crow pose are the hip flexors (psoas and iliacus), serratus anterior, triceps brachii, wrist flexors and extensors, and the deep core muscles, especially the transversus abdominis.
Many beginners are surprised that the hip flexors and core matter as much as the arms.
Strengthening these through Navasana, Plank, and Chaturanga practice is the most direct path to a stable Bakasana.
Where to Go From Here
Put down this article and do three things today. Spend five minutes on wrist preparation exercises. Practice ten slow Navasana holds with a 3-breath hold at the top. Then get into Malasana and feel what it’s like to place your hands on the floor and shift weight forward, even slightly.
Bakasana rarely arrives all at once. It builds one component at a time. Treat each session as a piece of the puzzle, not a pass-or-fail test.
The pose is accessible. You just need the right foundation underneath it.