Learn the Flip Dog Yoga Pose: Benefits and Safety 2026
The flip dog yoga pose is a dynamic backbend practiced in modern Vinyasa classes that builds chest openness, spinal extension, and upper body awareness in a single expressive shape. Done correctly, it is accessible to intermediate practitioners; done without alignment knowledge, it puts unnecessary strain on the wrists and shoulders.
Backbend poses like this one have been studied for their effects on spinal mobility and mood regulation. The National Center for Complementary and Integrative Health recognizes yoga-based spinal extension practices as having a credible evidence base for reducing perceived lower back discomfort and improving functional range of motion in the thoracic region. Those benefits are worth understanding before you ever flip your body upside down.
This article covers what flip dog actually is, how it differs from its closest relative Wild Thing, full step-by-step instructions with alignment cues, muscle engagement details, wrist and shoulder safety, modifications, variations, and how to build this pose into a real Vinyasa sequence. Whether you’re seeing this pose for the first time or refining it, there’s something here for your specific body.
What Is the Flip Dog Yoga Pose?
The flip dog yoga pose is a modern Vinyasa-style backbend where the body arches over a single grounded arm, with one foot planted and the hips lifted toward the sky. It combines elements of a supported backbend, a lateral body stretch, and a partial inversion into one continuous shape.
The name comes from the motion used to enter the pose. Starting from a position similar to Adho Mukha Svanasana (Downward-Facing Dog), the practitioner rotates the body to one side, flipping the hips upward and placing the top foot on the ground. The free arm sweeps overhead or rests on the hip.
This pose does not have a single classical Sanskrit name, which reflects its origins in contemporary Vinyasa rather than traditional Hatha or Ashtanga lineages. It is closely related to Camatkarasana (Wild Thing) and is sometimes treated as synonymous with it, though most experienced teachers distinguish the two by their entry mechanics. That distinction matters for both safety and sequencing.
Pose Tip:
- Flip dog is most safely practiced after warming the wrists, shoulders, and thoracic spine.
- The grounded wrist bears the most load. Spreading all five fingers wide distributes that load more evenly.
- Beginners should enter from a low starting position, not from a full Downward-Facing Dog, to control the range of motion during the flip.
What Is Flip Dog Pose in Yoga, Really?
Flip dog pose in yoga is a heart-opening backbend that belongs to the chest opener and spinal extension family of poses, typically used in Vinyasa flows as an expressive peak moment within a sun salutation variation or side-body sequence. It is not a foundational pose. It is best described as an intermediate to advanced shape that rewards a well-prepared body.
The physical shape itself involves one arm extended and weight-bearing on the mat, fingers spread, the body arched laterally and backward, hips lifted, and one or both feet grounded depending on the variation. The free arm can sweep behind the head, rest at the hip, or reach toward the ground on the opposite side.
Emotionally and physiologically, the pose is a strong chest and front-body opener. The intercostal muscles between the ribs lengthen as the ribcage expands. The anterior deltoid (front shoulder) and pectoralis major (chest) stretch under load. This combination is why many practitioners report a sense of openness or release in the chest after holding even a brief version of this pose.
Understanding what the pose actually is, as opposed to what it looks like in a photo, helps you practice it with intention rather than just mimicking a shape.
Flip Dog vs. Wild Thing: What Is the Actual Difference?
Flip dog and Camatkarasana (Wild Thing) are related poses that share a body position but differ in how they are entered and what they emphasize mechanically. Wild Thing is entered by lifting one leg from Downward-Facing Dog and then flipping the hips open. Flip dog is most often entered from Vasisthasana (Side Plank) by dropping the top foot to the ground and arching the spine.
The grounded foot placement also differs between the two. In Camatkarasana, the stepping foot lands behind and across the body, creating a diagonal line through the hips. In flip dog, the foot tends to land more directly beneath or slightly behind the hip, which changes the angle of the lateral stretch.
The shoulder and wrist loading differs as well. Camatkarasana allows more of a rotational entry with a brief moment of reduced wrist load. The flip dog transition from Side Plank maintains wrist load throughout the movement, which is why wrist preparation matters more for flip dog than for Wild Thing.
| Feature | Flip Dog | Camatkarasana (Wild Thing) |
|---|---|---|
| Primary entry pose | Vasisthasana (Side Plank) | Adho Mukha Svanasana (Downward Dog) |
| Foot placement | Beneath or slightly behind hip | Crossed diagonally behind body |
| Wrist load during transition | Continuous | Briefly reduced mid-transition |
| Sanskrit name | Not classically named | Camatkarasana |
| Typical use in flow | Side-body sequence peak | Sun salutation variation |
| Experience level needed | Intermediate | Intermediate |
Key Takeaway: Flip dog and Wild Thing look similar in photos but differ meaningfully in how they’re entered, where the foot lands, and how much wrist load is present throughout the transition, so knowing the difference helps you practice each one more safely.
How to Do Flip Dog Pose Step by Step
The flip dog yoga pose is entered from Vasisthasana (Side Plank) by rotating the hips toward the ceiling and grounding the top foot. Each step requires specific muscular engagement to protect the joints.
To practice Flip Dog Pose:
- Begin in Vasisthasana (Side Plank) on your right hand. Stack your left foot on top of the right or stagger the feet for more stability.
- Spread all five fingers of the right hand wide. Press firmly through the base knuckles, not just the palm heel.
- Engage your core, drawing the low belly in and up before you move.
- On an inhale, let the left knee bend. Allow the left foot to sweep back and down behind you, landing the toes or ball of the foot on the mat.
- As the foot lands, press through it to lift the hips higher toward the ceiling. Think of the hips as the highest point of the arch.
- Let the head drop back gently if the neck allows. The top (left) arm can sweep overhead or rest on the hip.
- Breathe here for 3 to 5 breath cycles. Maintain the press through the grounded hand throughout.
- To exit, re-engage the core, lift through the hips, and return the left foot to Side Plank or step back to Adho Mukha Svanasana (Downward-Facing Dog).
Modification for beginners: Keep the bottom (right) knee on the mat from the start. Perform the flip from a half Side Plank position. This reduces wrist load by roughly half while allowing the same spinal arc and chest-opening action.
What Muscles Does Flip Dog Work?
Flip dog works a broad range of muscles across the front, back, and lateral body simultaneously, which is part of why it appears in Vinyasa flows as a functional full-body shape. No single muscle group carries the pose; it is a cooperative effort across several systems.
The gluteus maximus drives the hip lift. Without strong glute engagement, the hips sag and the lower back compresses rather than extending through the thoracic spine. Think of the glutes as the engine lifting the entire arch off the ground.
The serratus anterior, a fan-shaped muscle wrapping the sides of the ribcage, is active in the weight-bearing arm. It keeps the shoulder blade protracted against the ribcage, which prevents the shoulder from collapsing and reduces impingement risk at the glenohumeral joint.
Primary muscles engaged in Flip Dog Pose:
- Gluteus maximus: Drives hip extension and lifts the pelvis upward
- Spinal erectors: Extend the thoracic and lumbar spine into the backbend arch
- Pectoralis major and minor: Stretch eccentrically as the chest opens
- Serratus anterior: Stabilizes the scapula of the grounded arm
- Triceps brachii: Maintains elbow extension in the supporting arm
- Obliques: Control lateral stability throughout the pose
- Hip flexors (iliopsoas): Lengthen under the weight of the lifted hips
- Wrist extensors and flexors: Co-contract to stabilize the loaded wrist joint
What Are the Benefits of Flip Dog Pose?
Flip dog offers measurable physical benefits related to spinal mobility, chest expansion, and lateral body strength when practiced consistently and with correct alignment. These benefits are not unique to this pose but are well-supported by the broader research base on backbend and chest-opening yoga postures.
Spinal extension is one of the most studied areas in yoga research. A study published in the International Journal of Yoga found that yoga practices emphasizing spinal extension were associated with reduced self-reported thoracic stiffness and improved postural awareness over an eight-week period. Flip dog’s strong thoracic extension component directly addresses the rounded-forward posture that develops from extended sitting.
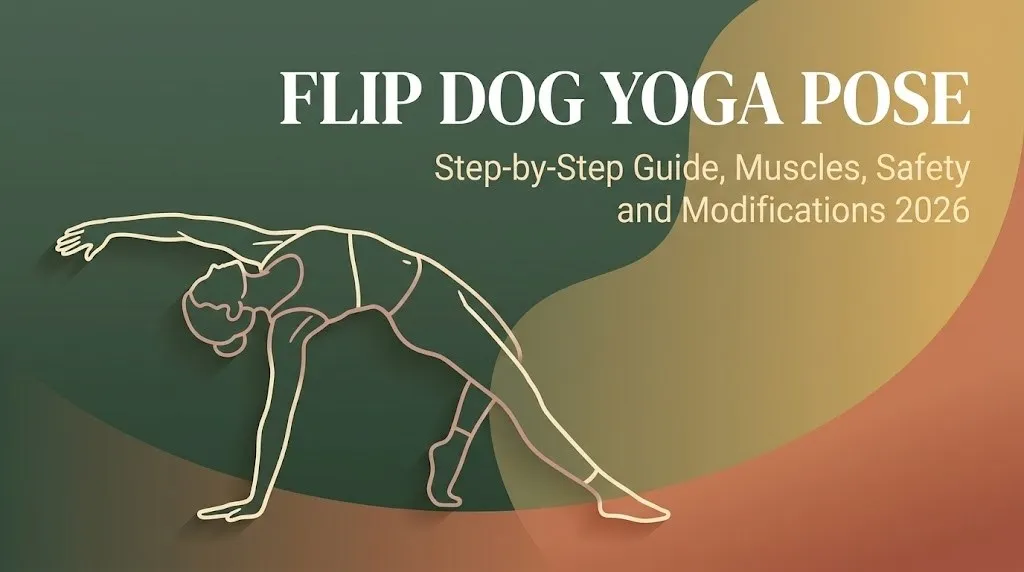
The lateral body stretch is a specific benefit that fewer yoga poses address as directly. The long line from the grounded wrist through the lifted hip to the top foot stretches the intercostal muscles, the serratus anterior, and the lateral obliques simultaneously. This is similar to the sensation of pressing both arms above your head and leaning to one side, but with body weight adding depth to the stretch.
Key benefits of the Flip Dog Yoga Pose:
- Thoracic spine mobility: Counters the flexion bias from sitting and screen use
- Chest and anterior shoulder opening: Stretches pectoralis major and anterior deltoid
- Lateral body lengthening: Engages and then releases the obliques and intercostals
- Wrist and shoulder strength: Builds load-bearing capacity in the supporting arm
- Hip flexor lengthening: The lifted hip position stretches the front of the hip
- Balance and proprioception: Single-arm support challenges body awareness
- Breath capacity: The open chest position allows fuller intercostal breathing
Key Takeaway: Flip dog’s strongest evidence-backed benefit is thoracic extension, which directly counters the rounded posture most people develop from desk work and screen time, making it more practically useful than it might appear from the outside.
Flip Dog Backbend Alignment Tips That Actually Matter
Good alignment in flip dog comes down to four non-negotiable actions: active wrist support, glute-driven hip lift, thoracic-led spinal extension, and a soft rather than forced neck drop. Ignoring any one of these shifts stress onto a joint that is not designed to handle it.
The most common alignment error is collapsing the wrist inward. When the wrist rolls toward the pinky side, the carpal bones compress asymmetrically, which increases the risk of ligament strain over time. The correction is deliberate: press through the base of the index finger and thumb as firmly as through the pinky side. Distribute the load evenly across all five finger bases.
The second most common error is leading the backbend from the lumbar spine rather than the thoracic spine. The lower back is not designed for the deep extension that the thoracic spine can handle. When practitioners collapse into the lumbar curve instead of opening through the mid and upper back, lower back compression follows quickly.
Pose Tip:
- Before the flip, draw your low belly in and up. This co-contraction of the deep core muscles protects the lumbar vertebrae during the extension.
- Imagine your sternum (breastbone) floating toward the ceiling. This cue activates thoracic extension before the lower back joins the movement.
- Keep a micro-bend in the elbow of the supporting arm rather than locking it. This engages the triceps and protects the elbow joint from hyperextension.
- If the neck feels compressed when dropped back, keep the chin neutral or slightly tucked. A neck drop is never mandatory in this pose.
Flip Dog Pose for Beginners: What You Need to Know First
Flip dog is not a beginner pose in the classical sense. It requires active wrist load-bearing, lateral balance, and enough spinal mobility to create a backbend arch without collapsing into the lower back. Beginners who attempt it without these prerequisites tend to land in a position that looks like the pose but functions like a strain.
That said, a version of flip dog is accessible to newer practitioners if the approach is modified correctly. The key prerequisite skills are: the ability to hold Vasisthasana (Side Plank) for at least 5 breath cycles on each side, and the ability to perform Setu Bandha Sarvangasana (Bridge Pose) with the hips fully lifted and stable. If both of those are accessible and stable, a modified flip dog transition is worth exploring.
The beginner modification drops the bottom knee to the mat from Side Plank before initiating the flip. This changes the geometry of the pose slightly but preserves the chest-opening and spinal extension benefits while reducing the wrist and balance demand to a manageable level.
According to Yoga Alliance guidelines for yoga teacher training, the sequencing of challenging arm-supported poses should follow a progression from stable two-point support (both hands and feet) to single-arm support, which is why the half Side Plank modification is the correct beginner entry, not a compromise.
Beginner progression:
- Practice half Vasisthasana (Side Plank) with bottom knee down for three to four weeks.
- Add Setu Bandha Sarvangasana (Bridge Pose) to your regular practice to build glute and spinal extensor strength.
- Attempt the modified flip dog (bottom knee down) only after both above feel fully stable.
- Progress to the full pose only after the modified version feels controlled and pain-free for at least two weeks.
Flip Dog Pose Modifications for Every Body
Modifications for flip dog address three main variables: wrist sensitivity, limited shoulder mobility, and reduced spinal extension range. Adjusting for any one of these does not diminish the pose; it makes the pose genuinely yours.
For wrist sensitivity, the most effective modification is using a wrist support wedge placed under the heel of the grounded hand. This reduces the wrist extension angle from roughly 90 degrees to 60 to 70 degrees, which is within a more comfortable functional range for most wrists. Rolled mat edges or a folded blanket under the heel of the hand serve the same purpose if a wedge is not available.
For limited shoulder mobility, allow the grounded elbow to bend slightly rather than maintaining a fully straight arm. This reduces the load on the glenohumeral joint (shoulder socket) and allows the chest to open more gradually. It is not incorrect form; it is appropriate adaptation.
| Modification | Who It Helps | How to Apply |
|---|---|---|
| Bottom knee on mat | Beginners, wrist sensitivity | Lower knee before the flip; maintain hip lift with glutes |
| Wrist wedge under heel | Wrist pain, carpal issues | Place wedge at 30 to 45 degree angle under palm heel |
| Bent elbow in support arm | Shoulder impingement | Soft bend maintained throughout; no locking |
| Foot on block | Limited ankle or hip flexibility | Place block where top foot lands to reduce required range |
| Arm stays at hip (no sweep) | Neck or shoulder restriction | Top arm rests on hip; removes shoulder extension demand |
| Wall support for hip | Seniors, balance concerns | Place wall behind hips as a guide for lift height |
Key Takeaway: The modified flip dog with the bottom knee down is not a lesser version of the pose; it is the correct starting point for most practitioners and builds exactly the strength and body awareness needed to progress safely to the full version.
Flip Dog Pose Variations and Progressions
Once the foundational flip dog is stable and comfortable for at least 5 breath cycles on each side, the pose has several meaningful progressions that deepen the spinal extension, increase the lateral stretch, or add a strength challenge.
The first natural progression is the sweeping arm variation. Instead of resting the top arm at the hip, sweep it in a wide arc from the hip, overhead, and down toward the floor on the opposite side of the body. This increases the range of shoulder flexion and adds an oblique stretch to the familiar backbend shape.
The second progression links flip dog directly into Urdhva Dhanurasana (Wheel Pose). From the flipped position, the practitioner places both hands on the mat, lifts both feet, and presses into full Wheel. This transition requires substantial shoulder and wrist strength and should be approached only after the individual poses are fully stable. It is a peak transition in advanced Vinyasa flows.
| Variation | Added Demand | Prerequisite |
|---|---|---|
| Arm sweep overhead | Shoulder mobility, oblique stretch | Stable base flip dog |
| Arm reaching toward floor (opposite side) | Deep lateral body stretch | Flexible thoracic spine |
| Flip into Urdhva Dhanurasana (Wheel) | Wrist, shoulder, and spinal strength | Full Wheel pose stable independently |
| Extended leg flip dog | Hip flexor and quad stretch | Hamstring and hip flexibility |
| Flip dog with bind | Shoulder and chest flexibility | Open anterior shoulder girdle |
For each variation, the same wrist alignment rules apply. Pressing through all five finger bases evenly is not optional in any version of this pose.
Flip Dog and Wrist Pain: How to Fix the Most Common Problem
Wrist pain in flip dog comes from one of three sources: wrist extension beyond the joint’s comfortable range, asymmetric load distribution across the carpal bones, or insufficient warm-up before entering a weight-bearing backbend. Identifying which source is causing the pain determines the correct fix.
Wrist extension pain occurs when the angle between the forearm and the back of the hand exceeds what the joint’s ligaments and tendons can support without strain. For most people, 90 degrees of wrist extension is at or near the limit. Flip dog in its full form loads the wrist at close to that angle. A wrist wedge, a rolled mat, or a flat fist modification (pressing knuckles into the mat rather than the palm) all reduce this angle.
Asymmetric load distribution is the more subtle problem. When the hand rolls inward or outward, one set of carpal bones absorbs more compressive force than the neighboring bones. This produces a pinching sensation on one side of the wrist. The correction is straightforward: before each rep, consciously press through all five finger bases with equal pressure.
The Journal of Bodywork and Movement Therapies has published work on wrist loading patterns in weight-bearing yoga postures, noting that intentional wrist preparation exercises performed for five to ten minutes before practice meaningfully reduce discomfort during poses like Side Plank and related transitions.
Wrist warm-up routine before flip dog:
- Cat-Cow wrist circles: 10 rotations each direction
- Tabletop wrist rocks front to back and side to side: 10 repetitions each
- Finger spread and press: Place hands flat, spread all fingers, press through bases, hold 5 seconds, repeat 5 times
- Gentle wrist flexion stretch: Back of the hand on the mat, apply light pressure for 15 seconds each wrist
Flip Dog Shoulder Safety: Protecting Your Rotator Cuff
The shoulder is the second most common site of discomfort in flip dog, and the mechanism is different from the wrist. The rotator cuff is a group of four muscles: the supraspinatus, infraspinatus, teres minor, and subscapularis. These muscles coordinate to keep the head of the humerus (upper arm bone) centered in the shoulder socket during movement.
In flip dog, the supporting arm is in a position that requires the rotator cuff to work actively while simultaneously supporting body weight. This is not an unsafe demand for a healthy, prepared shoulder. It becomes problematic when the practitioner rushes the transition, allows the shoulder to collapse forward (losing the serratus anterior engagement), or enters the pose with a pre-existing rotator cuff irritation.
The most protective cue for the shoulder in flip dog is to think about wrapping the front of the shoulder back and down before beginning the flip. This action externally rotates the humerus and engages the posterior rotator cuff muscles, creating a more stable joint position before load is applied.
Anyone who has experienced shoulder impingement (a pinching sensation when the arm is raised above shoulder height), a recent rotator cuff strain, or recurring shoulder instability should consult with a physical therapist familiar with yoga before attempting flip dog. This conversation matters because the specific direction of instability determines whether the pose is contraindicated entirely or simply needs specific positional adjustment.
Shoulder safety checklist:
- Engage the serratus anterior (draw the shoulder blade toward the spine before the flip)
- Externally rotate the supporting arm (think: front of shoulder rolling back)
- Never lock the elbow of the supporting arm
- Do not allow the shoulder to shrug toward the ear at any point
Key Takeaway: Wrist and shoulder safety in flip dog both come down to active stabilization before the load lands, which means the prep work you do before the flip matters more than any adjustment you try to make while you’re already in the pose.
Who Should Avoid Flip Dog Pose?
Some practitioners should not practice flip dog, and others should approach it only after addressing specific physical factors first. These are not arbitrary restrictions; they reflect the mechanical demands the pose places on specific joints and tissues.
People who should avoid flip dog entirely:
- Anyone with an acute wrist injury, recent wrist fracture, or active carpal tunnel syndrome causing numbness or tingling in the hand
- Anyone with an acute rotator cuff tear or post-surgical shoulder recovery within 12 months
- Anyone with severe cervical spine instability or a recent neck injury, as the neck drop position in the full pose can compress cervical joints
- Practitioners in the first trimester of pregnancy, due to the strong core compression and single-arm load
- Anyone experiencing an active thoracic or lumbar disc herniation that is aggravated by spinal extension
People who should modify and proceed with guidance:
- Those with chronic wrist sensitivity (use wedge and shortened hold times)
- Those with mild shoulder impingement that is improving (use the bent-elbow modification)
- Seniors with reduced bone density in the wrist (use knee-down modification to reduce load)
- People with thoracic kyphosis (rounded upper back) who may benefit from the pose long-term but need preparatory work first
The American College of Sports Medicine notes that weight-bearing positions involving wrist extension and shoulder load should be introduced progressively and preceded by adequate joint warm-up in all populations, particularly those over 50.
How to Transition Into Flip Dog in a Vinyasa Flow
In a Vinyasa class, flip dog typically appears as the peak of a side-body or arm-balance sequence. The most common entry path moves from Adho Mukha Svanasana (Downward-Facing Dog) through a three-legged dog variation, into Vasisthasana (Side Plank), and then flips. Each step of this transition deserves its own breath.
Breath coordination is what separates a safe, expressive flip from a rushed, sloppy one. The flip itself should happen on an inhale: the breath naturally lifts the chest, expands the ribcage, and encourages the thoracic extension the pose requires. Exhaling through the flip collapses the chest and makes the arch harder to find.
Step-by-step Vinyasa transition into Flip Dog:
- From Adho Mukha Svanasana (Downward-Facing Dog), inhale and lift the left leg to three-legged dog.
- On the exhale, open the left hip toward the left wall. Stack the left foot on the right for Vasisthasana (Side Plank), right hand grounded.
- Take one full breath in Side Plank. Engage the core and press through the right hand actively.
- On the next inhale, bend the left knee and swing the left foot toward the mat behind you.
- Press through the left foot as it lands. Allow the hips to lift on the momentum of the breath.
- Sweep the left arm overhead. Let the chest open toward the ceiling.
- Hold for 3 to 5 breaths. Maintain the press through the right hand throughout.
- On an exhale, return the left foot to Side Plank or step back directly to Downward Dog.
Modification for flow context: If the full flip feels unstable mid-class, simply hold Vasisthasana (Side Plank) and reach the top arm toward the ceiling. This preserves the lateral body opening without the wrist demand of the transition.
The Best Warm-Up Poses for Flip Dog
Warming up for flip dog means preparing four specific areas: the wrists, the shoulder girdle, the thoracic spine, and the hip flexors. Skipping any one of these makes the full pose harder and meaningfully increases joint risk.
The most effective warm-up sequence for flip dog takes eight to twelve minutes and does not require any special equipment. It can be done as part of a sun salutation warm-up or as a targeted preparation sequence before a side-body focused flow.
| Warm-Up Pose | What It Prepares | Hold Time |
|---|---|---|
| Wrist circles and tabletop rocks | Wrist extensors and flexors | 1 minute each direction |
| Bhujangasana (Cobra Pose) | Thoracic extension, spinal erectors | 5 breaths, 3 rounds |
| Anjaneyasana (Low Lunge) | Hip flexors, anterior body length | 5 to 8 breaths each side |
| Vasisthasana (Side Plank) | Shoulder stabilizers, serratus anterior | 5 breaths each side |
| Shoulder circles in tabletop | Rotator cuff activation | 10 rotations each direction |
| Setu Bandha Sarvangasana (Bridge Pose) | Glutes, spinal erectors | 5 breaths, 2 rounds |
The order matters. Move through wrist prep first, then open the thoracic spine in Cobra, lengthen the hip flexors in Low Lunge, and build to Side Plank before attempting the flip. This sequence mimics the increasing demand of flip dog itself, which is the safest way to prepare a joint for a new range of motion under load.
A study published in the Journal of Alternative and Complementary Medicine found that targeted preparatory sequences for intermediate yoga poses reduced self-reported joint discomfort during practice by a meaningful margin compared to unstructured warm-ups. Specificity in your warm-up is not optional when the target pose involves multi-joint loading.
Key Takeaway: The eight-minute warm-up sequence covering wrists, thoracic spine, hip flexors, and shoulder stabilizers is the single most effective thing you can add to your practice to make flip dog feel better and safer within one session.
Frequently Asked Questions About Flip Dog Yoga Pose
What is the difference between flip dog and wild thing yoga pose?
Flip dog is typically entered from Vasisthasana (Side Plank), while Camatkarasana (Wild Thing) is entered from Adho Mukha Svanasana (Downward-Facing Dog) by lifting one leg and flipping the hips open.
The foot placement and hip angle differ slightly between them, and flip dog maintains continuous wrist load through the transition where Wild Thing allows a brief reduction.
Both are intermediate backbends in the same pose family, but they are distinct in their entry mechanics and in how they are sequenced within a Vinyasa class.
Is flip dog pose good for beginners?
Flip dog in its full form is not recommended for beginners because it requires wrist load-bearing, lateral balance, and spinal mobility that take time to develop.
A modified version with the bottom knee on the mat is appropriate for newer practitioners who can already hold Vasisthasana (Side Plank) and Setu Bandha Sarvangasana (Bridge Pose) stably for at least five breaths.
Building toward the full pose over four to eight weeks is more productive and safer than attempting it without the foundational strength in place.
Why does my wrist hurt in flip dog pose?
Wrist pain in flip dog most commonly comes from too much extension angle at the wrist or uneven load distribution across the fingers.
Using a wrist wedge or rolled mat under the heel of the hand reduces the extension angle, and pressing evenly through all five finger bases corrects the asymmetric loading.
If wrist pain persists despite these modifications, a physical therapist familiar with yoga can assess whether a specific structural issue is contributing.
What muscles does flip dog yoga pose work?
Flip dog works the gluteus maximus, spinal erectors, serratus anterior, pectoralis major, obliques, triceps brachii, and the wrist extensors and flexors of the supporting arm.
The hip flexors and anterior deltoid are stretched rather than contracted, making this pose a simultaneous strengthening and lengthening shape.
The glutes are the primary driver of the hip lift, which is why building glute strength through Bridge Pose directly transfers to a better flip dog.
How do I transition into flip dog from downward dog?
From Adho Mukha Svanasana (Downward-Facing Dog), lift one leg to three-legged dog on an inhale, then open the hip and stack the feet into Vasisthasana (Side Plank) on the exhale.
Take one breath in Side Plank to stabilize, then on the next inhale bend the top knee and swing the top foot to the mat, pressing through it to lift the hips into the flip.
The key is coordinating the flip with the inhale breath, which naturally supports the chest-opening and spinal extension the pose requires.
Build It Brick by Brick
Flip dog rewards preparation more than any amount of effort during the pose itself. Start with the modified version, knee down, wrist warm-up done, breath coordinated with the flip. Do that consistently for two to three weeks before reaching for the full expression.
Add the wrist warm-up and six-pose prep sequence before every session where flip dog appears. Your joints will remember the preparation even when your mind is focused on the flow.
The pose is worth learning well. Get the foundation solid first.