The yoga squat pose, known in Sanskrit as Malasana (Garland Pose), is one of the most anatomically productive positions the human body can occupy. It opens the hips, loads the pelvic floor, decompresses the lumbar spine, and supports digestive function, all from a single seated squat.
Research published in the International Journal of Yoga confirms that hip-opening sequences including deep squat positions produce measurable improvements in hip joint range of motion and pelvic floor coordination in as few as eight weeks of regular practice. That makes Malasana more than a flexibility exercise; it’s a functional movement pattern with real physiological impact.
This article covers everything you need to practice the yoga squat pose correctly in 2026. You’ll find step-by-step instructions, an honest look at the research behind its benefits, clear modification options for beginners, seniors, and pregnant practitioners, and a structured sequence for building toward a deeper, more comfortable squat over time.
What Is the Yoga Squat Pose?
The yoga squat pose is a deep, held squatting position practiced in yoga that emphasizes hip external rotation, ankle dorsiflexion, and spinal lengthening rather than simply lowering the body toward the floor.
Unlike a functional squat in strength training, the yoga version is held statically for multiple breath cycles. The goal isn’t loading the legs for power. It’s creating space: in the hips, the lower back, and the pelvic floor.
The pose appears across multiple yoga styles. In Hatha yoga, it’s held for 5 to 10 breaths as a standalone hip opener. In Vinyasa sequences, it appears as a transitional or peak pose. In Yin yoga, it can be held for 2 to 5 minutes with props supporting the spine and hips. Each application serves a different physiological purpose.
Pose Tip:
- Keep feet wider than hip-width to allow the torso to descend between the thighs
- Press palms together at chest height and use the elbows to gently open the knees outward
- If heels lift, place a folded blanket underneath them immediately; do not force heels down
What Is Malasana (Garland Pose)?
Malasana, pronounced mah-LAH-sah-nah, is the Sanskrit name for Garland Pose. “Mala” translates as garland or necklace, a reference to the shape the arms form when they wrap around the legs in the full expression of the pose.
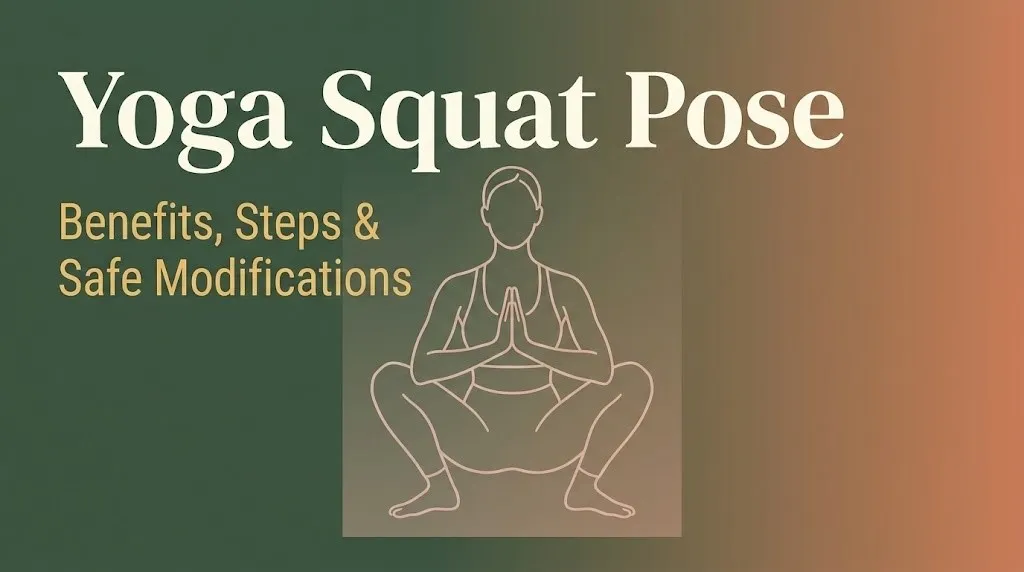
In its classic form, Malasana positions the practitioner in a deep squat with feet slightly wider than hip-width apart, toes turned out to approximately 45 degrees. The torso descends between the thighs. The hands press together at the sternum in Anjali Mudra (Prayer Position), with the elbows pressing the inner knees apart to encourage external hip rotation.
The pose has roots in the Hatha yoga tradition and appears in multiple classical lineages, including Ashtanga yoga, where it appears in the primary series as a seated transitional position. In contemporary yoga teaching, it’s recognized as one of the foundational hip-opening postures because it works the hip complex through its full range of motion under a gentle gravitational load.
Primary body areas targeted:
- Hip joints: deep flexion combined with external rotation
- Ankle joints: dorsiflexion range tested and loaded
- Pelvic floor: passively stretched in the descent, actively engaged on exit
- Lumbar spine: gently decompressed when the torso is upright
- Hip adductors and inner thighs: lengthened under body weight
How to Do the Yoga Squat Pose Step by Step
Practicing Malasana (Garland Pose) correctly requires attention to foot placement, spinal alignment, and breath from the very first step.
To practice the yoga squat pose:
- Stand in Tadasana (Mountain Pose) with feet hip-width apart. Take two full breaths here to settle the body.
- Step feet slightly wider than hip-width. Turn toes out to roughly 45 degrees. Check that your knees will track over your second and third toes when you bend.
- Inhale to lengthen the spine. Exhale and begin to bend the knees, lowering the hips toward the floor. Move slowly.
- Once thighs are parallel to the floor or below, bring hands to Anjali Mudra at the sternum. Press elbows gently into the inner knees to encourage them to widen.
- Check your heels. They should be flat on the floor. If they lift, place a folded blanket under both heels before continuing.
- Lengthen through the crown of the head. Avoid rounding the upper back excessively. Keep the chest open.
- Hold for 5 to 10 breaths using Ujjayi breath (a gentle ocean-sound breath through the nose).
- To exit: press feet firmly into the floor, engage the core, and slowly rise on an inhale. Return to Tadasana.
Modification for beginners: Sit on one or two stacked yoga blocks placed beneath the sitting bones. This reduces the depth of hip flexion and removes the ankle dorsiflexion requirement temporarily while the body adapts.
Safety note: Do not force the heels flat. Forcing ankle range before the joint is ready causes the knees to cave inward, which places stress on the medial knee ligaments. Work within your current range and use the blanket modification consistently.
Yoga Squat Pose Benefits for Hips and Lower Body
The yoga squat pose delivers some of the most direct hip-opening work available in any standing or seated yoga practice. The combination of deep hip flexion and external rotation in Malasana targets muscles that most other poses never reach in this way.
The primary hip benefit comes from the hip adductors (inner thigh muscles including the adductor longus, adductor magnus, and gracilis) being placed under a sustained eccentric stretch while the body weight loads them from above. Think of these muscles like a rubber band stretched between your knees and your pelvis: Malasana puts that band under real, productive tension.
The hip external rotators, including the piriformis and the six deep lateral rotators of the hip, also receive substantial work. These muscles are notoriously difficult to access in conventional exercise. Malasana reaches them directly because of the combination of hip flexion beyond 90 degrees and the knee-widening action created by the elbows pressing outward.
According to the Journal of Bodywork and Movement Therapies, hip joint mobility exercises that combine external rotation with deep flexion show greater improvements in functional hip range of motion than straight-plane stretching alone. Malasana fits this combined-plane criterion precisely.
Lower body benefits at a glance:
- Hip adductors: sustained lengthening under body weight
- Hip external rotators: deep rotation accessed through combined hip flexion
- Gluteus maximus: eccentrically loaded in the descent, concentrically engaged on the exit
- Quadriceps: isometrically active to maintain the squat position
- Achilles tendon and calf complex: lengthened under load in ankle dorsiflexion
Yoga Squat for Digestion and Pelvic Floor Health
Malasana (Garland Pose) is one of the most consistently cited yoga poses for supporting digestive function and pelvic floor health. The mechanism is structural, not mystical.
In a deep squat, the colon is positioned at a more anatomically favorable angle for peristalsis (the muscular wave motion that moves digestive contents through the bowel). The squatting position reduces the anorectal angle, which may reduce straining during bowel movements. Research cited by the National Center for Complementary and Integrative Health indicates that body position during defecation affects ease of elimination, and squatting positions are among those associated with more complete bowel emptying.
Pelvic floor benefits operate on two levels. In the descent into Malasana, the pelvic floor muscles are passively lengthened as the pelvic bowl opens under gravitational load. On exit from the pose, pressing the feet into the floor and drawing the lower belly inward naturally engages Mula Bandha (root lock), a coordinated contraction of the pelvic floor muscles. This two-phase pattern, passive stretch followed by active contraction, mirrors the principles of progressive pelvic floor rehabilitation as described by the American Physical Therapy Association.
Modification for digestive benefits: Even a partial squat on a block provides the hip angle change that supports digestive positioning. Full descent is not required to access this benefit.
Safety note: People with active pelvic organ prolapse or pelvic floor hypertonicity (a pelvic floor that is chronically over-contracted rather than under-active) should work with a pelvic floor physical therapist before practicing Malasana without props, as deep squatting may increase symptoms in certain presentations.
Yoga Squat for Back Pain and Spinal Decompression
The yoga squat pose creates traction-like decompression in the lumbar spine that few other standing poses can replicate. When the torso is held upright in a deep squat, the lumbar vertebrae are gently separated by the combination of hip flexion and gravitational load.
This is different from a forward fold. In Uttanasana (Standing Forward Fold), the spine flexes but the discs are compressed from the anterior side. In Malasana, the pelvis is in a posterior tilt, the lumbar curve is reduced, and the space between lumbar vertebrae subtly increases. People with chronic lower back tension frequently report immediate relief within a single sustained hold.
A 2021 review published in the Journal of Alternative and Complementary Medicine found that yoga interventions incorporating hip-opening and spinal decompression poses produced statistically meaningful reductions in chronic low back pain scores over 10-week programs. The review specifically noted that poses combining hip flexion with upright spinal alignment (a description that matches Malasana precisely) showed the strongest outcomes.
Important safety note: This benefit applies to non-specific chronic lower back tension, not disc herniations, spinal stenosis, or acute sciatica. People with diagnosed spinal conditions should have their yoga practice reviewed by a physical therapist or spine specialist familiar with yoga before practicing Malasana, as deep hip flexion can increase intradiscal pressure in certain disc pathologies.
Modification for back sensitivity: Practice with two yoga blocks stacked beneath the sitting bones to reduce the depth of forward pelvic tilt and maintain a more neutral lumbar curve.
Key Takeaway: Malasana is one of the few yoga poses that simultaneously opens the hips, loads the pelvic floor in a functional stretch-and-contract pattern, and creates gentle lumbar decompression, making it among the highest-value single poses in a home practice.
Yoga Squat vs. Regular Squat: What Is the Difference?
The yoga squat pose and the athletic squat are related movements that serve completely different purposes, and confusing them leads to poor technique in both.
An athletic squat (the barbell back squat or goblet squat in strength training) is a dynamic, load-bearing movement designed to build quadriceps, hamstring, and gluteal strength through concentric and eccentric muscular contractions. The goal is power output. Depth, bar position, and load dictate joint mechanics.
Malasana is static. It’s held for multiple breath cycles with zero external load. The goal is sustained hip, ankle, and spinal opening, not strength through movement. The body weight functions as a gentle gravitational assist, not a training load. The breath is the primary tool.
| Feature | Yoga Squat (Malasana) | Athletic Squat |
|---|---|---|
| Movement type | Static hold | Dynamic, repetitive |
| Primary goal | Flexibility, decompression, breath | Muscular strength and power |
| Load | Body weight only | External load (barbell, dumbbell) |
| Foot position | Wide, toes significantly turned out | Varies; often more parallel |
| Spine position | Upright, mild posterior pelvic tilt | Neutral to slight forward lean |
| Duration | 5 to 10 breaths, up to 5 minutes | 3 to 5 seconds per rep |
| Breath | Deliberate, nasal, Ujjayi | Exhale on exertion |
| Joint emphasis | Hips, ankles, pelvic floor | Knees, hips, lumbar spine |
| Appropriate for beginners | Yes, with props | Requires coaching to load safely |
The two movements complement each other well. Athletic squat training builds the leg strength that makes holding Malasana more stable. Malasana restores the hip and ankle mobility that athletic squatting gradually reduces over time.
Yoga Squat for Beginners: Starting Safely
Beginners can absolutely practice the yoga squat pose, but the full floor-level expression of Malasana is not the starting point for most people.
The biggest barrier for new practitioners is ankle dorsiflexion, the ability of the ankle to flex so the shin moves toward the foot. Most adults with desk-heavy lifestyles have restricted ankle mobility, which causes the heels to lift when squatting. Forcing heels down in this condition shifts stress directly onto the medial knee ligaments. This is the most common beginner injury in Malasana, and it is entirely preventable.
The second common barrier is tight hip adductors (inner thighs), which prevent the knees from tracking outward over the toes and cause the feet to pronate. Again, the solution is props, not force.
Beginner starting points:
- Start on two stacked yoga blocks placed under the sitting bones. This reduces ankle and hip demand immediately.
- Keep hold times short: 3 to 5 breaths for the first two to four weeks.
- Practice daily rather than for long durations. Frequency builds mobility faster than occasional long holds.
- Focus on breath quality in the hold rather than depth.
Week-by-week beginner progression:
| Week | Block Height | Hold Duration | Notes |
|---|---|---|---|
| 1 to 2 | Two blocks stacked | 3 breaths | Heels supported with blanket if needed |
| 3 to 4 | One block | 5 breaths | Check knee tracking weekly |
| 5 to 6 | Block at lowest height | 7 breaths | Begin reducing blanket under heels |
| 7 to 8 | No block (if ready) | 8 to 10 breaths | Only if heels stay grounded |
Malasana Modifications with Blocks and Props
Props don’t make Malasana easier in the sense of making it less effective. They make it more effective by allowing the body to actually relax into the position instead of gripping against an overstretched limit.
The most important prop in Malasana is the yoga block, and most practitioners should use two. Placed under the sitting bones, blocks raise the floor to meet the body rather than forcing the body to reach the floor before it’s ready.
A folded blanket under the heels addresses ankle dorsiflexion restriction directly. Rolling the blanket to approximately two inches of thickness removes the tipping sensation caused by lifting heels, allowing the entire lower leg to function in a more stable position. Think of this as giving the ankle joint a ramp rather than a cliff.
A wall provides balance support for people who feel unstable in the squat. Simply placing the back against a wall in the squat allows the practitioner to focus entirely on hip and ankle position without managing balance simultaneously.
Full prop guide for Malasana:
| Prop | Placement | Problem It Solves |
|---|---|---|
| Yoga blocks (2 stacked) | Under sitting bones | Reduces depth; less ankle and hip demand |
| Yoga block (1, lowest) | Under sitting bones | Transitional stage between full blocks and floor |
| Folded blanket | Under both heels | Ankle dorsiflexion restriction; prevents heel lift |
| Wall | Behind the back | Balance instability; allows focus on hip alignment |
| Bolster | Under sitting bones | Softer support for longer holds in Yin practice |
| Yoga strap | Around lower back, looped to feet | Advanced prop; helps maintain hold without muscular effort |
Key Takeaway: Props in Malasana are not a shortcut around the pose; they are the correct tool for any practitioner whose ankles, hips, or knees are not yet ready for the full floor-level expression, and using them consistently is how the body gets there faster.
Yoga Squat for Seniors and Limited Mobility
Seniors can benefit from yoga squat practice more than almost any other demographic, and the modifications available make it accessible even for those with significant mobility restrictions.
The physiological case for deep squatting in older adults is strong. The American College of Sports Medicine identifies hip mobility, ankle flexibility, and pelvic floor function as three of the most impactful physical capacities for maintaining independence and reducing fall risk in adults over 65. Malasana, practiced with appropriate support, directly addresses all three.
The primary adaptation for seniors is removing the full weight-bearing squat entirely and replacing it with a chair-supported squat variation. Seated on the front edge of a sturdy, non-rolling chair, the practitioner leans forward with feet wide and toes turned out, allowing the torso to descend between the knees. This creates the same hip angle as Malasana without the knee loading or balance challenge of the standing version.
Adaptation options for seniors:
- Chair-supported Malasana: sit on chair edge, feet wide, lean forward, elbows to knees
- Wall-supported Malasana: back to wall, sink into squat with heels on blanket, wall taking the balance work
- Half-squat with blocks: two blocks under sitting bones, stay at mid-range rather than full depth
- Reclined hip-opener substitute: Ananda Balasana (Happy Baby Pose) on the back delivers similar hip external rotation with zero weight-bearing
Safety note for seniors with hip replacements: Deep hip flexion beyond 90 degrees and combined hip flexion with internal rotation are typically contraindicated following posterior approach hip replacement surgery. Seniors with hip replacements should confirm their post-surgical movement restrictions with their orthopedic surgeon or physical therapist before practicing any version of Malasana.
Prenatal Yoga Squat: Is Malasana Safe During Pregnancy?
Malasana (Garland Pose) is generally considered one of the most recommended yoga poses during pregnancy, particularly in the second and third trimesters, because it supports pelvic opening, relieves lower back pressure, and prepares the body for labor.
The deep squat position creates the same pelvic floor lengthening and gravitational assistance that midwives and doulas have recommended for generations as a position of ease during early labor. Yoga teachers and midwives generally recommend that pregnant practitioners practice modified Malasana from the second trimester onward, using wall support or blocks to avoid excessive strain.
Specific prenatal modifications:
- Use wall support behind the back for balance, which shifts more freely as the center of gravity changes
- Keep blocks under the sitting bones through the third trimester, even if the practitioner was floor-level before pregnancy
- Avoid full forward compression of the belly; keep the torso upright and open
- Limit hold times to 3 to 5 breaths in the third trimester to avoid sustained pressure on the pelvic floor
A note on timing: In the final weeks before the due date, some practitioners find the squat position increases pelvic pressure uncomfortably. This is a normal response to the baby’s position and is a signal to reduce depth or switch to the seated chair variation instead.
Anyone experiencing pubic symphysis pain (pain at the front of the pelvis), pelvic girdle pain, or placenta previa should speak with their obstetric provider or a prenatal physiotherapist before practicing Malasana, as these conditions may make the pose inappropriate regardless of trimester.
Yoga Squat Contraindications: Who Should Skip or Modify?
Not everyone should practice the full yoga squat pose, and knowing when to skip or substitute is as important as knowing how to do it.
The most common contraindications involve the knee joint. Malasana places the knee in deep flexion while under body weight. This creates posterior compressive load on the knee joint and direct pressure on the menisci. People with active meniscal tears, recent ACL or PCL reconstruction, or significant knee osteoarthritis should avoid the full weight-bearing version without clearance from their physical therapist.
Ankle conditions are the second category. Severe ankle instability, recent ankle sprains, or post-surgical ankle stiffness may prevent even a modified version of the pose without causing compensatory strain elsewhere in the kinetic chain.
Full contraindication summary:
| Condition | Recommendation |
|---|---|
| Active meniscal tear | Avoid; substitute Happy Baby Pose on the back |
| Recent knee surgery (ACL, PCL, meniscus repair) | Avoid until cleared by physical therapist |
| Severe knee osteoarthritis | Chair version only or avoid |
| Hip replacement (posterior approach) | Avoid deep hip flexion; use chair version with limited range |
| Active pelvic organ prolapse | Avoid without pelvic floor PT guidance |
| Severe ankle instability | Use wall support and blanket under heels; reduce depth |
| Pubic symphysis pain (prenatal) | Avoid; switch to supported side-lying hip opener |
| Acute sciatica | Avoid; deep hip flexion may aggravate symptoms |
When in doubt about a specific condition, working with a yoga teacher who holds a 500-hour certification and has additional training in anatomy or therapeutic yoga provides the most appropriate individualized guidance.
Key Takeaway: The yoga squat pose is contraindicated for active knee injuries and certain post-surgical conditions, so using a prop-supported modification or a supine substitute is always a smarter choice than pushing through pain in the name of practice.
Ankle Mobility for the Yoga Squat: Why It Matters
Ankle mobility is the hidden gatekeeper of Malasana, and most practitioners don’t realize this until they’ve been trying to force their heels down for months without improvement.
Ankle dorsiflexion is the technical term for the movement that brings the shin toward the foot when the heel stays planted on the ground. In a full squat, the ankle needs approximately 35 to 40 degrees of dorsiflexion range to allow the heels to remain flat. Most people with sedentary lifestyles or a history of ankle sprains have between 15 and 25 degrees. The gap between what the body has and what the pose requires causes the heels to lift and the knees to cave inward.
The Achilles tendon and the gastrocnemius and soleus (calf muscles) are the primary structures limiting dorsiflexion in most practitioners. When these tissues are tight, they act like a short tether on the heel, pulling it up the moment the body descends into a squat.
Ankle mobility exercises to practice before Malasana:
- Standing calf stretch at wall: heel flat, back leg straight, hold for 45 seconds per side
- Ankle circles in seated position: 10 rotations per direction, both ankles daily
- Elevated heel squat with progressive blanket reduction: begin with 2-inch blanket, reduce by half-inch every two weeks
- Knee-to-wall drill: stand 4 inches from the wall, bend knee to touch the wall without lifting the heel. Measure distance and track progress.
According to a study published in the Journal of Bodywork and Movement Therapies, progressive ankle dorsiflexion training over six weeks produced meaningful improvements in squat depth in recreational athletes. The same principle applies to yoga squat practice.
Preparatory Poses for Malasana
Building toward Malasana (Garland Pose) is more effective than attempting the full pose repeatedly from a cold start. Think of the preparatory sequence as opening the doors before you walk through them: hip adductors, ankle dorsiflexors, and hip external rotators all need individual attention before the combined demand of the squat makes sense.
These preparatory poses work best practiced in the order listed, as each addresses a different limiting structure.
Preparatory pose sequence for Malasana:
| Pose (Sanskrit) | Pose (English) | What It Prepares | Hold Time |
|---|---|---|---|
| Baddha Konasana | Bound Angle Pose | Hip adductors, hip external rotation | 1 to 2 minutes |
| Prasarita Padottanasana | Wide-Legged Standing Forward Fold | Inner thighs, hamstrings | 8 to 10 breaths |
| Anjaneyasana | Low Crescent Lunge | Hip flexors, ankle dorsiflexion | 5 to 8 breaths |
| Uttanasana (bent knees) | Standing Forward Fold with bent knees | Lumbar decompression, calf stretch | 8 breaths |
| Utkatasana | Chair Pose | Quadriceps, ankle dorsiflexion, postural awareness | 5 to 8 breaths |
| Malasana on blocks | Supported Garland Pose | Full combined pattern, reduced depth | 5 to 10 breaths |
Practicing this sequence three to four times per week gives most practitioners a measurable improvement in squat depth within four to six weeks. The body responds faster to frequent, moderate practice than to infrequent, intense sessions.
Yoga Squat Sequence: How to Build a Squat-Based Practice
A squat-based yoga practice doesn’t mean doing Malasana over and over. It means building a coherent sequence that warms the relevant structures, practices the pose at an appropriate depth, and cools down the body intelligently afterward.
The following sequence works well as a standalone 25-minute home practice. It follows the principles of progressive hip and ankle loading recommended in yoga therapy education and mirrors sequencing approaches validated in research on yoga for hip mobility.
Full squat-based yoga sequence:
- Balasana (Child’s Pose): 2 minutes. Opens the hips and lower back gently. Sets the breath rhythm.
- Baddha Konasana (Bound Angle Pose): 90 seconds. Targets the hip adductors before standing work.
- Prasarita Padottanasana (Wide-Legged Standing Forward Fold): 8 breaths. Warms the inner thighs in a standing position.
- Anjaneyasana (Low Crescent Lunge): 6 breaths per side. Opens hip flexors and begins ankle dorsiflexion work.
- Utkatasana (Chair Pose): 6 breaths. Activates the quadriceps and begins ankle loading in a manageable range.
- Malasana on blocks: 8 breaths. Full squat at a supported depth.
- Malasana at full depth (if appropriate): 8 to 10 breaths. Remove blocks only when heels stay grounded.
- Ananda Balasana (Happy Baby Pose): 90 seconds. Supine hip release after the squat work.
- Supta Baddha Konasana (Reclined Bound Angle Pose): 2 minutes. Passive hip opening to close the practice.
- Savasana (Corpse Pose): 3 to 5 minutes. Nervous system consolidation.
According to the National Center for Complementary and Integrative Health, structured yoga sequences practiced three or more times per week show the most consistent benefits for flexibility, balance, and reported pain reduction across multiple body regions. A squat-based sequence practiced with this frequency delivers progressive hip and ankle mobility gains that a single long weekly session cannot replicate.
Key Takeaway: Building a squat-based yoga sequence that progresses from simpler hip openers into Malasana and closes with passive supine releases gives the body the warm-up and recovery structure it needs to improve safely and consistently over weeks, not just single sessions.
Frequently Asked Questions About the Yoga Squat Pose
What is the yoga squat pose called in Sanskrit?
The yoga squat pose is called Malasana in Sanskrit, which translates to Garland Pose in English.
The name refers to the garland-like shape the arms form when they wrap around the legs in the full expression of the pose.
Malasana should not be confused with Utkatasana (Chair Pose), which is a shallower squat with a different hip angle and muscle emphasis.
Is the yoga squat pose safe for bad knees?
The yoga squat pose places compressive load on the posterior knee joint, making it inappropriate for people with active meniscal tears, recent knee surgery, or significant knee instability.
A block-supported version reduces but does not eliminate this compression, and a supine substitute like Ananda Balasana (Happy Baby Pose) provides similar hip benefits with no knee load.
A physical therapist experienced in yoga rehabilitation can assess whether your specific knee condition allows any version of the pose.
How long should I hold Malasana?
Most yoga teachers recommend holding Malasana for 5 to 10 breaths in a Hatha or Vinyasa context, roughly 30 to 60 seconds.
In Yin yoga, Malasana can be held for 2 to 5 minutes with full prop support to allow passive connective tissue release.
Beginners should start with 3 breaths and increase gradually rather than pushing hold times before form is stable.
Can beginners do the yoga squat pose?
Beginners can practice Malasana from day one using two stacked yoga blocks under the sitting bones and a folded blanket under the heels.
These props remove the ankle dorsiflexion and hip depth requirements of the full pose while preserving the hip-opening and spinal benefits.
Most beginners progress to the floor-level expression within six to ten weeks of consistent daily practice with props.
What muscles does the yoga squat pose work?
Malasana (Garland Pose) primarily targets the hip adductors (inner thighs), hip external rotators (including the piriformis), and the pelvic floor muscles.
The quadriceps work isometrically to maintain the squat position, and the Achilles tendon and calf complex are loaded in dorsiflexion throughout the hold.
On exiting the pose, the gluteus maximus engages concentrically to drive the hip extension back to standing.
Start Where You Are, Not Where You Think You Should Be
Malasana is one of the most immediately useful poses in yoga. One session of three held rounds, each for eight breaths on a block, can leave the hips noticeably more open and the lower back noticeably lighter.
Start today with two blocks under your sitting bones and a blanket under your heels. Hold for five breaths, release, and repeat twice. That’s enough for day one.
Practice three times this week. The mobility will come. The props are not a detour from the pose; they are the pose, practiced correctly for where your body is right now.