Yoga Poses for Shoulder Pain, Mobility and Relief 2026
Yoga poses for shoulder pain work by targeting the tight muscles, restricted joints, and weakened stabilizers that make shoulder discomfort so persistent and difficult to shift. The right sequence, practiced consistently and with proper alignment, can reduce pain, restore range of motion, and strengthen the muscles that protect the shoulder long-term.
Shoulder pain is one of the most common musculoskeletal complaints in adults. According to the National Center for Complementary and Integrative Health (NCCIH), musculoskeletal conditions including shoulder pain represent one of the primary reasons adults seek complementary health approaches like yoga.
This guide covers specific poses for every shoulder situation: chronic tightness, acute injury, tendonitis, impingement, rotator cuff conditions, and the upper back and neck tension that usually travels with shoulder pain. You’ll get step-by-step instructions, safety notes for each condition, prop guidance, and a full sequence you can follow at home starting today.
Yoga Poses for Shoulder Pain
The most effective yoga poses for shoulder pain address three interconnected problems: tight posterior shoulder muscles, weak rotator cuff stabilizers, and restricted thoracic mobility. Targeting all three is what separates lasting relief from temporary symptom management.
The shoulder is the most mobile joint in the human body. That mobility comes at a cost. The glenohumeral joint (the ball-and-socket at the top of the arm) relies almost entirely on muscles, tendons, and ligaments for stability, unlike the hip, which has a deep bony socket. When those surrounding tissues tighten or weaken, pain follows quickly.
Yoga addresses this through a combination of passive lengthening (stretching tight structures) and active strengthening (loading the muscles that hold the joint in place). Both matter. Stretching alone without building stability is a common reason shoulder pain recurs despite consistent effort.
| Pose | Primary Target | Best For |
|---|---|---|
| Parsva Balasana (Thread the Needle) | Posterior shoulder, thoracic rotation | General tightness, desk workers |
| Gomukhasana arms (Cow Face Pose arms) | Rotator cuff, anterior chest | Tightness from overhead work |
| Garudasana arms (Eagle Arms) | Rhomboids, mid-trapezius | Upper back and shoulder blade pain |
| Adho Mukha Svanasana (Downward-Facing Dog) | Full shoulder girdle, serratus anterior | Mobility, mild impingement (modified) |
| Balasana (Child’s Pose) | Thoracic spine, teres major | Recovery, gentle decompression |
The American Physical Therapy Association notes that combining stretching with strengthening exercises produces better outcomes for shoulder pain than passive stretching alone. Yoga’s active poses do exactly this.
Yoga for Shoulder Pain Relief at Home
Practicing yoga for shoulder pain relief at home is accessible, low-cost, and effective when you work with a consistent routine and appropriate modifications for your pain level. You do not need a studio, a teacher, or advanced fitness to begin.
The most important principle for home practice with shoulder pain: start gentle and progress slowly. What feels like “not doing enough” in the first week is exactly the right intensity when you’re working around an injury or chronic pain. Pushing into sharp or radiating pain is never productive.
Home practice also allows you to pause when you need to. You can hold a pose longer, use the wall for support, or swap in a chair variation without feeling rushed. This self-directed pace is genuinely therapeutic, not a compromise.
Key items to have before starting a home shoulder yoga practice:
- Yoga mat: A non-slip surface at least 3mm thick.
- Two yoga blocks: For floor elevation in standing poses and wrist protection in weight-bearing poses.
- Yoga strap: Essential for Gomukhasana (Cow Face Pose) arms and any pose requiring arm reach you don’t yet have.
- Folded blanket: For under the shoulder in Thread the Needle and under the knees in prone poses.
- Sturdy chair: For chair-based modifications when floor work is uncomfortable.
Practice three to four times per week for four to six weeks before evaluating progress. Research suggests that consistent short sessions of 20 to 30 minutes outperform sporadic longer sessions for pain management outcomes.
Yoga for Injured Shoulder
Yoga for an injured shoulder requires a fundamentally different approach than yoga for general tightness: avoid end-range loading, prioritize pain-free movement, and choose passive or supported poses over active weight-bearing ones. The goal in the early stages is not progress. The goal is safe, non-aggravating movement that maintains blood flow and gentle tissue mobility.
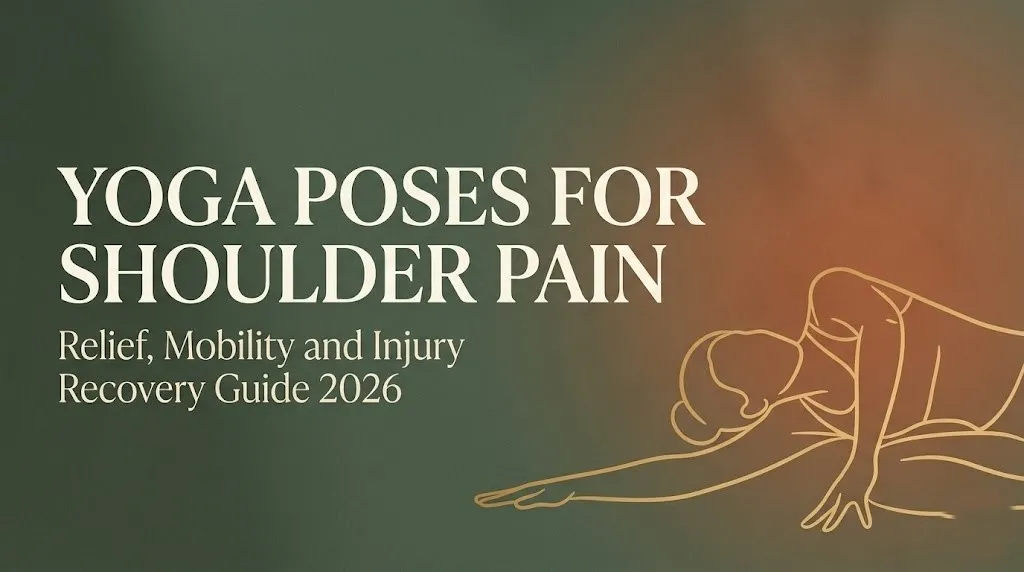
An injured shoulder is one where pain is present at rest, worsens with specific movements, or appeared after a specific event like a fall, a lifting incident, or an overhead strain. If your pain fits this description, obtaining an accurate diagnosis from an orthopedic specialist or physical therapist before beginning any yoga practice gives you the specific information you need to practice safely.
Think of an injured shoulder like a freshly sprained ankle. You wouldn’t load it immediately and push through the discomfort. You’d find the range where movement feels okay and work within that boundary. That same patience applied to shoulder yoga produces the best long-term results.
Safe starting poses for an injured shoulder:
- Marjaryasana-Bitilasana (Cat-Cow): Gentle spinal movement that creates indirect shoulder motion without loading the joint.
- Balasana (Child’s Pose): Arms alongside the body, not extended forward, to keep the shoulder in a supported neutral position.
- Supported Parsva Balasana (Thread the Needle): With a blanket under the threaded shoulder to reduce joint compression.
- Seated neck rolls and scapular circles: Non-pose movements that restore blood flow and reduce surrounding muscle guarding.
Safety caution: Any pose that causes sharp pain, pain that radiates down the arm, or numbness or tingling should be stopped immediately. These symptoms warrant evaluation rather than yoga practice.
Key Takeaway: For shoulder injuries, yoga’s job in the early stages is to maintain gentle mobility without loading the joint, not to push range of motion or build strength.
Yoga for Shoulder Tendonitis
Yoga for shoulder tendonitis focuses on reducing compression of the affected tendons, gently lengthening the muscles that pull the tendon out of its optimal position, and building the scapular stability that protects against re-aggravation. Tendonitis is not a reason to stop moving. It is a reason to move differently.
Shoulder tendonitis refers to inflammation of one or more tendons in the shoulder, most commonly the supraspinatus tendon, which sits in the narrow space between the top of the arm bone (humerus) and the acromion process above it. Repetitive overhead movements, prolonged slouching, and weakness in the serratus anterior and lower trapezius all contribute to tendon irritation.
A study published in the Journal of Alternative and Complementary Medicine found that yoga-based interventions reduced pain scores and improved functional range of motion in participants with shoulder joint conditions over a six-week period. The interventions emphasized controlled movement rather than passive stretching.
To practice Garudasana arms (Eagle Arms), which releases the posterior shoulder and mid-trapezius without compressing the supraspinatus:
- Sit or stand with the spine tall and shoulders relaxed away from the ears.
- Extend both arms forward at shoulder height.
- Cross the right arm under the left, bending both elbows so the forearms wrap around each other.
- Aim to bring the backs of the hands together or use a strap between the palms.
- Lift the elbows slightly and press the forearms away from the face.
- Hold for 5 breath cycles, then switch sides.
Modification: If crossing the arms causes pain, simply hug the opposite shoulders with each hand. This achieves a similar posterior shoulder release with zero joint stress.
Yoga for Shoulder Impingement
Yoga for shoulder impingement works best when poses avoid positions that narrow the subacromial space, specifically overhead arm positions, internal rotation under load, and full end-range abduction. The right yoga approach opens the space the impinged tissue needs.
Shoulder impingement syndrome occurs when soft tissue, usually the supraspinatus tendon or the bursa, is compressed between the humeral head and the acromion during arm movement. Common triggers include arms raised overhead, reaching across the body, and sleeping on the affected side.
The yoga poses that benefit shoulder impingement create posterior shoulder length, improve thoracic extension, and strengthen the muscles that hold the humeral head down and away from the acromion. This means emphasizing thoracic spine mobility work and external rotation strengthening alongside gentle stretching.
Parsva Balasana (Thread the Needle) is one of the best poses for impingement because it stretches the posterior capsule without requiring overhead reach.
To practice Parsva Balasana (Thread the Needle):
- Begin on hands and knees with wrists under shoulders and knees under hips.
- Inhale to lengthen the spine.
- On the exhale, slide the right arm along the floor beneath the left arm, palm facing up.
- Lower the right shoulder and right ear to the floor, keeping the left hand planted.
- Keep the hips level and stacked over the knees throughout.
- Hold for 8 to 10 breath cycles, then press back through the left hand to return.
- Repeat on the left side.
Modification: Place a folded blanket beneath the threaded shoulder if shoulder-to-floor contact causes pinching. Using a thicker blanket raises the shoulder slightly and removes compression from the joint.
Safety caution: Avoid any overhead arm position in yoga until the impingement has been evaluated. Poses that require the arm to rise above shoulder height, including traditional Adho Mukha Svanasana (Downward-Facing Dog), may aggravate an active impingement.
Key Takeaway: For shoulder impingement, the most effective yoga strategy avoids overhead positions and focuses on thoracic extension and posterior shoulder lengthening instead.
Yoga for Rotator Cuff
Yoga for rotator cuff conditions must distinguish between a mild strain or tendinopathy and a partial or full rotator cuff tear, because the appropriate practice is different for each. Mild strain responds well to gentle yoga. Partial or full tears require guidance from a physical therapist or orthopedic specialist before adding yoga to the recovery plan.
The rotator cuff is a group of four muscles that wrap around the glenohumeral joint: the supraspinatus, infraspinatus, teres minor, and subscapularis. Together, they center the humeral head in the socket during all arm movements. When any one of these is strained or torn, the remaining three work harder, often creating secondary tightness and pain patterns in the neck and upper back.
Gomukhasana arms (Cow Face Pose arms) is particularly useful for rotator cuff conditions because it simultaneously stretches the external rotators of the top arm and the internal rotators and anterior shoulder of the bottom arm, creating balanced length through the entire cuff group.
To practice Gomukhasana arms (Cow Face Pose arms):
- Sit or stand with the spine tall.
- Raise the right arm overhead, bend the elbow, and drop the right hand behind the head toward the upper back.
- Bring the left arm out to the side, bend the elbow, and reach the left hand up the back toward the right hand.
- If the hands meet, clasp the fingers together gently.
- Keep both sides of the neck long. Do not pull the head forward with the top arm.
- Hold for 6 breath cycles, breathing into any area of tightness.
- Release and switch sides.
Modification: Hold a yoga strap between the hands rather than clasping. Gradually walk the hands closer along the strap over several weeks as flexibility builds. This variation is safe even for mild rotator cuff strains.
Safety caution: If you have a confirmed rotator cuff tear, skip the full arm position entirely and work only with the strap, staying well within a pain-free range.
Yoga for Shoulder Mobility
Yoga for shoulder mobility means improving the active and passive range of motion through the glenohumeral joint, the acromioclavicular joint, and the thoracic spine, all of which work together to create full, pain-free arm movement. Mobility work is different from stretching. Mobility trains the shoulder to move freely through its full range with control.
Think of your shoulder like a door hinge. If the hinge is rusty (tight tissue) and the doorframe is warped (poor thoracic posture), the door won’t open smoothly no matter how often you oil just the hinge. Shoulder mobility yoga addresses both the joint itself and the thoracic environment that the shoulder sits in.
According to a study published in the International Journal of Yoga, participants who practiced yoga consistently for eight weeks showed measurable improvements in shoulder joint range of motion compared to control groups. The improvement was seen in both internal and external rotation.
| Mobility Direction | Primary Muscles to Release | Recommended Pose |
|---|---|---|
| External rotation | Subscapularis, pectoralis minor | Gomukhasana arms (Cow Face arms) |
| Internal rotation | Infraspinatus, teres minor | Eagle Arms (Garudasana arms) |
| Flexion (raising arm forward) | Posterior capsule, latissimus dorsi | Thread the Needle (Parsva Balasana) |
| Horizontal adduction | Posterior deltoid, teres minor | Cross-body shoulder stretch |
| Thoracic extension | Thoracic spinal extensors | Supported Matsyasana (Fish Pose) |
Mobility practice should include both active movements (circles, controlled reaches) and passive holds. Spending 30 to 60 seconds in a passive hold after active warming up gives the tissue time to respond and reorganize.
Yoga for Shoulder Flexibility
Yoga for shoulder flexibility targets the muscles that restrict range of motion when they shorten from habitual patterns like desk work, driving, phone use, or overhead sport. The primary culprits are the pectoralis minor, the anterior deltoid, the subscapularis, and the latissimus dorsi.
Flexibility is the passive capacity to lengthen. Mobility (covered in the previous section) is flexibility you can access and control. Both need attention. A shoulder that can be stretched passively but collapses under its own weight mid-reach lacks the stability to use that new range safely.
Prasarita Padottanasana (Wide-Legged Standing Forward Fold) with arms clasped behind the back is one of the most effective poses for opening the anterior shoulder and chest simultaneously.
To practice Prasarita Padottanasana (Wide-Legged Standing Forward Fold) with shoulder opener:
- Stand with feet wide apart, approximately three to four feet, toes pointing forward.
- Interlace the fingers behind the lower back, straightening the arms as much as comfortable.
- On an inhale, draw the shoulder blades together and lift the chest.
- On an exhale, hinge forward at the hips while keeping the spine long.
- Allow the clasped hands to arc overhead toward the floor as the torso lowers.
- Hold for 5 to 8 breath cycles, keeping the neck soft.
- Release the hands before pressing back to standing.
Modification: Use a yoga strap between the hands if fingers cannot clasp comfortably. Hold the strap at a width that allows the shoulders to draw back without strain.
Modification for tight hamstrings: Bend the knees generously. The shoulder opening, not the hamstring stretch, is the point of this variation.
Key Takeaway: Shoulder flexibility yoga must address the chest and anterior shoulder muscles, not just the back of the shoulder, to create balanced and lasting change.
Yoga Stretches for Shoulder Pain
The most effective yoga stretches for shoulder pain target the posterior shoulder capsule, the upper trapezius, and the muscles between the shoulder blades, which are the areas most people feel as the deep, persistent ache they associate with shoulder pain. These are distinct from the anterior shoulder stretches covered in the flexibility section.
The posterior shoulder capsule is a common source of pain that is frequently overlooked. When it tightens, the humeral head shifts slightly forward and upward in the socket. This subtle positional change increases pressure on the supraspinatus tendon and the subacromial bursa, producing the familiar dull ache at the front and top of the shoulder.
Garudasana arms (Eagle Arms) in a seated position specifically lengthens this posterior capsule. Here is how it works differently from what most people do with a simple cross-body stretch: by lifting the elbows and pressing the forearms forward, you create traction through the posterior shoulder rather than just compression.
Key yoga stretches for shoulder pain, with targeted areas:
- Parsva Balasana (Thread the Needle): posterior capsule, thoracic rotators, rhomboids
- Garudasana arms (Eagle Arms): posterior deltoid, infraspinatus, mid-trapezius
- Balasana with arms wide (Child’s Pose with extended arms): latissimus dorsi, teres major, thoracic spine
- Supported Matsyasana (Fish Pose) with block: pectoralis major, anterior deltoid, anterior intercostals
- Cross-body shoulder stretch: posterior deltoid, teres minor
Hold each stretch for 8 to 10 breath cycles, roughly 60 to 90 seconds. Research in Complementary Therapies in Medicine indicates that tissue lengthening in response to sustained stretch occurs most reliably after approximately 60 seconds of held tension.
Yoga Poses for Shoulders and Upper Back
Shoulder pain and upper back tightness are rarely separate problems. The muscles connecting the shoulder blades to the thoracic spine, including the rhomboids, middle trapezius, and serratus anterior, directly influence how the shoulder joint functions and how much pain it produces.
When the upper back rounds forward, a position called thoracic kyphosis, the shoulder blades lose their ability to rotate upward as the arm lifts. This mechanical failure puts excessive demand on the rotator cuff and narrows the subacromial space. Yoga that addresses thoracic extension alongside shoulder work produces better results than shoulder-only approaches.
Marjaryasana-Bitilasana (Cat-Cow) is the most accessible pose for restoring thoracic mobility. It moves the spine through flexion and extension rhythmically, rehydrating the intervertebral discs and activating the deep spinal stabilizers.
To practice Marjaryasana-Bitilasana (Cat-Cow):
- Begin on hands and knees with wrists under shoulders and knees under hips.
- On an inhale (Cow): drop the belly toward the floor, lift the chest and tailbone, allow the thoracic spine to extend.
- On an exhale (Cat): press the floor away, round the entire spine toward the ceiling, let the head release downward.
- Move slowly, spending 3 to 4 counts on each phase.
- Repeat for 8 to 10 full cycles.
Modification for wrist pain: Perform on fists rather than flat palms, which reduces wrist extension demand. Alternatively, perform seated with hands on thighs, moving only the spine.
Setu Bandha Sarvangasana (Bridge Pose) also supports upper back mobility by opening the chest and anterior shoulder while strengthening the posterior chain.
Yoga for Tight Shoulders and Neck
Tight shoulders and neck tension are functionally connected through the upper trapezius and levator scapulae, two muscles that run from the base of the skull and upper cervical spine down to the shoulder blade. When one tightens, the other follows. Treating them together produces faster and more durable relief.
The upper trapezius is frequently overworked in people who hunch toward screens or carry tension in the shoulder girdle. It becomes short and dense, pulling the shoulder blade up toward the ear and restricting the full range of neck movement. Think of it like a wire that has been pulled too tight for too long. The wire doesn’t break, but it shortens everything connected to it.
A gentle neck and shoulder release sequence that addresses both areas:
- Seated lateral neck stretch: Tilt the right ear toward the right shoulder, keeping the left shoulder actively pressing down. Hold 5 breaths. Switch sides.
- Shoulder rolls: Inhale to draw both shoulders toward the ears, exhale to roll them back and down. Repeat 8 times.
- Garudasana arms (Eagle Arms) with neck nod: In eagle arm position, gently drop the chin toward the forearms to add cervical flexion to the posterior shoulder stretch.
- Balasana (Child’s Pose) with arms alongside the body: Allows the upper trapezius to release with zero active work required.
According to the American Physical Therapy Association, the upper trapezius is one of the most consistently overactive muscles in adults with chronic neck and shoulder pain. Specific yoga stretches targeting this muscle alongside shoulder blade depressors produce measurable improvement in both areas.
Key Takeaway: Shoulder and neck tightness share the same muscular roots; yoga that targets the upper trapezius and levator scapulae addresses both problems simultaneously.
Yoga Sequence for Shoulder Pain
A complete yoga sequence for shoulder pain should progress from gentle warming and thoracic mobility through progressively deeper shoulder work, then close with supported restorative poses that let the nervous system absorb the practice. The order matters as much as the individual poses.
Here is a 25-minute home sequence for shoulder pain:
| Order | Pose | Sanskrit Name | Hold Time | Purpose |
|---|---|---|---|---|
| 1 | Cat-Cow | Marjaryasana-Bitilasana | 10 cycles | Thoracic warm-up |
| 2 | Child’s Pose (arms alongside body) | Balasana | 8 breaths | Shoulder decompression |
| 3 | Thread the Needle (right) | Parsva Balasana | 10 breaths | Posterior shoulder release |
| 4 | Thread the Needle (left) | Parsva Balasana | 10 breaths | Posterior shoulder release |
| 5 | Downward-Facing Dog (modified) | Adho Mukha Svanasana | 5 breaths | Full shoulder girdle |
| 6 | Eagle Arms seated (right over left) | Garudasana arms | 6 breaths | Posterior capsule |
| 7 | Eagle Arms seated (left over right) | Garudasana arms | 6 breaths | Posterior capsule |
| 8 | Cow Face Arms with strap | Gomukhasana arms | 6 breaths each side | Rotator cuff balance |
| 9 | Wide-Legged Forward Fold | Prasarita Padottanasana | 8 breaths | Anterior chest opening |
| 10 | Supported Fish Pose | Supported Matsyasana | 10 breaths | Thoracic extension, chest |
| 11 | Savasana | Savasana (Corpse Pose) | 3 to 5 minutes | Nervous system integration |
Practice this sequence three times per week. Give the shoulder at least one full rest day between sessions in the first two weeks.
Gentle Yoga for Shoulder Injury
Gentle yoga for shoulder injury prioritizes supported, passive, pain-free movement over active strengthening. The approach draws from Restorative yoga and Yin yoga principles: props support the body completely, holds are long, and the nervous system is invited to release its protective guarding of the injured area.
Restorative yoga uses bolsters, blankets, and blocks to hold the body in positions where no muscular effort is required. For an injured shoulder, this means finding positions where the shoulder can rest in a supported neutral or gently opened position without any active muscle work holding it there.
Yin yoga uses longer holds (two to five minutes per pose) to target the deeper connective tissue layers, including the joint capsule and fascial sheaths, rather than the muscles alone. Research published in Complementary Therapies in Medicine suggests that sustained passive holds of two minutes or longer produce measurable changes in connective tissue extensibility.
Gentle poses appropriate for shoulder injury recovery:
- Supported Balasana (Child’s Pose): Bolster placed lengthwise under the torso, arms relaxed alongside the body. Hold 3 to 5 minutes.
- Supine chest opener with bolster: Place a bolster horizontally under the thoracic spine, arms open at shoulder height or lower. Hold 2 to 4 minutes.
- Legs-Up-the-Wall (Viparita Karani): Arms at 45 degrees from the body, palms up. The shoulder rests passively in slight external rotation. Hold 5 minutes.
- Parsva Balasana (Thread the Needle) with blanket: Blanket under the threaded shoulder reduces compression. Hold 2 to 3 minutes per side.
Modification for acute injury (first two weeks): Limit all holds to 30 to 60 seconds initially. Longer holds in an acutely inflamed shoulder can increase soreness. Extend hold times gradually as pain decreases.
Chair Yoga for Shoulder Pain
Chair yoga for shoulder pain is the most accessible format for seniors, people with balance issues, those recovering from surgery, and anyone who cannot comfortably get to and from the floor. All core shoulder yoga poses can be adapted effectively to a seated chair position without losing their therapeutic value.
The chair provides a stable base that removes the need to balance, support body weight through the wrists, or lower to the floor. For someone with shoulder pain who also has knee, hip, or wrist limitations, chair yoga removes every barrier to beginning a shoulder practice safely.
To practice chair-based Garudasana arms (Eagle Arms):
- Sit toward the front of a sturdy chair with feet flat on the floor.
- Straighten the spine and allow the shoulders to relax away from the ears.
- Extend both arms forward at shoulder height.
- Cross the right arm under the left, bending both elbows so forearms wrap toward each other.
- Press the forearms gently away from the face, lifting the elbows slightly.
- Hold for 5 breaths, then switch the arm crossing.
Additional chair-based shoulder exercises:
- Seated shoulder rolls: 8 forward and 8 backward, slow and deliberate.
- Seated Gomukhasana arms with strap: Both arms move toward the back with a strap connecting them. Hold 5 breaths per side.
- Seated lateral chest stretch: Right hand holds the right side of the chair seat. Left arm reaches overhead and gently arcs to the right. Hold 5 breaths. Switch sides.
According to the NCCIH, chair-based yoga programs have shown improvements in pain, mood, and physical function among older adults and those with chronic pain conditions.
Key Takeaway: Chair yoga delivers the same shoulder-targeted benefits as floor-based practice and removes every physical barrier that prevents seniors or post-surgical patients from starting.
Yoga Poses to Avoid With Shoulder Injury
Knowing which yoga poses to avoid with a shoulder injury is as important as knowing which poses to practice. Certain positions consistently aggravate shoulder conditions regardless of how carefully they are performed.
| Pose to Avoid | Why It’s Risky | Safer Alternative |
|---|---|---|
| Full Chaturanga Dandasana (Four-Limbed Staff) | High rotator cuff load; compounds impingement | Knees-down push-up or skip entirely |
| Wheel Pose (Urdhva Dhanurasana) | Extreme shoulder extension under full body weight | Supported Matsyasana (Fish Pose) on a block |
| Headstand (Sirsasana) | All body weight through cervical spine and shoulders | Legs-Up-the-Wall (Viparita Karani) |
| Shoulder Stand (Sarvangasana) | Compresses cervical spine; loads posterior shoulder acutely | Supported Bridge Pose (Setu Bandha) |
| Full Downward Dog with inflamed tendon | Loads the supraspinatus at end-range shoulder flexion | Hands-on-chair modified version |
| Binding poses (Marichyasana III full bind) | Extreme internal rotation under leverage | Eagle Arms with strap |
Beyond specific poses, certain movement patterns should be avoided regardless of the pose name:
- Any position where pain increases above a 3 out of 10 on a personal discomfort scale.
- Overhead reaching when impingement or tendonitis is active.
- Weight-bearing on the affected arm when a rotator cuff tear is confirmed.
- Forcing end-range rotation in any direction.
A useful rule: if a pose requires you to brace, hold your breath, or grip the mat to manage the discomfort in your shoulder, it is outside your safe range for now.
Yoga Props for Shoulder Stretches
Yoga props for shoulder stretches are not optional accessories. For shoulder pain and injury work, they are the difference between poses that are safe and effective and poses that are risky and frustrating. The right prop placed correctly turns an inaccessible pose into a therapeutic one.
| Prop | How It Helps Shoulder Work | Specific Use |
|---|---|---|
| Yoga strap | Bridges the gap when arms cannot clasp | Gomukhasana arms, Prasarita Padottanasana arm clasp |
| Yoga blocks (pair) | Raises the floor in weight-bearing poses | Modified Downward Dog, seated poses |
| Bolster | Provides full passive support for shoulder at rest | Restorative chest opener, supine thoracic extension |
| Folded blanket | Cushions the shoulder in Thread the Needle | Under the threaded shoulder in Parsva Balasana |
| Wall | Supports balance and provides resistance | Wall-supported shoulder strengthening, modified Dog |
| Chair | Full stability for seated shoulder work | All chair yoga variations |
The yoga strap is the single most useful prop for shoulder pain practice. It extends the reach of the arms without requiring the shoulder to move into painful ranges. A six-foot cotton strap costs under $15 and immediately makes at least five standard shoulder poses accessible regardless of current flexibility.
Using props is a sign of intelligent practice, not limitation. Iyengar yoga, the style developed by B.K.S. Iyengar, built its entire methodology around the therapeutic use of props for exactly this reason. Iyengar teachers are among the most qualified practitioners for working with shoulder injuries within a yoga framework.
Modification tip: When using a strap for Gomukhasana arms (Cow Face Pose arms), hold the strap wider than you think you need to. Gradually decrease the distance between your hands over weeks, not days. Forcing the hands together prematurely stresses the rotator cuff tendons.
Frequently Asked Questions About Yoga Poses for Shoulder Pain
What yoga poses are best for shoulder pain?
The best yoga poses for shoulder pain are Parsva Balasana (Thread the Needle), Garudasana arms (Eagle Arms), and Gomukhasana arms (Cow Face Pose arms), because they target the posterior shoulder capsule, the rotator cuff, and the mid-trapezius where most shoulder pain originates.
Supporting these with Marjaryasana-Bitilasana (Cat-Cow) for thoracic mobility rounds out a complete approach.
Use a yoga strap if any of the arm positions are inaccessible due to current pain or tightness.
How often should I do yoga for shoulder pain relief?
Yoga teachers and physical therapists generally recommend practicing three to four times per week for shoulder pain, with at least one rest day between sessions in the first four weeks.
Daily practice is appropriate only if sessions are short (15 to 20 minutes) and entirely gentle, using restorative or Yin-style holds.
Expect to notice meaningful improvement in range of motion and pain levels after four to six weeks of consistent practice.
Can yoga make shoulder pain worse?
Yes, certain yoga poses can worsen shoulder pain if practiced incorrectly or when the shoulder needs rest rather than active loading.
Poses that place weight on the arms, require overhead reach, or demand end-range rotation are the most common culprits, especially for impingement, tendonitis, and rotator cuff conditions.
Using props, staying within a pain-free range, and avoiding the poses listed in the contraindications section of this guide significantly reduces this risk.
Is yoga good for rotator cuff injuries?
Yoga can support rotator cuff recovery when the practice is appropriate for the severity of the injury and stays within pain-free ranges. For mild strains and tendinopathy, gentle yoga poses with props are well-tolerated and help maintain mobility during recovery.
For confirmed partial or full rotator cuff tears, a physical therapist or orthopedic specialist should evaluate your specific tear and range of motion before you add yoga to your recovery plan.
Gomukhasana arms (Cow Face Pose arms) with a strap and Eagle Arms are generally well-tolerated for mild rotator cuff conditions.
How long should I hold yoga poses for shoulder pain?
For active yoga poses targeting shoulder pain, hold times of 5 to 10 breath cycles (approximately 30 to 60 seconds) are most effective for creating muscular length change.
For Yin or Restorative holds aimed at the joint capsule and deep connective tissue, holds of 2 to 5 minutes produce the deeper tissue response.
Research in Complementary Therapies in Medicine indicates that sustained holds beyond 60 seconds are necessary to create lasting extensibility changes in connective tissue, not just temporary muscular relaxation.
Start With One Pose Today
The most useful thing this guide can offer you is a single starting point. Pick one pose from this article and practice it today. Thread the Needle is a good first choice. It’s gentle, requires no props, produces immediate posterior shoulder release, and teaches you something specific about how your shoulder actually moves.
After one week of three sessions, add a second pose. After two weeks, try the full 25-minute sequence. This incremental approach builds a sustainable practice rather than a one-time effort.
Your shoulder needs consistent, intelligent attention over weeks. Not intensity. Not perfection. Just patience and repetition.