Forearm Stand Yoga: The Complete Pose Guide for 2026
Forearm stand yoga, known in Sanskrit as Pincha Mayurasana (Peacock Feather Pose), is an advanced inversion that builds serious upper body strength, shoulder stability, and whole-body coordination. With the right preparation and progressions, this pose is genuinely accessible to dedicated intermediate practitioners.
Research published in the International Journal of Yoga confirms that regular inversion practice can improve balance, proprioception, and core muscle endurance when approached progressively and with attention to alignment. This isn’t a pose you rush into, and the science backs that up.
This guide covers everything you actually need: what the pose is, which muscles it targets, a step-by-step breakdown, alignment cues, beginner modifications, safe progressions, helpful props, contraindications, and how it compares to other inversions. Think of it as the guide a knowledgeable senior teacher would walk you through before your first wall-assisted attempt.
Forearm Stand Yoga Pose
Forearm stand yoga pose is a full-body inversion where both forearms rest flat on the ground, elbows are directly under the shoulders, and the body is fully inverted with the legs extended overhead.
Unlike Adho Mukha Vrksasana (Handstand), this pose distributes body weight across the entire forearm rather than the wrists. That wider base makes it somewhat more accessible for people with wrist discomfort, though it demands significantly more shoulder and scapular strength than beginners often expect.
The pose sits in the advanced category across most yoga systems, including Ashtanga and Iyengar traditions. Iyengar yoga in particular uses props and wall support to teach this pose methodically, making it one of the better-structured frameworks for learning it safely.
It’s worth knowing that “advanced” is always relative. Body weight, shoulder history, and prior inversion experience all affect how long the path to this pose takes.
| Feature | Forearm Stand (Pincha Mayurasana) | Handstand (Adho Mukha Vrksasana) |
|---|---|---|
| Weight-bearing surface | Full forearms | Hands and wrists |
| Primary stability demand | Shoulder and scapular control | Wrist and core control |
| Difficulty level | Advanced | Advanced |
| Wrist-friendly option | Yes, relatively | No |
| Wall use for learning | Highly recommended | Highly recommended |
What Is Pincha Mayurasana
Pincha Mayurasana translates from Sanskrit as “Feathered Peacock Pose,” with “pincha” meaning feather and “mayura” meaning peacock.
The name references the peacock’s fanned tail feathers, which the fully extended legs overhead are said to resemble. In classical Hatha yoga texts, peacock-related poses are associated with digestive stimulation and pranic energy movement through the body’s core channels.
Pincha Mayurasana appears in several yoga lineages. In Ashtanga yoga, it belongs to the second series, known as Nadi Shodhana, and is considered a foundational arm balance for that advanced sequence. In Vinyasa classes, it often appears near the peak of a strength-focused flow.
The pose requires active engagement throughout, not just in the arms. Mula Bandha (root lock) and Uddiyana Bandha (abdominal lock) are commonly cued to stabilize the pelvis and prevent lumbar collapse while inverted.
Pose Tip:
- “Pincha” means feather, “Mayura” means peacock: the extended legs represent the peacock’s fan
- This pose appears in Ashtanga Second Series and advanced Vinyasa sequences
- Bandha engagement (Mula and Uddiyana) is not optional in this pose; it is the structural spine of the shape
Forearm Stand Yoga Benefits
Forearm stand yoga offers documented benefits including improved upper body strength, balance, focus, and regulated nervous system tone through inversion.
Inversions, as a category, have been studied for their effects on the autonomic nervous system. A study published in the Journal of Alternative and Complementary Medicine found that yoga inversion practices were associated with measurable reductions in perceived stress and improvements in parasympathetic nervous system activity. While that study encompassed multiple inversion types, forearm stand places the body in a similar physiological state.
From a structural standpoint, the pose builds:
- Shoulder girdle strength: deltoids, serratus anterior, and rotator cuff muscles work isometrically to hold the body overhead
- Core endurance: the transverse abdominis and obliques stabilize the inverted spine throughout the hold
- Balance and proprioception: the vestibular system recalibrates orientation while the body is upside-down
- Mental focus and concentration: the demand for sustained attention makes this a practical tool for training present-moment awareness
According to the National Center for Complementary and Integrative Health (NCCIH), yoga practices that include balance and inversion elements show consistent associations with improved mood and reduced anxiety symptoms across multiple controlled trials.
Muscles Worked in Forearm Stand
The forearm stand primarily works the deltoids, serratus anterior, rotator cuff, triceps, core stabilizers, and hip flexors in sustained isometric contraction.
Think of the shoulder girdle in this pose as a structural arch. Each element of that arch, the deltoids overhead, the serratus anterior pressing the shoulder blades flat against the back, and the trapezius holding the scapulae in place, must remain active simultaneously. If one element collapses, the whole arch buckles.
The serratus anterior deserves particular attention. This muscle wraps from the ribcage to the inner edge of the shoulder blade and is responsible for preventing “winging,” where the shoulder blades pop away from the back. Weak serratus anterior is the single most common reason beginners collapse in this pose.
| Muscle Group | Role in the Pose | Common Weakness Sign |
|---|---|---|
| Deltoids | Press forearms into floor, support body overhead | Arms shaking or bending |
| Serratus anterior | Holds shoulder blades flat against back | Shoulder blades winging out |
| Rotator cuff | Stabilizes the glenohumeral joint | Shoulder clicking or pain |
| Transverse abdominis | Prevents lumbar hyperextension | Low back arching overhead |
| Triceps | Keeps elbows stable and fully extended | Elbows splaying outward |
| Hip flexors and quads | Extend legs fully overhead | Legs bending at the knee |
The core works harder than most beginners expect. Without engaged abdominals, the lumbar spine hyperextends dramatically when inverted, shifting load away from the shoulder girdle and onto the lower back. That shift is both uncomfortable and a common injury pathway.
Key Takeaway: Shoulder strength alone won’t hold you in forearm stand. The serratus anterior and core are equally responsible, and training them specifically is the fastest path to a stable, safe inversion.
How to Do Forearm Stand Yoga Step by Step
To practice forearm stand yoga safely, begin at a wall with forearms grounded and elbows shoulder-width apart, then use a controlled kick-up to bring legs overhead.
Before your first attempt, practice at a wall. The wall gives your nervous system a reference point while you learn the shape. Removing the wall too soon is the most common reason beginners overtrain this pose and strain their shoulders.
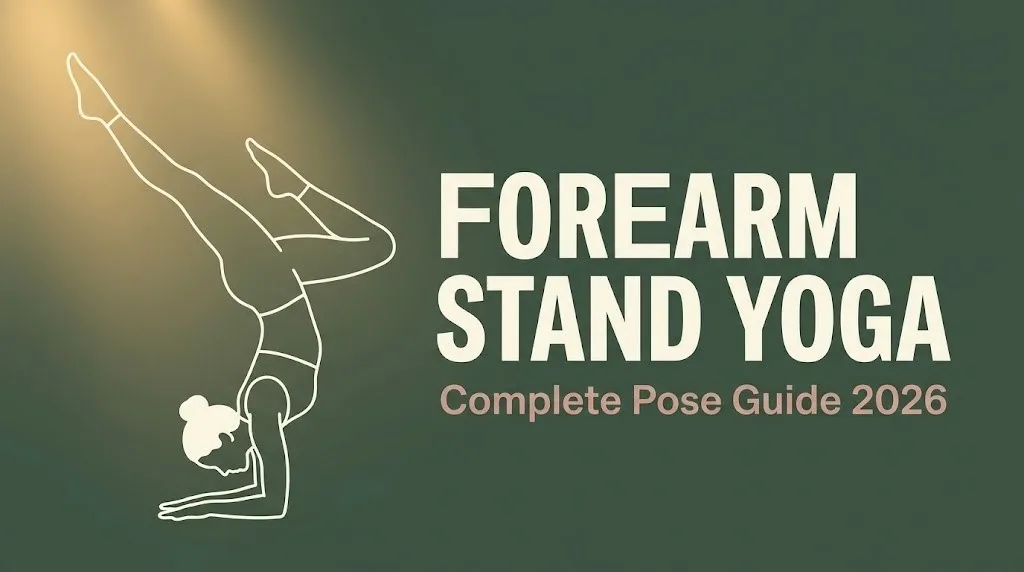
To practice Pincha Mayurasana (Forearm Stand):
- Place your forearms flat on the mat, parallel to each other, at shoulder-width distance. Press all four corners of each forearm into the ground.
- Check your elbows. They should be directly under your shoulders, not wider. Use a strap looped above the elbows to prevent splaying if needed.
- Curl your toes under and step your feet toward your face, walking them in as close as possible. This shortens the distance your hips need to travel overhead.
- Inhale and on the exhale, kick one leg up toward the wall, following immediately with the second leg.
- Once overhead, press firmly through both forearms. Draw your lower ribs in. Lengthen your tailbone toward the ceiling.
- Hold for 5 to 10 breaths in the early stages. Progress to 15 to 30 breath holds over weeks of practice.
- To release, lower one leg at a time with control. Rest in Balasana (Child’s Pose) for at least 5 breaths afterward.
Modification for beginners: Keep both feet on the floor and simply practice the forearm position and shoulder blade engagement. This alone builds the strength pattern needed.
Forearm Stand Alignment Tips
The most important alignment principle in forearm stand is maintaining elbows exactly shoulder-width apart with active, pressing forearms throughout the entire hold.
Elbow distance is foundational. When elbows splay wider than the shoulders, the glenohumeral joint loses mechanical support. The result is that the shoulder capsule bears shear load it isn’t designed for. This is the origin of most forearm stand-related shoulder injuries.
The second most important cue is forearm contact quality. Your forearms aren’t just resting on the mat. They are actively pressing. Think of them like the feet in Tadasana (Mountain Pose): four-point contact, evenly weighted, intentionally grounded.
Pose Tip:
- Elbows directly under shoulders, never wider
- Press all four corners of each forearm into the mat actively
- Draw the lower ribs in to prevent lumbar collapse overhead
- Keep the head lightly lifted, not passively hanging, to avoid cervical compression
- Gaze toward the floor between your hands to maintain a neutral neck
The head position deserves its own emphasis. Many practitioners let the head hang completely passive, which compresses the cervical spine and shifts body weight unpredictably. Instead, lightly engage the neck to keep the head between the upper arms, as if balancing a feather on the crown.
For practitioners with hypermobile shoulders, a slightly shorter hold time with extra attention to muscle engagement is safer than extended holds with passive joint laxity doing the work.
Forearm Stand Prep Poses
The best preparatory poses for forearm stand build shoulder strength, scapular stability, and body awareness in inversion: specifically Dolphin Pose, Plank Pose, and Supported Headstand.
No pose exists in isolation. Forearm stand draws on a set of physical capabilities that must be developed in sequence. Trying to kick up into the full pose before those capabilities are in place is the primary cause of shoulder strain and discouragement.
| Prep Pose (Sanskrit + English) | What It Builds | How Long to Practice Before Attempting Forearm Stand |
|---|---|---|
| Ardha Pincha Mayurasana (Dolphin Pose) | Shoulder flexion, serratus anterior, forearm grounding | 4 to 6 weeks consistently |
| Phalakasana (Plank Pose) | Core endurance, scapular stability | Ongoing baseline |
| Salamba Sirsasana (Supported Headstand) | Inversion tolerance, balance, body awareness overhead | 2 to 4 weeks comfortable |
| Chaturanga Dandasana (Four-Limbed Staff Pose) | Tricep and shoulder girdle strength | Ongoing baseline |
| Forearm Plank (no Sanskrit equivalent) | Forearm loading, elbow stability | 4 to 6 weeks consistently |
The American College of Sports Medicine recommends progressive overload for strength development, and this principle applies directly to yoga arm balance preparation. You wouldn’t skip weeks of prep and expect the full expression of a strength-demanding pose to appear. The body simply doesn’t work that way.
Modification: If Salamba Sirsasana (Supported Headstand) is not yet in your practice, focus on Dolphin Pose and forearm plank exclusively for six to eight weeks. That foundation alone will prepare most of the necessary shoulder mechanics.
Key Takeaway: Dolphin Pose practiced daily for four to six weeks does more to build forearm stand readiness than occasional full attempts at the pose itself.
Dolphin Pose to Forearm Stand Progression
The transition from Dolphin Pose to forearm stand is the single most effective training pathway for building the shoulder strength and body position awareness the full inversion requires.
Ardha Pincha Mayurasana (Dolphin Pose) is effectively forearm stand with your feet on the ground. Your forearms are in the same position, your shoulders perform the same mechanics, and your core engages identically. The only difference is that your feet remain grounded, removing the balance challenge entirely.
This makes Dolphin Pose the most direct training stimulus for the pose. Practicing it with intention means:
- Holding Dolphin Pose for 10 to 20 breath cycles with forearms active and shoulder blades drawn toward each other builds shoulder endurance
- Walking your feet toward your hands until your hips stack over your shoulders trains the hip elevation pattern needed for kick-up
- Adding single-leg lifts from Dolphin builds the one-leg kick-up strength without full inversion
To practice the Dolphin-to-forearm stand transition:
- Begin in Ardha Pincha Mayurasana (Dolphin Pose), forearms grounded, hips high.
- Walk your feet in toward your hands until your hips are directly above your elbows.
- Lift your right leg toward the ceiling, keeping both forearms pressing firmly.
- Hold the single-leg version for 3 to 5 breaths without losing shoulder position.
- Lower with control and repeat on the left.
- When single-leg holds feel stable, attempt a slow kick-up to the wall.
Modification: Place a folded blanket under the forearms for cushioning during extended Dolphin Pose practice. This reduces discomfort and allows longer hold times.
Forearm Stand with Blocks and Props
Using yoga blocks and a strap in forearm stand practice solves the two most common alignment failures: elbow splaying and uneven forearm pressure.
Props in Iyengar yoga tradition are not training wheels. They are alignment tools that allow practitioners to access the correct muscular engagement that sloppy form makes impossible. This distinction matters because using props correctly speeds up learning rather than slowing it.
The most useful props for forearm stand:
- Yoga strap: Loop it above the elbows at shoulder-width. This physically prevents elbow splaying and teaches the correct width through proprioceptive feedback.
- Yoga block between hands: Place a block vertically between the thumbs and index fingers. This cues hand and forearm positioning and keeps internal rotation of the arms from collapsing inward.
- Wall: Provides a stopping point overhead and removes the fear of falling. Use it until full balance is accessible without it.
- Yoga mat doubled over: Extra forearm cushioning for longer practice sessions.
| Prop | Specific Use | Who Benefits Most |
|---|---|---|
| Yoga strap (above elbows) | Prevents elbow splaying | Beginners, hypermobile shoulders |
| Yoga block (between hands) | Forearm and wrist alignment | Anyone with arm rotation issues |
| Wall | Provides balance reference overhead | All beginners, returning practitioners |
| Folded blanket | Forearm cushioning | Bony forearms, long practice sessions |
According to Yoga Alliance training standards, prop-assisted inversions are a recommended teaching approach for all levels, with particular emphasis on wall use for head-below-heart positions.
Modification: If balance is the limiting factor but strength is sufficient, practice against the wall indefinitely. There is no timeline that demands you remove the wall.
Forearm Stand for Beginners
Beginners can safely work toward forearm stand yoga by starting with Dolphin Pose, forearm plank, and wall-assisted kick-up attempts rather than jumping straight into the full inversion.
The honest truth is that most beginners aren’t physically ready for a kick-up attempt in their first year of practice, and that’s completely normal. The pose requires shoulder endurance, scapular control, and inversion comfort that take consistent training to develop.
A smart beginner approach focuses on:
- Building 10 to 20 breath holds in Dolphin Pose before attempting any inversion
- Developing 60-second forearm planks with neutral spine and active shoulder blades
- Practicing standing at the wall upside-down using L-shaped handstand position (feet on wall, hips over shoulders) to develop inversion tolerance
Beginners should also spend time simply lying on their backs and extending their legs overhead as in Halasana (Plow Pose) variations, which familiarize the nervous system with being inverted without load on the arms.
The fear of falling backward is real and common. It tends to make beginners kick too weakly, which means they never get their hips over their shoulders. Working at a wall or with a spotter removes that fear and allows a confident kick-up.
Pose Tip:
- Start with Dolphin Pose before any kick-up attempt
- Build 60-second forearm planks as a baseline strength test
- Use a wall every session until balance is genuinely stable
- Have a spotter assist with the kick-up until you understand the correct hip elevation
Key Takeaway: Forearm stand for beginners is less about attempting the pose and more about building the shoulder and core foundation that makes a safe attempt possible three to six months in.
Forearm Stand Modifications
Forearm stand modifications include wall-assisted practice, half-inversion holds, single-leg lifts from Dolphin, and seated shoulder-strengthening exercises for those unable to invert at all.
Modifications aren’t a lesser version of the real thing. They are precisely calibrated versions that build the specific strength patterns the full pose requires. A well-chosen modification develops the body faster than an improperly aligned full attempt.
Key modifications by level and condition:
- Complete beginners: Practice Dolphin Pose with active forearms for 2 to 3 minutes daily. Add single-leg lifts for kick-up pattern training.
- Intermediate practitioners: Use a strap above the elbows during wall-assisted kick-ups. Focus entirely on shoulder blade position at the top of the hold.
- Practitioners with wrist concerns: Forearm stand is already a wrist-friendly alternative to handstand, but those with elbow joint issues should avoid this pose until assessed by a physical therapist.
- Practitioners with tight hamstrings: Tight hamstrings limit hip flexion, making it harder to walk feet close during kick-up. Work on Uttanasana (Standing Forward Fold) and Parsvottanasana (Pyramid Pose) alongside inversion prep.
- Seniors or practitioners over 60: Wall-supported half-inversions, such as Viparita Karani (Legs-Up-the-Wall Pose), offer inversion benefits with significantly lower joint demand. Forearm stand should only be attempted by seniors with an established, strong practice and no cardiovascular or cervical complications.
| Condition | Recommended Modification |
|---|---|
| Beginner, no inversion experience | Dolphin Pose holds, no kick-up |
| Shoulder weakness | Forearm plank progression before any inversion |
| Fear of falling | Wall-only practice with spotter |
| Cervical spine sensitivity | Avoid; use Legs-Up-the-Wall instead |
| Elbow joint issue | Medical clearance required before forearm loading |
Forearm Stand Training Progression
A structured forearm stand training progression typically takes three to six months for intermediate practitioners with consistent practice three to four days per week.
That timeline isn’t arbitrary. The serratus anterior and rotator cuff respond to progressive loading the same way any muscle does. Research from the Complementary Therapies in Medicine journal indicates that yoga-based strength adaptations follow similar principles to conventional resistance training, with improvements measurable at the six to twelve-week mark of consistent practice.
A practical three-phase progression:
Phase 1 (Weeks 1 to 6): Foundation Building
- Daily Dolphin Pose: 3 sets of 10-breath holds
- Forearm Plank: 3 sets of 30 to 60 seconds
- Chaturanga: 5 to 8 controlled repetitions
- Goal: Consistent shoulder blade engagement and core stability
Phase 2 (Weeks 7 to 12): Inversion Introduction
- Wall-assisted forearm stand kick-ups: 5 attempts per session
- Single-leg Dolphin lifts: 3 sets each side
- L-shaped wall inversion practice: 3 holds of 30 seconds
- Goal: Comfortable kick-up with hips over shoulders at wall
Phase 3 (Weeks 13 to 24): Balance Development
- Wall kick-ups transitioning to free balance attempts
- 5 to 10 breath holds at wall with occasional release from wall
- Consistent 15 to 30 breath holds in full pose
- Goal: Controlled entry and exit without wall dependence
Modification: If progress stalls at Phase 1, extend it by four weeks rather than moving forward. Shoulder mechanics built slowly are far more stable than those rushed.
Forearm Stand vs Headstand
Forearm stand and headstand differ fundamentally in weight-bearing surface: headstand loads the head and cervical spine, while forearm stand distributes load entirely through the forearms and shoulder girdle.
This distinction has real safety implications. Salamba Sirsasana (Supported Headstand) requires the head to bear a portion of body weight, which can aggravate cervical spine conditions, neck compression issues, or disc injuries. Forearm stand removes the head from weight-bearing entirely.
| Feature | Forearm Stand (Pincha Mayurasana) | Headstand (Salamba Sirsasana) |
|---|---|---|
| Weight on head or neck | None | Yes, partial |
| Cervical spine risk | Low to moderate | Moderate to high |
| Shoulder demand | Very high | Moderate |
| Core demand | Very high | High |
| Beginner accessibility | Harder to balance | Slightly more stable base |
| Recommended for neck issues | Preferred option | Avoid |
| Yoga styles that feature it | Ashtanga 2nd Series, Iyengar, Vinyasa | Ashtanga 1st Series, Sivananda, Hatha |
Many yoga teachers and physical therapists actually recommend forearm stand as the safer choice for practitioners with a history of cervical disc issues, precisely because the head is fully unloaded.
That said, forearm stand demands considerably more shoulder and core strength than headstand. A practitioner who finds headstand accessible may still need months of preparation before forearm stand feels stable.
Key Takeaway: If you have any neck sensitivity or cervical spine history, forearm stand is the more appropriate inversion to work toward compared to headstand, provided your shoulders are strong enough.
Is Forearm Stand Safe
Forearm stand is safe for healthy intermediate practitioners who have built the prerequisite shoulder strength, core stability, and inversion experience through a structured progression.
The key word is “prerequisite.” This is not a pose that rewards impatience. The American College of Sports Medicine notes that upper extremity loading in overhead and inverted positions requires established shoulder girdle stability to minimize injury risk. Attempting the pose without that foundation is where most injuries occur.
The most common injuries associated with premature forearm stand attempts include:
- Rotator cuff strain: from insufficient shoulder stabilizer strength during loading
- Elbow tendinopathy: from repeated elbow hyperextension or misalignment
- Lumbar strain: from collapsing the lower back while inverted
- Cervical tension: from passive head hanging during the hold
None of these are inevitable. They are almost entirely the result of skipping the preparation phase.
For people with no injury history, good shoulder strength, and six or more months of consistent yoga practice, forearm stand carries a reasonable safety profile when practiced with a wall and proper alignment. Working with a qualified teacher for the first several attempts is strongly recommended.
Modification: Practitioners who are unsure about their shoulder readiness should complete a physical assessment with a licensed physical therapist who understands yoga biomechanics before kick-up attempts.
Forearm Stand Contraindications
Forearm stand should be avoided or modified by anyone with rotator cuff tears, cervical spine injuries, uncontrolled hypertension, glaucoma, or a history of shoulder dislocation.
These contraindications aren’t conservative warnings for cautious people. They reflect real physiological risks. Inversions increase intraocular pressure (pressure inside the eyes), which is a documented concern for people with glaucoma. A study in the Journal of Alternative and Complementary Medicine documented measurable increases in intraocular pressure during inverted yoga poses, making this a non-negotiable caution for anyone with this condition.
Uncontrolled hypertension is another genuine concern. Being fully inverted increases venous return to the heart and temporarily elevates intracranial pressure. Anyone managing blood pressure with medication should speak with the prescribing physician about whether inversions are appropriate, as part of a conversation about their overall practice.
Full contraindications for forearm stand:
- Rotator cuff tear (partial or full): direct loading of an injured structure
- Cervical spine herniation or instability: risk of aggravation from body weight positioning
- Glaucoma or retinal detachment: elevated intraocular pressure
- Uncontrolled high blood pressure: intracranial pressure increase during inversion
- Active shoulder impingement syndrome: the overhead position compresses the impingement site
- Recent wrist or elbow fracture: bone integrity may not yet support loading
- Pregnancy (second and third trimester): falling risk and center of gravity changes
- Severe osteoporosis of the spine: compression risk during fall
| Condition | Risk | Safer Alternative |
|---|---|---|
| Glaucoma | Elevated intraocular pressure | Viparita Karani (Legs-Up-the-Wall) |
| High blood pressure (uncontrolled) | Intracranial pressure increase | Seated forward folds, pranayama |
| Rotator cuff tear | Direct joint injury | Dolphin Pose with limited load |
| Cervical disc herniation | Aggravation from positioning | Child’s Pose, restorative inversions |
Forearm Stand Warm-Up Sequence
An effective forearm stand warm-up sequence prepares the shoulder girdle, wrists, core, and spine through targeted mobility and activation work before any inversion attempt.
Think of the shoulder joint before forearm stand the way you’d think of a cold engine. You wouldn’t run it at full capacity from a cold start. The glenohumeral joint needs circulation, lubrication, and muscle activation before it handles body weight overhead.
A 10 to 15 minute warm-up sequence:
- Shoulder circles: 10 slow rotations each direction, standing or seated
- Cat-Cow (Marjaryasana-Bitilasana): 10 rounds, emphasizing thoracic extension and spinal mobility
- Thread-the-Needle (Parsva Balasana): 5 breaths each side, opens thoracic rotation
- Downward-Facing Dog (Adho Mukha Svanasana): 3 holds of 10 breaths, shoulder blade activation
- Forearm Plank: 2 rounds of 30 to 45 seconds, core and forearm activation
- Dolphin Pose (Ardha Pincha Mayurasana): 3 holds of 10 breaths, direct forearm stand preparation
- Single-leg Dolphin lifts: 5 each side, kick-up pattern rehearsal
According to the National Center for Complementary and Integrative Health, yoga warm-up sequences that progressively load target muscle groups reduce the incidence of practice-related strain. This principle applies directly to pre-inversion preparation.
Modification: For any session where shoulder fatigue is present from previous training, limit the warm-up to Cat-Cow, Downward Dog, and Dolphin only. Practice the kick-up on a different day rather than loading fatigued stabilizers.
Key Takeaway: A 10 to 15 minute targeted warm-up, ending with Dolphin Pose holds and single-leg lifts, does more to prevent forearm stand injuries than any alignment tip you could apply after you’re already overhead.
Frequently Asked Questions About Forearm Stand Yoga
How long does it take to learn forearm stand yoga?
Most intermediate practitioners take three to six months to achieve a stable forearm stand with consistent practice three to four days per week.
The timeline depends heavily on existing shoulder strength, core stability, and prior inversion experience.
Beginners starting from scratch should expect six to twelve months of structured preparation before a safe, unsupported hold is achievable.
Can beginners do a forearm stand?
Beginners should not attempt a full kick-up into forearm stand without first building shoulder and core strength through preparatory poses.
Starting with Dolphin Pose, forearm plank, and wall-assisted L-inversions for eight to twelve weeks creates the necessary foundation.
With that preparation in place, a first wall-assisted kick-up attempt is reasonable and appropriate.
What muscles does the forearm stand work?
Forearm stand primarily works the deltoids, serratus anterior, rotator cuff muscles, triceps, transverse abdominis, and hip flexors.
The serratus anterior and core stabilizers carry more load than most practitioners expect, and weakness in either area is the most common cause of early collapse in the pose.
Targeted strengthening of these muscle groups during preparation accelerates progress significantly.
What is the difference between forearm stand and headstand?
Forearm stand places no weight on the head or cervical spine, while headstand loads the head partially throughout the hold.
This makes forearm stand the safer option for practitioners with cervical disc issues, neck sensitivity, or a history of compression-related neck pain.
Forearm stand demands more shoulder and scapular strength than headstand, so it requires more preparation despite being gentler on the neck.
Is forearm stand safe for people with high blood pressure?
Forearm stand is not recommended for people with uncontrolled high blood pressure because full inversions temporarily increase intracranial pressure.
Anyone managing blood pressure with medication should discuss their yoga practice with the prescribing physician before attempting any head-below-heart inversion.
Safer alternatives for this group include Viparita Karani (Legs-Up-the-Wall Pose), which provides mild inversion benefits with significantly lower cardiovascular demand.
Build the Foundation, Then Take Flight
The single most useful thing you can do today is start practicing Dolphin Pose. Not the kick-up. Not the full inversion. Just forearms on the mat, shoulder blades engaged, hips high. Hold it for 10 breaths. Do that every day for a month.
You’ll notice your shoulders getting stronger, your forearm contact becoming more intentional, and your fear of being upside-down quietly fading. That’s the work. When those elements are in place, the kick-up is just the last step, not the first.
Three sessions per week of the prep sequence outlined here, practiced consistently for three to six months, is the most reliable path to a stable, safe forearm stand.