Yoga Flows: Best Sequences, Plans and Poses for 2026
Yoga flows are structured sequences of poses linked by breath and intentional order, designed to warm the body progressively, challenge it at its peak, and return it to rest in a way that produces lasting physical and mental benefit. Whether you are building a home practice or learning to design your own sequences, understanding how flows work changes everything about how you practice.
The National Center for Complementary and Integrative Health (NCCIH) reports that yoga practice among American adults has grown consistently, with home-based practice rising sharply since 2020. Research published in the International Journal of Yoga confirms that yoga practiced two to three times per week produces measurable improvements in flexibility, strength, and stress reduction within 8 to 12 weeks.
This guide covers what makes a yoga flow work physiologically, how to build sequences from scratch, which flows suit specific goals (flexibility, strength, back pain, stress, and morning practice), how seniors can adapt flows safely, and how to structure a weekly yoga plan that produces real results. Numbered sequences are included throughout so you can practice directly from this page.
What Is a Yoga Flow and How Does It Work?
A yoga flow is a sequence of poses linked by conscious breath, arranged in a specific order so the body warms up gradually, reaches a physical challenge at the midpoint, and releases into rest at the close of the practice.
The word “flow” most directly refers to Vinyasa yoga, in which every movement is synchronized with either an inhale or an exhale. In Vinyasa, the breath drives the movement rather than the other way around. This creates a meditative quality even in physically demanding sequences, because the practitioner’s attention must remain on breath timing throughout.
The term is now used more broadly to describe any connected yoga sequence, including Hatha sequences where poses are held for multiple breath cycles before transitioning. The shared characteristic is intentionality: a flow is not a random selection of poses. It is a designed progression.
The physiological logic behind a yoga flow mirrors the warm-up, work, and cool-down structure used in all evidence-based exercise programming. The American College of Sports Medicine recommends that any exercise session begin with 5 to 10 minutes of progressive warm-up to increase muscle temperature and joint lubrication before peak effort. Yoga’s opening sequences do exactly this.
What separates a yoga flow from a simple pose list:
- Breath synchronization: Each transition is tied to an inhale or exhale, creating rhythm and pacing.
- Progressive loading: Earlier poses prepare the body for later, more demanding positions.
- Complementary pose pairing: Backbends are followed by forward folds. Twists alternate sides. The body is balanced, not just worked.
- Intentional closure: Every flow ends with stillness, typically Savasana (Corpse Pose), allowing the nervous system to integrate the session’s work.
Yoga Sequencing: The Science Behind Pose Order
Yoga sequencing refers to the deliberate ordering of poses within a practice session, using the body’s physiological warm-up requirements, joint preparation needs, and recovery mechanics to maximize both safety and effectiveness.
Pose order matters more than most beginners realize. Placing a deep hamstring stretch in the first two minutes of a cold practice creates a fundamentally different and more injury-prone experience than placing the same stretch after 15 minutes of progressive movement. The hamstrings, like rubber bands stored in a cold room, need warmth before they can lengthen safely.
Well-designed sequencing follows a logical arc:
- Grounding and breath establishment: Seated or supine poses that establish Ujjayi breath and bring the practitioner’s attention to the body.
- Spinal warm-up: Gentle mobilization of the thoracic and lumbar spine through poses like Marjaryasana-Bitilasana (Cat-Cow Pose).
- Progressive standing work: Standing poses that build heat, cardiovascular demand, and lower-body strength.
- Peak poses: The most demanding postures in the sequence, practiced when the body is fully warm and the nervous system is engaged.
- Counter poses: Poses that balance the demands of the peak, releasing the muscles most intensely worked.
- Cool-down and floor work: Passive stretches and restorative positions.
- Savasana: Final integration.
According to the Journal of Alternative and Complementary Medicine, yoga’s benefits in flexibility and strength are most pronounced in programs that follow structured, teacher-designed sequencing compared to self-directed pose practice without progression logic. The order is not arbitrary. It is functional anatomy applied to movement design.
Traditional Yoga Sequence: The Classic Structure Explained
The traditional yoga sequence, as taught in classical Hatha and codified in Ashtanga yoga, follows a fixed architecture: standing poses before seated poses, active poses before passive ones, backbends before forward folds, and inversions before the final rest.
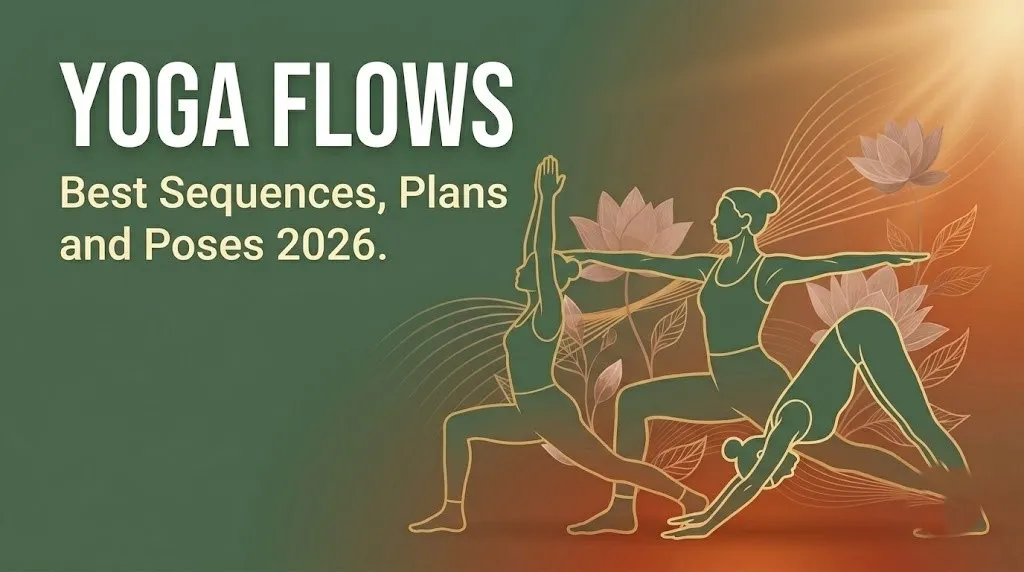
Ashtanga yoga’s Primary Series is the most thoroughly documented traditional sequence. It opens with Surya Namaskar A and B (Sun Salutation A and B), progresses through a standing sequence, moves to a seated series of forward folds and hip openers, finishes with backbends and inversions, and closes in Savasana (Corpse Pose). This architecture has been practiced in the same order for generations and has a clear physiological rationale.
Surya Namaskar A (Sun Salutation A) is the foundational warm-up sequence in both Ashtanga and most Vinyasa-based flows. It combines forward folds, lunges, a plank, a low-plank or Chaturanga Dandasana (Four-Limbed Staff Pose), a backbend, and a return through Adho Mukha Svanasana (Downward Facing Dog) in approximately 5 to 10 breath cycles.
| Sequence Phase | Traditional Content | Duration (Typical) |
|---|---|---|
| Opening pranayama | Breath awareness, Ujjayi establishment | 3 to 5 minutes |
| Sun Salutations | Surya Namaskar A and B, 3 to 6 rounds | 10 to 15 minutes |
| Standing poses | Warriors, Triangle, Balance poses | 15 to 20 minutes |
| Seated and floor | Forward folds, hip openers, twists | 10 to 15 minutes |
| Backbends | Bridge, Wheel, Camel | 5 to 10 minutes |
| Cool-down | Supine stretches, gentle twists | 5 to 8 minutes |
| Savasana | Full body rest | 5 to 10 minutes |
Modification: Beginners and seniors should reduce Sun Salutation rounds to 2 to 3 and replace Chaturanga with a gentle lowering of the knees to the floor. This preserves the warm-up effect without loading unprepared shoulder and wrist structures.
Key Takeaway: Yoga sequencing is applied exercise science. The order of poses determines whether the body is prepared for each challenge or exposed to it cold. Structure is not optional in a well-designed yoga flow.
Best Yoga Sequence for Beginners
The best yoga sequence for beginners uses familiar, accessible poses, moves at a pace that allows each position to be understood before transitioning, and keeps total practice time between 20 and 30 minutes to prevent fatigue from overriding learning.
Beginners need sequences that teach, not just challenge. A beginner flow should include the foundational poses that appear in nearly every yoga class: Tadasana (Mountain Pose), Adho Mukha Svanasana (Downward Facing Dog), Virabhadrasana I (Warrior I), Virabhadrasana II (Warrior II), Balasana (Child’s Pose), and Savasana (Corpse Pose). These six poses appear in most class formats across most yoga styles. Learning them well transfers across any class a beginner might eventually attend.
A 20-minute beginner yoga sequence:
- Sukhasana (Easy Pose): Sit cross-legged. Take 10 slow nasal breaths. Feel the breath expand the rib cage.
- Marjaryasana-Bitilasana (Cat-Cow Pose): Come to hands and knees. 8 slow rounds, one movement per breath.
- Adho Mukha Svanasana (Downward Facing Dog): Press hips up and back. Hold 5 breaths. Knees can stay bent.
- Tadasana (Mountain Pose): Walk feet to hands. Stand tall. Hold 5 breaths.
- Virabhadrasana I (Warrior I) right: Step right foot forward. Bend right knee. Arms overhead. Hold 5 breaths.
- Virabhadrasana I (Warrior I) left: Repeat on the left side. Hold 5 breaths.
- Virabhadrasana II (Warrior II) right: Open stance, arms extended, gaze over right fingertips. Hold 5 breaths.
- Virabhadrasana II (Warrior II) left: Repeat on the left side. Hold 5 breaths.
- Balasana (Child’s Pose): Kneel, fold forward, arms extended or at sides. Hold 8 breaths.
- Savasana (Corpse Pose): Lie flat. Rest for 3 to 5 minutes.
Modification: If kneeling is painful, place a folded blanket under the knees. If standing balance is difficult, practice near a wall for Warrior I and II.
Yoga Opening Sequence: How to Warm Up Correctly
A yoga opening sequence is the first 5 to 15 minutes of a practice designed to increase muscle temperature, mobilize the joints, establish breath rhythm, and prepare the nervous system for the physical demands that follow.
Skipping the opening sequence is the most common sequencing mistake in home practice. Cold muscles stretched aggressively do not become more flexible. They respond with a protective tightening reflex that makes the stretch both less effective and more injury-prone. A good opening sequence respects this physiology by starting with the smallest, most accessible movements and building outward.
The most effective opening sequences start at the spine. Marjaryasana-Bitilasana (Cat-Cow Pose) mobilizes every segment of the spinal column in both flexion and extension, increases synovial fluid circulation in the intervertebral joints, and engages the deep core stabilizers before standing poses demand them. It is the single most efficient opening movement in yoga.
An effective 10-minute opening sequence:
- Sukhasana (Easy Pose): Seated breathing for 3 minutes. Establish Ujjayi breath.
- Neck rolls: 3 slow circles each direction. Avoid full cervical extension if any neck sensitivity exists.
- Marjaryasana-Bitilasana (Cat-Cow Pose): 8 rounds on hands and knees.
- Adho Mukha Svanasana (Downward Facing Dog): Hold 5 breaths. Pedal the heels alternately for 3 additional breaths.
- Low lunge right (Anjaneyasana): Step right foot forward. Hold 5 breaths. Hip flexor lengthening begins here.
- Low lunge left: Repeat on the left side. Hold 5 breaths.
- Return to Downward Dog: Hold 3 breaths before stepping to the top of the mat.
Modification: Replace the floor-based opening with a chair-seated version for seniors or practitioners who cannot comfortably kneel. Cat-Cow can be practiced seated in a chair by placing hands on the knees and alternately arching and rounding the mid-back.
How to Build a Yoga Sequence from Scratch
Building a yoga sequence from scratch means selecting a peak pose, working backward to identify the preparation the body needs, and then working forward to choose the counter poses that restore balance after the peak’s demands.
The peak pose is the organizing principle of any well-designed yoga flow. Choose the most challenging or physically specific pose you want to practice. Then ask: what does the body need to be physically ready for this pose? What muscles need to be warm? What joints need to be mobilized? What balance or coordination demands does it make? Every pose that precedes the peak in a well-designed sequence answers one of those questions.
After the peak, apply the same logic in reverse. What muscles were most intensely contracted? What stretch releases them? What posture restores neutral spine after a deep backbend, or neutral hips after a long hip-opening sequence?
Framework for building any yoga sequence:
- Choose your peak pose first. Example: Virabhadrasana III (Warrior III), a standing balance requiring strong hamstrings, hip stability, and core engagement.
- Identify prerequisites. Warrior III needs: hamstring length, hip flexor mobility, single-leg balance, and core activation.
- Build preparation poses. Include: Downward Dog (hamstrings), low lunges (hip flexors), standing balance prep like tree pose (proprioception), and plank (core activation).
- Place the peak. Practice Warrior III when all prerequisite tissues are warm and prepared.
- Choose counter poses. After Warrior III: a standing forward fold releases the hamstrings from their active contraction. A low lunge to the same side closes the hip flexor that was lengthened. Balasana (Child’s Pose) resets the spine.
- Close with cool-down and Savasana.
Pose Tip:
- Never place your deepest forward fold before any active warm-up. Cold hamstrings under loaded stretch create the conditions for strain.
- Plan counter poses for both sides of the body, not just the peak pose’s dominant side.
Key Takeaway: Every well-designed yoga flow starts with the peak pose in mind and works outward from there. Knowing where you are going tells you exactly what preparation the body needs before it arrives.
Printable Yoga Sequences: What to Include and Why
A printable yoga sequence is a text-based or visual guide listing poses in order with hold times, breath cues, and modifications, allowing a practitioner to follow a complete yoga flow at home without audio or video instruction.
The value of a printable yoga sequence is consistency. When you practice from memory, sequences drift. Poses get skipped. Hold times shorten. A printed reference keeps the practice honest and complete, particularly during the early months of home practice when muscle memory has not yet encoded the flow’s structure.
An effective printable yoga sequence includes:
- Pose name in both Sanskrit and English, so the practitioner can reference either the instructor’s language or the traditional term
- Hold time in breath cycles, not just seconds, because breath is the pacer in yoga, not a clock
- Brief alignment cue for each pose (one sentence maximum per pose in a printable format)
- Modification note for each pose that has a common beginner or senior variation
- Breath direction for each transition: inhale to rise, exhale to fold, etc.
- Section headers marking the opening, warm-up, standing sequence, peak, cool-down, and Savasana phases
What a good printable yoga sequence does NOT include:
- Long prose descriptions that cannot be read while on the mat
- Poses without Sanskrit names (limits the practitioner’s ability to transfer knowledge to other classes)
- A sequence without Savasana (incomplete practice)
- Poses listed without hold times (prevents pacing from becoming random)
According to the International Journal of Yoga, home practitioners who use structured written sequences report higher practice consistency than those practicing without a plan. Structure supports adherence, and adherence is what produces results.
Morning Yoga Flow: A Sequence to Start Your Day
A morning yoga flow is a short, energizing sequence practiced upon waking that mobilizes stiff overnight joints, activates the cardiovascular system gently, and establishes the breath rhythm that supports focused attention throughout the day.
Morning yoga benefits from its timing: the body has been still for 6 to 8 hours. Connective tissue is relatively dehydrated and joints are less lubricated than they will be after an hour of movement. Morning flows should therefore start even more gently than midday or evening practices, with longer warm-up phases relative to total session time.
A 20-minute morning yoga flow:
- Sukhasana (Easy Pose): Seated breathing, 5 slow nasal breaths.
- Seated neck rolls: 3 circles each direction, slow.
- Marjaryasana-Bitilasana (Cat-Cow Pose): 10 rounds on hands and knees.
- Adho Mukha Svanasana (Downward Facing Dog): 5 breaths. Pedal heels.
- Surya Namaskar A (Sun Salutation A): 3 full rounds. Slow in the first round.
- Virabhadrasana I (Warrior I): Right side, hold 5 breaths. Left side, hold 5 breaths.
- Virabhadrasana II (Warrior II): Right side, hold 5 breaths. Left side, hold 5 breaths.
- Utkatasana (Chair Pose): Hold 5 breaths. Lower and repeat once.
- Setu Bandha Sarvangasana (Bridge Pose): 3 rounds, holding 5 breaths each.
- Supta Matsyendrasana (Supine Twist): Right side, hold 8 breaths. Left side, hold 8 breaths.
- Savasana (Corpse Pose): 3 minutes minimum.
Modification: Replace floor-based poses with chair-seated versions for practitioners who find floor transitions difficult in the morning. A morning chair yoga flow provides equivalent joint mobilization with less ground-to-standing demand.
Yoga Flow for Flexibility: Poses and Sequencing Tips
A yoga flow for flexibility targets the body’s primary areas of tightness, specifically the hamstrings, hip flexors, thoracic spine, and shoulder girdle, using progressive, breath-supported holds that train the nervous system to permit greater range of motion over time.
Flexibility is not purely a tissue property. It is substantially governed by the nervous system’s tolerance for a given range of motion. A muscle that “feels tight” is often being guarded by the nervous system rather than being structurally short. Yoga’s breath-synchronized approach to stretching directly addresses this: slow exhalations during held stretches reduce the nervous system’s protective guarding response, allowing the muscle to release more fully.
The poses most effective for a flexibility-focused flow:
- Paschimottanasana (Seated Forward Fold): Targets hamstrings and lumbar erectors. Hold 8 to 10 breath cycles.
- Anjaneyasana (Low Lunge): Targets hip flexors (psoas and iliacus). Hold 8 breaths per side.
- Utthita Trikonasana (Extended Triangle Pose): Targets hamstrings, hip abductors, and thoracic rotators. Hold 6 to 8 breaths per side.
- Gomukhasana (Cow Face Pose): Targets hip external rotators and shoulder girdle. Hold 8 to 10 breaths per side.
- Supta Padangusthasana (Reclined Hand to Big Toe Pose): Targets hamstrings in a supported, gravity-assisted position. Hold 8 breaths per side.
Modification: Use a yoga strap looped around the foot in Paschimottanasana and Supta Padangusthasana for practitioners who cannot reach the feet with straight arms. The strap preserves proper alignment and allows the hamstrings to release without the lower back compensating.
Key Takeaway: Flexibility gains from yoga come from consistent, breath-supported practice over 8 to 12 weeks, not from forcing deeper stretches in any single session. The breath is the actual tool for releasing muscular guarding, not the hands pulling harder.
Yoga Flow for Strength: Building Muscle Through Sequences
A yoga flow for strength builds muscular endurance and functional strength by using isometric holds in load-bearing poses, repeated transitions through high-demand positions, and progressive sequencing that challenges the same muscle groups from multiple angles within a single session.
The strength demand in yoga is real and measurable. Chaturanga Dandasana (Four-Limbed Staff Pose) places the triceps, anterior deltoids, and pectorals under eccentric load as the body lowers. Holding Utkatasana (Chair Pose) for 10 breath cycles challenges the quadriceps and gluteus maximus comparably to a wall sit of equivalent duration. A study published in Complementary Therapies in Medicine found that consistent yoga practice produced lower-body strength improvements comparable to moderate resistance training over a 12-week period.
A strength-focused yoga flow sequence:
- Surya Namaskar B (Sun Salutation B): 4 rounds, maintaining Chaturanga rather than dropping the knees.
- Utkatasana (Chair Pose): Hold 10 breaths. Repeat twice with 5-breath rest between.
- Virabhadrasana I (Warrior I): Right side, hold 8 breaths. Left side, hold 8 breaths.
- Virabhadrasana III (Warrior III): Right side, hold 5 breaths. Left side, hold 5 breaths.
- Vasisthasana (Side Plank Pose): Right side, hold 5 breaths. Left side, hold 5 breaths.
- Navasana (Boat Pose): Hold 5 breaths. Lower and repeat twice.
- Setu Bandha Sarvangasana (Bridge Pose): 5 breaths, lower, repeat 3 times.
- Balasana (Child’s Pose): Recovery rest, 8 breaths.
- Savasana (Corpse Pose): 5 minutes minimum.
Modification: Replace full Chaturanga with a knees-down lowering for practitioners building shoulder girdle strength. Replace Vasisthasana with a forearm side plank to reduce wrist load.
Yoga Flow for Back Pain: Safe Sequencing Principles
A yoga flow for back pain uses spinal mobilization, core-strengthening poses, and hip-opening sequences to reduce lumbar tension and build the muscular support that protects the lower back during daily movement.
Research published in the Journal of Alternative and Complementary Medicine found that yoga practiced two to three times per week reduced chronic lower back pain scores in adult participants after 12 weeks. The most effective sequences combined gentle spinal mobilization with core activation rather than deep forward folds or aggressive twists.
Safe sequencing principles for back pain flows:
- Begin with spinal mobilization before any loading: Cat-Cow before any standing pose.
- Avoid deep forward folds early in the session: Cold hamstrings pulling on the posterior chain increases lumbar load.
- Prioritize core activation before backbends: Plank and Bridge activate the posterior chain safely before deeper spinal extension.
- Avoid poses that reproduce symptoms: Any position causing radiating pain, numbness, or tingling should be stopped immediately.
- Use props consistently: A block under the sacrum in Bridge Pose converts an active backbend to a gentle passive hip opener, appropriate even for acute back pain phases.
A safe back pain yoga flow:
- Marjaryasana-Bitilasana (Cat-Cow Pose): 10 rounds. Very slow.
- Apanasana (Knees to Chest Pose): Both knees hugged to chest. 8 breaths.
- Supta Matsyendrasana (Supine Twist): Right side, hold 8 breaths. Left side, hold 8 breaths. Keep both shoulders on the floor.
- Setu Bandha Sarvangasana (Bridge Pose): 3 rounds, 5 breaths each. No forcing.
- Adho Mukha Svanasana (Downward Facing Dog): Hold 5 breaths. Knees generously bent.
- Anjaneyasana (Low Lunge): Right side, hold 8 breaths. Left side, 8 breaths.
- Balasana (Child’s Pose): Arms extended forward. 10 breaths.
- Savasana: 5 minutes minimum.
Safety note: Anyone with an acute disc herniation or undiagnosed radiating leg pain should work with a physical therapist to identify safe movement ranges before following any yoga flow independently.
Key Takeaway: A yoga flow for back pain works best when it prioritizes spinal mobilization and core activation before anything else. The correct order, not just the correct poses, determines whether the sequence helps or aggravates.
Yoga Flow for Stress and Anxiety Relief
A yoga flow for stress and anxiety reduces cortisol, activates the parasympathetic nervous system, and trains the mind toward present-moment attention through the combination of slow movement, controlled breath, and the physical grounding of body weight in supported poses.
The NCCIH identifies yoga as one of the most evidence-supported complementary practices for stress and anxiety reduction, noting that both breathwork and movement contribute independently to parasympathetic activation. Combined in a well-designed stress-relief flow, these mechanisms compound.
Ujjayi breath is the primary tool in a stress-relief flow. Its slow rhythm and audible quality give the practitioner something concrete to return attention to when the mind wanders. Research reviewed by the NCCIH shows that slow, controlled breathing patterns reduce sympathetic nervous system activity within minutes of beginning, regardless of whether movement accompanies the breath.
Effective poses for a stress-relief yoga flow:
- Sukhasana (Easy Pose) with forward fold: Grounds the pelvis and quiets the nervous system.
- Balasana (Child’s Pose): The forehead-to-floor position directly stimulates the vagus nerve via facial pressure, accelerating parasympathetic activation.
- Viparita Karani (Legs Up the Wall Pose): Promotes venous return and activates the relaxation response through mild inversion.
- Supta Baddha Konasana (Reclined Bound Angle Pose): Opens the inner groin and hip adductors passively, releasing chronic tension from the psoas without any muscular effort.
- Savasana (Corpse Pose): Practiced with a blanket over the body and eyes covered, the final rest consolidates the parasympathetic state.
Modification: Practitioners who find floor poses anxiety-provoking can practice this flow seated in a chair or lying in bed. The breath technique produces the physiological benefit regardless of the physical position.
Yoga Cool-Down Sequence: Why It Matters and How to Do It
A yoga cool-down sequence is the final 10 to 15 minutes of a practice, transitioning the body from active movement to passive rest through progressively gentler poses that release the muscles most intensely worked and shift the nervous system from sympathetic to parasympathetic dominance.
Cutting the cool-down short is the most common practice error among home practitioners who are short on time. The cardiovascular system needs time to return to resting state after vigorous practice. Joints that have been loaded for 45 minutes benefit from passive decompression before returning to daily activity. And the nervous system’s shift toward parasympathetic mode, which produces the long-term stress-reduction benefits of yoga, happens primarily during the cool-down and Savasana phases.
A complete 12-minute cool-down sequence:
- Adho Mukha Svanasana (Downward Facing Dog): 3 breaths. Transition from standing to floor.
- Balasana (Child’s Pose): 8 breaths. Full spinal decompression.
- Supta Matsyendrasana (Supine Twist): Right side, 8 breaths. Left side, 8 breaths.
- Supta Padangusthasana (Reclined Hand to Big Toe Pose): Right leg, 8 breaths. Left leg, 8 breaths. Use a strap if the leg cannot straighten.
- Apanasana (Knees to Chest Pose): Both knees hugged to chest. 5 breaths. Rock gently side to side.
- Savasana (Corpse Pose): Minimum 5 minutes. Eyes closed. Arms slightly away from the body. No movement.
Modification: Seniors and people with hip sensitivity can replace the supine twist with a seated chair twist, rotating gently from the thoracic spine rather than the lumbar.
Yoga Flow for Seniors: Chair and Modified Sequences
Yoga flows for seniors use chair support, reduced range of motion, slower pacing, and careful attention to balance safety to deliver the documented benefits of yoga practice without the fall risk or joint overload that standard standing sequences can create for older adults.
Research published in the International Journal of Yoga found that yoga practice in adults over 60 improved balance, reduced fall risk, and increased lower-body strength after 8 to 12 weeks of twice-weekly practice. These benefits are accessible through modified and chair-adapted flows that do not require floor-based poses or demanding balance work.
A 20-minute chair yoga flow for seniors:
- Seated Sukhasana: 5 slow breaths, seated on the chair’s edge with a tall spine.
- Seated neck rolls: 3 circles each direction.
- Seated Cat-Cow: Hands on knees, arch and round the mid-back 8 times with breath.
- Seated Warrior I arms: Feet flat on the floor, raise both arms overhead on an inhale. Hold 5 breaths.
- Seated Virabhadrasana II: Extend right leg to the side, arms wide. Hold 5 breaths. Repeat left.
- Seated forward fold: Hands on thighs, hinge forward from the hips with a long spine. Hold 8 breaths.
- Seated spinal twist: Right hand to left knee, left hand behind the chair back. Hold 5 breaths per side.
- Seated Savasana: Hands in lap, eyes closed, 3 to 5 minutes. Breathing only.
| Standard Pose | Chair Adaptation | What It Preserves |
|---|---|---|
| Downward Dog | Hands on chair back at hip height | Hamstring stretch, shoulder opening |
| Warrior I | Seated: arms overhead, one foot extended | Hip flexor length, shoulder mobility |
| Bridge Pose | Seated: press feet into floor, lift sit bones slightly | Glute activation, spinal awareness |
| Supine twist | Seated: hands on knees, gentle thoracic rotation | Spinal mobility, waist release |
Key Takeaway: Chair yoga is not a compromise. For seniors and people with limited mobility, it is the format that allows consistent practice, and consistent practice is the only thing that produces the documented benefits in the research.
Yoga Plan: How to Structure a Weekly Yoga Practice
A weekly yoga plan is a structured schedule assigning specific flow types to specific days, balancing active practice with restorative practice and rest to produce progressive physical improvement without overuse or burnout.
The most common planning mistake in home yoga is practicing the same vigorous flow every day and wondering why the body feels perpetually fatigued rather than progressively stronger and more flexible. The body adapts during rest, not during practice. A well-designed weekly plan builds in variety of intensity and genuine recovery days.
A practical weekly yoga plan for consistent practitioners:
| Day | Flow Type | Duration | Primary Focus |
|---|---|---|---|
| Monday | Vinyasa or strength flow | 45 to 60 minutes | Cardiovascular and strength |
| Tuesday | Rest or gentle walk | N/A | Recovery |
| Wednesday | Hatha or flexibility flow | 45 minutes | Range of motion |
| Thursday | Morning flow | 20 minutes | Activation and breath |
| Friday | Vinyasa or strength flow | 45 to 60 minutes | Cardiovascular and strength |
| Saturday | Restorative or Yin flow | 45 to 60 minutes | Passive release, nervous system |
| Sunday | Rest | N/A | Full recovery |
This structure provides three active sessions, one moderate session, one short activation session, one restorative session, and two rest days. According to the American College of Sports Medicine, this alternating intensity pattern matches the progressive overload and recovery principles that produce adaptation in any physical training program.
Beginners should start with two active sessions and one restorative session per week, adding sessions gradually as the body adapts to the physical demand.
How to Use a Printable Yoga Sequence at Home
Using a printable yoga sequence at home effectively requires placing the sequence where you can see it without craning the neck, following it at a pace that allows breath to lead each transition, and practicing the same sequence consistently rather than switching flows every session.
The most common home practice mistake with printed sequences is treating them like a checklist to complete as quickly as possible. A printed yoga flow is a pace guide, not a timer. Hold times listed as “5 breath cycles” should always be 5 actual, full breath cycles, not 5 rushed ones.
Tips for using printable yoga sequences effectively:
- Place the sequence at eye level. Prop it against a wall or use a music stand. Looking down at a sheet on the floor while in a yoga pose creates exactly the neck problem yoga is designed to prevent.
- Practice the same sequence for at least 4 weeks. Variety is appealing but consistency produces adaptation. A beginner who practices the same 20-minute flow three times per week for a month will show more measurable improvement than one who tries a new flow every session.
- Annotate your sequence. After each practice, note which poses needed modification and which held times felt appropriate. Adjust the printed version based on your own experience.
- Keep a separate sequence for each goal. One printed flow for mornings. One for flexibility. One for stress relief. Label and store them somewhere accessible so the right one is always ready.
Modification: Seniors and beginners should print sequences with chair adaptations noted beside each standard pose. Having the modification in writing removes the need to remember it under physical and mental exertion during practice.
Frequently Asked Questions About Yoga Flows
What is the difference between a yoga flow and a yoga class?
A yoga flow is the sequence of poses practiced within a class, while a yoga class is the instructor-led session that delivers a flow as part of a broader teaching environment.
You can practice a yoga flow at home from a printed or memorized sequence without an instructor.
Most yoga classes, particularly Vinyasa and Hatha styles, are built around one or more structured flows that move the student through a logical progression from warm-up to cool-down.
How long should a yoga flow be for beginners?
Beginners should start with yoga flows lasting 20 to 30 minutes, including a 5-minute opening, a 10 to 15-minute main sequence, and a 5-minute cool-down including Savasana.
This duration is long enough to produce a meaningful warm-up effect and introduce several foundational poses without creating the fatigue that makes form break down.
Session length should increase gradually, adding 5 to 10 minutes every two to four weeks as physical endurance and pose familiarity improve.
What is the best yoga sequence for flexibility?
The best yoga sequence for flexibility prioritizes the hamstrings, hip flexors, and thoracic spine using long, breath-supported holds of 8 to 10 breath cycles per pose.
Poses including Paschimottanasana (Seated Forward Fold), Anjaneyasana (Low Lunge), and Gomukhasana (Cow Face Pose) target the areas where most adults hold their primary flexibility restrictions.
Flexibility improvements require consistent practice over 8 to 12 weeks. A single long stretch session produces temporary change. Regular two-to-three-times-weekly practice produces structural adaptation.
Can I do yoga flows every day?
Practicing yoga flows every day is appropriate only when the session intensity varies across the week, combining active vigorous flows with gentler Restorative or Yin sessions.
Practicing vigorous flows daily without rest days increases overuse injury risk and slows the body’s adaptive response, because tissue repair and strength adaptation both occur during rest periods, not during practice.
If you want a daily practice, alternate vigorous flow days with Restorative or gentle yoga days and include at least one full rest day per week.
What poses should I always include in a yoga flow?
Every yoga flow should include an opening breath awareness pose, at least one spinal mobilization pose, one or more standing poses, and a closing Savasana (Corpse Pose).
Marjaryasana-Bitilasana (Cat-Cow Pose) for spinal warm-up, Adho Mukha Svanasana (Downward Facing Dog) as a transitional and strengthening position, and Savasana as a closing rest are the three poses that appear most consistently across every well-designed yoga flow at every level.
Skipping Savasana is the single most counterproductive modification a home practitioner can make. It is where the nervous system integrates the practice’s effects.
One Flow This Week. The Same Flow Next Week.
Pick the flow from this guide that matches your most pressing goal right now: morning activation, flexibility, stress relief, or beginner foundations. Print it or write it on a card. Practice it three times this week.
Next week, practice it again. The second and third time through any flow is where the real learning begins. The body stops managing the unfamiliar and starts adapting to it.
That is when yoga works.