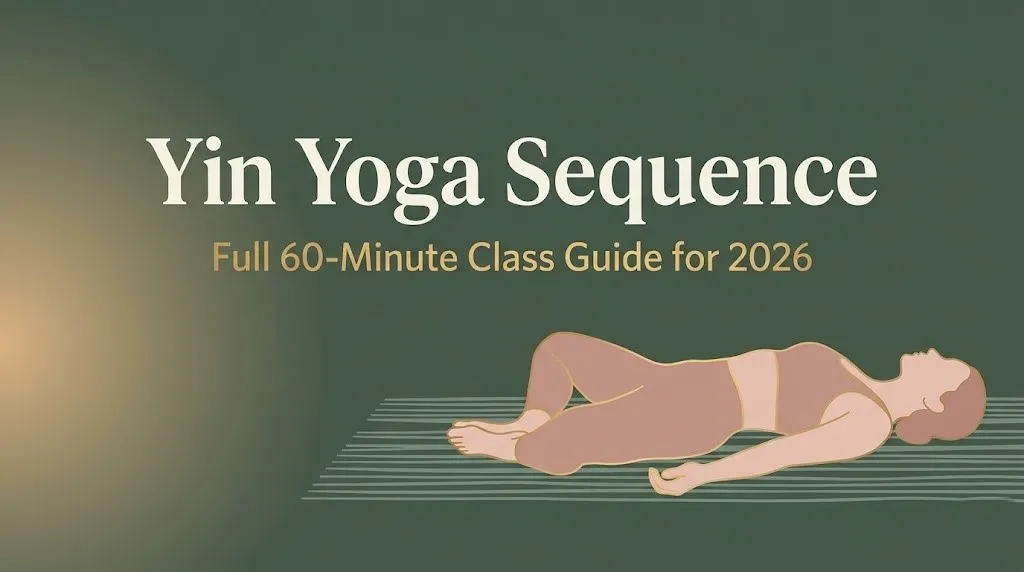
Yin Yoga Sequence: Full 60-Minute Class Guide for 2026
A well-designed yin yoga sequence holds each pose for three to five minutes, targets the connective tissue of the hips, spine, and lower body, and produces a depth of physical release and mental stillness that faster-paced yoga styles simply cannot reach in the same timeframe. This guide gives you a complete 60-minute structure you can use today, whether you are practicing at home or planning a class for students.
The research behind yin yoga’s effects on stress, sleep, and connective tissue is more substantial than most people realize. The National Center for Complementary and Integrative Health identifies yoga-based practices that combine long holds with breath awareness among the interventions with the strongest evidence for stress response reduction and autonomic nervous system regulation in adults.
You will find everything here: how yin yoga works biologically, how to sequence a 60-minute class from opening to final rest, which poses target which body regions, what props you need, how to modify for different bodies, and a complete sequence with hold times you can print and use immediately.
Yin Yoga Sequence
A yin yoga sequence is a series of floor-based yoga poses held passively for three to five minutes each, targeting the deep connective tissues of the body rather than the superficial muscles, and organized to create a balanced effect across one or more body regions within a single practice session. It is the specific combination of pose selection, hold duration, and ordering that distinguishes yin yoga from other yoga styles.
Yin yoga as a distinct practice was developed and systematized by Paul Grilley and later expanded by Sarah Powers, who integrated Chinese medicine meridian theory into the sequencing framework. The practice draws from earlier traditions of Tao Yin, a Chinese exercise practice emphasizing long-held passive postures, and adapts them into the context of contemporary yoga anatomy.
What makes a yin sequence different from simply holding yoga poses for a long time is intention and body positioning. In yin yoga, the muscles are deliberately kept as passive as possible during each hold. The body is placed in a shape that applies a gentle, sustained stress to a specific connective tissue target, whether that is the hip joint capsule, the lumbar ligaments, or the fascial sleeve along the inner thigh. The long hold allows the tissue to respond gradually rather than contracting defensively in response to a quick stretch.
The sequencing matters as much as the individual poses. A well-ordered yin sequence moves through the body in a logical progression: typically working from one body region to another, balancing the demands placed on the front and back of the body, and building toward a final long rest in Savasana (Corpse Pose) that allows the nervous system to integrate the session’s effects.
- What defines a complete yin yoga sequence:
- Floor-based poses held for 3 to 5 minutes each (beginners may start at 2 minutes)
- Muscles deliberately relaxed to allow connective tissue loading
- Poses ordered to address one or two body regions systematically
- Transitions between poses are slow and deliberate, not rushed
- Session closes with Savasana of at least 5 to 10 minutes
What Is Yin Yoga and How Does It Work
Yin yoga is a slow, floor-based style of yoga that uses long passive holds to apply a gentle, sustained stress to the ligaments, joint capsules, fascia, and other connective tissues of the body, rather than the muscular activation that characterizes most active yoga styles. It works by exploiting a specific property of connective tissue called creep, the slow deformation of dense connective tissue under sustained low load.
Unlike muscle tissue, which responds to a rapid stretch by contracting reflexively (the stretch reflex), connective tissue responds to slow, sustained loading by gradually elongating. Fascia, tendons, and ligaments are primarily composed of collagen fibers arranged in dense, relatively inelastic weaves. When a sustained, gentle stress is applied for three to five minutes, those collagen fibers can realign and reorganize over time with consistent practice.
Think of connective tissue like a piece of cold taffy. Pull it quickly and it snaps. Pull it slowly and steadily and it gradually yields and changes shape. Yin yoga applies the slow, steady pull. The muscles need to stay passive to allow the force to reach the deeper tissues. This is why yin yoga teachers consistently cue practitioners to find a position of mild sensation rather than a sharp stretch: the goal is to access the deeper tissue layer, not to challenge the muscles.
The nervous system also responds distinctly to long passive holds. Extended stillness in a mild stretch activates the parasympathetic nervous system, the “rest and digest” state that counteracts chronic stress and supports recovery. This is the mechanism behind the well-documented calming and sleep-supportive effects of yin practice.
According to a study published in the Complementary Therapies in Medicine, adults who practiced yin yoga for eight weeks showed measurable reductions in state anxiety, rumination, and fatigue compared to a waitlist control group, with effects sustained at a six-week follow-up.
Yin Yoga Benefits for Connective Tissue and Fascia
Yin yoga’s primary physical benefit is the maintenance and gradual improvement of connective tissue health, specifically in the joints and fascial networks of the hips, spine, pelvis, and shoulders. This matters because connective tissue receives far less circulation than muscle tissue and responds to a very different stimulus for adaptation.
Joints are lubricated and nourished through movement and compression. The cartilage, ligaments, and joint capsule tissues that make up each joint have limited direct blood supply and rely on synovial fluid circulation, facilitated by loading and unloading cycles, for nutrient delivery and waste removal. Yin yoga’s sustained loading and releasing of joint positions provides exactly this type of cyclical stress that joint tissue needs to remain healthy.
Fascia, the connective tissue web that surrounds and connects every muscle, organ, and bone in the body, also responds specifically to slow sustained loading. Research in the field of fascia science, including work published in the Journal of Bodywork and Movement Therapies, has documented that fascial tissue undergoes measurable structural changes in response to sustained loading at the force levels produced in yoga, particularly when the force is applied slowly and held consistently.
A review published in the International Journal of Yoga examining yoga’s effects on flexibility and connective tissue found that long-hold passive stretching protocols produced greater improvements in range of motion at the hip and spine than equivalent time spent in shorter holds, supporting the biomechanical rationale for yin yoga’s approach.
The benefit extends to older adults specifically. Connective tissue naturally becomes less hydrated and more brittle with age, a process accelerated by sedentary behavior. Regular yin practice is one of the most age-appropriate forms of joint maintenance available because it requires no muscular strength, no cardiovascular output, and no complex balance skills.
- Connective tissue benefits of consistent yin yoga practice:
- Joint capsule mobility: gradual improvement in hip, spine, and shoulder range of motion
- Fascial hydration: sustained loading encourages fluid movement through fascial tissue
- Ligament resilience: appropriate stress maintains collagen organization
- Cartilage health: loading cycles support synovial fluid circulation
- Postural fascial lengthening: front body and back body fascial chains respond to targeted yin holds
Key Takeaway: Yin yoga works on connective tissue, not muscles, and that is precisely why it produces a different quality of physical release than active yoga styles. The long holds are not about endurance; they are about reaching the biological depth where structural change in fascia and joint tissue actually occurs.
Yin Yoga vs Restorative Yoga
Yin yoga and restorative yoga are frequently confused because both are slow, floor-based, and calming, but they differ in a fundamental way: yin yoga intentionally applies mild stress to connective tissue, while restorative yoga uses props to remove all stress from the body and allow complete passive rest. The two practices serve different purposes and are not interchangeable.
In a restorative yoga class, every pose is supported by props (bolsters, blankets, blocks, straps) to the point where the body experiences zero muscular effort and zero tissue stretch. The goal is complete surrender to support. Restorative yoga is most appropriate for recovery, illness, acute stress, postpartum care, or any situation where the body needs support rather than stimulus.
In yin yoga, props are used selectively to modify intensity and protect specific joints, but the pose is not designed to eliminate sensation. A practitioner should feel a moderate, dull, spreading sensation in the target tissue during a yin hold. The sensation is the signal that the connective tissue is receiving the stress stimulus it needs to respond and adapt.
The confusion between the two styles leads practitioners to either over-prop their yin poses (accidentally converting them into restorative holds with no tissue benefit) or under-prop their restorative poses (adding unnecessary stress during a session designed for recovery). Knowing the difference helps you choose the right practice for what your body actually needs on a given day.
| Feature | Yin Yoga | Restorative Yoga |
|---|---|---|
| Primary target | Connective tissue and fascia | Nervous system and recovery |
| Sensation goal | Mild, dull, spreading sensation | Zero sensation, complete surrender |
| Props | Used to modify, not eliminate sensation | Used to fully support and remove all effort |
| Hold duration | 3 to 5 minutes per pose | 5 to 20 minutes per pose |
| Appropriate for | Regular practice, flexibility maintenance | Recovery, illness, high stress, post-surgery |
| Muscular engagement | Muscles deliberately relaxed | Muscles completely passive with prop support |
| Intensity | Mild to moderate (tissue level) | Minimal, fully passive |
Yin Yoga Sequencing Principles
Yin yoga sequencing principles are the structural rules that govern how poses are ordered within a session to create a balanced, progressive, and physiologically coherent practice rather than a random collection of floor holds. Understanding these principles is what separates a well-designed yin sequence from a pose list.
The first principle is regional focus. Most yin classes concentrate on one or two body regions rather than attempting to address the entire body equally in 60 minutes. A hip-focused class works the hip joint capsule, hip flexors, and hip external rotators through multiple complementary poses from different angles. A spine-focused class addresses the lumbar and thoracic spine in flexion, extension, and lateral bend. Attempting to hit every body region in one 60-minute class produces a superficial stimulus in each area rather than meaningful depth in any.
The second principle is front-body and back-body balance. Every yin session should include at least one pose that targets the front body (hip flexors, abdominal fascia, anterior chest) and at least one that targets the back body (lumbar erectors, posterior hip, upper back). A session that only opens the hips in flexion without countering with an extension-based pose leaves the body structurally unbalanced.
The third principle is sequencing from opening to peak to closing. A yin class should begin with accessible, relatively lower-intensity poses that allow the body to settle. The most demanding poses, usually the longest holds in the most challenging positions, come in the middle third of the session. The final third moves back toward gentler shapes before Savasana.
Pose Tip:
- Begin with two to three minutes of quiet lying in Savasana (Corpse Pose) before the first pose. This signals to the nervous system that stillness is the mode of the session.
- Place your most demanding hip or spine pose in the middle 20 minutes of a 60-minute sequence, not at the beginning or end.
- Always include a gentle spinal twist as a transitional pose between floor sections of the body to neutralize the spine between asymmetrical holds.
60-Minute Yin Yoga Sequence Structure
A 60-minute yin yoga sequence is optimally structured in three distinct phases: an opening phase of 10 to 12 minutes that grounds the practitioner and introduces the body to stillness, a working phase of 35 to 40 minutes that moves through the session’s target body regions with the longest and most demanding holds, and a closing phase of 10 to 12 minutes that includes a final transitional pose and a minimum of 5 minutes in Savasana. This structure applies whether you are practicing solo or teaching a class.
The opening phase serves a neurological purpose that is often undervalued. Moving from the stimulation of daily activity into the stillness of a yin practice is not instantaneous. The nervous system needs a transition. Beginning with one or two accessible poses held for two to three minutes each, rather than jumping immediately into a five-minute hip opener, gives the body time to make this shift and arrive in the parasympathetic state where yin practice is most effective.
The working phase is where the primary connective tissue targets are addressed. This is where three to five minute holds are appropriate and where the sequence’s regional focus plays out. For a hip-focused 60-minute class, this section might move through a Dragon Pose (Low Lunge variation), a Sleeping Swan (hip external rotation), a Shoelace hold, and a Butterfly before transitioning to the floor.
The closing phase is not an afterthought. It is when the nervous system integrates the session’s physical effects. Rushing through Savasana or skipping it entirely negates a meaningful portion of the practice’s physiological benefit. The parasympathetic activation built through the session consolidates most fully in the final quiet.
| Phase | Duration | Purpose | Hold Times |
|---|---|---|---|
| Opening | 10 to 12 minutes | Nervous system transition, body arrival | 2 to 3 minutes per pose |
| Working | 35 to 40 minutes | Connective tissue targeting, regional focus | 3 to 5 minutes per pose |
| Closing | 10 to 12 minutes | Integration, final neutralizer, Savasana | 3 minutes transitional, 5 to 7 min Savasana |
Key Takeaway: The 60-minute yin yoga structure is not just a sequence of long holds. It is three distinct phases, each serving a specific physiological purpose, and the opening and closing phases are as important as the poses in the middle.
Best Yin Yoga Poses for Beginners
The best yin yoga poses for beginners are those with the most accessible entry point, the widest range of prop-supported modifications, and the clearest sensation signal so a new practitioner can easily identify whether they have found an appropriate depth. Beginners do well with supine and seated shapes before attempting prone or deeper hip-opening positions.
Supta Baddha Konasana (Reclined Bound Angle Pose) is the ideal starting pose for any beginner yin sequence. Lying on the back with the soles of the feet together and knees falling out to the sides, the pose targets the inner thigh fascia, hip adductors, and groin without requiring any mobility the practitioner may not yet have. Bolsters or folded blankets under each knee make the sensation immediately manageable for tight hips.
Balasana (Child’s Pose) in its yin context is held passively for three to five minutes with arms either extended forward or resting alongside the body toward the feet. It targets the lumbar erectors, gluteus maximus, and posterior hip fascia. Almost every body can access some version of Child’s Pose with appropriate prop support, making it one of the most universally accessible yin poses available.
Supta Matsyendrasana (Supine Twist) rounds out the beginner-friendly options with a simple, supported spinal rotation that addresses the thoracic and lumbar spine, the IT band, and the outer hip. Lying on the back and dropping both knees to one side, with a blanket between the knees for comfort, this pose requires no hip flexibility and no prior yoga experience.
- Best yin poses for beginners with body targets:
- Supta Baddha Konasana (Reclined Bound Angle): inner thigh fascia, hip adductors
- Balasana (Child’s Pose): lumbar erectors, posterior hip, gluteus maximus
- Supta Matsyendrasana (Supine Twist): thoracic and lumbar spine, IT band
- Salamba Bhujangasana (Sphinx Pose): lumbar extension, anterior longitudinal ligament
- Paschimottanasana (Seated Forward Fold): hamstrings, lumbar fascia, posterior leg fascia
Modification: Every beginner yin pose should begin at 50% of the practitioner’s available depth for the first 30 seconds. The tissue needs time to respond and release before additional depth becomes appropriate. Never force depth at the start of a hold.
Yin Yoga Sequence for Hips
A yin yoga sequence for hips targets the joint capsule of the hip, the hip flexors, the hip external rotators, the hip adductors, and the iliotibial band through a series of poses that approach the hip from multiple angles across a 30 to 60-minute session. The hip is the most requested body region in yin yoga because it holds the most chronic tension in sedentary adults.
The hip joint is a ball-and-socket joint with the potential for movement in every plane: flexion, extension, abduction, adduction, internal rotation, and external rotation. A well-designed hip yin sequence addresses all of these directions across its poses rather than focusing exclusively on one movement pattern. Focusing only on external rotation, for example, which is the most commonly taught hip yin pose orientation, leaves the hip flexors and adductors unaddressed.
Dragon Pose (a yin yoga name for a deep Low Lunge variation, related to Ardha Anjaneyasana) is the primary hip flexor pose in yin yoga. The front knee bends to 90 degrees or less while the back knee rests on the mat, and the practitioner allows the hips to sink toward the floor without muscular support. The target is the psoas and iliacus of the back leg, two of the most chronically shortened muscles in people who sit for extended periods.
A yin hip sequence for 60 minutes typically moves through Dragon Pose on each side (5 minutes), Sleeping Swan on each side (5 minutes), Butterfly (4 minutes), and a supine hip sequence including Figure-4 stretch and a final Supta Baddha Konasana (3 to 4 minutes each) before Savasana.
Safety note: People with hip replacements should avoid all deep hip external rotation poses, including Sleeping Swan and any crossed-leg position, until explicitly cleared by their orthopedic surgeon. The supine Figure-4 stretch is generally safer for hip replacement patients as it allows greater control of range of motion, but individual surgical parameters vary and a surgeon’s specific guidance is appropriate.
Yin Yoga Sequence for Spine and Lower Back
A yin yoga sequence for the spine and lower back targets the lumbar erectors, thoracic erectors, posterior hip fascia, and the ligamentous system of the lumbar spine through poses that address spinal flexion, extension, and rotation in a balanced sequence. Lower back tension is one of the most common reasons adults seek out yin yoga.
The lumbar spine is a common storage site for both physical tension and the fascial thickening that results from prolonged sitting and repetitive forward-flexion patterns. Yin yoga addresses lumbar tension through two complementary approaches: passive flexion holds like Balasana (Child’s Pose) that lengthen the posterior spinal tissues, and passive extension holds like Salamba Bhujangasana (Sphinx Pose) that address the anterior spinal ligaments and compress the posterior lumbar structures gently.
Think of the lumbar spine like a hinge that has been held in one position (slightly flexed, as in sitting) for most of the day. Yin yoga alternates between opening the hinge fully in the opposite direction (extension in Sphinx) and deepening the flexion with full passive release (Child’s Pose). Together, these movements restore the lumbar spine’s available range in both directions rather than exclusively lengthening the posterior tissues.
Bananasana (Banana Pose) is a lateral yin pose where the practitioner lies on their back and walks both feet to one side, arching the body in a crescent shape. This targets the quadratus lumborum, the lateral fascial chain along the thoracic spine, and the intercostal fascia along the ribs. It is one of the most underused yin poses for spine health despite being highly accessible and remarkably effective for the lateral tissue chains that forward-fold dominated sequences never reach.
Modification: Practitioners with active lumbar disc herniation should approach Sphinx Pose with caution. A bolster under the chest raises the torso, reduces the extension angle, and decreases lumbar compression. If any radiating sensation is felt in the legs during Sphinx, exit the pose immediately and consult a spine specialist before practicing any lumbar extension positions.
Key Takeaway: A spine-focused yin sequence needs both flexion and extension poses. Doing only Child’s Pose and forward folds opens the back body but neglects the anterior spinal ligaments and hip flexors that a balanced spine practice requires.
Yin Yoga Sequence for Stress and Sleep
A yin yoga sequence designed for stress relief and sleep support uses long passive holds in supine and gently inverted positions, combined with diaphragmatic breathwork, to activate the parasympathetic nervous system and reduce circulating cortisol levels in the hours following practice. This is among the most research-supported applications of yin yoga.
The Harvard T.H. Chan School of Public Health notes that mind-body practices that combine slow movement, breath awareness, and stillness consistently show the strongest effects on the hypothalamic-pituitary-adrenal axis, the physiological system that governs the stress response. Yin yoga’s combination of extended stillness, mild physical sensation, and focused breath makes it one of the most accessible and effective delivery mechanisms for these effects.
A stress-and-sleep yin sequence differs from a general yin sequence in two specific ways. First, it avoids any pose that produces intense sensation, because high-intensity physical sensation activates the sympathetic nervous system rather than the parasympathetic. The target sensation level in a sleep-focused sequence is “comfortable and dull,” never “sharp or intense.” Second, it prioritizes supine over prone or seated positions, as lying on the back produces the lowest baseline muscular activation and most directly supports the shift into parasympathetic dominance.
Poses particularly effective for a stress and sleep yin sequence include Viparita Karani (Legs Up the Wall), Supta Baddha Konasana (Reclined Bound Angle), Supta Matsyendrasana (Supine Twist on both sides), and a long Savasana (Corpse Pose) of 10 to 15 minutes. A stress-focused sequence is best practiced within two to three hours of sleep rather than immediately after a busy or stimulating activity.
- Key features of a yin sequence for stress and sleep:
- Sensation level: comfortable, dull, and spreading (never sharp or intense)
- Position preference: supine and semi-inverted over seated or prone
- Hold times: 4 to 5 minutes each to allow full parasympathetic activation
- Breath cue throughout: slow exhale twice as long as the inhale
- Savasana: minimum 10 minutes with an eye pillow or blanket over the eyes
How Long to Hold Poses in Yin Yoga
Yin yoga poses are held for 3 to 5 minutes for most practitioners and most body regions, with beginners starting at 2 minutes and advanced practitioners extending to 7 minutes for specific deep tissue targets. The hold time is not arbitrary. It is the minimum duration needed for connective tissue to begin its creep response under passive loading.
The first 60 to 90 seconds of any yin hold typically feel the most intense, as the muscles attempt to respond to the stretch stimulus before settling into passivity. This initial intensity is normal and not a signal to exit the pose, unless the sensation is sharp, pinching, or felt in a joint rather than in the belly of a tissue. The sensation typically softens or changes quality between minutes two and three as the muscular protective response diminishes and the connective tissue begins to yield.
Duration recommendations also depend on the tissue being targeted. Hip joint capsule work benefits from longer holds, often four to five minutes, because the joint capsule is among the densest connective tissues in the body and responds slowly. Fascial holds along the spine or lateral body may be effective at three minutes. Poses targeting the more superficial hamstring fascia can produce meaningful effect in two to three minutes for most practitioners.
| Practitioner Level | Recommended Hold | Body Region Variation | Key Signal to Exit |
|---|---|---|---|
| Complete beginner | 2 minutes per pose | Start lower for hips and spine | Sharp, pinching, or joint sensation |
| Beginner, 4 to 8 weeks in | 3 minutes per pose | Extend toward 4 min for deep hips | Numbness, tingling, or joint pain |
| Intermediate | 3 to 5 minutes per pose | 5 min for hip capsule, 3 min for lateral body | Loss of sensation quality (gone numb) |
| Advanced | 5 to 7 minutes for specific targets | Longer for hip capsule and sacroiliac work | Fatigue or discomfort in joint tissue |
| Seniors or limited mobility | 2 to 3 minutes with full prop support | Reduce all holds by 1 minute initially | Knee or hip joint discomfort |
Props for Yin Yoga Practice
The most useful props for yin yoga are yoga bolsters, yoga blocks, folded blankets, and a yoga strap, each serving a distinct purpose in making the practice accessible, safe, and effective across the full range of body types and flexibility levels. Props in yin yoga are not signs of limitation. They are precision instruments.
The yoga bolster is the most used prop in yin yoga. A bolster placed under the chest in Sphinx Pose reduces the lumbar extension angle for people with sensitive lower backs. A bolster supporting the outer hip in Sleeping Swan allows the front hip to relax without collapsing into a compromised position. In Supta Baddha Konasana (Reclined Bound Angle), a bolster along the spine supports the upper back and chest for practitioners with tight thoracic muscles.
Yoga blocks serve primarily as height adjusters. In seated yin poses where the hips are lower than the knees, a block under the sitting bones tips the pelvis forward and allows the lumbar spine to maintain a neutral curve rather than rounding. In prone poses where the floor feels too far away, a block creates an intermediate resting surface for the forehead, hands, or hips.
The yoga strap is most useful in yin yoga for poses where the practitioner cannot comfortably reach their feet or maintain a hold without muscular tension in the arms and shoulders. In Paschimottanasana (Seated Forward Fold), looping a strap around the feet allows the arms to relax and the forward fold to become truly passive rather than an active reach.
- Complete yin yoga prop guide:
- Yoga bolster: chest support in Sphinx, hip support in Sleeping Swan, full body support in Savasana
- Yoga block (2 recommended): sitting bone height in seated poses, forehead rest in prone poses
- Folded blanket: knee padding in kneeling poses, between knees in supine twists, eye covering in Savasana
- Yoga strap: reaching feet in forward folds, shoulder width in chest-opening poses
- Wall: hip elevation in Viparita Karani (Legs Up the Wall), foot placement reference
Key Takeaway: Props in yin yoga are not optional extras for beginners. They are the tools that allow every practitioner to find the precise depth of sensation in a pose where connective tissue work actually happens, without forcing past the point where protective muscle contraction defeats the purpose.
Yin Yoga Modifications for Beginners and Hypermobility
Yin yoga modifications for beginners focus on reducing hold depth and duration while maintaining the passive character of the pose. Modifications for hypermobile practitioners work in the opposite direction: adding support to prevent the joints from moving into the end range positions that hypermobility makes available but connective tissue health does not support.
For beginners, the two most important modifications are time and depth. Starting with two-minute holds instead of three to five, and entering each pose at 50 to 70 percent of available range, makes the practice immediately sustainable and prevents the next-day soreness that often discourages newcomers from returning. The tissue benefits of yin yoga accumulate over weeks of consistent practice, not in one aggressive session.
Hypermobility requires a different approach entirely. Practitioners with hypermobility, whether generalized hypermobility or hypermobility spectrum disorder, have connective tissue that is already more extensible than average. The goal in yin yoga for hypermobile practitioners is not to increase range of motion but to develop appropriate tissue support and proprioceptive awareness within the existing range. This means stopping each pose well short of the end range, using props to create a sense of support rather than stretch, and keeping hold times shorter, typically two to three minutes, to avoid overstressing already lax ligaments.
Yoga Alliance and physical therapists working with hypermobile populations consistently advise that yoga for hypermobility should emphasize active muscular stability around joints rather than passive tissue stretching. This means that a hypermobile practitioner may benefit from a balanced weekly practice that includes both yin yoga at moderate depth and an active style like Hatha or Vinyasa that builds the muscular stability to support their naturally extensive range.
Pose Tip:
- Beginners: place a folded blanket under the sitting bones in all seated yin poses to prevent lumbar rounding.
- Hypermobile practitioners: use a bolster or blanket to limit depth in every hip-opening pose. The sensation target is “present but mild.”
- Safety caution: Hypermobile practitioners should exit any yin pose that produces a feeling of “going past” their joint, which is different from the dull spreading sensation of appropriate connective tissue loading.
Yin Yoga Contraindications and Safety
Yin yoga contraindications are specific physical conditions where the long passive loading of connective tissue in yin yoga poses may cause harm rather than benefit, and understanding them is as important for a practitioner as knowing which poses to include. Yin yoga is broadly accessible but it is not appropriate for everyone in every circumstance.
Osteoporosis is the most important contraindication for deep spinal flexion poses in yin yoga. In advanced osteoporosis, the lumbar and thoracic vertebrae are vulnerable to compression fracture under the loading that a deep three-to-five-minute forward fold can produce. People with known osteoporosis should practice yin yoga with a teacher experienced in bone health adaptations and should avoid deep forward folds, spinal twists beyond comfortable range, and any pose that applies significant compressive load to the spine.
Pregnancy requires specific modifications, particularly in the second and third trimesters. Deep hip external rotation poses, supine poses held for extended periods after the first trimester, and any prone pose are contraindicated or need significant modification. Prenatal yoga with a certified prenatal yoga teacher is the appropriate context for pregnant practitioners rather than a standard yin class.
Practitioners with recent ligament sprains or tears, specifically of the knee, ankle, or hip, should avoid yin yoga in the affected area until the ligament has healed. The gentle sustained loading of yin yoga, which is beneficial for healthy connective tissue, can slow the healing of a recently injured ligament by applying stress to tissue that needs rest rather than loading.
- Yin yoga contraindications summary:
- Osteoporosis: avoid deep spinal flexion and compression poses
- Pregnancy (second and third trimester): avoid deep supine holds, prone poses, and deep twists
- Recent ligament injuries: avoid yin loading of the injured joint until healed
- Hypermobility: practice with reduced depth and shorter holds
- Hip replacement: avoid deep hip external rotation poses without surgical clearance
- Acute inflammatory joint conditions: avoid loading the inflamed joint
How to Teach a Yin Yoga Class
Teaching a yin yoga class requires a different instructional approach than teaching an active yoga style: the teacher’s primary role is to help students find and stay in an appropriate depth of sensation, manage the experience of stillness over extended holds, and exit poses safely rather than actively demonstrating and cueing alignment cues during the hold itself. Yin teaching is quieter and more attentive than Vinyasa teaching.
The opening of a yin class sets the tone for the entire 60 minutes. Spending two to three minutes in an initial Savasana before the first pose, with verbal guidance about what yin yoga is, what sensation is appropriate, and what the general theme of the session is, grounds students and removes the anxiety that stillness and unfamiliar sensation can produce in newcomers.
During each hold, effective yin teachers offer one to two verbal cues in the first minute (entering the pose and finding the appropriate depth), one check-in around the two-minute mark (staying or adjusting), and a clear exit cue with specific instruction for the transition. Silence between cues is a teaching choice, not a gap. It gives students the space to develop interoceptive awareness, the internal attention to body sensation, that yin yoga specifically trains.
According to research published in the Journal of Alternative and Complementary Medicine, yoga practices that include extended periods of stillness and guided interoceptive attention produce greater improvements in self-reported mindfulness and body awareness than movement-dominated yoga practices over comparable time periods. This research supports the specific value of the quiet, attentive teaching approach that yin yoga demands.
- Key skills for yin yoga teaching:
- Opening ritual: 2 to 3 minutes of initial Savasana with verbal orientation
- Entry cues: clear, specific guidance for entering each pose with appropriate prop setup
- Hold management: 1 to 2 cues in the first minute, silence, one check-in at midpoint
- Exit instruction: specific verbal cue with transition guidance to the next pose
- Closing: a minimum 5-minute Savasana with verbal release cues and silence
- Post-class transition: remind students to move slowly when leaving Savasana
Key Takeaway: Great yin yoga teaching happens mostly in the silences, not during the cues. Your job as a teacher is to set each pose up clearly, help students find appropriate depth, and then get out of the way so interoceptive awareness can develop.
Complete 60-Minute Yin Yoga Sequence With Hold Times
A complete 60-minute yin yoga sequence includes 10 to 12 poses held for 3 to 5 minutes each, organized in three phases (opening, working, closing), targeting the hips and spine as primary regions, and closing with a minimum 5-minute Savasana. The sequence below is designed for intermediate beginners and can be practiced at home or used as a teaching template.
This sequence follows a supine-to-prone-to-supine arc. The body begins lying on its back in accessible opening poses, moves to floor-level hip and spine work in the middle section, and returns to supine positions for the closing. Props needed: one bolster, two blocks, two blankets, and a strap.
To practice the complete 60-minute yin yoga sequence:
- Opening Savasana (Corpse Pose): Lie flat on your back, arms at sides. Close eyes. Take 10 slow breaths. Allow the body to begin releasing held muscular tension. Duration: 3 minutes.
- Supta Baddha Konasana (Reclined Bound Angle Pose): Soles of feet together, knees falling out. Place a blanket under each knee for support. Arms rest at sides. Feel a gentle spreading along the inner thighs and groin. Duration: 4 minutes.
- Supta Matsyendrasana (Supine Twist), right side: Lying on your back, both knees to the right. Place a blanket between the knees. Left arm extends out. Allow shoulders to remain relatively flat. Duration: 3 minutes. Switch sides: 3 minutes.
- Balasana (Child’s Pose): Kneel, bring hips toward heels, fold torso forward. Arms extended or resting alongside body. A bolster under the chest supports those with limited hip flexion. Duration: 4 minutes.
- Dragon Pose (Low Lunge variation, related to Ardha Anjaneyasana), right side: Right foot forward, left knee on mat. Hips sink toward the floor without muscular effort. Front knee bends comfortably. Hands on blocks for those with short arms. Duration: 5 minutes. Switch sides: 5 minutes.
- Sleeping Swan (Yin variation of Eka Pada Rajakapotasana), right side: Right shin angled across the mat (comfortable angle for the individual’s hip). Left leg extended back. Fold forward over the right shin or use a bolster under the right hip. Duration: 5 minutes. Switch sides: 5 minutes.
- Salamba Bhujangasana (Sphinx Pose): Lying prone, forearms on the mat, elbows under shoulders. Chest lifts gently. Lower the head for more rest, keep it up for more spinal extension. A bolster under the chest reduces lumbar compression for sensitive backs. Duration: 4 minutes.
- Bananasana (Banana Pose), right side: Lying on your back, walk both feet to the right, walk arms to the right, creating a crescent arc through the body. Hold for the lateral fascial chain. Duration: 3 minutes. Switch sides: 3 minutes.
- Paschimottanasana (Seated Forward Fold): Sit with legs extended. Loop a strap around the feet. Fold forward passively, allowing the spine to round gently. Duration: 4 minutes.
- Viparita Karani (Legs Up the Wall): Scoot hips to the wall, extend legs up. Arms rest at sides. A folded blanket under the hips is optional. Duration: 5 minutes.
- Savasana (Corpse Pose): Lie flat, arms slightly away from the body, palms up. Place a blanket over the body and an eye pillow over the eyes. Complete stillness. Duration: 7 minutes.
| Pose | Duration | Body Target | Prop Option |
|---|---|---|---|
| Opening Savasana | 3 min | Nervous system arrival | Blanket over body |
| Supta Baddha Konasana | 4 min | Inner thigh, groin | Blanket under each knee |
| Supine Twist (each side) | 3 min per side | Thoracic and lumbar spine | Blanket between knees |
| Balasana (Child’s Pose) | 4 min | Lumbar erectors, posterior hip | Bolster under chest |
| Dragon Pose (each side) | 5 min per side | Psoas, hip flexors | Blocks under hands |
| Sleeping Swan (each side) | 5 min per side | Hip external rotators, joint capsule | Bolster under front hip |
| Sphinx Pose | 4 min | Lumbar extension, anterior ligaments | Bolster under chest |
| Bananasana (each side) | 3 min per side | Lateral chain, quadratus lumborum | None needed |
| Paschimottanasana | 4 min | Hamstrings, lumbar fascia | Strap around feet |
| Viparita Karani | 5 min | Venous return, gentle inversion | Blanket under hips |
| Savasana | 7 min | Full integration, parasympathetic rest | Blanket, eye pillow |
| Total | ~60 minutes | Hips, spine, lateral body | Multiple |
Frequently Asked Questions About Yin Yoga Sequence
What is a good yin yoga sequence for beginners?
A good beginner yin yoga sequence includes 6 to 8 accessible supine and seated poses held for 2 to 3 minutes each, targeting the hips and lower back with full prop support throughout.
Good starting poses include Supta Baddha Konasana (Reclined Bound Angle), Balasana (Child’s Pose), Supta Matsyendrasana (Supine Twist), and Sphinx Pose, all of which can be practiced comfortably with blankets and blocks without prior flexibility.
Begin with shorter holds and focus on finding a mild, spreading sensation rather than a sharp stretch before gradually extending hold times as you become familiar with the practice.
How long should you hold poses in a yin yoga sequence?
Beginners should hold yin yoga poses for 2 to 3 minutes, while intermediate and experienced practitioners typically hold for 3 to 5 minutes per pose.
Connective tissue requires a minimum of 2 to 3 minutes of sustained passive loading to begin its creep response, which is why yin yoga holds are categorically longer than those in active yoga styles.
Start at the shorter end of the range and only extend hold times when you can maintain the pose with relaxed muscles and a steady breath throughout the full duration.
What is the difference between yin yoga and restorative yoga?
Yin yoga intentionally applies mild stress to connective tissue through passive holds, while restorative yoga uses props to fully support the body and eliminate all sensation and effort.
In yin yoga, a moderate, dull, spreading sensation is the goal and indicates the connective tissue is receiving an appropriate stimulus. In restorative yoga, the goal is zero sensation and complete surrender to prop support.
Choose yin yoga when you want to work on joint mobility and connective tissue health. Choose restorative yoga when your body needs recovery, rest, or support during illness or high stress.
Can I do yin yoga every day?
Yes, most people can practice yin yoga daily if the session targets different body regions on consecutive days to allow connective tissue adequate recovery time between loading sessions.
Practicing the same hip sequence every day for seven consecutive days applies repetitive stress to the same tissues without adequate recovery, which can be counterproductive.
A sensible approach is alternating between a hip-focused session, a spine-focused session, and a full-body gentle session across a week to maintain variety and allow each tissue area to rest between specific loading sessions.
What props do I need for a home yin yoga practice?
The most useful props for a home yin yoga practice are one yoga bolster, two yoga blocks, two folded blankets, and a yoga strap.
A bolster supports the chest in prone poses and the hips in hip-opening poses. Blocks adjust height in seated positions. Blankets pad the knees and provide warmth in Savasana. A strap extends reach in forward folds without muscular tension in the arms.
If you are just starting, a firm sofa cushion can substitute for a bolster and two thick hardcover books can substitute for blocks until you invest in dedicated props.
Start Tonight With One Pose
Pick one pose from the complete sequence and hold it tonight. Supta Baddha Konasana (Reclined Bound Angle) requires nothing beyond a blanket under each knee and three minutes on your back before bed. Set a timer. Breathe slowly. Let the inner thighs release.
Add one pose per week until you have built the full 60-minute sequence. There is no rush. Yin yoga is, by definition, the practice of not rushing.
Return to the complete sequence table whenever you need a reference. Print it. Use it. The session builds itself