Yoga Flow Sequence Guide: Beginner to Advanced 2026
A yoga flow sequence is a series of poses linked together by breath, designed to move your body through a logical arc of warm-up, peak effort, and release. With the right structure, you can build one at home in 20 minutes and get the same physical and nervous system benefits that a studio class provides.
The research behind breath-synchronized yoga movement is more than anecdotal. According to a 2021 review published in the International Journal of Yoga, regular Vinyasa-style practice produces measurable improvements in cardiovascular endurance, flexibility, and self-reported stress levels across multiple adult age groups. These effects appear within four to eight weeks of consistent practice.
This guide covers what a yoga flow sequence actually is, how it differs from other yoga styles, the principles behind smart sequencing, and five complete sequences you can use immediately. You’ll also find modifications for beginners, older adults, and people managing back or wrist sensitivity.
What Is a Yoga Flow Sequence
A yoga flow sequence is a structured series of yoga postures connected by breath, where each movement either follows an inhale or an exhale, creating continuous, coordinated movement rather than isolated static holds.
The word “flow” refers to the linking principle: poses transition into one another without full stops between each one. This distinguishes a flow sequence from a traditional Hatha yoga class, where poses are held independently for several breaths before releasing completely and setting up the next posture.
Flow sequences are most closely associated with Vinyasa yoga, a style in which the breath directs the pace and structure of every transition. The Sanskrit word “vinyasa” translates roughly as “to place in a special way,” which captures the intentional architecture behind every sequence.
What a yoga flow sequence is not: a random collection of poses strung together. Well-built sequences follow a logical physiological arc. They prepare the body with gentle warm-up movements, build toward more demanding peak poses, then systematically guide the body toward recovery and rest.
Key structural elements of any yoga flow sequence:
- Warm-up phase: Gentle mobilization of the spine, hips, and shoulders before load-bearing poses
- Building phase: Progressively more demanding standing and balance postures
- Peak pose: The most physically demanding posture the sequence is designed to prepare for
- Counter-pose: A posture that neutralizes the physical demand of the peak pose
- Cool-down and integration: Forward folds, supine stretches, and final rest
Yoga Flow Sequence vs. Other Yoga Styles
A yoga flow sequence differs from other yoga styles primarily in how breath and movement are coordinated, and in the pace at which postures are linked together.
| Yoga Style | Movement Style | Breath Relationship | Typical Pace | Sequencing Structure |
|---|---|---|---|---|
| Vinyasa | Continuous flow | Each movement synced to breath | Moderate to fast | Instructor-built, varies class to class |
| Hatha | Static holds | Breath during hold | Slow | Pose-by-pose, not linked |
| Ashtanga | Set sequence, flowing | Strict breath count per pose | Moderate to vigorous | Fixed traditional sequence |
| Yin | Long passive holds | Breath during hold | Very slow | Tissue-targeted, not flowing |
| Restorative | Supported stillness | Deep relaxation breath | Slowest | Prop-dependent, no flow |
| Kundalini | Repetitive kriyas | Often breath-of-fire | Variable | Mantra and energy-based |
Understanding these distinctions matters practically. Someone recovering from an injury may benefit more from a Yin or Restorative approach than a flow sequence. A beginner intimidated by fast movement would do better starting with Hatha before progressing to flow.
According to the National Center for Complementary and Integrative Health (NCCIH), different yoga styles produce different physiological profiles. Choosing the right style for your current physical state is as important as practicing consistently.
Flow sequences are particularly well-suited for practitioners who want both the mindfulness elements of yoga and a more aerobic physical challenge than static styles provide.
Yoga Sequencing Principles
Yoga sequencing principles are the structural rules that determine which poses come before or after others, ensuring the body is properly prepared at each stage and not placed under sudden load without preparation.
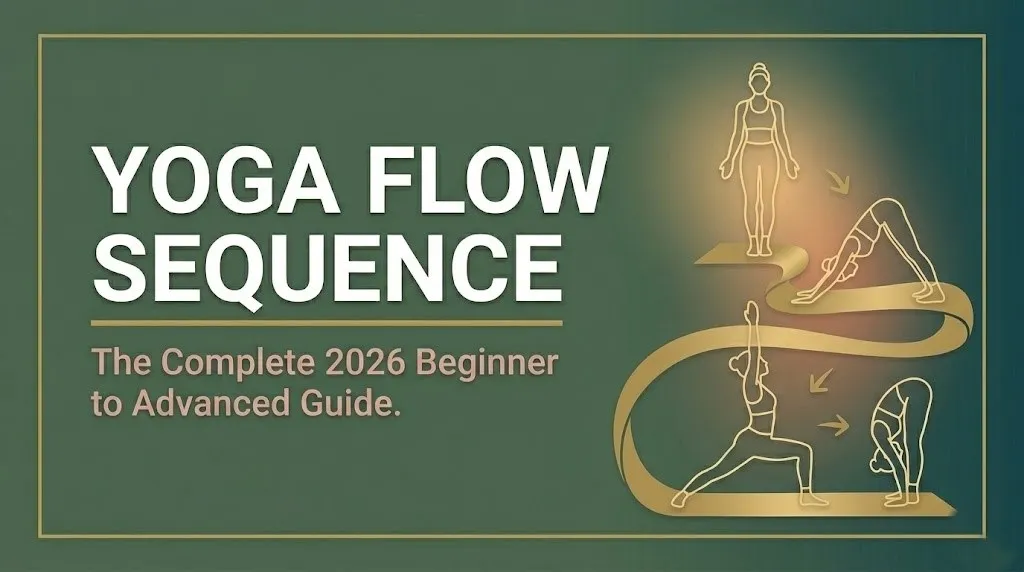
Think of a yoga flow sequence like warming up a car engine in winter. You don’t accelerate hard from a cold start. You let the engine warm gradually, bring it to operating temperature, then push harder. Your joints and connective tissue work exactly the same way.
The primary sequencing principles used in Vinyasa and Hatha teaching:
- Counter-pose principle: Every deep backbend needs a forward fold to follow. Every deep hip opener needs a neutral hip position afterward. Failing to counter-pose is the most common cause of post-practice soreness.
- Spinal neutrality first: Always begin with neutral spine mobilization (Cat-Cow, for example) before loading the spine in extension or flexion.
- Joint preparation before loading: Wrists need rotation and gentle flexion before Chaturanga Dandasana (Four-Limbed Staff Pose). Hips need gentle rotation before deep lunges. Shoulders need circles before arm balances.
- Peak pose targeting: A well-designed sequence works backward from the peak pose. If the peak is a backbend, the sequence prepares the thoracic spine, hip flexors, and shoulder girdle.
- Symmetry: Any lateral pose done on one side must be repeated on the other side within the same sequence.
Yoga Alliance recommends that certified yoga teachers demonstrate competency in sequencing principles as a core component of their 200-hour teacher training curriculum. These principles apply equally to home practitioners building their own practice.
Key Takeaway: Every good yoga flow sequence has three jobs: prepare the body, challenge it at its edge, and then help it recover. Skip any of those three and you get either injury or frustration.
How to Build a Yoga Flow Sequence
Building a yoga flow sequence means choosing a peak pose, then working backward to identify everything the body needs to be ready for that pose, and forward to identify what it needs to recover from it.
Start with one question: what is this sequence for? A morning practice for energy has a different structure than an evening practice for release. A flexibility-focused sequence looks different from a strength-focused one. Naming your intention first makes every subsequent choice clearer.
To build a basic yoga flow sequence:
- Choose your peak pose. For beginners, this might be Virabhadrasana I (Warrior I Pose). For intermediate practitioners, it might be a deep backbend or a balance pose.
- Identify what the peak pose requires physically. Warrior I needs open hip flexors, stable ankles, and shoulder mobility. Your warm-up should address all three.
- Build a 5 to 7 pose warm-up arc. Start supine or kneeling. Move to all-fours. Progress to standing. Each phase should be gentler than the next.
- Place your peak pose or peak sequence at the two-thirds mark. This is where the body is warm enough to work hard but not yet fatigued.
- Follow the peak with a counter-pose. If the peak is a backbend, follow with a forward fold. If it’s a deep hip opener, follow with a neutral seated position.
- Build a 3 to 5 pose cool-down. Move progressively toward the floor. End in Savasana (Corpse Pose) for a minimum of 3 to 5 minutes.
- Check for symmetry. If you practiced any lateral or asymmetrical pose, confirm it appears on both sides in your plan.
Modification for beginners: Keep the peak pose simple and familiar. A sequence that reaches its hardest point at something you can do comfortably is better than one that strands you in an unfamiliar pose mid-sequence.
Beginner Yoga Flow Sequence
A beginner yoga flow sequence should include no more than 8 to 12 poses, move slowly enough to learn breath coordination, and avoid wrist-bearing positions until adequate shoulder stability has been established.
This 8-pose beginner sequence is designed for someone with minimal yoga experience. Each pose is familiar enough to learn in one session. The arc moves from the floor to standing and back again.
To practice the Beginner Foundation Flow:
- Balasana (Child’s Pose): Start here. Knees wide, arms extended forward. 5 slow breaths. This grounds the nervous system before any active work begins.
- Marjaryasana-Bitilasana (Cat-Cow Pose): Come to hands and knees. Inhale to arch the spine (Cow). Exhale to round it (Cat). 8 cycles. This mobilizes every segment of the spine.
- Adho Mukha Svanasana (Downward-Facing Dog): Tuck toes, press hips up and back. Hold for 5 breaths. Heels move toward the floor without forcing contact.
- Virabhadrasana I (Warrior I Pose): Step right foot forward from Downward Dog. Front knee bends to 90 degrees. Arms reach overhead. Hold 4 breaths. Repeat left side.
- Virabhadrasana II (Warrior II Pose): From Warrior I, open hips to the long edge of the mat. Arms extend parallel to the floor. Hold 4 breaths per side.
- Uttanasana (Standing Forward Fold): Walk hands back to standing. Fold forward from the hips. Knees may stay bent. Hold 5 breaths.
- Tadasana (Mountain Pose): Roll slowly to standing, one vertebra at a time. Stand still for 3 breaths. Feel the ground under your feet.
- Savasana (Corpse Pose): Lie on your back, arms slightly away from your body. Close your eyes. Remain still for 5 minutes.
Modification for limited wrist mobility: Replace Downward Dog with a standing forward fold or a tabletop position with fists on the floor to reduce wrist extension load.
Short Yoga Flow: A 20-Minute Sequence
A 20-minute yoga flow sequence is long enough to produce measurable physical and nervous system benefits when practiced consistently three to five times per week. The key is structure, not duration.
According to the American College of Sports Medicine, even short bouts of moderate-intensity mind-body exercise (15 to 20 minutes) produce measurable improvements in mood, perceived energy, and cognitive performance when practiced regularly. The threshold for benefit is lower than most people expect.
This 20-minute sequence moves through Sun Salutation A, a warrior series, and a seated cool-down:
To practice the 20-Minute Flow:
- Tadasana (Mountain Pose): Stand at the top of your mat. 3 grounding breaths.
- Surya Namaskar A (Sun Salutation A): Complete 3 full rounds. Each round includes: Uttanasana (Forward Fold), Plank, Chaturanga Dandasana (Four-Limbed Staff Pose), Urdhva Mukha Svanasana (Upward-Facing Dog), Adho Mukha Svanasana (Downward-Facing Dog), and return to standing. Hold Down Dog for 3 breaths each round.
- Virabhadrasana I (Warrior I): Step right foot forward. Hold 4 breaths. Step back to Down Dog. Repeat left side.
- Virabhadrasana II (Warrior II): From right-side Warrior I, open to Warrior II. Hold 4 breaths per side.
- Utkatasana (Chair Pose): Both feet together at the top of the mat. Sit hips back and down. Arms reach overhead. Hold 5 breaths.
- Uttanasana (Standing Forward Fold): Release arms down. Hold 5 breaths.
- Sukhasana (Easy Seated Pose): Come to seated. Cross legs comfortably. 5 slow breaths to transition the nervous system.
- Supine Twist (Supta Matsyendrasana): Lie on your back. Hug right knee to chest, guide it across the body. Arms wide. 5 breaths per side.
- Savasana (Corpse Pose): Lie flat. 3 minutes minimum.
Modification for Chaturanga Dandasana: Lower knees to the floor before pressing through to Upward Dog. This protects the shoulders and is always appropriate for beginners.
Key Takeaway: Twenty minutes three times per week beats sixty minutes once per week for building the nervous system adaptation that makes yoga flow feel natural and sustainable.
Morning Yoga Flow Sequence
A morning yoga flow sequence should prioritize spinal mobilization and gentle activation before asking the body to bear load. The body’s connective tissue is less pliable after sleep, and rushing into demanding poses before warming up raises injury risk.
The spine loses intervertebral fluid during the night as you lie still. Think of morning spinal tissue like a dry sponge: it needs gentle movement and rehydration before it’s ready for compression or deep stretch. That’s why the first five minutes of any morning flow should be non-weight-bearing or gently weight-bearing.
A morning flow also serves a neurological function. Breath-synchronized movement at the start of the day activates the prefrontal cortex and moderates early-morning cortisol spikes, which peak within 30 to 45 minutes of waking. Research published in Complementary Therapies in Medicine found that morning yoga practice reduced perceived stress and improved self-rated mood scores compared to morning screen use or passive rest.
Morning yoga flow priorities:
- Start supine or seated for the first 5 to 8 minutes. Let the spine warm gently before standing poses.
- Use breath-led movement from the first pose. Inhale to lengthen, exhale to deepen. This activates the parasympathetic nervous system immediately.
- Include at least one hip flexor opener. Hip flexors shorten significantly overnight. A low lunge or kneeling hip stretch warms them before they’re asked to work in standing poses.
- Save backbends for after the 10-minute mark. Cold thoracic extension under load is where morning back tweaks happen.
- End with 2 minutes of stillness before transitioning out of practice. This anchors the calm nervous system state into the rest of the morning.
Modification for morning stiffness in seniors: Begin in a chair with seated Cat-Cow and seated forward fold before moving to the floor. This reduces the demand of lowering to and rising from the floor repeatedly.
Vinyasa Yoga Sequences and Breath Coordination
Vinyasa yoga sequences are distinguished from other flow practices by the strict one-breath-one-movement principle: every single transition is cued to either an inhale or an exhale, with no movement occurring outside of breath.
This is not merely an aesthetic preference. The breath-movement link in Vinyasa serves a biomechanical function. Inhaling naturally extends the spine and expands the chest. Exhaling naturally compresses the core and rounds the spine. Vinyasa sequencing uses this relationship deliberately: backbend transitions pair with inhales, forward folds and twists pair with exhales.
Ujjayi pranayama (Victorious Breath or Ocean Breath) is the breath technique used in Vinyasa practice. Practitioners slightly constrict the throat during both inhalation and exhalation, producing a soft audible sound. This technique slows the breath to approximately 5 to 6 breaths per minute, which research in the Journal of Alternative and Complementary Medicine links to increased heart rate variability and improved vagal tone, both markers of parasympathetic nervous system function.
Getting breath-movement coordination right takes time. Most beginners focus on the pose shape and lose track of the breath. The practical fix: slow down the sequence by 30 percent and prioritize breath first. The pose alignment will improve naturally as the breath lengthens.
Breath coordination guide for common Vinyasa transitions:
| Movement | Breath | Why |
|---|---|---|
| Rising from forward fold to standing | Inhale | Spinal extension naturally follows inhalation |
| Folding forward or down | Exhale | Core engagement follows exhalation |
| Opening arms wide (Warrior II) | Inhale | Chest expansion follows inhalation |
| Twisting in any direction | Exhale | Core wrapping follows exhalation |
| Pressing up to Upward Dog | Inhale | Spinal extension requires inhale support |
| Pressing back to Down Dog | Exhale | Hip flexion and fold follow exhalation |
Yoga Flow Benefits for Body and Mind
A yoga flow sequence practiced consistently produces physical and psychological benefits that are better documented than most people realize, and more specific than the generic “yoga is good for you” framing found in most wellness content.
According to a 2022 systematic review published in Complementary Therapies in Medicine, regular Vinyasa-style yoga practice produced statistically measurable improvements in muscular endurance, balance, and self-reported quality of life across adult populations. The review included 18 randomized controlled trials.
Physical benefits with research support include:
- Improved cardiovascular function: Moderate-intensity yoga flow elevates heart rate to a level consistent with light aerobic exercise. The ACSM classifies Vinyasa yoga as moderate-intensity physical activity.
- Increased functional flexibility: Regular flow practice improves hamstring, hip flexor, and thoracic spine range of motion more effectively than static stretching alone, per multiple studies in the International Journal of Yoga.
- Enhanced balance and proprioception: Single-leg standing poses and dynamic transitions challenge the vestibular system and improve balance scores in all adult age groups.
- Reduced lower back pain: Flow sequences that emphasize core engagement and spinal mobility show consistent benefit for chronic low back pain management.
- Stronger core musculature: Plank holds, Chaturanga, and transitional movements activate the transverse abdominis, obliques, and spinal erectors continuously throughout a flow.
Psychological benefits also receive strong research support. The NCCIH notes that yoga practice reduces self-reported anxiety, improves sleep quality, and lowers perceived stress scores across diverse populations when practiced at least twice per week.
Key Takeaway: The physical benefits of yoga flow sequences are not vague wellness claims. They’re supported by randomized controlled trials across balance, flexibility, cardiovascular function, and back pain outcomes.
Yoga Flow for Stress and Anxiety Relief
A yoga flow sequence is one of the most practical accessible tools for managing acute stress and chronic low-level anxiety, and the mechanism is biological rather than motivational.
When the body moves in coordination with slow, controlled breathing, the vagus nerve activates the parasympathetic nervous system, the branch responsible for rest, digestion, and recovery. This directly counteracts the sympathetic nervous system activation that characterizes the stress response. The effect is measurable within a single session.
A 2020 study published in the Journal of Alternative and Complementary Medicine found that a single 60-minute yoga class reduced salivary cortisol levels by a mean of 27 percent compared to pre-class baseline measurements in adult participants. Shorter sessions (20 to 30 minutes) showed smaller but still measurable reductions.
For stress and anxiety specifically, the structure of the sequence matters. Slow, ground-level sequences with long holds and deliberate breath are more effective for acute anxiety than fast-paced, aerobically challenging flows. If you’re practicing specifically to reduce anxiety, lean toward a slower pace and extend your exhales to be 2 counts longer than your inhales. An exhale-dominant breathing ratio amplifies the parasympathetic response.
Forward-folding poses are particularly effective in this context:
- Uttanasana (Standing Forward Fold): Gentle spinal traction combined with the calming effect of a head-below-heart position
- Balasana (Child’s Pose): The prone compression of the abdomen against the thighs stimulates the vagal nerve directly
- Paschimottanasana (Seated Forward Bend): Extended passive hamstring stretch with breath deepens the rest response
Modification for high anxiety: If lying on your back in Savasana feels uncomfortable (a common experience for those with anxiety), practice the final rest pose on your side with knees bent and a blanket between the knees instead.
Yoga Flow Sequence for Flexibility
A yoga flow sequence designed for flexibility uses longer holds in targeted stretches, supported positions for passive tissue release, and a deliberate arc that addresses the most commonly restricted areas: hamstrings, hip flexors, thoracic spine, and shoulder girdle.
Flexibility training in a flow context works differently than static stretching. Dynamic movement warms the connective tissue before it’s stretched, making the tissue more pliable and the stretch more productive. This is why the same hamstring position held in Yin yoga for three minutes produces different tissue effects than the same shape held for five breaths in a Vinyasa flow.
Flexibility-focused sequences should target these areas in this order, from safest to warm tissue progression:
| Area | Opening Pose | Hold Time | Modification |
|---|---|---|---|
| Thoracic spine | Cat-Cow (Marjaryasana-Bitilasana) | 8 cycles | Seated on chair for those with knee issues |
| Hip flexors | Low Lunge (Anjaneyasana) | 8 to 10 breaths per side | Back knee on mat with a folded blanket |
| Hamstrings | Uttanasana (Standing Forward Fold) | 8 to 10 breaths | Knees bent; hands on blocks |
| Inner groin | Baddha Konasana (Bound Angle Pose) | 10 to 12 breaths | Blankets under both knees |
| Shoulder girdle | Gomukhasana arms (Cow Face arms) | 8 breaths per side | Use a strap between the hands |
A study published in the International Journal of Yoga found that 12 weeks of consistent yoga practice improved hamstring flexibility by an average of 35 percent in previously sedentary adult participants. The improvement was greater in participants who practiced at least four times per week.
Modification for very limited hamstring flexibility: Use yoga blocks under the hands in all standing forward folds. Never force the stretch to the point of sharp discomfort behind the knee.
Yoga Flow for Back Pain
A yoga flow sequence for back pain focuses on core stabilization, spinal decompression, and hip mobility rather than aggressive stretching of the lumbar spine, which can worsen rather than relieve many common back conditions.
This distinction matters. Many people with back pain attempt to stretch the lower back directly, forcing forward folds or deep twists. For conditions involving lumbar disc compression or sacroiliac joint instability, these movements can aggravate symptoms. The more effective approach is to strengthen the muscles that support the spine and decompress the joints through traction-style positions.
According to the NCCIH, yoga practice has been shown in multiple randomized controlled trials to reduce chronic low back pain intensity and improve functional movement scores in adults. The best outcomes occur in programs that emphasize core engagement and gentle spinal extension rather than aggressive forward bending.
Poses that consistently support back pain management in a flow sequence:
- Marjaryasana-Bitilasana (Cat-Cow): Gentle cyclic spinal mobilization that increases circulation to the intervertebral discs
- Setu Bandha Sarvangasana (Bridge Pose): Activates the glutes and hamstrings, reducing lumbar load
- Adho Mukha Svanasana (Downward-Facing Dog): Creates gentle spinal traction by lengthening the spine against gravity
- Supta Matsyendrasana (Supine Spinal Twist): Passive rotation that releases spinal erector tension without compression
- Vidalasana (Thread-the-Needle Pose): Thoracic rotation that decompresses the mid-back without lumbar stress
Safety caution: Anyone with an acute herniated disc, sciatica flare, or undiagnosed back pain should work with a physical therapist familiar with yoga before beginning any flow practice for back pain. Starting gently with Cat-Cow and Bridge Pose only, and adding poses gradually, is the safest approach.
Modification for acute back flare: Reduce any sequence to supine and gentle kneeling positions only. Avoid standing forward folds and twists until the acute phase has settled.
Key Takeaway: Yoga for back pain works best when it builds core stability and decompresses the spine rather than stretching the lumbar region directly.
Yoga Flow Modifications for Beginners and Seniors
Yoga flow modifications make the practice accessible across a wide range of bodies, fitness levels, and physical conditions without removing the structural integrity or benefit of the sequence.
The two populations that benefit most from specific modifications are absolute beginners, who need lower demand and more time to understand alignment, and older adults, whose joints, balance, and connective tissue may require gentler loading and more support.
Modifications by challenge and population:
| Pose | Standard Version | Beginner Modification | Senior / Limited Mobility Modification |
|---|---|---|---|
| Chaturanga Dandasana | Full low push-up position | Knees to floor, lower chest slowly | Skip entirely; use kneeling push-up or Cobra only |
| Adho Mukha Svanasana | Full Downward Dog | Bent knees, focus on spinal length | Hands on chair seat instead of floor |
| Virabhadrasana I | Full Warrior I, arms overhead | Hands on hips, reduced knee bend | Chair-supported lunge with hand on wall |
| Utkatasana (Chair Pose) | Deep squat, arms high | Shallow bend, hands on thighs | Sit and stand from a chair slowly |
| Savasana | Flat on back | Knees bent, feet on floor | Side-lying with blanket between knees |
For beginners, yoga blocks are the single most useful prop. Placing blocks under the hands in forward folds, under the hips in seated poses, and beside the feet in standing poses immediately makes poses more accessible without reducing their effectiveness.
According to Yoga Alliance, instructor-led beginners’ classes should always offer at least one modification for every pose taught. If you’re practicing alone at home, applying this standard to yourself is the most self-respecting thing you can do for your practice.
For seniors specifically, holding poses for fewer breath cycles (3 rather than 5 or 8) and including more transitions through tabletop and seated positions reduces the repetitive demand on knees and wrists that comes from standard flowing sequences.
Yoga Flow Sequence at Home
A yoga flow sequence at home is entirely practical with minimal equipment and a defined space of roughly 2 meters by 1 meter, the footprint of a standard yoga mat. The most common barriers to home practice are not physical but structural: not knowing what to do or in what order.
The most effective home flow practitioners share three habits. They practice at the same time each day so the behavior becomes automatic rather than decided. They use a consistent sequence long enough to learn it from memory, typically 3 to 4 weeks, before changing it. They treat the first five minutes as non-negotiable even on days when motivation is low, because momentum builds once you start.
Props that meaningfully improve a home yoga flow practice:
- Yoga mat: Provides grip and joint cushioning. A 4 to 6mm thickness works for most practices.
- Two yoga blocks: The most versatile prop. Use under hands, hips, and head. Cork or foam both work.
- One yoga strap: Extends reach in forward folds and shoulder stretches without forcing the stretch.
- One folded blanket: Knee padding for kneeling poses, support under hips in seated poses, warmth during Savasana.
Space modifications for small rooms:
- Replace any pose requiring a wide leg stance with a narrower version
- Use the wall as a balance support for all standing single-leg poses
- Practice Sun Salutations at three-quarter pace if ceiling height is an issue for arm extensions
- A mat turned sideways still provides enough space for the majority of lying-down poses
Research suggests that home yoga practitioners who set up their space consistently, mat out, props nearby, lighting adjusted, show significantly higher practice frequency than those who set up fresh each session. Reducing friction before practice begins is a behavioral strategy, not a yoga principle, but it works.
Yoga Cool-Down Sequence After Flow
A yoga cool-down sequence after flow is the physiologically necessary final phase of any practice, and skipping it is the equivalent of stopping a run and immediately sitting down without walking it off.
During an active yoga flow, your heart rate is elevated, your muscles are warm and have been working under load, and your nervous system is in a moderately activated state. The cool-down phase performs three specific jobs: it lowers heart rate progressively, releases accumulated muscular tension, and transitions the nervous system toward the parasympathetic rest state that makes post-practice recovery productive.
A complete cool-down should last 5 to 10 minutes after any flow of 20 minutes or more. For a short 20-minute flow, 5 minutes is sufficient. For a 60-minute practice, 10 minutes of cool-down is appropriate.
To practice a complete yoga cool-down sequence:
- Supta Matsyendrasana (Supine Spinal Twist): Lie on your back. Right knee crosses to the left. Arms wide. 6 to 8 breaths per side. This releases the spinal erectors worked throughout the flow.
- Apanasana (Knees-to-Chest Pose): Both knees hugged to the chest. Rock gently side to side. 5 to 8 breaths. Massages the lumbar spine and begins the descent into rest.
- Supta Baddha Konasana (Reclined Bound Angle Pose): Soles of feet together, knees dropped wide. Arms at sides. 8 to 10 breaths. Releases the inner groin and hip rotators worked in standing poses.
- Paschimottanasana (Seated Forward Bend): Sit upright, legs extended. Fold forward from the hips. Hold for 8 to 10 breaths. Lengthens the hamstrings and releases the posterior chain.
- Savasana (Corpse Pose): Lie flat on your back. Arms slightly away from sides, palms up. Eyes closed. Minimum 3 minutes for a short practice; 5 minutes for longer flows.
Modification for Savasana in pregnancy (second and third trimester): Practice in a side-lying position with a bolster or folded blanket between the knees. This avoids supine positioning that can compress the vena cava.
Pose Tip:
- In Supta Matsyendrasana, keep both shoulders on the mat even if the knee doesn’t reach the floor
- In Paschimottanasana, lead with the chest moving forward rather than the head dropping down
- In Savasana, set a timer so you don’t cut the rest short
Key Takeaway: The cool-down is not optional yoga admin. It’s when the physical work you did in the flow actually gets processed and integrated by the nervous system.
Frequently Asked Questions About Yoga Flow Sequences
What is the difference between a yoga flow sequence and a regular yoga class?
A yoga flow sequence links poses together through breath, creating continuous movement rather than isolated static holds between each posture.
A traditional Hatha yoga class holds each pose independently for several breaths before releasing fully and setting up the next one, with no linking transitions.
Both approaches are valid; the choice depends on whether you want a more meditative, slow-hold practice or a more dynamic, breath-led movement experience.
How long should a beginner yoga flow sequence be?
Beginners should start with a yoga flow sequence of 15 to 20 minutes, using 8 to 12 poses with longer holds and slower transitions than intermediate flows.
This duration is long enough to warm the body, practice breath coordination, and include a proper cool-down without creating fatigue that discourages the next session.
Gradually increase to 30 or 45 minutes over four to six weeks as the sequence becomes familiar and the breath-movement link feels more natural.
Can I do a yoga flow sequence every day?
Yes, most adults can practice a yoga flow sequence daily, provided they vary the intensity and include at least one gentler session per week.
A daily practice of 20 minutes at moderate intensity is well within what the American College of Sports Medicine considers appropriate weekly physical activity for general health maintenance.
If muscles feel sore or fatigued, choose a slower, more restorative sequence that day rather than skipping practice entirely.
What poses are essential for a basic yoga flow sequence?
The essential poses for a basic yoga flow sequence are Tadasana (Mountain Pose), Adho Mukha Svanasana (Downward-Facing Dog), Virabhadrasana I (Warrior I), Uttanasana (Standing Forward Fold), and Savasana (Corpse Pose).
These five poses together create a complete arc from grounding to opening to forward folding to rest, and they prepare the body for any direction of more advanced practice.
A Sun Salutation A sequence, which links several of these poses, is the single most practiced yoga flow in the world and an ideal starting point for any beginner.
Is yoga flow good for people with back pain?
Yoga flow sequences designed around core engagement, spinal decompression, and gentle mobilization are well-supported for chronic low back pain management.
The NCCIH cites multiple randomized controlled trials showing yoga reduces chronic low back pain intensity and improves function in adult participants.
Anyone with acute back pain, a recent spinal injury, or undiagnosed symptoms should work with a physical therapist or spine specialist to identify which poses are appropriate before beginning a flow practice.
Start With One Sequence
The most productive thing you can do with this guide is choose one sequence and practice it every day for two weeks. Not a different one each day. The same one.
That repetition is how the breath-movement link becomes automatic. It’s how you stop thinking about what comes next and start actually practicing. Pick the 20-minute flow or the beginner foundation sequence, roll out your mat tomorrow morning, and do it imperfectly.
Imperfect practice done consistently builds the nervous system patterns that consistent practice requires. Start there.