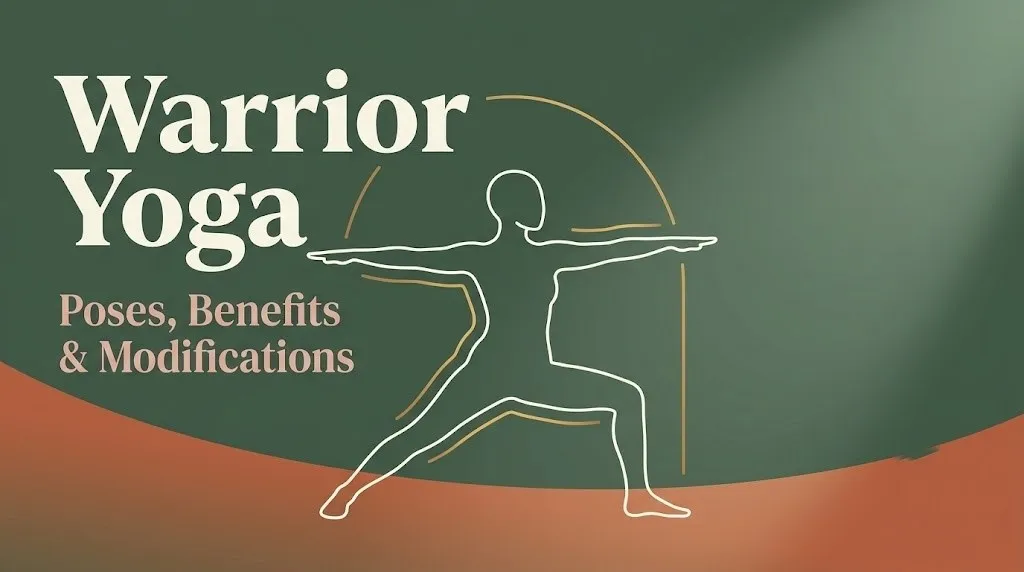
Warrior Yoga: Poses, Benefits & Modifications 2026
Warrior yoga refers to a family of standing poses built on the wide-legged lunge stance. These poses, rooted in classical Hatha yoga, build strength, balance, and body awareness in ways that few other standing postures can match.
The National Center for Complementary and Integrative Health (NCCIH) recognizes yoga as a practice with documented benefits for musculoskeletal health, stress reduction, and functional movement capacity. The warrior poses sit at the center of most yoga traditions precisely because they deliver all of these benefits in a single stance.
This guide covers every warrior pose in the family: how to do each one, which muscles it trains, who should modify it, and how to build a full sequence at home. Whether you are stepping onto the mat for the first time or returning after a long break, you will find specific, actionable guidance here.
What Is Warrior Yoga?
Warrior yoga is the practice of one or more standing lunge-based poses drawn from the Virabhadrasana family, used across Hatha, Vinyasa, Iyengar, and Ashtanga yoga traditions. These poses are named after Virabhadra, a warrior figure from Hindu mythology, and they share a foundation of wide-legged grounding, strong hip engagement, and upright spine alignment.
The family includes five main poses: Virabhadrasana I (Warrior I), Virabhadrasana II (Warrior II), Virabhadrasana III (Warrior III), Viparita Virabhadrasana (Reverse Warrior), and Baddha Virabhadrasana (Humble Warrior). Each pose targets different muscle groups and movement patterns, even though they all begin from the same lunge base.
Warrior poses appear in virtually every style of yoga taught in the United States. In a Vinyasa class, they move quickly as part of a heat-building flow. In Iyengar yoga, each pose may be held and refined for several minutes with props. In a Hatha class, they typically fall somewhere in between.
What makes warrior yoga distinct from other standing poses is the combination of strength and openness it requires simultaneously. The front leg works hard in an isometric contraction while the hips open and the spine lifts. That dual demand is why these poses build so much functional strength.
Warrior Pose Sanskrit Name: Understanding Virabhadrasana
Virabhadrasana is the Sanskrit name for the warrior yoga pose family. The word comes from “Virabhadra,” a fierce and powerful warrior created by the god Shiva in Hindu scripture, and “asana,” meaning posture or seat.
The three numbered warrior poses each have their own Sanskrit designation. Virabhadrasana I describes the closed-hip, arms-raised version. Virabhadrasana II names the open-hip, arms-extended version. Virabhadrasana III refers to the single-leg balance position with the torso parallel to the floor.
Two additional poses carry related but distinct Sanskrit names. Viparita Virabhadrasana translates roughly as “reversed warrior” or “exalted warrior.” Baddha Virabhadrasana means “bound warrior,” referring to the interlaced hands behind the back used in Humble Warrior.
| Sanskrit Name | English Name | Distinct Feature |
|---|---|---|
| Virabhadrasana I | Warrior I | Hips face forward, arms reach up |
| Virabhadrasana II | Warrior II | Hips open to the side, arms extend wide |
| Virabhadrasana III | Warrior III | Single-leg balance, body parallel to floor |
| Viparita Virabhadrasana | Reverse Warrior | Side bend from Warrior II base |
| Baddha Virabhadrasana | Humble Warrior | Bound hands, forward fold inside front leg |
Knowing the Sanskrit names matters if you attend classes, because teachers use them interchangeably with English names. Hearing “Virabhadrasana II” in a fast Vinyasa sequence and knowing exactly where to place your feet and arms removes a layer of confusion that can break your flow.
Warrior Yoga Benefits: What Research Actually Shows
Warrior yoga poses offer measurable benefits across muscular strength, joint stability, balance, and mental focus. These are not vague wellness claims; several have been studied directly.
A study published in the International Journal of Yoga found that regular yoga practice, including standing balance and strength poses, produced statistically measurable improvements in lower body strength, postural stability, and proprioceptive function in healthy adults. The warrior poses were among the primary postures used in that protocol.
The American College of Sports Medicine categorizes yoga as a valid form of muscular endurance training. Holding a warrior pose isometrically for 30 to 90 seconds creates sustained muscular demand in the quadriceps, glutes, and stabilizing muscles of the hip, meeting the threshold for strength-endurance adaptation.
Research published in Complementary Therapies in Medicine found that yoga-based interventions reduced self-reported stress and anxiety in adult participants across multiple study cohorts. The standing and balancing components of a yoga practice, which include warrior poses, were associated with improvements in focus, body awareness, and mood regulation.
Key documented benefits include:
- Improved lower body muscular endurance
- Greater hip joint range of motion over time
- Enhanced postural stability and balance
- Reduced perceived stress and improved attentional focus
- Increased body awareness and proprioceptive sensitivity
- Functional strength gains relevant to daily movement patterns
Warrior Yoga Muscles Worked: A Full-Body Breakdown
Warrior yoga poses recruit muscles across the entire body, not just the legs. Understanding which muscles are active in each pose helps you train more intentionally and identify why a particular area feels fatigued or tight.
The quadriceps (vastus medialis, vastus lateralis, rectus femoris, vastus intermedius) are the primary movers in the front leg across all warrior poses. They hold the bent knee in position and resist gravity throughout the hold. Think of them as the engine running continuously in the background.
The gluteus maximus and gluteus medius engage strongly in the back leg and stabilizing hip, respectively. The gluteus medius is particularly active in Warrior II, where it controls lateral hip alignment and prevents the pelvis from tilting sideways.
The hip flexors, specifically the psoas major and iliacus, work in the front hip of Warrior I and Warrior II. In Warrior III, they assist in maintaining the lifted leg’s position. These muscles are often chronically shortened from sitting, and the lunge-based warrior poses offer a functional stretch while also strengthening them in a lengthened position.
| Pose | Primary Lower Body Muscles | Primary Upper Body and Core |
|---|---|---|
| Warrior I | Quadriceps, glutes, psoas | Deltoids, trapezius, erector spinae |
| Warrior II | Quadriceps, glute medius, adductors | Rhomboids, shoulder stabilizers, obliques |
| Warrior III | Hamstrings, glute maximus, calf | Transverse abdominis, erector spinae |
| Reverse Warrior | Quadriceps, lateral hip | Obliques, intercostals, lateral deltoid |
| Humble Warrior | Glutes, hamstrings | Pectorals, anterior deltoids, trapezius |
The transverse abdominis and erector spinae stabilize the spine in every warrior pose. Without that deep core engagement, the lower back absorbs forces it is not designed to handle alone, which is why yoga teachers cue “draw the navel gently in” throughout these postures.
Key Takeaway: Warrior yoga is not just a leg workout. Every pose in the family trains your core, shoulder girdle, and hip stabilizers alongside your legs, making it genuinely full-body strength training.
Warrior 1 Yoga Pose Step by Step
Virabhadrasana I (Warrior I) is a closed-hip standing lunge with the arms raised overhead and the gaze directed forward or slightly up. It builds hip flexor strength, quadriceps endurance, and shoulder stability simultaneously.
One of the most common errors in Warrior I is allowing the back heel to lift or the front knee to collapse inward. Both errors remove the pose’s intended muscular load and increase joint stress.
To practice Virabhadrasana I:
- Stand at the top of your mat in Tadasana (Mountain Pose) with feet together.
- Step your left foot back approximately 3 to 4 feet. The back foot turns out to 45 degrees.
- Square your hips forward as much as your body allows. Place your hands on your hips to check.
- Bend the front knee until it stacks directly over the front ankle. The knee should not travel past the toes.
- Press the outer edge of the back foot firmly into the floor. Keep the back leg straight and strong.
- On an inhale, sweep your arms up alongside your ears. Palms face each other or touch overhead.
- Soften your shoulder blades down your back. Avoid shrugging.
- Hold for 5 to 8 breath cycles, roughly 30 to 45 seconds.
- To release, exhale, lower your arms, and step the back foot forward.
Pose Tip:
- Keep front knee tracking over the second toe, not collapsing inward
- Back heel stays grounded; if it lifts, shorten your stance
- Beginners: place hands on hips instead of reaching overhead until hip flexors open
Modification: If squaring the hips forward is painful at the sacroiliac joint, allow a slight outward rotation of the back hip. A yoga block placed under the front heel can reduce ankle stress for people with limited ankle dorsiflexion.
Warrior 2 Yoga Pose Alignment
Virabhadrasana II (Warrior II) is an open-hip standing lunge with both arms extended wide at shoulder height and the gaze directed over the front fingertips. It is one of the most commonly taught yoga poses in the world and one of the most frequently misaligned.
The key distinction from Warrior I is that the hips open fully to the long edge of the mat rather than squaring forward. This distinction creates an entirely different muscular demand, shifting the primary load from the hip flexors to the gluteus medius and hip abductors.
Proper Warrior II alignment requires:
- Front foot points straight ahead (toward the short end of the mat)
- Back foot turns to 90 degrees (parallel to the short end of the mat)
- Front knee bends to approximately 90 degrees, tracking directly over the ankle
- Torso stacks vertically over the hips, not leaning forward
- Arms extend at shoulder height, palms face down
- Shoulder blades draw together slightly to keep the chest open
- Gaze is soft and directed over the front middle finger
The most common error teachers correct in Warrior II is the front knee collapsing inward toward the big toe side of the foot. This places shear force on the medial knee structures. The cue is simple: press the front knee outward toward the pinky toe.
According to research published in the Journal of Alternative and Complementary Medicine, sustained standing poses held for 30 to 60 seconds activate the hip abductor and external rotator muscles in patterns comparable to targeted physical therapy exercises for hip stabilization.
Modification: People with shoulder impingement or rotator cuff irritation should keep their arms lower, hands resting on their hips, or arms extended but with a slight downward angle. Reducing arm height removes shoulder stress without compromising the lower body benefit.
Warrior 3 Yoga Pose: How to Do It Safely
Virabhadrasana III (Warrior III) is a single-leg standing balance pose where the body forms a letter T shape, with the standing leg vertical and the lifted leg and torso parallel to the floor. It is the most proprioceptively challenging warrior pose in the family.
The primary demand in Warrior III shifts from the front leg to the hamstrings, gluteus maximus, and deep spinal stabilizers of the standing side. The lifted leg is held horizontal through active engagement of the posterior chain, not by swinging momentum.
To practice Virabhadrasana III:
- Begin in Virabhadrasana I (Warrior I) on your right side.
- Shift your weight into the right foot.
- On an exhale, hinge forward from the hip as the left leg lifts behind you.
- Reach the arms forward, alongside the ears. Hands can also go to hips or be clasped.
- Aim for a straight line from the back heel through the crown of the head.
- The standing hip should not hike outward. Keep both hip points level.
- Engage the core by drawing the lower abdomen gently inward.
- Breathe steadily. Hold for 3 to 5 breath cycles.
- To release, exhale and step the back foot down into a lunge.
Pose Tip:
- Use a wall or chair back for the lifted foot if balance is unsteady
- Gaze at a fixed floor point about 2 feet ahead of your standing foot
- If the lower back arches sharply, lower the lifted leg slightly and re-engage the abdominals
Modification for beginners or those with balance issues: Place the hands on the back of a chair or against a wall. This allows the full posterior chain benefit without the balance challenge. People with ankle instability should practice on a firm, flat surface, never on a soft mat without additional ankle support.
Key Takeaway: Warrior III is the hardest balance pose in the warrior family. Using a chair or wall does not make the pose “less than.” It makes the pose accessible and safe, which is always the goal.
Reverse Warrior Yoga: The Side Stretch You Are Probably Skipping
Viparita Virabhadrasana (Reverse Warrior), sometimes called Exalted Warrior, is a lateral side bend performed from the Warrior II base. It is one of the most underused poses in the warrior family, even though it addresses muscles that the other warrior poses do not reach.
From Warrior II, the front arm sweeps upward and the torso leans back toward the rear leg. The back hand rests lightly on the back thigh. The result is a strong opening through the lateral trunk muscles, specifically the obliques and intercostal muscles (the muscles between the ribs), as well as the lateral hip of the front leg side.
Reverse Warrior is not a passive stretch. The quadriceps of the front leg remain fully active in the same bent-knee position as Warrior II. You are adding a side bend on top of an already engaged lower body, which means the core must work harder to control the movement.
The most common error is dropping the front knee from its bent position as the arm sweeps back. Keep the bend. Another error is pressing the back hand heavily into the back thigh and using it as a lever, which can strain the lower back. The hand rests; it does not push.
Modification: If reaching the arm fully overhead causes shoulder or neck discomfort, keep the front arm at a 45-degree angle rather than fully extended. People with lateral spinal stenosis or a herniated disc should skip or significantly reduce the depth of this side bend, and ideally check with their physical therapist before practicing it.
Humble Warrior Yoga: Strength, Humility, and Shoulder Opening
Baddha Virabhadrasana (Humble Warrior), also called Devotional Warrior, combines a deep Warrior I stance with interlaced hands behind the back and a forward fold inside the front leg. It is physically demanding and often emotionally intense for practitioners.
The pose targets the pectorals (chest), anterior deltoids (front of shoulders), and upper trapezius through the shoulder-opening bind. At the same time, the hip external rotators and hamstrings receive a deep stretch from the forward fold position.
To practice Baddha Virabhadrasana:
- Set up in Virabhadrasana I (Warrior I) on your right side.
- Interlace your fingers behind your lower back. Straighten the arms as much as your shoulders allow.
- On an exhale, hinge forward from the front hip, bringing the torso and clasped hands inside the right (front) knee.
- Let the crown of the head move toward the floor. Do not force it.
- Keep the front knee bent and tracking over the ankle.
- Hold for 5 breath cycles, then inhale back to standing.
Safety note: People with glaucoma or high blood pressure should avoid the inverted position in this pose. The head-below-heart orientation increases intraocular pressure and should be skipped or replaced with a standing forward version. If you have shoulder instability or a recent shoulder injury, skip the bind entirely and place hands on the front thigh instead.
According to the National Center for Complementary and Integrative Health, individuals managing cardiovascular conditions, glaucoma, or acute disc injury should discuss which yoga poses are appropriate with their healthcare provider before beginning a standing or inversion-adjacent practice.
Warrior Yoga for Beginners: Where to Start Without Getting Hurt
Warrior yoga is accessible to beginners, but the right starting point matters. Jumping into Warrior III on your first day of yoga is a recipe for frustration and potential injury.
Most yoga teachers and physical therapists recommend that beginners start with Virabhadrasana II (Warrior II) before any other warrior pose. The open-hip position is more anatomically forgiving for people with tight hip flexors, and the wide base of support makes balance less precarious than Warrior I or Warrior III.
The second priority for beginners is stance width. Many first-time practitioners stand too narrow, which stresses the knee, or too wide, which makes hip leveling impossible. A general guideline: step the feet approximately the length of one of your own legs apart, roughly 3 to 4 feet for most adults.
| Starting Priority | Pose | Why |
|---|---|---|
| First | Warrior II | Open hip, wide base, easiest balance |
| Second | Warrior I | Adds hip flexor work, slightly more complex |
| Third | Reverse Warrior | Introduces lateral movement from Warrior II |
| Fourth | Humble Warrior | Adds shoulder bind and forward fold |
| Fifth | Warrior III | Requires single-leg balance and posterior chain strength |
Props are not optional for beginners; they are part of smart practice. A yoga block under the front hand in a forward fold transition, a wall for Warrior III balance, or a strap to bridge the gap in Humble Warrior’s bind all make the poses work for the body you actually have today.
Key Takeaway: Beginners get the most benefit from Warrior II first. The open hip, stable base, and clear alignment cues make it the best entry point into the warrior yoga family before progressing to more complex variations.
Warrior Yoga for Seniors: Safe Practice After 60
Warrior yoga is well-suited for older adults when approached with appropriate modifications and realistic expectations about what the body needs. Research published in Complementary Therapies in Medicine found that yoga practice in adults over 60 improved balance, reduced fall risk, and enhanced self-reported quality of life when practiced consistently over 8 to 12 weeks.
The priorities for seniors in warrior yoga shift slightly from those of younger practitioners. Balance safety comes first. Strength building is the secondary goal. Breath awareness and joint comfort guide the pace.
Seniors with osteoporosis should be aware that any pose involving deep forward flexion of the spine, such as Humble Warrior, carries a small risk of vertebral compression if bone density is significantly reduced. Humble Warrior should be modified to a gentle bow rather than a deep fold, keeping the spine long rather than rounding it.
Key modifications for seniors:
- Use a chair back or wall for Warrior I and Warrior III balance support
- Reduce the depth of the front knee bend to 45 degrees instead of 90 degrees
- Shorten the stance width by 4 to 6 inches to reduce hip and knee load
- Hold poses for 3 to 5 breaths rather than longer holds until strength builds
- Avoid Warrior III without a support surface until single-leg balance is comfortable
The American College of Sports Medicine recommends balance training at least two days per week for adults over 65 to reduce fall risk. Warrior poses practiced with a chair for support meet this recommendation and can be done at home without equipment.
Warrior Yoga Chair Modifications: Full Access for Every Body
Chair-modified warrior yoga makes the full benefit of these poses available to people who cannot stand safely on one leg, have significant joint limitations, or are recovering from surgery. This is not a lesser practice; it is intelligent adaptation.
The chair functions as a standing support for balance-dependent poses and as a seat for fully modified versions. A standard armless, sturdy chair works best. Avoid chairs with wheels.
| Pose | Chair Modification | What It Preserves |
|---|---|---|
| Warrior I | Stand behind chair, hands on back, one foot steps back | Hip flexor stretch, quadriceps engagement |
| Warrior II | Sit sideways on chair, front leg bent, back leg extended | Hip abductor work, arm and shoulder engagement |
| Warrior III | Stand behind chair, hands on back, one leg lifts behind | Posterior chain work, balance training |
| Reverse Warrior | From seated Warrior II position, sweep front arm up | Lateral trunk stretch, oblique activation |
| Humble Warrior | Seated, interlace hands behind back, gentle forward lean | Shoulder opening, hip flexor release |
Chair Warrior II is one of the most beneficial seated yoga poses for older adults and people with lower extremity joint replacements. The lateral hip muscles, which control knee tracking and pelvis stability, are engaged even in the seated position if the alignment cues are maintained: front knee over the ankle, torso upright, arms at shoulder height.
For anyone post-surgery: Check with your physical therapist or surgeon about when standing warrior poses are appropriate after a knee or hip replacement. Chair-modified versions are typically safe earlier in recovery and can serve as a bridge to standing practice.
Warrior Yoga for Knee Pain: What to Adjust and What to Skip
Warrior yoga and knee pain have a complicated relationship. Done well, warrior poses can strengthen the muscles that protect the knee joint. Done poorly, they can aggravate the same joint.
The most important alignment rule for anyone with knee pain is front knee tracking. The front knee must align with the second toe, not collapse inward or drift outward. Inward collapse (knee valgus) places stress on the medial collateral ligament and medial meniscus, two structures that are already strained in many people with knee pain.
A study in the Journal of Alternative and Complementary Medicine found that yoga-based hip strengthening exercises improved knee pain and function in individuals with patellofemoral syndrome, a common source of anterior knee pain. Warrior II was among the poses included in the protocol, modified with a reduced knee bend depth.
Adjustments for knee pain:
- Reduce the front knee bend to 30 to 45 degrees instead of 90 degrees
- Widen the stance slightly to reduce the load through the front knee
- Avoid Warrior III entirely if your knee is currently inflamed or acutely painful
- Use a block under the front heel if you have limited ankle flexibility causing the knee to compensate
- Skip Humble Warrior if kneeling or deep hip rotation aggravates your knee
What to skip entirely with acute knee injury: Deep lunge positions, full 90-degree Warrior I, and Warrior III on the injured side. Acute inflammation, recent surgery, or a freshly diagnosed ligament tear should be evaluated by an orthopedic specialist or sports physical therapist before any standing yoga practice resumes.
Key Takeaway: Knee pain does not disqualify you from warrior yoga, but it does require reducing bend depth, monitoring knee tracking carefully, and skipping poses that load an already inflamed joint.
Warrior Yoga for Lower Back: When It Helps and When It Doesn’t
Warrior poses can support lower back health or aggravate it, depending entirely on your specific condition and how you practice. The distinction is worth understanding before you step onto the mat.
For most people with chronic non-specific lower back pain, warrior poses are beneficial. The erector spinae and multifidus muscles, which stabilize the lumbar spine, are activated in every warrior pose through the demand of maintaining an upright torso against a dynamic leg load. Strengthening these muscles reduces the passive load on spinal discs and ligaments.
Research published in the International Journal of Yoga found that an 8-week yoga intervention, including standing strength poses, reduced chronic low back pain scores by a clinically meaningful margin in a group of working-age adults. Participants reported both reduced pain and improved functional movement.
The risk area is Warrior I specifically. When the hips are squared forward in a tight front-to-back stance, the lumbar spine often compensates by overarching if the hip flexors are stiff. This compression into the lower back can aggravate facet joints or lumbar disc issues. The cue is to slightly tuck the tailbone and draw the lower ribs in, reducing the arch without rounding the spine.
Adjustments for lower back conditions:
- In Warrior I: allow the hips to remain at a slight angle if full squaring causes lower back compression
- In Warrior II: focus on keeping the torso stacked directly over the hips, not leaning forward
- In Warrior III: keep a micro-bend in the standing knee to reduce hamstring-to-spine tension transfer
- Skip Humble Warrior if you have active disc herniation with radiating symptoms
Anyone with a recent disc herniation, spondylolisthesis, or acute sciatic nerve compression should receive clearance from a physical therapist or spine specialist before practicing standing yoga poses.
Warrior Yoga at Home Sequence: A 20-Minute Practice You Can Follow Today
A complete warrior yoga at home sequence does not require a studio, a teacher present, or more than a mat and 20 minutes. This sequence moves through the five warrior poses in a logical order, beginning with the most accessible and building toward the most demanding.
Complete the full sequence on the right side, then repeat on the left side before resting in Savasana (Corpse Pose).
Warm-up (2 to 3 minutes):
- 5 slow rounds of Marjaryasana-Bitilasana (Cat-Cow Pose) to mobilize the spine
- 5 deep hip circles in each direction from a standing position
- 30 seconds of standing on each foot to activate ankle stabilizers
The Sequence:
- Virabhadrasana II (Warrior II): Hold 5 to 8 breaths. Focus on front knee tracking and arm extension.
- Viparita Virabhadrasana (Reverse Warrior): From Warrior II, sweep front arm up. Hold 4 to 6 breaths.
- Virabhadrasana I (Warrior I): Step front foot forward, square hips, arms overhead. Hold 5 to 8 breaths.
- Baddha Virabhadrasana (Humble Warrior): From Warrior I, interlace hands, fold forward inside front leg. Hold 4 to 5 breaths.
- Virabhadrasana III (Warrior III): From Warrior I, hinge forward, lift back leg. Hold 3 to 5 breaths.
Cool-down (3 to 5 minutes):
- Anjaneyasana (Low Lunge) to release hip flexors after the sequence
- Uttanasana (Standing Forward Fold) to decompress the spine
- Savasana (Corpse Pose) for 3 to 5 minutes to allow full integration
According to the Harvard T.H. Chan School of Public Health, consistent yoga practice of as few as 20 to 30 minutes, three times per week, is associated with measurable improvements in flexibility, balance, and perceived stress levels in healthy adults of all ages.
Frequently Asked Questions About Warrior Yoga
What are the warrior poses in yoga called in Sanskrit?
The warrior poses in yoga are called Virabhadrasana I, Virabhadrasana II, and Virabhadrasana III in Sanskrit.
Two additional related poses are Viparita Virabhadrasana (Reverse Warrior) and Baddha Virabhadrasana (Humble Warrior).
All five names refer to Virabhadra, a warrior figure from Hindu mythology.
How long should you hold warrior pose for the best results?
Most yoga teachers recommend holding warrior poses for 5 to 8 breath cycles, roughly 30 to 45 seconds, for a balance of strength and breath awareness.
Shorter holds of 3 to 5 breaths work well for beginners or people with joint sensitivity.
In Yin or Restorative yoga contexts, longer holds of 2 to 3 minutes are sometimes used, but this is not standard for the warrior family, which is primarily a strength-based sequence.
Is warrior yoga safe for people with bad knees?
Warrior yoga can be safe for people with knee pain when the front knee bend is reduced to 30 to 45 degrees and the knee is kept aligned over the second toe.
Warrior II with a partial bend is commonly used in physical therapy protocols for patellofemoral knee pain.
Anyone with acute ligament tears, recent surgery, or active joint swelling should check with their physical therapist before attempting any deep lunge position.
What is the difference between Warrior I and Warrior II?
Warrior I (Virabhadrasana I) has the hips squared forward and the arms reaching overhead, creating a closed-hip lunge position.
Warrior II (Virabhadrasana II) has the hips open to the side and the arms extending wide at shoulder height, creating an open-hip stance.
These two alignment differences produce distinct muscular demands: Warrior I emphasizes the hip flexors and shoulder girdle, while Warrior II targets the hip abductors and lateral stabilizers.
Can beginners do warrior yoga poses without a teacher?
Beginners can safely start with Warrior II at home using detailed written or video instructions.
The most important safety points to follow without a teacher present are: keep the front knee over the ankle, maintain the back heel on the floor, and stop if you feel sharp or pinching pain in any joint.
Starting with a class, even one online class, to learn the foundational alignment cues before practicing solo reduces the risk of forming habits that are difficult to correct later.
Warrior yoga rewards consistency more than flexibility or prior fitness. The poses will challenge you on your first day and still teach you something new after three years of practice. Start with Warrior II this week. Hold it for five breaths. Notice where you feel the work, where you feel the opening, and what your body tells you.
Add one pose at a time. Use the sequence in this guide when you are ready to string them together. If your knees or back need modifications, use them without hesitation; the modified version of a pose done with full awareness beats the “full” version done carelessly.
The mat is where the work happens. That part is up to you.