Toe Yoga Exercises: Stretches, Strength & Foot Relief
Toe yoga exercises are targeted movements and stretches that improve the strength, flexibility, and independent mobility of the toes, forming the foundation of stable, safe yoga practice. Most practitioners spend years perfecting their poses from the hips up while completely ignoring the ten small structures holding everything together at the bottom.
The toes are not passive passengers in yoga. According to the American Podiatric Medical Association, foot problems affect roughly 75% of Americans at some point in their lives, and weakened intrinsic foot muscles are a contributing factor in conditions from plantar fasciitis to chronic ankle instability. Targeted toe exercises address these issues at the source.
This guide covers everything from foot anatomy to step-by-step exercises, sequences for seniors and beginners, condition-specific guidance for bunions and plantar fasciitis, and a complete home practice routine. Your feet are about to get a lot more attention.
Toe Yoga Exercises: What They Are and Why They Work
Toe yoga exercises are structured movements, stretches, and strengthening techniques applied specifically to the toes and surrounding foot structures, practiced in yoga as both preparation for poses and as standalone therapeutic tools.
The term covers a broad range of practices. Some are isolated movements: spreading the toes, lifting individual toes, or curling and extending the toes against resistance. Others are integrated into yoga poses, such as gripping the big toe in Padangusthasana (Big Toe Pose) or pressing all five toes into the floor during Tadasana (Mountain Pose).
What unites them is intentional, mindful engagement of the foot’s small muscles. Most shoes compress the toes together for hours every day. That compression gradually weakens the muscles responsible for toe spreading, independent toe movement, and arch support. Toe yoga exercises reverse this pattern systematically.
Key characteristics of toe yoga exercises:
- Can be practiced seated, standing, or integrated into yoga poses
- Require no special equipment, though a yoga mat adds comfort and grip
- Suitable for all fitness levels, with modifications for sensitivity or injury
- Produce results (improved balance, reduced foot pain) in 4 to 8 weeks of consistent practice, based on physical therapy research patterns
- Practiced barefoot for maximum sensory feedback and muscle activation
Why Toe Strength Matters in Yoga
Toe strength is the foundation of every standing yoga pose, and without it, balance, stability, and safe alignment are all compromised from the ground up.
Think of your standing poses like a building. The foundation determines everything above it. Weak, immobile toes create an unstable base, and that instability travels up the kinetic chain through the ankles, knees, hips, and spine. A practitioner with strong, mobile toes has dramatically more control over their balance and alignment than one whose toes are rigid and compressed.
In Iyengar yoga, spreading and grounding all five toes is one of the first instructions given in every standing pose. B.K.S. Iyengar described the feet as the foundation of the body’s architecture, and the toes as the roots that anchor the entire structure. This is not aesthetics. It is biomechanics.
According to the Journal of Physical Therapy Science, intrinsic foot muscle strength is directly correlated with dynamic balance performance in adults across all age groups. People with stronger toe flexors and spreaders demonstrate measurably better single-leg balance, which is exactly what yoga poses like Vrksasana (Tree Pose) and Virabhadrasana III (Warrior III) demand.
Benefits of building toe strength through yoga:
- Improved single-leg balance in standing poses
- Better load distribution across the foot’s three arches
- Reduced ankle wobble during transitions between poses
- Lower risk of plantar fascia strain from improved arch support
- More precise alignment cues transmitted from the foot upward
Toe Anatomy and the Yoga Foot: What You Need to Know
The foot contains 26 bones, 33 joints, and over 100 muscles, tendons, and ligaments, with the toes accounting for 14 of those bones and a complex web of intrinsic muscles beneath them.
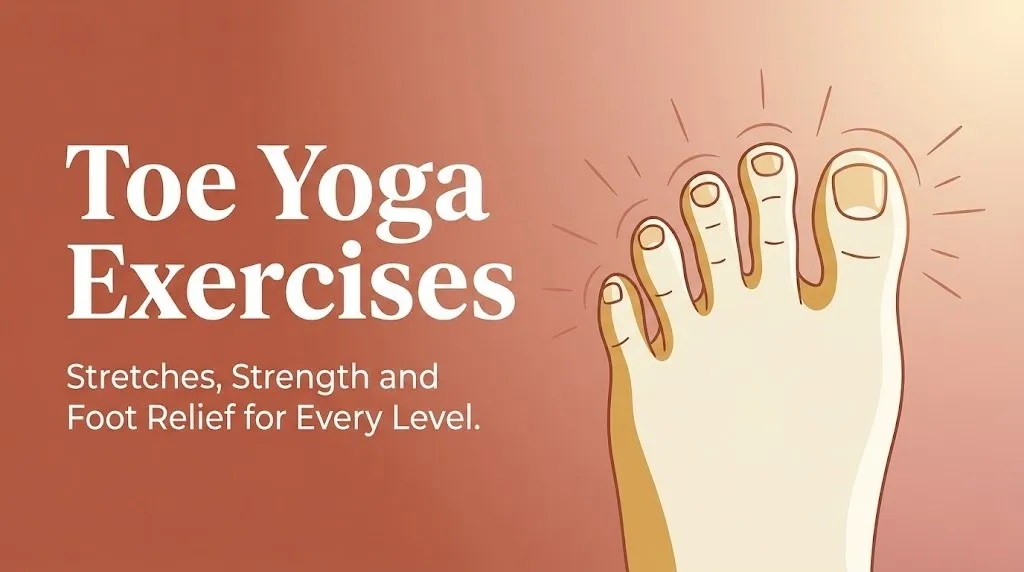
The toes themselves consist of phalanges: three bones per toe (proximal, middle, and distal) except the big toe, which has two. The joints connecting these bones are the metatarsophalangeal joints (MTP joints) at the base of each toe, and the interphalangeal joints further along. These joints are the primary targets of toe yoga exercises.
The muscles most relevant to yoga practice include the flexor digitorum brevis (curls the lesser toes), the extensor digitorum longus (lifts the toes), the abductor hallucis (spreads the big toe away from the others), and the lumbricals (which control fine individual toe movement). Most people have essentially no conscious control over these muscles because shoes have done the work for them for decades.
The foot also has three arches: the medial longitudinal arch (the inner arch most people recognize), the lateral longitudinal arch (outer edge of the foot), and the transverse arch (running across the ball of the foot). All three require intrinsic foot muscle strength to maintain, and all three are trained by toe yoga exercises.
Understanding this anatomy matters because it tells you which exercise targets which structure. Toe spreading targets the abductor muscles. Toe curls target the flexors. Toe lifts target the extensors. Each exercise has a specific anatomical job.
Key Takeaway: Your toes are the root of every standing pose you will ever do in yoga. Weak toes create weak foundations. Three weeks of daily toe exercises will change how every standing pose feels.
Toe Spreading Yoga Exercise
Toe spreading is the practice of actively separating all five toes as wide as possible, training the abductor hallucis and the smaller toe abductor muscles that most people have essentially switched off through years of shoe wear.
This exercise is foundational. Before you can engage the toes meaningfully in any yoga pose, you need to be able to move them independently. For most beginners, the first attempt at spreading the toes produces almost nothing. The message from the brain to those small muscles has gone quiet from disuse. The exercise itself is the process of re-establishing that connection.
To practice toe spreading (seated or standing):
- Sit in a chair or on the floor with your bare feet flat on the ground, hip-width apart.
- Press all ten toes firmly into the floor. Feel the full contact.
- Without lifting your heels or the balls of your feet, attempt to spread all five toes as wide as possible. Hold for 5 full breaths.
- Release and let the toes return to their natural resting position.
- Repeat 5 to 8 times per foot.
- Progress to spreading only the big toe away from the others while keeping the lesser toes still. Then try the opposite: spread the lesser toes while the big toe stays planted.
Modification for beginners: If you cannot spread the toes at first, use your fingers to physically separate them before attempting the movement. Repeat this manual separation 10 times before trying the active version. Over one to two weeks, the neural connection typically begins to form.
Modification for people with bunions: Keep the range of motion gentle. Do not force the big toe beyond its comfortable range. Even a small spreading movement activates the abductor hallucis, which directly counteracts the inward drift associated with bunion progression.
Toe Flexion and Extension Yoga
Toe flexion refers to curling the toes downward toward the sole of the foot, and toe extension refers to lifting the toes upward away from the floor. Together, these two movements train the full range of motion at the metatarsophalangeal joints.
Both movements are used constantly in yoga. The balls of the feet press down (flexion engagement) in Adho Mukha Svanasana (Downward Facing Dog). The toes lift and extend in preparatory heel-raise work. The coordinated interplay of flexion and extension across the foot determines how evenly weight distributes through every standing and kneeling pose.
To practice toe flexion and extension:
- Sit comfortably with feet flat on the floor, knees at 90 degrees.
- Keeping the heel on the floor, curl all ten toes downward as if gripping the floor. Hold for 3 breaths. This is flexion.
- Release and then lift all ten toes upward, spreading them as they rise. Hold for 3 breaths. This is extension.
- Repeat the full cycle 8 to 10 times per foot.
- Progress to alternating: curl the lesser four toes while the big toe lifts, then switch.
- Final variation: press only the big toe down while the lesser toes lift. Then press the lesser toes down while the big toe lifts.
The alternating version is genuinely challenging. Most people discover they have almost no independent control over the big toe versus the lesser toes. That discovery is the point. Building that separation is what creates real toe yoga competence.
Modification for people with arthritis in the toe joints: Reduce the range of motion significantly. Move only to the point of mild sensation, not discomfort. Warm the feet first by soaking them in warm water for 5 minutes before practicing.
Yoga Toe Stretch: Padangusthasana and Standing Toe Stretches
Padangusthasana (Big Toe Pose) is a standing forward fold where the practitioner hooks the index and middle fingers around the big toe of each foot, creating a deep stretch through the hamstrings while simultaneously engaging the toe flexors of the gripping hand and the toe extensors of the standing foot.
This pose does something no seated toe stretch can fully replicate: it loads the toe joints under the weight of the entire body. The big toe must grip and hold firmly while the hamstrings lengthen under that tension. This builds functional strength in the flexor hallucis longus, the long muscle running up the back of the leg that connects directly to the big toe.
To practice Padangusthasana:
- Stand with feet hip-width apart or parallel, toes pointing forward.
- On an exhale, fold forward from the hips, keeping the spine long as you descend.
- Hook the first two fingers of each hand around the corresponding big toe. Press the thumb against the side of the toe for grip stability.
- On an inhale, lengthen the spine forward, elbows wide, chest open.
- On an exhale, fold deeper, drawing the elbows out to the sides. Hold for 5 to 8 breaths.
- To release, inhale, lengthen, and press through the feet to rise slowly.
Modification for tight hamstrings: Bend the knees generously, even significantly. The toe grip is the goal, not straight legs. A generous knee bend allows the spine to stay long and the grip to be genuine.
Modification for lower back sensitivity: Place yoga blocks on the floor and grip the blocks instead of the toes. Build hamstring length over weeks before returning to the full toe grip.
Standing toe curls in Tadasana (Mountain Pose) offer a simpler alternative: stand barefoot, lift all toes, spread them, and press them back down one at a time from the little toe to the big toe. This “piano” movement teaches individual toe control without the forward-fold demand.
Key Takeaway: Padangusthasana is the most yoga-specific toe exercise available. It builds toe strength, hamstring flexibility, and spinal awareness simultaneously. No other single exercise in this guide does all three.
Toe Strengthening Exercises in Yoga
Toe strengthening in yoga goes beyond simple curls and spreads. It involves sustained engagement, load-bearing, and the conscious activation of the foot’s intrinsic muscles throughout dynamic movement.
The towel scrunch is one of the most research-supported toe strengthening exercises in physical therapy and translates directly into yoga practice. Place a small towel flat on the floor. Using only your toes, scrunch the towel toward you without lifting your heel. This movement isolates the flexor digitorum brevis and builds the kind of gripping strength that stabilizes the foot in every weight-bearing pose.
To practice towel scrunch toe strengthening:
- Sit in a chair with a small towel laid flat on the floor in front of you.
- Place the bare foot flat on one end of the towel.
- Using only the toes (no foot sliding, no heel lifting), grip the towel and pull it toward you in small scrunch movements.
- Continue until the towel is fully gathered under the foot. This takes approximately 30 to 60 seconds per foot.
- Smooth the towel back out and repeat 3 times per foot.
- Progress to the standing version: perform the same scrunch on a yoga mat in Tadasana (Mountain Pose), activating the arch and toe grip while maintaining full standing alignment.
According to the Journal of Foot and Ankle Research, intrinsic foot muscle strengthening programs that include toe flexion resistance exercises reduce plantar fascia load and improve dynamic balance scores in adults after 6 weeks of consistent practice.
Modification for seniors or people with neuropathy: Reduce the towel size to a washcloth. Perform the exercise seated with support. The smaller resistance range is still therapeutically effective and reduces the risk of cramping.
Toe Yoga Exercises for Beginners
Beginners starting toe yoga exercises should focus on awareness before strength, because most people’s first challenge is not weakness but an almost complete absence of conscious connection to their toe muscles.
The single best starting point for beginners is simply sitting barefoot and noticing the toes. Can you feel all ten toes individually? Can you move the big toe without moving the others? Can you feel the floor under the ball of each foot separately from the heel? These awareness questions are the first layer of toe yoga practice, and they cost nothing to explore.
Beginner toe yoga exercise sequence (practice daily for 4 weeks before progressing):
- Toe awareness scan: Sit with bare feet on the floor. Close your eyes. Notice each toe individually. Spend 5 breaths here.
- Toe counting: Without using your hands, try to “count” your toes by moving them one at a time from little toe to big toe. This is harder than it sounds and is the foundation of independent toe control.
- Gentle toe spreading: Attempt to spread the toes wide. Hold 3 breaths. Release. Repeat 5 times.
- Toe lift and lower: Lift all toes, hold 2 breaths, lower slowly. Repeat 8 times per foot.
- Big toe isolation: Lift only the big toe while the lesser toes stay on the floor. Attempt 5 repetitions per foot. If this is impossible at first, use a finger to assist the big toe upward while training the sensation.
Modification for beginners with foot pain: Practice all exercises seated in a chair first. Avoid standing versions until the seated movements feel comfortable and controlled.
Seated Toe Yoga Exercises
Seated toe yoga exercises are the most accessible entry point into toe mobility practice, removing the balance demand of standing while still targeting the same intrinsic foot muscles.
Seated practice is ideal for beginners, people recovering from foot injuries, individuals with balance challenges, and anyone who cannot comfortably stand barefoot for extended periods. The anatomical work is nearly identical to the standing versions. The muscles being trained are the same. The only difference is that gravity is not loading the foot from above.
Seated toe yoga exercises to practice:
- Seated toe spread: Feet flat on floor, spread toes as wide as possible, hold 5 breaths, release. Repeat 8 times.
- Seated toe wave: Lift the big toe while lesser toes press down. Then switch: press big toe down and lift lesser toes. Alternate 10 times per foot.
- Seated marble pickup: Place 10 to 15 marbles on the floor. Pick up each marble using only the toes and transfer it to a small bowl. Builds flexor digitorum brevis and toe coordination simultaneously.
- Seated arch dome: Without lifting toes or heel, attempt to shorten the foot by drawing the ball of the foot toward the heel. This creates a doming action in the arch, which trains the abductor hallucis and other intrinsic muscles. Hold 3 breaths, release. Repeat 8 times.
- Seated toe circles: Rotate each big toe in slow circles, first clockwise, then counterclockwise. 5 circles each direction per foot.
Modification for people with arthritis: Warm the feet with a heating pad or warm soak for 5 to 10 minutes before seated exercises. Keep all movements within a comfortable range. Mild stretching sensation is appropriate; sharp or stabbing pain is a signal to stop.
Key Takeaway: Seated toe exercises produce the same muscle activation as standing versions. If standing feels unstable or painful, seated practice is not a lesser option. It is the smarter starting point.
Toe Yoga Exercises for Seniors
Toe yoga exercises are particularly valuable for older adults because toe strength and mobility directly influence balance, fall prevention, and functional walking ability, all of which change with age.
The NCCIH notes that yoga practices targeting balance and lower extremity strength show measurable reductions in fall risk among adults over 65. Toe strength is a specific and often overlooked component of that balance equation. When the toes can grip the floor actively, the proprioceptive system receives richer feedback about the body’s position in space, and balance corrections happen faster.
Safe senior toe yoga exercise guidelines:
| Exercise | Seated or Standing | Modification for Seniors |
|---|---|---|
| Toe spreading | Both | Start seated; use chair support if standing |
| Toe flexion and extension | Seated preferred | Reduce range; stop if cramping occurs |
| Arch dome | Seated | Use a soft surface (yoga mat on floor) |
| Towel scrunch | Seated | Use smaller cloth; shorten duration |
| Toe lift and lower | Both | Standing version near wall for safety |
| Padangusthasana | Modified only | Use blocks, bend knees significantly |
Seniors with peripheral neuropathy (often associated with diabetes) should practice toe yoga exercises with particular care. Reduced sensation in the toes means reduced feedback about pressure and pain. A podiatrist or physical therapist familiar with neuropathy can provide specific parameters for safe practice.
The best starting point for seniors is the seated toe awareness scan and spread sequence, practiced daily for two to four weeks before any standing versions are attempted.
Yoga for Bunions and Hammertoes
Yoga-based toe exercises can help slow the progression of bunions (hallux valgus) and hammertoes by strengthening the muscles that counteract the deforming forces on the toe joints.
A bunion forms when the big toe drifts toward the second toe, causing the metatarsal head to protrude at the side of the foot. This happens partly because the abductor hallucis (the muscle that pulls the big toe away from the others) weakens over time, often from shoe compression. Toe spreading exercises and arch dome work directly strengthen this muscle, which physically pulls the big toe back toward its natural alignment.
A hammertoe is a contracture deformity of the lesser toes, where the middle joint bends downward in a fixed or flexible position. Yoga toe extension exercises and marble pickups train the muscles that counteract this contracture, specifically the extensor digitorum longus and the lumbricals.
Yoga exercises specifically appropriate for bunions and hammertoes:
- Toe spreading with big toe isolation: Activates abductor hallucis to counteract inward drift
- Arch dome exercise: Reduces splaying forces on the metatarsals
- Gentle toe extension: Counteracts the flexion contracture of hammertoe joints
- Towel scrunch (modified): Builds flexor-extensor balance without forcing deformed joints
Safety note for bunions: Avoid poses that force the big toe into further adduction (bending toward the other toes). Any pose that places the foot in a position that increases pain at the MTP joint should be modified or omitted.
Anyone whose bunion or hammertoe has progressed to the point of persistent pain, skin breakdown, or walking difficulty should work with a podiatrist alongside their yoga practice.
Yoga for Plantar Fasciitis and Toe Pain
Yoga toe stretches are among the most effective non-pharmaceutical interventions for plantar fasciitis, specifically because they target both the plantar fascia directly and the toe flexors that share load with it.
The plantar fascia is a thick band of connective tissue running from the heel to the base of the toes. When the toe flexors are weak or the plantar fascia is shortened from lack of movement, heel and arch pain develop. Stretching the toes into extension (bending them upward) directly loads and lengthens the plantar fascia, which physical therapists routinely prescribe as a first-line treatment.
According to the Journal of Foot and Ankle Research, self-stretching programs targeting the plantar fascia and toe flexors reduce plantar heel pain in adults by measurable margins over 8 weeks, with stretching performed 3 times daily showing the strongest outcomes.
Yoga toe exercises for plantar fasciitis:
- Seated toe extension stretch: Cross one ankle over the opposite knee. Grip all five toes and pull them gently back toward the shin. Hold 20 to 30 seconds, repeat 3 times per foot. Best performed first thing in the morning before standing.
- Standing wall toe stretch: Stand facing a wall. Place the toes of one foot against the wall, heel on the floor. Lean gently forward. Hold 20 seconds, repeat 3 times per side.
- Kneeling toe tuck stretch in Vajrasana: Kneel with toes tucked under (toenails pointing toward you, balls of feet on the floor). Sit back onto the heels gently. This stretch targets the plantar fascia and toe flexors simultaneously. Begin with just 1 minute and build gradually.
Safety note for plantar fasciitis: Sharp heel pain during toe extension stretches may indicate an acute plantar fascia tear rather than chronic plantar fasciitis. If pain is severe, sudden, or associated with bruising, a physical therapist or orthopedic specialist should assess the foot before continuing exercise.
Key Takeaway: For plantar fasciitis, the kneeling toe tuck stretch in Vajrasana is the most yoga-specific and targeted exercise available. Start with one minute and build from there.
Toe Yoga Exercises for Balance and Stability
Toe grip and spreading directly contribute to balance by expanding the base of support, increasing sensory input from the foot’s mechanoreceptors, and enabling faster postural corrections during standing and movement.
The toes contain dense concentrations of mechanoreceptors, sensory nerve endings that detect pressure, texture, and movement. When the toes are actively engaged and spread, these receptors send detailed information to the brain about the body’s position and any shifts in weight distribution. That information feeds the proprioceptive system, which manages balance corrections before you are even aware a correction is needed.
Shoes with narrow toe boxes compress the toes together, reducing this sensory surface. Regular toe spreading and gripping exercises rebuild it. Think of your toes like the roots of a tree: a tree with spreading, deep roots handles wind far better than one with roots bunched together.
Toe yoga exercises specifically for balance:
- Single-leg toe gripping: Stand in Tadasana and lift one foot slightly off the floor. On the standing foot, actively spread and grip the toes into the mat. Hold 5 breaths per side.
- Toe wave balance challenge: In Vrksasana (Tree Pose), practice the “piano” toe wave on the standing foot during the hold. This advanced variation adds a proprioceptive challenge that improves balance reflexes.
- Heel raise with toe spread: Rise onto the balls of both feet, spreading the toes as you rise and gripping as you lower. Repeat 10 times slowly. This builds the toe and forefoot strength needed for transitional balance in yoga flows.
Modification for balance challenges: Practice single-leg toe gripping near a wall. Touch fingertips to the wall lightly for safety without relying on it for full support.
Yoga Poses That Engage the Toes
Several core yoga poses require active, conscious toe engagement to be performed with correct alignment and maximum benefit.
Tadasana (Mountain Pose) is the most foundational. When practiced correctly, all five toes are spread and pressing actively into the floor, the three arches of the foot are lifted, and the weight is distributed evenly across the heel, ball of the little toe, and ball of the big toe. Most beginners collapse one or more arches and bunch the toes. The result is a pose that teaches poor alignment from the first moment of contact with the ground.
Yoga poses that require or significantly benefit from active toe engagement:
| Pose (English) | Sanskrit Name | Toe Engagement Required |
|---|---|---|
| Mountain Pose | Tadasana | Spread all toes; press actively into mat |
| Tree Pose | Vrksasana | Grip the floor with standing foot toes |
| Warrior I | Virabhadrasana I | Press outer edge and toes of back foot |
| Warrior II | Virabhadrasana II | Spread toes of both feet; grip through front foot |
| Downward Facing Dog | Adho Mukha Svanasana | Press balls of feet; spread toes toward mat |
| Big Toe Pose | Padangusthasana | Active toe grip; toe flexor engagement |
| Chair Pose | Utkatasana | Lift all toes to find natural arch; replace slowly |
| Child’s Pose | Balasana | Option to tuck toes for plantar fascia stretch |
In Iyengar yoga, the active foot described in each of these poses is taught from the very first class. The precision of toe engagement distinguishes an Iyengar-trained foot from an untrained one immediately.
Yoga Foot and Toe Sequence for Home Practice
A complete home toe yoga sequence works through all major toe movements in a logical anatomical order: awareness first, then mobility, then strength, then integration into a standing pose.
This sequence takes approximately 15 to 20 minutes and can be practiced daily or three times per week as part of a broader yoga routine.
Complete yoga foot and toe sequence:
Phase 1: Arrival and Awareness (3 minutes)
- Sit comfortably in a chair or on the floor. Remove shoes and socks.
- Rest both feet flat on the floor or on a yoga mat.
- Close your eyes. Scan through each toe individually. Notice which toes you can feel clearly and which feel vague or absent. Spend 10 slow breaths here.
Phase 2: Mobility Work (5 minutes)
- Toe spreading: Spread all toes wide. Hold 5 breaths. Release. Repeat 5 times per foot.
- Toe flexion and extension: Curl toes down for 3 breaths, extend up for 3 breaths. Repeat 8 times.
- Toe circles: Big toe circles, 5 each direction per foot.
Phase 3: Strengthening (5 minutes)
- Towel scrunch: Using a small towel, gather the cloth toward you using only the toes. 3 rounds per foot.
- Arch dome: Shorten the foot without lifting toes or heel. Hold 3 breaths. Repeat 8 times per foot.
- Heel raise with toe spread: Rise onto the balls of both feet, toes spread. Lower slowly. 10 repetitions.
Phase 4: Stretch (4 minutes)
- Seated toe extension stretch: Cross ankle over knee. Pull toes back gently toward shin. Hold 30 seconds. Repeat 3 times per foot.
- Kneeling toe tuck (Vajrasana variation): Toes tucked under, sit gently back. Hold 1 to 2 minutes total.
Phase 5: Integration (3 minutes)
- Stand in Tadasana (Mountain Pose). Actively spread all ten toes. Lift toes, then place them down one by one, little toe to big toe. Stand and breathe for 10 full breaths, maintaining active toe engagement throughout.
Modification for beginners: Skip steps 11 and 12 for the first two weeks. Build the seated exercises first before adding standing and kneeling demands.
Frequently Asked Questions About Toe Yoga Exercises
What are toe yoga exercises good for?
Toe yoga exercises improve toe flexibility, intrinsic foot muscle strength, balance, and foot pain from conditions like plantar fasciitis, bunions, and hammertoes.
They also improve standing pose stability and alignment in yoga by building the foot’s ability to actively engage and spread during weight-bearing positions.
The American Podiatric Medical Association recognizes targeted foot exercises as a foundational element of foot health maintenance for adults of all ages.
Can yoga help with bunions or hammertoes?
Yoga-based toe exercises can slow the progression of bunions and hammertoes by strengthening the muscles that counteract the deforming forces on the toe joints.
Toe spreading exercises and arch dome work specifically activate the abductor hallucis, which physically resists the inward drift of the big toe associated with bunion formation.
Yoga does not reverse established bony deformity, but consistent toe exercise practice can reduce discomfort and maintain the mobility of affected joints over time.
How often should you do toe yoga exercises?
Most yoga teachers and physical therapists recommend practicing toe yoga exercises daily, at least for the first four to eight weeks of building a new practice.
Sessions of 10 to 15 minutes per day are sufficient for measurable improvement in toe mobility and intrinsic foot muscle strength.
Once baseline strength and mobility are established, three sessions per week maintains the gains effectively.
Are toe yoga exercises safe for seniors?
Toe yoga exercises are safe for most seniors when started in a seated position and progressed gradually over two to four weeks.
The NCCIH notes that yoga practices targeting balance and lower extremity strength reduce fall risk in older adults, and toe-specific exercises directly support those outcomes.
Seniors with peripheral neuropathy or significant arthritis in the toe joints should work with a podiatrist or physical therapist to establish safe exercise parameters before starting.
What is the best yoga toe stretch for plantar fasciitis?
The best yoga toe stretch for plantar fasciitis is the seated toe extension stretch: cross one ankle over the opposite knee, grip all five toes, and pull them back toward the shin for 20 to 30 seconds.
This movement directly loads and lengthens the plantar fascia, which physical therapy research identifies as one of the most effective non-surgical treatments for plantar heel pain.
Perform this stretch three times per foot, ideally first thing in the morning before standing, as plantar fascia pain is typically worst with the first steps of the day.
Your Feet Have Been Waiting for This
Ten toes. Ten small structures that have been doing enormous work, mostly ignored, possibly compressed for years. Starting today, give them fifteen minutes.
Pick two exercises from this guide: the toe spread and the seated toe extension stretch. Do them barefoot on your yoga mat before you practice anything else. Do them again tomorrow. Notice what changes in your standing poses after one week.
The foundation of your entire yoga practice starts here, at the floor, with your toes.