Intermediate Yoga Poses: Strength and Form Guide 2026
Intermediate yoga poses are the specific postures that require a foundation of strength, flexibility, and body awareness beyond what beginner classes build, and knowing which ones to practice and how to approach them safely is what separates practitioners who progress from those who plateau. This guide gives you the exact information most yoga content skips: readiness criteria, muscle-level teaching cues, pose categories, and a full home sequence.
Yoga practice depth matters for long-term health outcomes. The National Center for Complementary and Integrative Health (NCCIH) has documented that regular yoga practice improves muscular strength, balance, and flexibility across all practitioner levels, with more experienced practitioners showing more pronounced musculoskeletal adaptations. Staying at beginner level indefinitely means leaving those adaptations on the table.
You will find here a clear definition of what makes a pose intermediate, how to assess your own readiness, detailed breakdowns of every major intermediate pose category, two specific pose technique guides with alignment cues, and a complete home sequence you can practice this week.
What Are Intermediate Yoga Poses
Intermediate yoga poses are postures that require a combination of established foundational strength, adequate joint range of motion, and coordinated breath control that beginners typically need 6 months to 2 years of consistent practice to develop. They are not simply “harder” versions of beginner poses. They are poses that demand more simultaneous physical and mental coordination.
The intermediate category spans several types of postures: arm balances, deeper backbends, introductory inversions, complex standing balance poses, and advanced twists. Each demands a different prerequisite skill set.
| Pose Category | Primary Prerequisite | Example Intermediate Pose |
|---|---|---|
| Arm balances | Wrist strength, core stability | Bakasana (Crow Pose) |
| Backbends | Thoracic mobility, hip flexor length | Ustrasana (Camel Pose) |
| Inversions | Shoulder stability, core control | Sirsasana (Headstand) |
| Twists | Spinal rotation, core strength | Ardha Matsyendrasana (Half Lord of the Fishes) |
| Hip openers | Hip flexor and adductor flexibility | Eka Pada Rajakapotasana (Pigeon Pose) |
| Balance poses | Proprioception, ankle stability | Vasisthasana (Side Plank Pose) |
| Core poses | Deep core activation | Navasana (Boat Pose) |
Understanding these categories helps you choose where to focus first. Most practitioners have natural strengths in one or two categories and gaps in others. Starting with your gaps produces the most balanced development.
What Makes a Yoga Pose Intermediate
A yoga pose is intermediate when it requires three or more of the following physical qualities simultaneously: specific joint range of motion beyond passive flexibility, active muscular strength to support an unstable load, coordinated core engagement with breath, proprioceptive awareness in an unfamiliar joint position, and the patience to stay in controlled discomfort. Beginner poses typically require one or two of these at a time.
The distinction matters because many practitioners attempt intermediate poses without the underlying prerequisites. This is how yoga injuries happen. A practitioner who cannot hold Phalakasana (Plank Pose) for 30 seconds with a neutral spine is not ready for Vasisthasana (Side Plank Pose). A practitioner who cannot perform a full Adho Mukha Svanasana (Downward-Facing Dog) with straight legs and a long spine is not ready for Sirsasana (Headstand).
Think of intermediate poses like compound interest: they pay out in proportion to what you have deposited in foundational practice. A shallow foundation produces a shaky intermediate practice, regardless of how ambitious the goal.
Key physical markers that distinguish intermediate from beginner demands:
- Load through end-range positions: Intermediate poses require strength at the limit of your current range, not just within it
- Bilateral asymmetry management: Many intermediate poses are unilateral, demanding the stabilizing side to work harder
- Intra-abdominal pressure control: Breath and core must coordinate, not compete
- Multi-plane movement: Intermediate poses often combine forward fold with rotation, or backbend with balance
How to Know You Are Ready for Intermediate Yoga
You are likely ready for intermediate yoga poses when you can hold the following six foundational poses with correct alignment and steady breath for the durations listed, without gripping, shaking, or losing spinal neutrality. These are not arbitrary tests; they reflect the specific physical capacities intermediate poses demand.
| Foundational Pose | Sanskrit | Hold Duration | Why It Matters for Intermediate |
|---|---|---|---|
| Plank Pose | Phalakasana | 45 seconds | Wrist, shoulder, core base for arm balances |
| Downward-Facing Dog | Adho Mukha Svanasana | 10 breaths, legs straight | Hamstring length, shoulder stability |
| Warrior II | Virabhadrasana II | 8 breaths per side | Hip strength and stability for complex standing poses |
| Low Lunge | Anjaneyasana | 8 breaths per side | Hip flexor length needed for backbends |
| Seated Forward Fold | Paschimottanasana | 8 breaths with flat back | Hamstring length for inversions and hip openers |
| Chair Pose | Utkatasana | 8 breaths | Quad and glute strength for balance poses |
One more honest marker: if your breath becomes ragged or disappears in the six poses above, your nervous system is already at its edge. Intermediate poses add to that load. Practice until breath stays smooth and continuous, then progress.
According to the American College of Sports Medicine (ACSM), progressive overload in exercise requires a stable foundation before adding complexity. This principle applies directly to yoga: skipping foundational competency and moving to intermediate poses increases strain on joints and connective tissue.
Key Takeaway: You are ready for intermediate yoga poses when you can hold the six foundational poses listed above with steady breath and correct alignment, not when you feel bored with beginner class.
Intermediate Yoga Poses for Strength
Intermediate yoga poses for strength primarily target the posterior chain (glutes, hamstrings, spinal extensors), shoulder girdle (rotator cuff, serratus anterior, trapezius), and deep core (transversus abdominis, multifidus) through sustained isometric holds and eccentric loading in challenging positions.
Strength-focused intermediate poses include:
- Vasisthasana (Side Plank Pose): Loads the obliques, serratus anterior, and gluteus medius in a unilateral position
- Navasana (Boat Pose): Targets hip flexors and deep core in a challenging hip flexion angle
- Virabhadrasana III (Warrior III): Demands single-leg glute and hamstring strength through sustained hip extension
- Chaturanga Dandasana (Four-Limbed Staff Pose): Loads triceps, pectorals, and core at a mechanically challenging angle
- Bakasana (Crow Pose): Requires wrist, tricep, and hip flexor strength simultaneously
A 2015 study published in the International Journal of Yoga found that 12 weeks of regular yoga practice increased upper and lower body muscular strength in previously sedentary adults. Intermediate poses produce stronger adaptations than beginner poses because they create greater muscular demand through more challenging joint angles.
Modification for those building toward strength: Use a yoga block under the hips in Boat Pose to reduce hip flexor demand while maintaining core engagement. Perform Chaturanga with knees down until shoulder strength allows the full version without the chest dropping below the elbows.
Intermediate Yoga Poses for Flexibility
Intermediate yoga poses for flexibility target the deep hip capsule, thoracic spine, hamstring tendons, and shoulder joint through sustained passive and active stretching that goes beyond what standard beginner poses access.
The most significant flexibility gains at the intermediate level come from poses that combine multiple stretch targets simultaneously. Gomukhasana (Cow Face Pose) stretches the hip external rotators, IT band, and shoulder simultaneously. Parsvottanasana (Pyramid Pose) demands hamstring length with active thoracic extension, not just passive folding.
Intermediate flexibility-focused poses worth prioritizing:
- Eka Pada Rajakapotasana (Pigeon Pose): Deep hip external rotation and hip flexor lengthening
- Gomukhasana (Cow Face Pose): Hip external rotation combined with shoulder opening
- Parsvottanasana (Pyramid Pose): Active hamstring lengthening under lumbar stability demand
- Parivrtta Trikonasana (Revolved Triangle Pose): Combines hamstring flexibility with spinal rotation
- Hanumanasana (Monkey Pose / Full Split): Full hip flexor and hamstring range
Flexibility in yoga is not passive relaxation into a shape. It is controlled lengthening under attention. Think of it like slowly uncoiling a spring under guidance: force it and it snaps; ease it carefully and it extends fully.
Research published in the Journal of Bodywork and Movement Therapies found that yoga-based stretching programs improved hamstring flexibility more than static stretching alone, particularly when breath coordination was maintained during holds.
Modification: Use a yoga block under the front hand in Pyramid Pose to maintain spinal length when hamstrings are not yet long enough to fold flat. In Pigeon Pose, a bolster under the front hip prevents the pelvis from rotating and keeps the stretch appropriately targeted.
Intermediate Yoga Poses for Balance
Intermediate yoga poses for balance challenge the proprioceptive system, vestibular system, and ankle and hip stabilizers through single-leg positions with extended lever arms, narrow bases, and occasional eye-closing cues that remove visual input.
Intermediate balance poses demand more than standing on one leg. They require maintaining spinal alignment and hip stability while managing a shifted center of gravity. This is fundamentally different from beginner balance poses like Vrksasana (Tree Pose), where the base of support is relatively stable.
Key intermediate balance poses by demand level:
| Pose | Sanskrit | Primary Balance Challenge | Supporting Muscles |
|---|---|---|---|
| Warrior III | Virabhadrasana III | Extended lever arm; hip stability | Gluteus medius, hamstrings, core |
| Half Moon | Ardha Chandrasana | Lateral hip stability; rotation | Gluteus medius, obliques |
| Side Plank | Vasisthasana | Lateral support; wrist load | Serratus anterior, obliques, gluteus medius |
| Eagle Pose | Garudasana | Narrow base; hip and ankle | Peroneals, tibialis anterior, core |
| Dancer’s Pose | Natarajasana | Hip flexion; shoulder extension combined | Hip flexors, shoulder girdle, core |
According to the National Center for Complementary and Integrative Health (NCCIH), yoga practice improves postural stability and reduces fall risk in adults across all age groups, with larger effects observed in practitioners at the intermediate level compared to beginners.
Modification: Use a wall or yoga block for hand support in Warrior III and Half Moon. Even with wall support, the proprioceptive challenge of single-leg balance remains intact and the training stimulus is preserved.
Key Takeaway: Intermediate balance poses train the proprioceptive system through extended lever arms and narrow bases; using a wall for support does not reduce the training benefit, it just keeps you safe while you build capacity.
Intermediate Yoga Backbends: Building Safe Spinal Extension
Intermediate yoga backbends are poses that demand thoracic spine extension beyond what passive sitting posture allows, combined with active strength in the posterior chain and appropriate length in the hip flexors and anterior shoulder. The emphasis on thoracic extension, not lumbar compression, is the single most important technical distinction at this level.
Most practitioners default to bending from the lumbar spine because the thoracic spine is stiffer from years of forward-rounded sitting posture. This pattern causes lower back strain in backbends and needs to be actively corrected before progressing.
Intermediate backbends in order of demand:
- Ustrasana (Camel Pose): First true kneeling backbend requiring hip flexor length and thoracic extension
- Setu Bandha Sarvangasana (Bridge Pose): Supine backbend building glute and spinal strength (often classified beginner-to-intermediate)
- Dhanurasana (Bow Pose): Prone backbend demanding posterior chain strength and hip flexor length
- Urdhva Mukha Svanasana (Upward-Facing Dog): Arms-straight backbend requiring shoulder and thoracic extension
- Urdhva Dhanurasana (Wheel Pose): Full hands-and-feet backbend; advanced intermediate
Pose Tip:
- In all intermediate backbends, initiate the movement from the thoracic spine (mid-back). The lumbar spine follows; it does not lead.
- Warm up with Marjaryasana-Bitilasana (Cat-Cow) for 10 rounds before any backbend sequence.
- Anyone with an acute lumbar disc herniation should avoid Wheel Pose and reduce Camel Pose to a gentle chest lift until cleared by a physiotherapist.
Intermediate Yoga Arm Balances: Where to Begin
Intermediate yoga arm balances are poses where the entire body weight is supported through the hands and arms, requiring coordinated wrist stability, tricep and pectoral strength, core engagement, and the ability to shift the center of gravity precisely over the support base. Bakasana (Crow Pose) is the standard entry point for this category.
The most common reason arm balances fail is not insufficient strength. It is incorrect weight distribution. Practitioners keep their hips too high and their weight too far back, meaning the arms cannot bear the load efficiently. The key mechanical shift is moving your chest and shoulders forward past your wrists so the body’s center of gravity aligns over the base of support.
Intermediate arm balances in progressive order:
- Bakasana (Crow Pose): Both knees on upper arms; first arm balance for most practitioners
- Bhujapidasana (Shoulder-Pressing Pose): Legs wrapped around upper arms; more hip flexibility required
- Eka Pada Koundinyasana I (Sage Koundinya’s Pose I): One leg extended; requires twist combined with arm balance
- Tittibhasana (Firefly Pose): Both legs extended; demands significant hamstring length
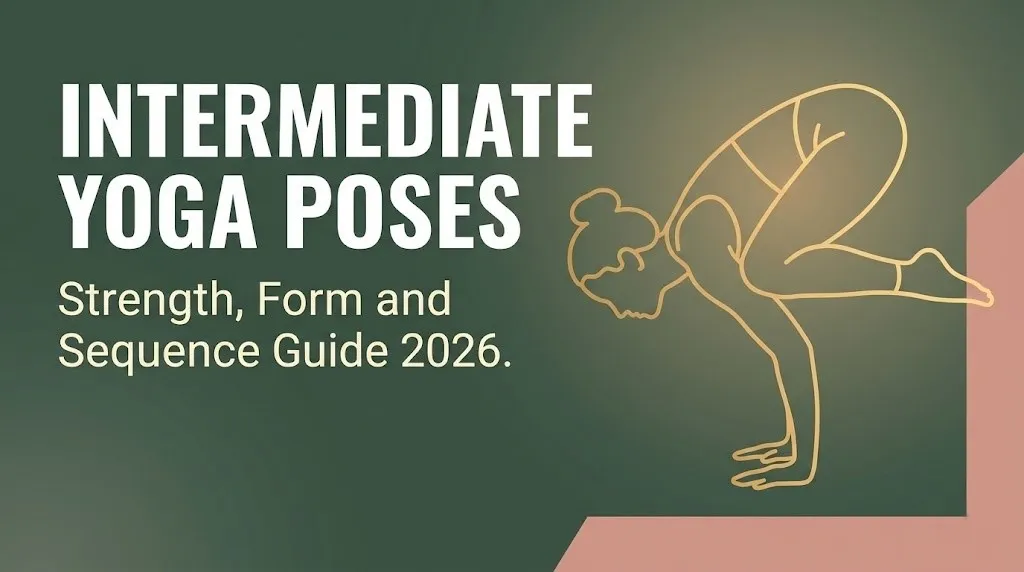
To practice Bakasana (Crow Pose):
- Begin in a squat. Feet together or slightly apart. Hands flat, shoulder-width, fingers spread wide.
- Place your knees on the outer upper arms, as high toward the armpits as possible.
- Shift your weight forward slowly. Your toes will lighten off the floor naturally.
- Round your upper back. Hug your knees into your arms. Pull your belly up and in.
- Lift one foot, then the other. Hold for 3 to 5 breaths.
- Lower toes to the floor gently on an exhale.
Modification: Place a folded yoga blanket or block under your feet and practice the weight-shifting step without full lift. This builds confidence and correct alignment before flight.
Intermediate Yoga Inversions: Going Upside Down Safely
Intermediate yoga inversions are poses where the hips rise above the heart and the head approaches or contacts the floor, requiring specific shoulder stability, core control, and the ability to manage blood pressure redistribution without dizziness. The most accessible intermediate inversion is Sarvangasana (Shoulder Stand), with Sirsasana (Headstand) representing the more demanding progression.
Inversions are among the most misunderstood intermediate poses. Many practitioners attempt Headstand without the shoulder and core strength to protect the cervical spine, which carries a real injury risk. The rule is simple: build Shoulder Stand first. Master it for 3 full minutes with steady breath before attempting Headstand.
Prerequisites for safe intermediate inversions:
- Phalakasana (Plank Pose): Hold 60 seconds with neutral spine and no shoulder winging
- Dolphin Pose (Makarasana variation): 30 seconds with heels pressing toward the floor
- Forearm plank: 45 seconds without lower back sagging
- Shoulder stability test: From all-fours, lift one arm without the opposite shoulder dropping
A 2016 review published in the Journal of Alternative and Complementary Medicine found that yoga inversions practiced with proper technique showed no adverse cardiovascular effects in healthy adults, but noted that practitioners with hypertension, glaucoma, or detached retina should avoid inversions without explicit medical guidance from a specialist familiar with their condition.
Modification: Practice Viparita Karani (Legs-Up-the-Wall Pose) as an accessible inversion that provides circulatory benefits without the full weight-bearing demand of Shoulder Stand or Headstand. This is appropriate for beginners to inversions, seniors, or anyone with neck sensitivity.
Key Takeaway: Intermediate inversions require shoulder stability and core strength before attempting Headstand; master Shoulder Stand for 3 full minutes first, and never practice Headstand without a wall available.
Intermediate Yoga Twists: Technique and Anatomy
Intermediate yoga twists produce spinal rotation through the thoracic spine primarily, with the lumbar spine following in a controlled, supported manner. The intermediate distinction is the addition of a bound arm position, a challenging base (seated cross-legged or straight-legged), or a combined forward fold and twist simultaneously.
The most common technical error in yoga twists at all levels is rotating from the lumbar spine instead of the thoracic. The lumbar vertebrae have limited rotation capacity due to the orientation of their facet joints. Forcing rotation there causes strain. The thoracic spine is designed for rotation and responds well to progressive challenge.
Key intermediate twists and their specific targets:
- Ardha Matsyendrasana (Half Lord of the Fishes Pose): Seated cross-legged twist targeting thoracic rotation and piriformis
- Parivrtta Trikonasana (Revolved Triangle Pose): Standing twist combined with hamstring lengthening
- Parivrtta Parsvakonasana (Revolved Side Angle Pose): Deep standing twist requiring hip flexibility and core stability
- Marichyasana C (Sage Marichi’s Pose C): Seated twist with one knee bent; introduces deeper thoracic challenge
To practice Ardha Matsyendrasana (Half Lord of the Fishes Pose):
- Sit with legs extended. Bend your right knee and cross your right foot over your left thigh. Place it flat on the floor.
- Keep your left leg extended or bend your left knee, tucking your left foot beside your right hip.
- Inhale to lengthen the spine. Think of stacking your vertebrae like a column.
- Exhale and rotate to the right. Place your left elbow on the outside of your right knee.
- Right hand presses the floor behind you for support.
- Hold for 5 to 8 breaths, lengthening on each inhale, deepening the rotation slightly on each exhale.
- Inhale to unwind. Switch sides.
Modification: If the seated position rounds the lower back, sit on a folded yoga blanket to tilt the pelvis forward and allow the spine to lengthen before rotating.
Intermediate Yoga Hip Openers: What They Actually Do
Intermediate yoga hip openers target the deep hip external rotators (including the piriformis, obturator internus, and gemellus), the hip flexors (particularly the psoas and iliacus), and the hip adductors through sustained holds in positions beyond what standard Warrior sequences access.
The phrase “hip opener” is often used loosely in yoga. Intermediate hip openers specifically work the hip joint capsule and its surrounding musculature at end-range positions. The distinction from beginner hip openers is the combination of multiple demands simultaneously: external rotation plus abduction, or hip flexion plus internal rotation.
Intermediate hip openers by category:
- Eka Pada Rajakapotasana (Pigeon Pose): External rotation of front hip; hip flexor stretch of back hip
- Gomukhasana (Cow Face Pose): Deep external rotation with adductor and IT band involvement
- Baddha Konasana (Bound Angle Pose) in forward fold: Adductor stretch with lumbar lengthening
- Agnistambhasana (Fire Log Pose / Double Pigeon): Deep external rotation stacking; requires significant hip mobility
- Hanumanasana (Monkey Pose / Full Split): Full range hip flexor and hamstring combination
Pose Tip:
- In Pigeon Pose, place a bolster or folded blanket under the front hip if it lifts off the floor. The lifted hip causes the pelvis to rotate and reduces the effectiveness of the stretch for the intended muscles.
- Fire Log Pose is significantly more demanding than it appears. If the top knee is more than 6 inches from the floor, begin with Pigeon Pose and build hip external rotation over several months before attempting Fire Log.
- Practitioners with a history of hip labral tears should approach deep external rotation poses under the supervision of a physiotherapist familiar with their specific anatomy.
Intermediate Yoga Core Poses: Beyond Basic Plank
Intermediate yoga core poses target the transversus abdominis, obliques, multifidus, and hip flexors through challenging lever arms, rotational demands, and combined movements that require simultaneous core bracing and controlled breath. They go well beyond the basic Phalakasana (Plank Pose) that beginners build.
The core in yoga is not the “six-pack.” It is the deep stabilizing system surrounding the spine and pelvis. Intermediate core poses challenge this system by increasing the distance between the load and the base of support, which dramatically increases the muscular demand.
Intermediate core poses worth prioritizing:
- Navasana (Boat Pose): Hip flexors and deep core under hip flexion load
- Vasisthasana (Side Plank Pose): Lateral core chain under unilateral support
- Urdhva Prasarita Padasana (Upward Extended Legs Pose): Supine leg lowering demanding eccentric core control
- Kumbhakasana (High Plank Pose with leg lift): Adds unilateral demand to full plank
- Tittibhasana (Firefly Pose): Combines core with arm balance
Harvard T.H. Chan School of Public Health identifies core strength as a key component of functional fitness and injury prevention, noting that deep stabilizer training reduces lower back pain incidence more effectively than superficial abdominal strengthening alone. Yoga’s intermediate core poses specifically target the deep stabilizers, not just the surface muscles.
Modification: In Boat Pose, keep knees bent with shins parallel to the floor. This maintains the core demand while reducing the hip flexor load for practitioners with tight hip flexors or lower back sensitivity.
Key Takeaway: Intermediate yoga core poses challenge the deep stabilizing system, not just the surface muscles; Boat Pose, Side Plank, and controlled leg-lowering exercises produce more functional core strength than crunches.
Crow Pose for Intermediate Yoga Practitioners
Bakasana (Crow Pose) is the foundational arm balance for intermediate practitioners, requiring coordinated wrist stability, tricep strength, hip flexor engagement, and precise forward weight shift over the hands. It is the gateway pose to the entire arm balance category.
Most practitioners who cannot yet do Crow Pose are missing one of three things: sufficient wrist strength for the load, the hip flexor engagement to keep the hips high, or the courage to shift weight forward past what feels safe. The first two are built through practice. The third comes from controlled, repeated exposure.
To build toward Bakasana (Crow Pose):
- Build Plank Pose holds to 60 seconds with wrists directly under shoulders.
- Practice Chaturanga Dandasana (Four-Limbed Staff Pose) with full body alignment, elbows grazing ribs.
- From Malasana (Garland Pose / Squat), practice placing knees on upper arms and rocking forward without lifting.
- Add a yoga block under each foot at its lowest height. This reduces the distance your feet need to travel.
- Shift weight forward until toes feel light. Lift one foot, hold 2 breaths, lower.
- Progress to lifting both feet simultaneously when single-foot lift feels controlled.
People with carpal tunnel syndrome, wrist tendinitis, or recent wrist fractures should avoid Crow Pose. Even modified weight-bearing on hyperextended wrists increases inflammation in these conditions. A forearm variation (Pincha Mayurasana preparation) may be safer for some practitioners, with guidance from a yoga therapist.
Camel Pose Intermediate Yoga Technique
Ustrasana (Camel Pose) is an intermediate kneeling backbend that requires genuine thoracic spine mobility, adequate hip flexor length, and active gluteal engagement to protect the lumbar spine. It is classified intermediate because it demands all three simultaneously, and most practitioners lack at least one of them.
The common error is reaching the hands back toward the heels while the lumbar spine collapses into excessive extension. This creates a hinge at the lumbar joints rather than a distributed backbend through the thoracic spine. The lumbar spine should lengthen and support; the thoracic spine should open.
To practice Ustrasana (Camel Pose) with correct technique:
- Kneel with knees hip-width apart. Tops of the feet flat on the floor, or toes tucked for a higher hand position.
- Place your hands on your lower back, fingers pointing down. Press your hips forward.
- Inhale and lift your chest toward the ceiling. Lead with the sternum, not the chin.
- Engage your glutes gently. This protects the lumbar spine.
- If thoracic mobility allows, release one hand at a time to your heel. Keep the hips stacked over the knees.
- Hold for 5 breaths. On each inhale, lift the chest higher. On each exhale, press the hips forward more.
- To exit: bring hands to lower back, inhale, and slowly rise upright. Sit in Vajrasana (Thunderbolt Pose) for several breaths.
Modification: Keep hands on the lower back for the full pose if reaching heels compresses the lumbar spine. Tuck the toes under to raise the heel height and make it easier to reach. People with lumbar disc herniation should avoid the full backbend and practice a supported chest-lift only.
Intermediate Yoga Sequence at Home
A complete intermediate yoga sequence at home should run 45 to 60 minutes and cover at least one pose from each of the major categories: standing, balance, backbend, twist, hip opener, and core. The structure matters as much as the individual poses.
Warm-Up Phase (10 minutes):
- Balasana (Child’s Pose): 10 breaths. Hips toward heels.
- Marjaryasana-Bitilasana (Cat-Cow): 10 rounds. Link breath to movement.
- Adho Mukha Svanasana (Downward-Facing Dog): 10 breaths. Pedal heels alternately.
- Surya Namaskar A (Sun Salutation A): 3 full rounds. Build heat progressively.
Peak Intermediate Phase (35 minutes):
- Virabhadrasana III (Warrior III): 5 breaths per side.
- Ardha Chandrasana (Half Moon Pose): 5 breaths per side. Block under bottom hand.
- Vasisthasana (Side Plank Pose): 5 breaths per side. Knee down version if needed.
- Parivrtta Trikonasana (Revolved Triangle Pose): 5 breaths per side. Block under bottom hand.
- Ardha Matsyendrasana (Half Lord of the Fishes Pose): 6 breaths per side.
- Navasana (Boat Pose): 8 breaths. Repeat twice.
- Ustrasana (Camel Pose): 5 breaths. Two rounds.
- Eka Pada Rajakapotasana (Pigeon Pose): 90 seconds per side.
- Bakasana (Crow Pose): 3 attempts of 3 to 5 breaths.
- Setu Bandha Sarvangasana (Bridge Pose): 8 breaths. Three rounds.
Cool-Down Phase (10 minutes):
- Supta Matsyendrasana (Supine Spinal Twist): 1 minute per side.
- Paschimottanasana (Seated Forward Fold): 1 minute.
- Supta Baddha Konasana (Reclining Bound Angle Pose): 2 minutes.
- Savasana (Corpse Pose): 5 minutes minimum.
| Practitioner Tier | Modification | Time Adjustment |
|---|---|---|
| Lower intermediate | Skip Crow; add extra Warrior III | Reduce peak phase to 25 minutes |
| Mid intermediate | Full sequence as written | 45 minutes total |
| Upper intermediate | Add Sirsasana prep; longer holds | 60 minutes total |
How to Progress from Intermediate to Advanced Yoga
Progress from intermediate to advanced yoga happens through three specific processes: systematically increasing time under tension in challenging poses, developing the strength to perform currently impossible poses from their prerequisites, and building enough body awareness to self-correct alignment without a teacher’s feedback.
Most practitioners get stuck at the intermediate level not because of physical limitations but because they practice the same poses repeatedly without increasing the demand. Holding Crow Pose for 3 breaths every week for a year produces very little additional adaptation compared to progressing to 8 breaths and then attempting one-legged variations.
Specific progression strategies for intermediate practitioners:
- Increase hold times before adding new poses: Hold familiar intermediate poses for 10 to 12 breaths before moving to harder variations
- Target your prerequisite gaps: Identify which foundational capacity is limiting your next goal pose and address it directly
- Practice peak poses at the start of sessions: Place your most challenging pose after warm-up but before fatigue sets in
- Add challenge through props, not just difficulty: A yoga block under one hand in Triangle Pose removes a crutch; removing the block in Revolved Triangle adds challenge appropriately
- Record and review your practice: Video feedback reveals alignment errors that feel correct from inside the pose
Research published in the Journal of Bodywork and Movement Therapies found that self-monitoring during yoga practice (through video or partner feedback) accelerated alignment improvement significantly compared to practice without feedback. This is particularly relevant at the transition from intermediate to advanced, where self-correction replaces teacher correction.
Progress is not linear. Expect weeks where a pose clicks and weeks where it regresses. That variability is neurological adaptation, not failure. Keep showing up with specific goals.
Key Takeaway: Progressing from intermediate to advanced yoga requires increasing hold times, addressing prerequisite gaps, and placing your hardest pose at the beginning of sessions when energy is highest, not at the end when you are already fatigued.
Frequently Asked Questions About Intermediate Yoga Poses
How do I know if I am ready for intermediate yoga poses?
You are ready for intermediate yoga poses when you can hold Plank Pose for 45 seconds, Downward-Facing Dog for 10 breaths with straight legs, and Warrior II for 8 breaths per side, all with steady breath and correct alignment.
Readiness is defined by foundational competency, not by time spent practicing or by how bored you feel in beginner classes.
If your breath disappears during any of those foundational holds, spend more time there before adding intermediate demands.
What is the difference between beginner and intermediate yoga poses?
Beginner poses require one or two physical qualities simultaneously: basic flexibility or basic strength.
Intermediate poses require three or more: specific joint range of motion, active strength at end-range, coordinated breath, and proprioceptive awareness in unfamiliar positions.
The difference is complexity of demand, not just difficulty of shape.
What is the hardest intermediate yoga pose?
Urdhva Dhanurasana (Wheel Pose) is generally considered the most demanding intermediate pose because it requires simultaneous thoracic spine mobility, hip flexor length, shoulder flexibility, wrist stability, and active posterior chain strength.
Bakasana (Crow Pose) is a close second in terms of the number of prerequisites required, particularly for practitioners with limited wrist strength.
Both poses have clear prerequisite progressions that make them accessible with systematic preparation.
How long does it take to reach an intermediate level in yoga?
Most practitioners reach a reliable intermediate level after 6 months to 2 years of consistent practice, defined as three or more sessions per week.
The timeline varies significantly based on prior athletic background, body proportions, and whether guidance from a qualified teacher has been available.
Yoga teachers and physical therapists generally agree that the quality of foundational practice matters more than the duration.
Can I practice intermediate yoga poses at home without a teacher?
Yes, most intermediate yoga poses can be safely practiced at home with careful preparation, a clear understanding of prerequisites, and access to props including blocks, a strap, and a blanket.
Exceptions include Headstand and other full inversions, which carry higher injury risk when practiced without feedback and should ideally be learned with an experienced teacher before independent home practice.
Video recording your practice and comparing alignment to a reliable reference is the most effective home-practice substitute for in-person instruction.
Intermediate yoga is where practice gets genuinely interesting. The poses ask more of you, and the physical and mental returns grow proportionally.
Start with the readiness assessment this week. Pick the one foundational pose where you feel least confident and spend two sessions bringing it to the standard listed in that table. Once it passes, choose your first intermediate target from whichever category appeals most.
Practice three times this week. Give yourself one focused session on the new pose, one on your full sequence, and one on recovery with Yin holds. That rhythm builds intermediate-level fitness faster than anything else.